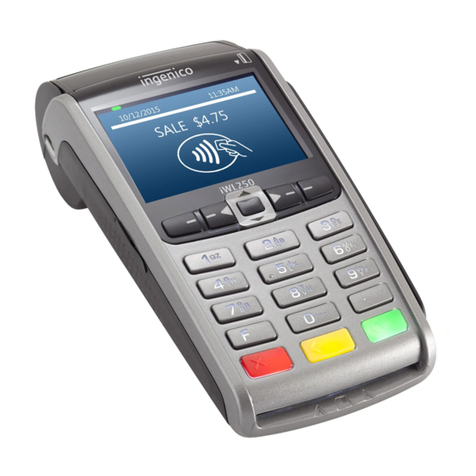
FIS VX 680 Reference guide

VX 680 Wireless Terminal
DOWNLOAD/UPDATE PROCEDURES
(for EBT and, or WIC)
Note:
These updates apply to merchants who have VMAC FIS EBT and, or VMAC FIS WIC loaded into their VX
680 Wireless terminals from FIS
•The VX 680 Wireless EBT (only) DOWNLOAD PROCEDURES are listed first (1.)
•The VX 680 Wireless WIC (only) DOWNLOAD PROCEDURES are listed second (2.)
Preparation steps:
1. Power down your terminal
a. Unplug the terminal from any power outlets and remove your battery
b. Replace the battery
2. Power up your terminal by pressing and holding the Green ENTER button until the screen lights
up
a. This will cause the terminal to connect to the nearest AT&T Tower
b. You will see VMAC and FIS EBT on the screen (for EBT only terminals)
c. You will see VMAC and FIS WIC on the screen (for WIC only terminals)
d. You will see VMAC and FIS EBT and FIS WIC on the screen (for EBT/ WIC combo
terminals)
i. Merchants with EBT and WIC (combo) terminals will need to email FIS to
schedule a download time via phone
ii. FIS.Wireless.Payments@fisglobal.com
iii. Be sure to include your FNS number or X-9 number in the subject line
3. If your terminal does not connect to an AT&T tower
a. Power down your terminal and then power it back up so it can connect to the nearest
AT&T tower
1. VX 680 Wireless EBT (only) DOWNLOAD PROCEDURES
EBT Download/Update steps:
1. Your terminal must be in the Network Control Panel (NCP) Screen to perform the
Download/Update
2. To access the NCP screen and verify your terminal is connected to the nearest AT&T Tower
a. Press the BLUE Bubble to the right of the ALPHA Bubble at the bottom of the VMAC
screen, until the Network Control Panel (NCP) appears

b. Confirm the display says:
i. Connected to AT&T
ii. and you have a double-digit Signal Strength in % (11% or more is necessary)
•If you are not connected to AT&T power down your terminal and then power it
back up so it can connect to the nearest AT&T tower
3. Press the ENTER button
4. Tools should be highlighted on your screen
a. Press ENTER
5. Select Download
a. Press the number 8 two times to highlight Download
b. Press ENTER
6. Default Interface should be highlighted on your screen
a. Press ENTER
7. Download should be highlighted on your screen
a. Press ENTER
8. Enter 3 (for EBT) for the Group ID number
a. Press ENTER
9. Enter 166831 for Group ID Password
a. Press ENTER
10. Full should be highlighted on your screen
a. Press ENTER
11. The URL/address should be SSLGTWYD1.FNIS.COM or SSLGTWYP1.FNIS.COM or 67.23.53.172
a. Press ENTER
12. The Port should be 8013
a. Press ENTER
13. The SSL should be False
a. Press ENTER
14. Block Size may or may not have a value
a. Press ENTER
15. Heap Size may or may not have a value
a. Press ENTER
16. Terminal ID
a. Should already be populated
b. Consists of (Alphabet Letter-Six Digit Number-Three Digit Sequence Number) i.e.
(A123456001)
c. Will be printed near the top of the receipt as MERCHANT TERM ID:
d. Should match the EBT POS ID on the silver information sticker on the side of the
terminal
e. Press ENTER
17. Application Name should be FISEBT02

a. Press ENTER
18. Resumable Download should be False
a. Press ENTER
19. A Settings Summary screen appears
a. Press ENTER
20. Another Settings Summary screen appears
a. Press ENTER
21. Download Please Wait appears on the screen
a. Dash Lines (-) will appear on the screen
b. As the terminal downloads, the dashes will convert into stars (*)
c. Full Download will take about 30 seconds to one minute
d. The terminal will display multiple different screens during this process
22. When the Download is complete
a. The Screen will say VMAC and FIS EBT
b. Five seconds later, the terminal will automatically print a Configuration Report
i. Confirm you markets name is printed on the top of the receipt
23. After the configuration report prints you will see VMAC and FIS EBT
a. You can select FIS EBT
i. If the screen says CLOSED, you will need to Sign On to your terminal to open it
ii. Select the PURPLE Bubble to the left of the ALPHA Bubble at the bottom of the
screen
iii. Put in your ID and Press ENTER, then put in your PW and Press ENTER
b. You can proceed to the TESTING THE TERMINAL when you see FOOD
STAMP/CASH/BALANCE INQ on your screen
TESTING THE TERMINAL
(how to perform a Communication Test)
Preparation steps (if necessary)
1. Power up your terminal (if necessary)
2. Go to the NCP screen to verify you are connected to AT&T
a. Press the BLUE Bubble to the right of the ALPHA Bubble at the bottom of the VMAC
screen, until the Network Control Panel appears
b. Confirm the display says:
i. Connected to AT&T
ii. and you have a double-digit Signal Strength in % (11% or more is necessary)
iii. If you are not connected to AT&T power down your terminal and then power it
back up so it can connect to the nearest AT&T tower
3. Sign onto your terminal (if necessary)

a. Make sure you use the correct ID and PW
Communication Test (COMM TEST) procedures
1. When you see FOOD STAMP/CASH/BALANCE INQ on the screen
a. Press the Green ENTER button one time
i. The screen will say FUNCTION?
b. Press the number 8 one time
2. The terminal will say
a. COMM TEST/Sending Data/Receiving Data
3. The terminal will then print a receipt
a. Look for the phrase COMM TEST ACCEPTED on the receipt
4. The phrase COMM TEST ACCEPTED means your terminal
a. Was able to contact FIS
b. Is ready to perform live EBT transactions
Note:
If the update does not correct your operational issue, you can contact FIS directly at:
•FIS.Wireless.Payments@fisglobal.com
oBe sure to include in the subject line, your FNS number in the subject line
2. VX 680 Wireless WIC (only) DOWNLOAD PROCEDURES
Note:
The download will not work for wireless terminals that have both EBT and WIC (combo) on them
•Merchants with EBT and WIC (combo) terminals will need to email FIS to schedule a download
time via phone
•FIS.Wireless.Payments@fisglobal.com
oBe sure to include your FNS number or X-9 number in the subject line
WIC Preparation Steps:
1. You must know what your terminal POS ID is
a. You may need to enter it into the terminal
b. The POS ID is located on the Silver Information Stickers on the side of the terminal
c. The POS ID has 10 characters, for example (F123456001)

2. Your terminal must be connected to an AT&T tower to successfully download the updated files
3. From the VMAC FIS WIC screen
a. Press the BLUE Bubble to the right of the ALPHA Bubble at the bottom of your screen
b. This will bring up the Network Control Panel (NCP)
i. Verify you are connected to AT&T and your Signal Strength is more than 11%
ii. If your terminal is not connected to AT&T; power down your terminal and then
power it back up so it can connect to the nearest AT&T tower
WIC Download/Update steps:
1. At the same time
a. Press the Green ENTER button and number (7) one time
2. When the screen says Please Enter Password
a. Type 166831
b. Press ENTER
3. From the VERIX TERMINAL MGR screen
a. Press (2) Edit Parameters
4. When Group ID: _1 appears
a. Press ENTER
5. When the screen says Please Enter Password
a. Type 166831
b. Press ENTER
6. When File: CONFIG. SYS appears
a. Press ENTER
7. You are now in the Parameters File, you will be looking for *ZA *ZN *ZT
a. Press the Green ENTER button to scroll through the Parameters
b. Verify Parameter: *ZA has Value: *MA
i. Press ENTER multiple times until you see *ZN
c. Verify Parameter: *ZN has Value: SSLGTWYD1.FNIS.COM:8013 or SSLGTWYD1.FNIS.COM
or SSLGTWYP1.FNIS.COM:8013 or 67.23.53.172:8013
i. If *ZN Value is empty, press (3) to Edit
ii. Very Slowly, Type in 67.23.53.172:8013 instructions directly below (if type too
quickly, the numbers will change into other characters)
1. Press 6 then 7 then (press (1) three times quickly for the .)
2. Press 2 then 3 then (press (1) three times quickly for the .)
3. Press 5 then 3 then (press (1) three times quickly for the .)
4. Press 1 then 7 then 2 then (press (#) multiple times to get the colon : )
5. Press 8 then 0 then 1 then 3
6. Press ENTER when done, to go back to the Parameters
iii. Press Enter multiple times until you see *ZT
d. Verify Parameter: *ZT has your WIC POS ID as the Value, for example (F123456001)

i. Your WIC POS ID is located on the Silver Information Sticker on the side of your
terminal
ii. The Silver Information Sticker should have
1. Name of the Market
2. Help Desk Phone Number
3. S/N
4. WIC POS ID
5. FNS# (when applicable)
iii. If the *ZT Value is empty, press (3) to Edit
1. Very slowly, Type in your 10 Character POS ID (use the Yellow back
arrow button, in between the RED (X) CANCEL button, and the GREEN
ENTER button, to erase mistakes or back up)
a. First letter (i.e. for the letter E (press 3 two times quickly until it
becomes the letter E) or for the letter F (press 3 three times
quickly until it becomes the letter F) etc.)
b. Next six digits (type slowly so they don’t change to letters)
c. Last three sequence digits (i.e. (001) or (002) etc.)
2. Press ENTER to go back to the Parameters
e. Press the RED (X) one time to exit the Parameters
8. In the VERIX TERMINAL MGR screen
a. Press (3) Download
9. When Group ID: _1 appears
a. Press ENTER
10. Press (2) Multi – app
11. Press (1) Full dnld
12. When WARNING appears
a. Press (2) Continue
13. In the VTM DOWNLOAD MGR G1 screen
a. Press (6) TCPIP
14. Download is highlighted
a. Press ENTER
15. Default Interface is highlighted
a. Press ENTER
16. Download is highlighted
a. Press ENTER
17. URL/Address says SSLGTWYD1.FNIS.COM
a. Press ENTER
18. Port is 8013
a. Press ENTER
19. SSL is False

a. Press ENTER
20. Block Size may not have a value
a. Press ENTER
21. Heap Size may not have a value
a. Press ENTER
22. Terminal ID will show your POS ID i.e. (F123456001)
a. Press ENTER
23. Application Name is *MA
a. Press ENTER
24. Resumable Download False
a. Press ENTER
25. Settings Summary screen appears
a. Press ENTER
26. Settings Summary screen appears
a. Press ENTER
27. Download Please Wait appears on the screen
a. Dash Lines (-) will appear on the screen
b. Dash Lines will turn to stars (*) as the download progresses
28. When the Download is complete
a. The Screen will say VMAC and FIS WIC
29. Three seconds later, the terminal will print a Configuration Report
a. Verify your market name is on the top of the receipt
30. Your terminal is now updated and ready to process transactions
TESTING THE TERMINAL
(how to perform a Communication Test)
Preparation steps (if necessary)
1. Power up your terminal (if necessary)
2. Go to the Network Control Panel screen to verify you are connected to AT&T
a. Press the BLUE Bubble to the right of the ALPHA Bubble at the bottom of the VMAC
screen, until the Network Control Panel Appears
b. Confirm the display says:
i. Connected to AT&T
ii. You have a double-digit Signal Strength in % (11% or more is necessary)
3. Press the RED (X) to exit the Network Control Panel
4. Select FIS WIC
a. Sign onto your terminal (if it says CLOSED)

b. Make sure you use the correct ID and PW
Communication Test (COMM TEST) procedures
1. When you see BALANCE INQ/PURCHASE on the screen
a. Press the Green ENTER button one time
i. The screen will say FUNCTION?
b. Press the number (8) one time
2. The terminal will say
a. COMM TEST/Sending Data/Receiving Data
3. The terminal will then print a receipt
a. Look for the phrase COMM TEST ACCEPTED on the receipt
4. The phrase COMM TEST ACCEPTED means your terminal
a. Was able to contact FIS
b. Is ready to perform live WIC transactions
Note:
If the update does not correct your operational issue you can contact FIS directly at:
•FIS.Wireless.Payments@fisglobal.com
oBe sure to include in the subject line, your
FNS number (for EBT)
Or,
X-9 number (for WIC)
Thank you,
FIS
Table of contents
Other FIS Touch Terminal manuals

