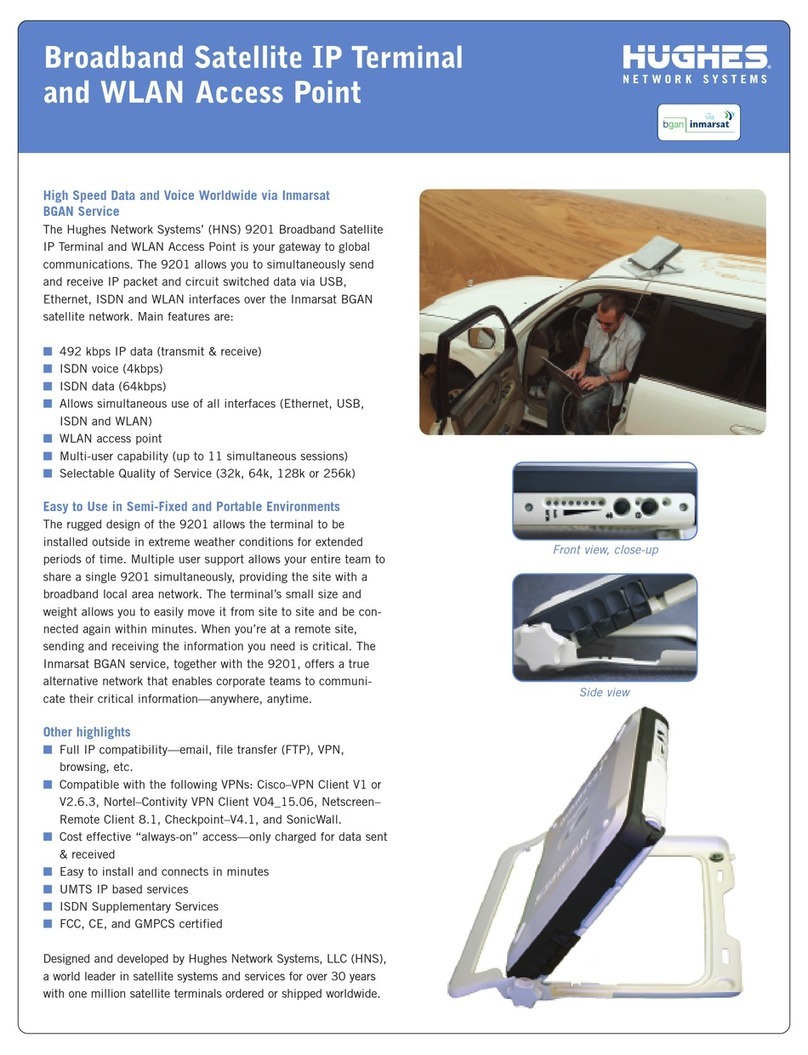
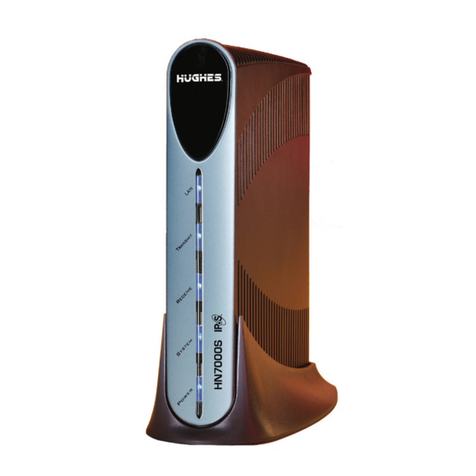
Hughes HN7000S User manual

1037076-0001
Revision C
July 5, 2007
HN System
Upgrading to a Model HN7000S
Remote Terminal

Copyright © 2007 Hughes Network Systems, LLC
All rights reserved. This publication and its contents are proprietary to Hughes Network Systems,
LLC. No part of this publication may be reproduced in any form or by any means without the written
permission of Hughes Network Systems, LLC, 11717 Exploration Lane, Germantown, Maryland
20876.
Hughes Network Systems, LLC has made every effort to ensure the correctness and completeness
of the material in this document. Hughes Network Systems, LLC shall not be liable for errors
contained herein. The information in this document is subject to change without notice. Hughes
Network Systems, LLC makes no warranty of any kind with regard to this material, including, but not
limited to, the implied warranties of merchantability and fitness for a particular purpose.
Trademarks
Hughes and Hughes Network Systems <if your document contains additional HNS trademark
names, insert them here> are trademarks of Hughes Network Systems, LLC. All other trademarks
are the property of their respective owners.
Revision record
Revision Date of issue Scope
A July 18, 2006 Production release
B October 12, 2006 Added Caution statement concerning
tightness of transmit and receive cables.
C July 5, 2007 Updated manual to include procedures
for users with Activation Software CD.

• Important safety information
1037076-0001 Revision C iii
Important safety information
For your safety and protection, read this entire manual before
attempting to install the HN7000S remote terminal. In particular,
read this safety section carefully. Keep this safety information
where you can refer to it if necessary.
Types of warnings used
in this manual
This section introduces the types of warnings used in this manual
to alert you to possible safety hazards.
CAUTION
Indicates a potentially hazardous situation, which, if not
avoided, may result in minor or moderate injury.
CAUTION
Indicates a situation or practice that might result in property
damage.

• Important safety information
iv 1037076-0001 Revision C

• Contents
1037076-0001 Revision C v
Contents
Important safety information . . . . . . . . . . . . . . . . . . . . . iii
Types of warnings used in this manual . . . . . . . . . . . . . . . . . . . iii
Chapter 1
Introduction . . . . . . . . . . . . . . . . . . . . . . . . . . . . . . . . . . . .1
Obtaining help during the upgrade. . . . . . . . . . . . . . . . . . . . . . . .1
System requirements . . . . . . . . . . . . . . . . . . . . . . . . . . . . . . . . . .1
Summary of the upgrade process . . . . . . . . . . . . . . . . . . . . . . . . .2
Disposing of the old remote terminal . . . . . . . . . . . . . . . . . . . . . .2
Chapter 2
Uninstalling your current remote terminal . . . . . . . . . . .3
Inventorying upgrade kit components . . . . . . . . . . . . . . . . . . . . .3
Uninstalling a DW4000 . . . . . . . . . . . . . . . . . . . . . . . . . . . . . . . .4
Removing ICS software from your computer . . . . . . . . . . . . .4
Windows XP. . . . . . . . . . . . . . . . . . . . . . . . . . . . . . . . . . . . .4
Windows 2000 . . . . . . . . . . . . . . . . . . . . . . . . . . . . . . . . . . .4
Windows Me . . . . . . . . . . . . . . . . . . . . . . . . . . . . . . . . . . . .5
Windows 98 SE . . . . . . . . . . . . . . . . . . . . . . . . . . . . . . . . . .5
Uninstalling DIRECWAY software from your computer . . . .5
Disconnecting the receive and transmit modems from your
computer . . . . . . . . . . . . . . . . . . . . . . . . . . . . . . . . . . . . . . . . . .6
Uninstalling a DW6000 or DW7000 . . . . . . . . . . . . . . . . . . . . . .7
Chapter 3
Installing the HN7000S remote terminal . . . . . . . . . . . . .9
Attaching the remote terminal to the pedestal base . . . . . . . . . . .9
Using the Activation Software CD. . . . . . . . . . . . . . . . . . . . . . .11
Disabling web browser proxy settings . . . . . . . . . . . . . . . . . . . .13
Internet Explorer. . . . . . . . . . . . . . . . . . . . . . . . . . . . . . . . . . .13
Netscape . . . . . . . . . . . . . . . . . . . . . . . . . . . . . . . . . . . . . . . . .14
Configuring your computer’s TCP/IP settings. . . . . . . . . . . . . .15
Windows XP. . . . . . . . . . . . . . . . . . . . . . . . . . . . . . . . . . . . . .16
Windows 2000 . . . . . . . . . . . . . . . . . . . . . . . . . . . . . . . . . . . .18
Windows 98 SE and Me . . . . . . . . . . . . . . . . . . . . . . . . . . . . .21
MacIntosh . . . . . . . . . . . . . . . . . . . . . . . . . . . . . . . . . . . . . . . .24
Connecting component cables . . . . . . . . . . . . . . . . . . . . . . . . . .26
Completing the activation process . . . . . . . . . . . . . . . . . . . . . . .27

• Contents
vi 1037076-0001 Revision C
Testing the connection between the computer and remote
terminal. . . . . . . . . . . . . . . . . . . . . . . . . . . . . . . . . . . . . . . . . . . .36
Troubleshooting a failed ping test . . . . . . . . . . . . . . . . . . . . .39
Registering the remote terminal for service . . . . . . . . . . . . . . . .39
Chapter 4
Completing the upgrade . . . . . . . . . . . . . . . . . . . . . . . . .49
Confirming that the remote terminal’s software is current . . . .49
Accessing myHughesNet.com . . . . . . . . . . . . . . . . . . . . . . . . . .52
Downloading the LCCU. . . . . . . . . . . . . . . . . . . . . . . . . . . . .54
Downloading the HN7000S user guide . . . . . . . . . . . . . . . . .54
Printing the System Information page . . . . . . . . . . . . . . . . . . . .54
Creating a shortcut to the System Control Center . . . . . . . . . . .57
Reconfiguring your network . . . . . . . . . . . . . . . . . . . . . . . . . . .58
Appendix A
Configuring Windows network settings manually for
static IP address . . . . . . . . . . . . . . . . . . . . . . . . . . . . . . . .59
Accessing the System Control Center for addressing
information . . . . . . . . . . . . . . . . . . . . . . . . . . . . . . . . . . . . . . . . .60
Windows XP. . . . . . . . . . . . . . . . . . . . . . . . . . . . . . . . . . . . . . . .61
Windows 2000 . . . . . . . . . . . . . . . . . . . . . . . . . . . . . . . . . . . . . .65
Windows 98SE or Me . . . . . . . . . . . . . . . . . . . . . . . . . . . . . . . .67
Appendix B
Conformance with standards and directives. . . . . . . . .71
Safety – operating conditions for Canada . . . . . . . . . . . . . . . . .71
Repairs in Canada. . . . . . . . . . . . . . . . . . . . . . . . . . . . . . . . . .72
Electromagnetic compatibility (EMI) . . . . . . . . . . . . . . . . . . . .72
FCC Part 15 . . . . . . . . . . . . . . . . . . . . . . . . . . . . . . . . . . . . . .72
Canada Class B warning. . . . . . . . . . . . . . . . . . . . . . . . . . . . .73
R&TTE (EU) . . . . . . . . . . . . . . . . . . . . . . . . . . . . . . . . . . . . .73
Telecommunications standards . . . . . . . . . . . . . . . . . . . . . . . . .73
IPoS . . . . . . . . . . . . . . . . . . . . . . . . . . . . . . . . . . . . . . . . . . . .73
Repairs in the United States . . . . . . . . . . . . . . . . . . . . . . . . . .74
Canada – equipment attachment limitations. . . . . . . . . . . . . .74
Acronyms and abbreviations . . . . . . . . . . . . . . . . . . . . .75
Index . . . . . . . . . . . . . . . . . . . . . . . . . . . . . . . . . . . . . . . . .77

• Figures
1037076-0001 Revision C vii
Figures
Chapter 2
1. Inventorying HN7000S upgrade kit components . . . . . . . . . . . . . . . . . . . . . . . . .3
2. Uninstalling a DW4000 . . . . . . . . . . . . . . . . . . . . . . . . . . . . . . . . . . . . . . . . . . . .6
3. Uninstalling a DW6000/DW7000 . . . . . . . . . . . . . . . . . . . . . . . . . . . . . . . . . . . .8
Chapter 3
4. Attaching the HN7000S terminal to the pedestal base . . . . . . . . . . . . . . . . . . . .10
5. Connect Your Modem via Ethernet screen. . . . . . . . . . . . . . . . . . . . . . . . . . . . .12
6. Selecting the Connections tab. . . . . . . . . . . . . . . . . . . . . . . . . . . . . . . . . . . . . . .13
7. Accessing LAN settings . . . . . . . . . . . . . . . . . . . . . . . . . . . . . . . . . . . . . . . . . . .14
8. Accessing proxy settings: Netscape . . . . . . . . . . . . . . . . . . . . . . . . . . . . . . . . . .15
9. Network Connections . . . . . . . . . . . . . . . . . . . . . . . . . . . . . . . . . . . . . . . . . . . . .16
10. Local Area Connection Properties . . . . . . . . . . . . . . . . . . . . . . . . . . . . . . . . . . .17
11. Internet Protocol Properties dialog. . . . . . . . . . . . . . . . . . . . . . . . . . . . . . . . . . .17
12. Network and Dialup Connections. . . . . . . . . . . . . . . . . . . . . . . . . . . . . . . . . . . .18
13. Local Area Connection Properties . . . . . . . . . . . . . . . . . . . . . . . . . . . . . . . . . . .19
14. Internet Protocol Properties . . . . . . . . . . . . . . . . . . . . . . . . . . . . . . . . . . . . . . . .20
15. Control Panel . . . . . . . . . . . . . . . . . . . . . . . . . . . . . . . . . . . . . . . . . . . . . . . . . . .21
16. Network window . . . . . . . . . . . . . . . . . . . . . . . . . . . . . . . . . . . . . . . . . . . . . . . .22
17. TCP/IP Properties . . . . . . . . . . . . . . . . . . . . . . . . . . . . . . . . . . . . . . . . . . . . . . . .22
18. Gateway tab . . . . . . . . . . . . . . . . . . . . . . . . . . . . . . . . . . . . . . . . . . . . . . . . . . . .23
19. Mac System Preferences menu. . . . . . . . . . . . . . . . . . . . . . . . . . . . . . . . . . . . . .24
20. Mac Network screen. . . . . . . . . . . . . . . . . . . . . . . . . . . . . . . . . . . . . . . . . . . . . .24
21. Select DHCP from the Configure drop-down menu . . . . . . . . . . . . . . . . . . . . .25
22. Connecting component cables . . . . . . . . . . . . . . . . . . . . . . . . . . . . . . . . . . . . . .26
23. Are You Upgrading Your Modem Hardware? screen . . . . . . . . . . . . . . . . . . . .28
24. Broadband Satellite - Registration screen . . . . . . . . . . . . . . . . . . . . . . . . . . . . .29
25. Broadband Satellite - Antenna Location screen . . . . . . . . . . . . . . . . . . . . . . . . .29
26. Entering your SAN and PIN. . . . . . . . . . . . . . . . . . . . . . . . . . . . . . . . . . . . . . . .31
27. HughesNet Registration screen . . . . . . . . . . . . . . . . . . . . . . . . . . . . . . . . . . . . .32
28. Recording registration information . . . . . . . . . . . . . . . . . . . . . . . . . . . . . . . . . .33
29. Restarting the HN7000S remote terminal . . . . . . . . . . . . . . . . . . . . . . . . . . . . .34
30. HughesNet Tools home page . . . . . . . . . . . . . . . . . . . . . . . . . . . . . . . . . . . . . . .35
31. HN7000S front panel LEDs . . . . . . . . . . . . . . . . . . . . . . . . . . . . . . . . . . . . . . . .37
32. Successful ping test . . . . . . . . . . . . . . . . . . . . . . . . . . . . . . . . . . . . . . . . . . . . . .38
• Figures
viii 1037076-0001 Revision C
33. Failed ping test . . . . . . . . . . . . . . . . . . . . . . . . . . . . . . . . . . . . . . . . . . . . . . . . . .38
34. Accessing the HN7000 System Control Center . . . . . . . . . . . . . . . . . . . . . . . . .40
35. Entering your zip code . . . . . . . . . . . . . . . . . . . . . . . . . . . . . . . . . . . . . . . . . . . .41
36. Verifying that your location is correct . . . . . . . . . . . . . . . . . . . . . . . . . . . . . . . .42
37. Registration in Progress screen. . . . . . . . . . . . . . . . . . . . . . . . . . . . . . . . . . . . . .43
38. Entering your SAN and PIN. . . . . . . . . . . . . . . . . . . . . . . . . . . . . . . . . . . . . . . .44
39. Swapping the old remote terminal with the HN7000S. . . . . . . . . . . . . . . . . . . .45
40. Recording registration information . . . . . . . . . . . . . . . . . . . . . . . . . . . . . . . . . .46
41. Restarting the HN7000S remote terminal . . . . . . . . . . . . . . . . . . . . . . . . . . . . .47
Chapter 4
42. HN7000S System Control Center home page . . . . . . . . . . . . . . . . . . . . . . . . . .50
43. Confirming that remote terminal software is current . . . . . . . . . . . . . . . . . . . . .51
44. My HughesNet welcome page . . . . . . . . . . . . . . . . . . . . . . . . . . . . . . . . . . . . . .53
45. Accessing the System Information page . . . . . . . . . . . . . . . . . . . . . . . . . . . . . .55
46. Printing the system information page. . . . . . . . . . . . . . . . . . . . . . . . . . . . . . . . .56
47. Creating a shortcut to the System Control Center . . . . . . . . . . . . . . . . . . . . . . .57
48. Entering the System Control Center URL in the Create Shortcut dialog . . . . . .57
49. Entering the name of the shortcut. . . . . . . . . . . . . . . . . . . . . . . . . . . . . . . . . . . .58
Appendix A
50. System Control Center Home page . . . . . . . . . . . . . . . . . . . . . . . . . . . . . . . . . .60
51. System Information page . . . . . . . . . . . . . . . . . . . . . . . . . . . . . . . . . . . . . . . . . .61
52. Network and Dialup Connections. . . . . . . . . . . . . . . . . . . . . . . . . . . . . . . . . . . .62
54. TCP/IP Properties . . . . . . . . . . . . . . . . . . . . . . . . . . . . . . . . . . . . . . . . . . . . . . . .63
53. Local Area Connections . . . . . . . . . . . . . . . . . . . . . . . . . . . . . . . . . . . . . . . . . . .63
55. Entering the preferred DNS server address . . . . . . . . . . . . . . . . . . . . . . . . . . . .64
56. Network and Dialup Connections. . . . . . . . . . . . . . . . . . . . . . . . . . . . . . . . . . . .65
57. Local Area Connections . . . . . . . . . . . . . . . . . . . . . . . . . . . . . . . . . . . . . . . . . . .65
58. Local Area Connection Properties . . . . . . . . . . . . . . . . . . . . . . . . . . . . . . . . . . .66
59. TCP/IP Properties . . . . . . . . . . . . . . . . . . . . . . . . . . . . . . . . . . . . . . . . . . . . . . . .67
60. Network dialog with Configuration tab . . . . . . . . . . . . . . . . . . . . . . . . . . . . . . .68
61. TCP/IP Properties . . . . . . . . . . . . . . . . . . . . . . . . . . . . . . . . . . . . . . . . . . . . . . . .68
62. Entering the remote terminal’s IP address . . . . . . . . . . . . . . . . . . . . . . . . . . . . .69
Appendix B
63. IPoS symbol . . . . . . . . . . . . . . . . . . . . . . . . . . . . . . . . . . . . . . . . . . . . . . . . . . . .73

• Tables
x1037076-0001 Revision C

Chapter 1 • Introduction
1037076-0001 Revision C 1
Chapter 1
Introduction
This manual explains how to uninstall a DW4000, DW6000, or
DW7000 remote terminal and replace it with your new HN7000S
remote terminal.
This introductory chapter discusses the following topics:
•Obtaining help during the upgrade on page 1
•System requirements on page 1
•Summary of the upgrade process on page 2
•Disposing of the old remote terminal on page 2
Obtaining help during
the upgrade
This section explains how to obtain technical support should you
need help upgrading your remote terminal. Be sure that you
complete the procedures in the following chapters before seeking
assistance.
If you purchased this product through a Hughes retail channel,
call Customer Care at 1-866-347-3292.
If you purchased this product from a value-added reseller (VAR),
please contact your VAR, rather than Hughes, for assistance. Your
VAR is trained to assist you with any technical problems you
might experience during the upgrade of your HN7000S remote
terminal.
System requirements The HN7000S self-hosted remote terminal is designed to connect
to your computer. To operate in conjunction with the Hughes
network, your computer must meet the following requirements:
•Operating system
– PC: Windows XP, Windows 2000, Windows Me, Windows
98 SE
– MAC: 10.1 or higher
•Processor
– PC: Pentium II 333 Mhz or faster
– MAC: 300 Mhz or faster

Chapter 1 • Introduction
21037076-0001 Revision C
•Memory
– PC: 128MB RAM, Windows 2000 and XP; 64MB RAM,
Windows 98SE and Me
– MAC: 128MB
•Free hard drive space
– PC: 100MB
– MAC: 150MB
To determine whether your system meets these installation
requirements, you can use the HughesNet Activation Software
CD included in your upgrade kit. To do so, follow the procedures
outlined in Chapter 3 – Installing the HN7000S remote terminal.
The following items are not included in the upgrade kit.
•A functioning 10/100 BaseT Ethernet interface must be
installed on the computer that will be connected to the
HN7000S.
•If the Ethernet cable in the upgrade kit is not long enough to
connect your computer to the HN7000S remote terminal, you
may need to obtain a longer one. You can use a crossover or
straight-through Cat-5 Ethernet cable to connect your
computer to the HN7000S remote terminal.
•A power strip or surge protector. If you do not have one,
proceed with the installation using a standard wall outlet or
other power source.
Summary of the
upgrade process
Upgrading your remote terminal to an HN7000S consists of the
following high-level steps:
•Uninstalling your current remote terminal
•Proper disposal of the old remote terminal
•Installing the HN7000S remote terminal
•Follow-up tasks, including:
– Confirming that the remote terminal’s software is current
– Accessing my HughesNet.com
– Additional tasks
Disposing of the
old remote terminal
Hughes encourages you to dispose and recycle responsibly in
accordance with state and local codes. Many local organizations
will collect your electronic equipment and recycle the materials.
For information on electronic equipment recycling options, see
the Electronic Industries Alliance Consumer Education Initiative
web page at http://www.eiae.org.

Chapter 2 • Uninstalling your current remote terminal
1037076-0001 Revision C 3
Chapter 2
Uninstalling your current
remote terminal
This chapter explains how to uninstall your current modem or
remote terminal.
The following topics are discussed:
•Inventorying upgrade kit components on page 3
•Uninstalling a DW4000 on page 4
•Uninstalling a DW6000 or DW7000 on page 7
Inventorying upgrade
kit components
Before installing your new HN7000S remote terminal, make sure
you have all the items shown in Figure 1.
Note: If you are upgrading from a DW6000/DW7000, you will
reuse the DW6000/DW7000 power supply, power cords, and
Ethernet cable. Your upgrade kit does not contain replacements for
these items.
Figure 1: Inventorying HN7000S upgrade kit components

Chapter 2 • Uninstalling your current remote terminal
41037076-0001 Revision C
Uninstalling a DW4000 The process of uninstalling a DW4000 consists of the following
tasks:
•Removing Internet connection sharing (ICS) software from
your computer (if you are not using ICS, you can skip this
task)
•Removing DIRECWAY software from your computer
•Disconnecting the indoor receive unit (IRU) and indoor
transmit unit (ITU) stack from your computer
Removing ICS software
from your computer
Determine which operating system is installed on your computer
and select the appropriate procedures to remove the ICS software
from the computer:
Windows XP on page 4
Windows 2000 on page 4
Windows 98 SE on page 5
Windows Me on page 5
Windows XP 1. Open My Computer or Windows Explorer.
2. Right-click My Network Places and select Properties.
3. Highlight each Local Area Connection until you find the one
that is listed as the Satellite Receiver Adapter.
4. Right-click on the Local Area Connection that corresponds to
the Satellite Receiver Adapter and click Properties. The
Local Area Connection Properties dialog appears.
5. Select the Advanced tab and Click Settings.
6. At the Windows Firewall General tab, select ON and check
the Don’t Allow Exceptions check box.
7. Click OK to close the Windows Firewall dialog.
8. Click OK to close the Local Area Connection Properties
dialog.
Windows 2000 1. Click Start
→
Settings→Network and Dial-up Connections.
The Network and Dial-up Connections dialog box appears.
2. Highlight each Local Area Connection until you find the one
that is listed as the Satellite Receiver Adapter.
3. Right-click on the Local Area Connection that corresponds to
the Satellite Receiver Adapter and click Properties.
4. At the dialog that appears, select the Sharing tab.
5. Uncheck the check box next to Enable Internet Connection
Sharing for this connection.
6. Click OK.
7. Close the Network and Dial-up Connections window.

Chapter 2 • Uninstalling your current remote terminal
1037076-0001 Revision C 5
Windows Me 1. Click Start
→
Settings→Control Panel.
2. Double-click the Add/Remove Programs icon. The
Add/Remove Programs screen appears.
3. Select the Windows Setup tab. The Windows Setup screen
appears.
4. Highlight Communications and click Details.
5. Uncheck the check box next to Internet Connection Sharing.
6. Click OK.
7. Return to the Windows Setup tab.
8. Click OK.
9. Restart the computer.
Windows 98 SE 1. Click Start
→
Settings→Control Panel.
2. Double-click the Add/Remove Programs icon. The
Add/Remove Programs screen appears.
3. Select the Windows Setup tab. The Windows Setup screen
appears.
4. Highlight Internet Tools and click Details.
5. Uncheck the check box next to Internet Connection Sharing
and click OK.
6. Return to the Windows Setup tab.
7. Click OK.
8. Restart the computer.
Uninstalling DIRECWAY
software from your
computer
When your DW4000 was installed, DIRECWAY software was
also installed on your computer. You must remove this software
from your computer before installing your new HN7000S
terminal. Follow these steps to remove the software:
1. Locate the USB cable that connects the IRU to your
computer. See Figure 2.
2. Detach the USB cable from the IRU and the computer.
3. On your computer, go to Start→Programs
→
DIRECWAY
→
Uninstall.
4. Click Ye s on the message confirming that you want to
uninstall DIRECWAY.
Status messages reporting on the progress of the software
removal appear.
5. Reboot your computer if instructed to do so. Ignore or click
through any error messages.

Chapter 2 • Uninstalling your current remote terminal
61037076-0001 Revision C
Disconnecting the receive
and transmit modems from
your computer
Refer to Figure 2 and complete the steps in this section to
disconnect the receive modem (IRU) and transmit modem (ITU)
stack from your computer.
1. Turn your computer off.
2. Unplug the power supply AC power cord from the electrical
outlet or power source.
3. Unplug the power supply DC power cord from the IRU.
4. Detach the coaxial cable from the IRU.
You may need to loosen the connector with a 7/16-inch
wrench.
5. Label the cable with a tag or small piece of electrical tape
with the words satellite in written on it.
6. Detach the coaxial cable from the ITU.
You may need to loosen the connector with a 7/16-inch
wrench.
Figure 2: Uninstalling a DW4000
Receiver
cable
TEL
From USB port on computer
DC power cord Transmitter cable
Power
supply
Receive modem
Transmit modem
P one
cable
USB cable
AC power
cord
25-pin
connector
CAUTION
•When removing power from the IRU, always unplug the
AC power cord from the wall outlet, surge protector, or
power strip first.
•Never pull the DC power cord from the back of the IRU
until the AC power cord is disconnected. Doing so could
damage the pins and cause a short in the system.

Chapter 2 • Uninstalling your current remote terminal
1037076-0001 Revision C 7
7. Label the cable with a tag or small piece of electrical tape
with the words satellite out written on it.
8. Remove the two 25-pin connectors from the two modems.
9. Remove the USB cable from the IRU.
10. Dispose of the DW4000 remote terminal. See Disposing of
the old remote terminal on page 2 for information on disposal
and recycling. Do not return the remote terminal to Hughes.
You may discard the modems, USB cable, power supply, and
25-pin cable; you are not required to return them.
11. Proceed to Chapter 3 – Installing the HN7000S remote
terminal.
Uninstalling a DW6000
or DW7000
Complete the procedures in this section if you are upgrading from
a DW6000/DW7000 remote terminal. Complete the following
steps, referring to Figure 3:
1. Turn your computer off.
2. Unplug the power supply from the wall outlet or other power
source.
3. Unplug the power supply’s DC power cord from the
DW6000/DW7000 remote terminal. Set the power supply and
cords aside.
4. Locate the Ethernet cable that connects the
DW6000/DW7000 remote terminal to your computer and
detach it from the remote terminal. Leave the other end of the
cable attached to your computer; you will reuse it.
CAUTION
•When removing power from the DW6000/DW7000
remote terminal, always unplug the AC power cord from
the wall outlet, surge protector, or power strip first.
•Never pull the DC power cord from the back of the
remote terminal until the AC power cord is
disconnected. Doing so could damage the pins and
cause a short in the system.

Chapter 2 • Uninstalling your current remote terminal
81037076-0001 Revision C
.
5. Detach the coaxial cable from the SAT IN connector on the
DW6000/DW7000 remote terminal. If the connector is too
tight to remove by hand, loosen it with a 7/16-inch wrench. If
the connector is warm, let it cool first.
6. Label the cable with a tag or small piece of electrical tape
with the words satellite in on it.
7. Detach the coaxial cable from the SAT OUT connector on the
DW6000/DW7000 remote terminal. If the connector is too
tight to remove by hand, loosen it with a 7/16-inch wrench. If
the connector is warm, let it cool first.
8. Label the cable with a tag or small piece of electrical tape
with the words satellite out.
9. Dispose of the DW6000/DW7000 remote terminal. See
Disposing of the old remote terminal on page 2 for
information on disposal and recycling. Do not return the
remote terminal to Hughes. Do not discard the power
supply or cords.
10. Proceed to Chapter 3.
Figure 3: Uninstalling a DW6000/DW7000
AC power
cord
Ethernet
cable
SAT IN
Power
supply
DC power cord
LAN 2
DC IN
LAN
Ethernet
SAT OUT

Chapter 3 • Installing the HN7000S remote terminal
1037076-0001 Revision C 9
Chapter 3
Installing the HN7000S remote terminal
This chapter explains how to install an HN7000S remote terminal
and register it for service.
The following topics are discussed:
•Attaching the remote terminal to the pedestal base on page 9
•Using the Activation Software CD on page 11
•Disabling web browser proxy settings on page 13
•Configuring your computer’s TCP/IP settings on page 15
•Connecting component cables on page 26
•Completing the activation process on page 27 2
•Testing the connection between the computer and remote
terminal on page 36
•Registering the remote terminal for service on page 39
Attaching the remote
terminal to the pedestal
base
Refer to Figure 4 and follow the steps below to attach the remote
terminal to the pedestal base.
1. Remove the DW6000/DW7000 from the pedestal base by
gently pulling up and back on the tab on the bottom rear of
the base, as shown in Figure 4. You can then slide the base off
the remote terminal.
Note: Although use of the pedestal base is optional for
Enterprise customers, Hughes strongly recommends that you use it
whenever possible. The pedestal base ensures that the remote
terminal receives proper ventilation. If you do not use the pedestal
base, you must make sure that the ventilation openings on the unit
are not blocked during operation. If you are not planning to attach
the unit to a pedestal base, skip to Connecting component cables
on page 26.

Chapter 3 • Installing the HN7000S remote terminal
10 1037076-0001 Revision C
2. Position the HN7000S and pedestal base as shown in
Figure 4, aligning the bottom set of ventilation openings on
the HN7000S with the guides on the pedestal base.
3. Gently slide the HN7000S into the pedestal base until it locks
into position.
Figure 4: Attaching the HN7000S terminal to the pedestal base
CAUTION
•Do not connect the power supply to the HN7000S
remote terminal and power source until instructed to do
so.
•Do not block the remote terminal’s ventilation openings.
Do not place the remote terminal near heat sources
such as radiators, heat registers, ovens, stoves, or other
components that produce heat.
•Leave approximately 6 inches of space around the top
and sides of the remote terminal to ensure proper
ventilation and to avoid overheating.
Other manuals for HN7000S
2
Table of contents
Other Hughes Touch Terminal manuals

Hughes
Hughes 9502 User manual

Hughes
Hughes 9201 User manual

Hughes
Hughes EchoStar Mobile 4500 User manual

Hughes
Hughes DiRECWAY DW7700 Owner's manual

Hughes
Hughes HNS 9201 User manual

Hughes
Hughes 9502 User manual

Hughes
Hughes HN7000S User manual

Hughes
Hughes EchoStar Mobile 4500 User manual

Hughes
Hughes EchoStar Mobile 4500 User manual

Hughes
Hughes 9350 User manual