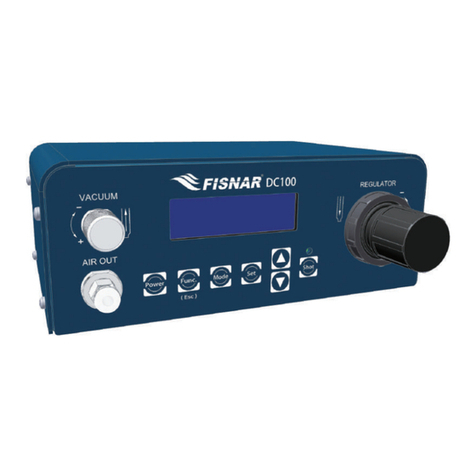
FISNAR DC100 MAX User manual

DC100 MAX Digital Dispenser Operating Manual
© 2023 Fisnar - 2 - DC100 MAX Rev 4
Table of Contents
Overview 4
Product Safety Statements 5
Specifications 7
Accessories 7
External Controls 8
Display Screen 11
Keypad Controls 12
Machine Setup 15
Dispense Setup 16
Dispense Modes 18
•Purge Mode
18
•Teach Mode
19
•Timed Mode
20
•Time+ Mode
22
•Cycle Mode
24
Function Menu 26
•Program Number
28
•Glue Alarm
29
•Pressure Alarm
31
•Vacuum Alarm
33
•Auto Purge
35
•Add Time+
37
•Cycle Delay
38
•Dispense Count
39
•Dispense Limit
40
•Dispense Time
42
•Sequence
43
•Shot Actuation
47
•Power Button
48
•Language
49
•Calibration
50
•Machine Reset
51
•Total Cycles
52
•Used Time
53
•Machine Copy
54
•RS232 Port
55
•Pressure Unit
56
•Vacuum Unit
57

DC100 MAX Digital Dispenser Operating Manual
© 2023 Fisnar - 3 - DC100 MAX Rev 4
Table of Contents
•Dispense Cancel
58
•Change Password
59
•Operator Lockout
60
Foot Switch Connector 61
I/O Connector 62
•Schematic
62
•
Output Signals
63
•
Input Signals
64
•Output Signal Definition
65
•Input Signal Definition
66
•
Input / Output Signal Testing
68
RS232 Connector 70
•Barcode Scanner
70
•RS232 External Control
71
Spare Parts List 72
Technical Drawing 74
Appendix 75
•Appendix 1
75
•Appendix 2
76

DC100 MAX Digital Dispenser Operating Manual
© 2023 Fisnar - 4 - DC100 MAX Rev 4
OVERVIEW
Model DC100 MAX Digital Dispenser
The DC100 MAX is a versatile, high precision dispenser designed to achieve exceptional levels
of process stability in critical dispense
applications: from microdot deposits and precise
beads, to potting and encapsulation. The advanced user-friendly dispense software features
a wide range of intelligent functions, allowing the user to maximize accuracy, control and
monitoring of their dispensing process.
Programmable alarms can be set to notify the user when fluid material life has ended, or when
fluctuations in the dispensing pressure have occurred. The sequence function enables the
dispense time to be changed at pre-set time intervals or shots. This ensu
res consistent
dispense results from the start to finish of the process, due to fluid viscosity changes or
reduction in the syringe fluid level being accounted for.
•Digital dispensing parameters, precision regulator, vacuum control and high flow solenoid ensure
high accuracy repeatable dispense results.
•16 programmable memory slots
•5 dispense modes (Purge, Teach, Timed, Time+, Cycle)
•Multilingual Display, digitally displaying dispense time, pressure and vacuum
•13 channel I/O circuit for external program change, dispense actuation, machine status and alarm
monitoring & signaling.
•I/O test mode
•Momentary or Latching shot actuation signal
•RS232 port for external control, monitoring and programming of dispense parameters
•Internal pressure and vacuum calibration function
•Operator lockout function prevents dispense programs and functions from being modified
•Pressure and Vacuum alarm for maintaining consistent dispense parameters
•
Auto-purge cycle and glue alarm prevents premature curing when dispensing 2K fluid materials
•
Option to attach barcode scanner for touch-free program selection and dispense actuation

DC100 MAX Digital Dispenser Operating Manual
© 2023 Fisnar - 5 - DC100 MAX Rev 4
Do not operate the machine in excess of its maximum ratings / settings.
Make sure that the input air supply is clean and dry. A 5 micron air filter/regulator
(560567) is recommended to ensure the input air supply is clean and dry.
If corrosive or flammable fluids are being used, a syringe barrel adapter head
assembly with inline filter must be used, to help prevent the fluids from being
sucked back into the machine.
The fluid being dispensed may be toxic and / or hazardous. Refer to the Material
Safety Data Sheet for proper handling and safety precautions.
Do not smoke or use near an open flame when flammable materials are being
dispensed.
Do not expose the machine directly to sunlight.
Avoid cleaning the machine with aggressive solvents – neutral detergents are
preferred.
Do not overfill the barrel and/or lay the barrel on its side. This will prevent fluids
from flowing back into the machine – refer to figures A& Bbelow.
DC100 MAX Malfunction
If the machine malfunctions, shut down the machine immediately. This can be
done by either pressing the power button on the front of the machine or
disconnecting the power cord.
Always use a piston with the barrel to prevent fluids from flowing back into the
machine
When dispensing low viscosity fluids that require the vacuum be aware not to
increase to a point where fluids begin to run back into the air line potentially
reaching the control box. The vacuum should not be set too high or it will cause
material to creep backwards.
SAFETY
General Precautions

DC100 MAX Digital Dispenser Operating Manual
© 2023 Fisnar - 6 - DC100 MAX Rev 4
Inappropriate Use
If the machine is used in a way other than described in this manual, it may cause damage
to self or property.
Do not use any components with the machine other than Fisnar authorized
components.
Do not use incompatible materials.
Do not make any modifications to the machine.
All repairs must be done using Fisnar specified spare parts.
Do not operate the machine in excess of its maximum ratings / settings.
Fire Prevention
Refer to the following instructions to avoid any fire or explosion.
Access your surroundings and the location of the nearest fire extinguisher and
Emergency Exit.
Do not smoke or use near an open flame when flammable materials are being
dispensed.
Immediately disconnect power if any sparking or smoke appears.
Do not expose the machine directly to sunlight.
Maintenance
The DC100 MAX is generally a maintenance free machine. However, to ensure smooth
operation please follow the below instructions.
Only use non-woven cleaners on the machine.
Avoid cleaning the machine with aggressive solvents – neutral detergents are
preferred.
Ensure that compressed air supply to the machine is clean and moisture free.
Do not lay the barrel on its side. This will prevent fluids from flowing back into
the machine.
SAFETY

DC100 MAX Digital Dispenser Operating Manual
© 2023 Fisnar - 7 - DC100 MAX Rev 4
ACCESSORIES
Item
Description
Quantity
5601890
Power Adaptor (Input: 100 – 240 VAC / Output: 24 VDC)
1
5601888
Foot Pedal
1
561851
Air Inlet Hose Assembly 1
5601969
FSX Syringe Barrel Stand
1
5779K712
Push To Connect Tube Fitting 1/4" Stem OD X 5/32" Tube OD
1
Note: Consumable kit (part # QK-CSK) & needle sample kit (part # QK-NSK) available to purchase separately.
Part # QK-CSK Part # QK-NSK
SPECIFICATIONS
Dimensions (W x D x H): 7.56” x 5.04” x 3.00” (192 x 128 x 76 mm)
Weight: 2.31 lbs. (1.05 kg)
Input AC to Power Supply: 100 – 240 VAC, 50 / 60 Hz
Output DC from Power Supply: 24 VDC – 0.75 Amp
Cycle Rate: Up to 600 cycles / min
Relative Humidity: 20 – 90% (No Condensation)
Operating Temperature: 50 – 104℉ (10 – 40℃)
Timer: 0.008 – 999.9 seconds
Air Input: 100 psi (7 bar) max
Air Output: 1 – 100 psi (0.07 – 7 bar)
Standards:
CE & UKCA Approved, EMC Compliant.
RoHS Compliant

DC100 MAX Digital Dispenser Operating Manual
© 2023 Fisnar - 8 - DC100 MAX Rev 4
EXTERNAL CONTROLS
Item Illustration Item Illustration Item Illustration
1 Vacuum Control 7 Scroll Buttons 13 Air In Port
2 Air Out Port 8 Shot Button 14 Foot Switch Connector
3 Power Button 9 Display 15 Fuse
4 Function / Escape
Button
10 Air Pressure
Regulator 16 Exhaust Port
5 Mode Button 11 Power Input Connector 17 RS232 Connector
6 Set Button 12 I/O Connector 18 Grounding Point
1
2
3
4
5
6
7
9
8
16
REAR
14
11
12
13
15
FRONT
10
17
18

DC100 MAX Digital Dispenser Operating Manual
© 2023 Fisnar - 9 - DC100 MAX Rev 4
EXTERNAL CONTROLS
1. Suck Back Control
Keeps a negative air pressure in the syringe barrel when not
dispensing. Required to prevent low viscosity fluids dripping from the
dispense tip in between dispense cycles.
2. Air Out Port The syringe barrel adapter head assembly is connected here.
3. Display Screen
Shows the current program number, dispense mode, parameter
values and active function alarms of the machine.
For further information, please refer to display screen overview.
4. Pressure Regulator
Adjusts the amount of pressure being used to dispense fluid from the
syringe barrel. To reach the desired pressure, turn the knob
counterclockwise to a point below the required pressure, and then turn
the knob clockwise to reach the required pressure.
The regulator can be locked into position by tightening the jam nut
behind the knob against the regulator body on the front panel of the
machine.
1
2
3
4

DC100 MAX Digital Dispenser Operating Manual
© 2023 Fisnar - 10 - DC100 MAX Rev 4
EXTERNAL CONTROLS
1. Foot Switch
Connector
The foot pedal switch is connected here. Alternatively, it can be used
for connecting to an external device (e.g. Fisnar dispense robot) that
will send the dispense start signal to the machine.
2 Fuse The machine fuse is located here.
3. Power Input
Connector Power input cable from the external power supply is connected here.
4. I/O Connector
Where the external machine I/O input signals and output signals are
connected.
A courtesy 24V + output is also included on the I/O Connector
5. RS232 Connector
Used for externally programming and controlling the machine.
Alternatively, a barcode scanner can be plugged into this connector.
6. Grounding Point
A wire from an external earth ground
source within the workplace
environment can be connected here
to ensure the machine is
permanently and safely grounded.
7. Air In Port External Compressed air 70-100 psi (5-7 bar) is connected here,
using the supplied ¼” OD air inlet hose.
8. Exhaust
When the suck-back control is in use, air will be exhausted from this
port in between dispense cycles.
A muffler (560024-DCHF) can be fitted into the exhaust outlet port to
reduce the emitted noise of the exhausted air.
8
1
3
4
7
2
5
6

DC100 MAX Digital Dispenser Operating Manual
© 2023 Fisnar - 11 - DC100 MAX Rev 4
DISPLAY SCREEN
1. Program Number Displays the currently selected program number. Up to sixteen (16)
individual programs can be saved to the machine for future recall.
2. Dispense Mode
Displays the current mode the saving program is in. There are five (5)
dispense modes available: PURGE, TEACH, TIMED,
TIME+ and
CYCLE.
3. Function Alarms
Displays which feature(s) are currently turned ON. I.E. Dispense Limit
(L), Glue Alarm (G), Pressure Alarm (P), Vacuum Alarm (V) and Auto
Purge (A).
4. Parameter Values Displays the values of the machine parameters (i.e. dispensing time,
pressure and/or vacuum).
1
2
3
4

DC100 MAX Digital Dispenser Operating Manual
© 2023 Fisnar - 12 - DC100 MAX Rev 4
KEYPAD CONTROLS
1. Power On / Off Press the button to switch the machine ON or OFF.
2. Function Menu Press the button to enter into the function menu.
3. Dispense Mode Press the button to select the dispense mode that the program
will operate in (i.e. PURGE, TEACH, TIMED, TIME+, CYCLE).
4.
Set Dispense Time
/ Function Menu
Navigate
Press the button to set the dispense time. Use the or
buttons to change the individual numeric value. The digit displaying
the “_” below it, is the one that will be adjusted.
Continue to press the button to scroll through the digit positions,
adjusting the numerical values as required.
When the button is pressed after the first digit from the left is
displaying “_” below it, the “_” will move to below the decimal place.
1
2
3
4
5
6

DC100 MAX Digital Dispenser Operating Manual
© 2023 Fisnar - 13 - DC100 MAX Rev 4
Use the or
buttons to move the decimal place into the
correct needed position.
The button can continue to be pressed to cycle through the digit
and decimal place positions in a continuous scrolling cycle.
When the dispense time has been correctly set, press and hold the
button for approximately two (2) seconds to save the dispense
time and exit back to the home screen.
When in the function menu, the button is used to enter into the
function setting and then used to scroll through the different parameter
values within the function setting.
5. Parameter Display
Press the or
button to scroll through the different
parameter display screens.
Dispense Time

DC100 MAX Digital Dispenser Operating Manual
© 2023 Fisnar - 14 - DC100 MAX Rev 4
Dispense Time and Vacuum
Dispense Time and Pressure
Dispense Limit, Glue Alarm and Auto Purge
6. Dispense Shot Press the button to actuate the machine and begin dispensing
fluid.

DC100 MAX Digital Dispenser Operating Manual
© 2023 Fisnar - 15 - DC100 MAX Rev 4
MACHINE SETUP
1. Connect the air hose from a compressed air supply source 70-100 psi (5-7 bar) to the “Air
In” port on the back of the machine.
2. Insert the foot pedal connector plug into the “Foot Switch" connector on the back of the
machine.
3. Attach the appropriate country type plug adapter onto the power supply and then connect
the electrical power cord to the port on the back of the machine.
4. Connect the end of the adapter head assembly with the green colored push to connect fitting,
to the “Air Out” port on the front of the machine.
1
2
3
4

DC100 MAX Digital Dispenser Operating Manual
© 2023 Fisnar - 16 - DC100 MAX Rev 4
DISPENSE SETUP
Attach the syringe barrel adapter head assembly to the syringe barrel (with piston fitted inside) as shown
below. See FIG. 1 (A – C).
FIG. 1: Dispense Setup
Do not overfill the syringe barrel and/or lay the syringe barrel on its side. This will
prevent fluids from flowing back into the machine – refer to figures A& Bbelow.
Place the filled syringe barrel in the supplied syringe barrel stand (5601969) when
not being used.
1.
Connect the syringe barrel adapter head assembly to the “Air Out” port on the front of the
machine. Fisnar adapter head assemblies are fitted with a green colored push to connect
fitting (5606038) that can be inserted directly into the “Air Out” port on the front of the
machine.
2.
If a syringe barrel adapter head assembly with 5/32” OD tubing is being
used with the
machine that has a bayonet fitting attached to the end of it, make sure to cut the bayonet
fitting off from the tubing first. Then install the included push to connect air adapter fitting
(5779K712) onto the tubing and insert it into the “Air Out” port on the front of the machine.
If a syringe barrel adapter head assembly with 1/4” OD tubing is being
used with the
machine, cut the bayonet fitting off from the tubing and insert it directly into the “Air Out” port.
A
B
C

DC100 MAX Digital Dispenser Operating Manual
© 2023 Fisnar - 17 - DC100 MAX Rev 4
3.
When not being used, the syringe barrel
should be placed in the syringe barrel stand
provided. This will prevent the dispense tip from being accidentally damaged or having fluid
inside the syringe barrel flow back into the machine if it is placed horizontally on the work
surface.
The bottle it is placed into, allows any fluid that drips from the dispense tip to be safely
captured. The dispense tip is also protected in the bottle from any foreign contaminants or
environmental lighting that may affect the properties of the fluid within it.
4.
Purge trays are provided with the syringe stand to allow for a small amount of fluid to be
purged into a clean and contained location. This is also helpful when a new dispense tip is
attached to the syringe barrel or when checking for accurate fluid material flow. This is helpful
for ensuring optimum dispense results.

DC100 MAX Digital Dispenser Operating Manual
© 2023 Fisnar - 18 - DC100 MAX Rev 4
DISPENSE MODES
PURGE MODE
1.
Press the button until “PURGE” mode is displayed.
PURGE mode allows the operator to actuate the machine on demand whenever
the dispense signal is activated (i.e. foot pedal is pressed).
2.
Press the foot pedal or the button to actuate the machine
and begin
dispensing fluid. Release the foot pedal or button to stop dispensing fluid.
The machine will count up from zero (0) seconds
the amount of time you are
dispensing fluid while the foot pedal or button is pressed.
The TIME shown on the digital display after the foot pedal or button has
been released, will reset to zero (0) seconds every time the machine is actuated.

DC100 MAX Digital Dispenser Operating Manual
© 2023 Fisnar - 19 - DC100 MAX Rev 4
DISPENSE MODES
TEACH MODE
1.
Press the button until “TEACH” mode is displayed.
TEACH mode allows the operator to calculate the correct dispense time needed
for the application process. This is useful when carrying out a potting process.
2.
Press the foot pedal or the
button to actuate the machine and begin
dispensing fluid. Release the foot pedal or button to stop dispensing fluid.
The TIME shown will increase cumulatively every time the machine is actuated.
If or when needed, press and hold the button to reset the timer to zero (0).
3.
The time shown on the screen will be the total cumulative time the machine has
been actuated for.
Once the correct dispense time is obtained, press the button to switch to
TIMED, TIME+ or CYCLE mode to save the value.

DC100 MAX Digital Dispenser Operating Manual
© 2023 Fisnar - 20 - DC100 MAX Rev 4
DISPENSE MODES
TIMED MODE
1.
Press the button until “TIMED” mode is displayed.
TIMED mode allows the operator to dispense fluid for a set period, regardless of
how long the foot pedal is pressed.
2.
Press the button to set the dispense time. Use the or buttons to
change the individual numeric value. The digit displaying the “_” below it, is the
one that will be adjusted.
Continue to press the button to scroll through the digit positions, adjusting
the numerical values as required.
When the button is pressed after the first digit from the left is displaying “_”
below it, the “_” will move to below the decimal place. Use the or
buttons to move the decimal place into the correct needed position.
Table of contents
Other FISNAR Dispenser manuals
Popular Dispenser manuals by other brands
Kingston Technology
Kingston Technology SKID-DOO KFC110 instructions

Hydro
Hydro Chem 918 quick start guide
Franke
Franke EXOS629X Installation and operating instructions
Cornelius
Cornelius 2230 C4-100 manual
Cornelius
Cornelius IntelliBlue R134 Kuwait Series operating instructions

Silkpaint
Silkpaint AirPen manual

