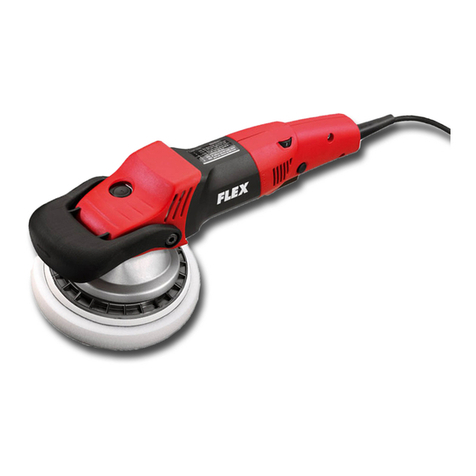
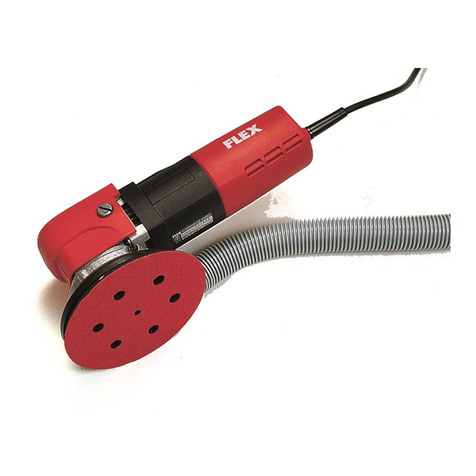
Flex XC3401VRG User manual

XC3401VRG
326.593/09.06
Book_XC3401.book Seite 1 Mittwoch, 13. September 2006 9:18 09

Polisher XC3401VRG
12
Contents
Symbols used in this manual . . . . . 12
Technical specifications . . . . . . . . . 12
Overview . . . . . . . . . . . . . . . . . . . . 13
For your safety . . . . . . . . . . . . . . . . 14
Operating instructions . . . . . . . . . . 16
Maintenance and care . . . . . . . . . . 18
Disposal information . . . . . . . . . . . . 19
CE Declaration of Conformity . . . . . 19
Guarantee . . . . . . . . . . . . . . . . . . . 20
Symbols used in this manual
Danger!
Denotes impending danger. Non-
observance of this warning may result
in death or extremely severe injuries.
Caution!
Denotes a possibly dangerous situation.
Non-observance of this warning may result
in slight injury or damage to property.
Note
Denotes application tips and important
information.
Symbols on the power tool
Before switching on the power
tool, read the operating manual!
Wear goggles!
Disposal information for the old
machine!
(See page 19)
Technical specifications
Machine type XC3401VRG
Order number 322.008
Tool Ømax. mm 160
Tool holder Velcro Ø150
Speed r.p.m. 160–480
Stroke rate min-1 3200–9600
Stroke mm 8
Power input W 900
Power output W 590
Weight (without power cord) kg 2.5
Safety class II /
Book_XC3401.book Seite 12 Mittwoch, 13. September 2006 9:18 09

Polisher XC3401VRG
13
Overview
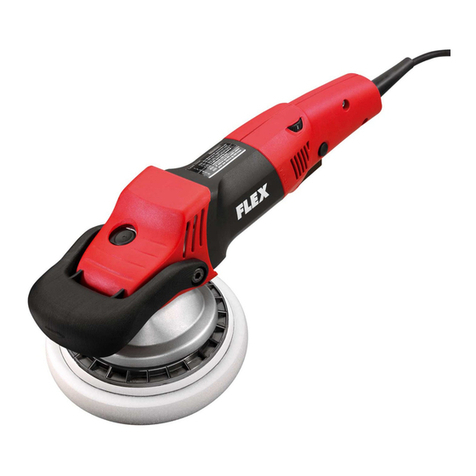
1 Handle cover
2 Bail handle
3 Spindle lock
Forlockingthespindlewhenchanging
the Velcro pad.
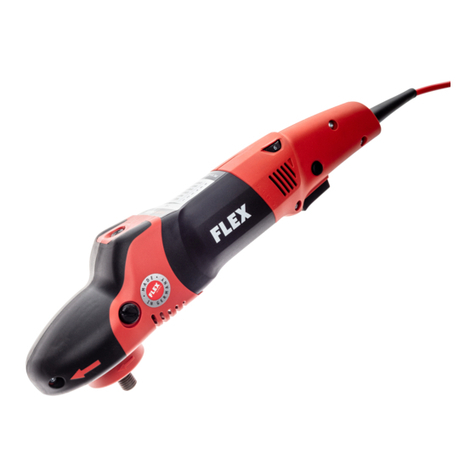
4 Gear head
Withairoutletanddirection-of-rotation
arrow.
5 Rating plate
6 Locking button
Lockstheswitch(7)duringcontinuous
operation.
7Switch
Switches the power tool on and off
and also accelerates it up to the
preselected speed.
8 4.0 m power cord with plug
9 Dial for preselecting the speed
10 Hexagon-socket key
11 Housing
12 Velcro pad
Book_XC3401.book Seite 13 Mittwoch, 13. September 2006 9:18 09

Polisher XC3401VRG
14
For your safety
Danger!
Before using the polisher, please read and
follow:
–these operating instructions,
–the ”General safety instructions”on the
handling of power tools in the enclosed
booklet (leaflet-no.: 315.915/04.04),
–the currently valid site rules and the
regulations for the prevention of
accidents.
This polisher is state-of-the-art and has
been constructed in accordance with the
acknowledged safety regulations.
Nevertheless, when in use, the power tool
may be a danger to life and limb of the user
or a third party, or the power tool or other
property may be damaged. The polisher
may be used only
–used as intended,
–in perfect working order.
Faults which impair safety must be repaired
immediately.
Noise
Caution
Wear ear protection at a sound pressure
above 85 dB(A).
Measured according to EN 60745:
:
Vibration
Weighted effective value of acceleration
according to EN 60745: 4.9 m/s²
Intended use
This hand-operated orbit polisher is
designed
–is designed for industrial applications,
–for all types of polishing work, e.g.
paintwork on vehicles, furniture, metal
and stone surfaces, etc. with polishing
sponge, lambswool and wool pads
–for use with polishing tools which are
permitted to run at a speed of at least
500 r.p.m.
Safety instructions
Danger!
nWhen using the power tool,
wear protective equipment:
Goggles, dust mask, ear protection,
protective gloves, non-slip safety shoes.
Wear tight-fitting clothes which cannot
be caught by the polisher while you are
working.
nDo not machine materials which release
hazardous substances.
Donotpolishmaterialswhichcontain
asbestos.
n
If dust is hazardous, wear a dust mask
in accordance with DIN EN 149!
Recommended filter class P2.
nAlways guide the polisher with both
hands.Hold thepolisherinthefrontarea
by the handle cover (1) only. Attach bail
handle (2) if the conditions at the work
place permit.
Sound pressure LPA dB(A) 79
Sound power LWA dB(A) 90
Book_XC3401.book Seite 14 Mittwoch, 13. September 2006 9:18 09

Polisher XC3401VRG
15
nDo not clamp the polisher in a vice.
nClamp the workpiece if it is not securely
positioned by its own weight.
nBefore using the polisher, always check
the power cord (8) and polisher for
damage. Do not start a damaged
polisher.
nAlways lay the power cord (8) to the rear
away from the polisher.
nUse only tools which have a permitted
speed at least as high as the nominal
speed of the polisher.
nUse only original polishing materials
supplied by the manufacturer. If other
polishing materials are used, the weight
differences may increase the vibrations
of the polisher.
nBefore using the machine, check that
the installed tools have been secured
according to the manufacturer’s
instructions.
nBefore using the polisher, checkthat the
polishing tools have been installed and
attached correctly. Switch on the
machine at no load for 30 seconds!
Interrupt the test run immediately if
violent vibrations occur or other damage
is established. Check the machine to
determine the cause.
nAs the polisher vibrates, breaks should
be taken after working for some time.
nKeep hands away from rotating parts.
nDo not load the polisher to such an
extent that it stops.
nIfpolishinginoneplaceat ahighcontact
pressure, the work surface will heat up.
Risk of burns! Risk of damaging
sensitive surfaces.
nDo not apply high contact pressure if the
Velcro pad (11) is at an angle, otherwise
the Velcro pad will bend and be
damaged.
nIf polishing plastic surfaces, these will
become electrostatically charged.
Caution, flashover may occur.
nProtect people and objects from ejected
remnants of the polishing and abrading
materials.
nBefore putting the polisher down,
switch it off and wait until it stops.
nIf polishers are used outdoors or are
exposed to extreme metal dusts,
connect via a residual-current-operated
circuit-breaker (tripping current
maximum 30 mA).
nUse only extension cables permitted
for outdoor use.
nIdentify the polisher with stickers only.
Do not drill any holes into the housing.
Damage to property!
nThe mains voltage and the voltage
specifications on the rating plate (5)
must correspond.
nDo not press the spindle lock (3) until
the tool stops.
Book_XC3401.book Seite 15 Mittwoch, 13. September 2006 9:18 09
Polisher XC3401VRG
16
Operating instructions
Danger!
Before carrying out any work on the
polisher, always pull out the mains plug.
Before switching on the polisher
Unpack the polisher and check that there
are no missing or damaged parts.
Attach handle cover
Attaching the bail handle
1. Remove 2 screws from the handle
cover.
2. Push bail handle over the handle cover
with the finger recess face down.
3. Attach the bail handle with the 2 screws
and key (10).
Switch on and off
Brief operation without engaged
switch rocker:
–Press and hold down the switch.
–To switch off, release the switch.
Continuous operation with engaged
switch rocker:
–Press and hold down the switch.
–To lock into position, hold down the
locking button and release the switch.
–To switch off, briefly press and release
the switch.
Book_XC3401.book Seite 16 Mittwoch, 13. September 2006 9:18 09

Polisher XC3401VRG
17
Note
Following a power failure, the switched on
power tool does not restart.
Preselecting the speed
–To set the operating speed, move the
dial (9) to the required value.
–Gently press the switch (7) to accelerate
the power tool up to the preselected
speed.
Note
If an overload or overheating occurs during
continues operation, the power tool auto-
matically reduces the speed until the power
tool has cooled down adequately.
Attach or change tools
1. Pull out the mains plug.
2. Firmly press polishing material, centred
on the eye, onto the Velcro pad (11).
Use undamaged polishing tools only.
3. Insert the mains plug into the socket.
4. Switch on the polisher (without engaging
it) and run the polisher for approx.
30 seconds. Check for imbalances and
vibrations.
5. Switch off the polisher.
Operating instructions
Caution!
When the polisher is switched off,
the grinding tool continues running briefly.
Note
Following a tool change (e. g. wool pad
instead of polishing sponge), the difference
in weight may increase the vibrations.
Change the operating speed with the
adjusting wheel (9) until the vibrations have
been reduced.
–Switch on the machine before placing it
on the surface which is to be polished
and run the polisher up to the set speed.
–Applying light contact pressure, move
the polisher in circular, overlapping
movements on the surface which is to
be polished in order to obtain a good
polishing finish and to ensure that the
tool has a long service life.
–On sensitive surfaces (e.g. car
paintwork) do not work aggressively
but work at slow speeds applying low
contact pressure.
For further information on the manu-
facturer’s products go to www.flex-tools.de.
Book_XC3401.book Seite 17 Mittwoch, 13. September 2006 9:18 09
Polisher XC3401VRG
18
Maintenance and care
Danger!
Before carrying out any work on the
polisher, always pull out the mains plug.
Cleaning
–Regularly clean the power tool and
ventilation slots. Frequency of cleaning
is dependent on the material and
duration of use.
–Regularly blow out the housing interior
and motor with dry compressed air.
Carbon brushes
The polisher features cut-off carbon
brushes.
When the wear limit of the cut-off carbon
brushes is reached, the polisher switches
off automatically.
Note!
Use only original parts supplied by the
manufacturer for replacement purposes.
If non-original partsare used,the guarantee
obligations of the manufacturer will be
deemed null and void.
Whenthepolisherisbeing used,the carbon
brushes can be seen sparking through the
rear air inlet apertures.
If the carbon brushes spark excessively,
switch off the polisher immediately.
Take the polisher to a customer service
workshop authorised by the manufacturer.
Gears
Note!
Do not loosen the screws on the gear
head (4) during the warranty period.
Non-compliance will deem the guarantee
obligations of the manufacturer null and
void.
Replacing a worn Velcro pad
1. Pull out the mains plug.
2. Remove polishing sponge.
3. Place machine on its back.
4. Press spindle lock and loosen and
remove the screw with an Allen key.
Remove Velcro pad.
5. If required, clean the key surface of the
output shaft.
6. Place a new Velcro pad on the output
shaft.
Thegrooveof theVelcropadmustmesh
with the key surface of the output shaft,
if required rotate the output shaft.
7. Screw in the screw and tighten with the
Allen key. Simultaneously press the
spindle lock.
8. Conduct a test run. Check for
imbalances and vibrations.
Book_XC3401.book Seite 18 Mittwoch, 13. September 2006 9:18 09

Polisher XC3401VRG
19
Repairs
Repairsmaybecarriedoutbyanauthorised
customer service centre only.
Spare parts and accessories
Note!
Only the tools released by FLEX may
be used.
For other accessories, in particular tools
and polishing aids, see the manufacturer’s
catalogues.
Disposal information
Danger!
Render redundant power tools unusable
by removing the power cord.
EU countries only
Do not throw electric power tools
into the household waste!
In accordance with the European Directive
2002/96/EG on Waste Electrical and
Electronic Equipment and transposition into
national law used electric power tools must
be collected separately and recycled in an
environmentally friendly manner.
Note!
Please ask your dealer about disposal
options!
CE Declaration of Conformity
We hereby declare that this product
corresponds with the following standards
or normative documents:
EN 60745, EN 55014, EN 61000
in accordance with the regulations
stipulated in the directives
73/23/EWG, 89/336/EWG, 98/37/EG.
06 Rühle Severin
FLEX-Elektrowerkzeuge GmbH
Bahnhofstrasse 15
D-71711 Steinheim/Murr
Spare-part/Accessory Order
no.
Handle cover 332.402
Bail handle 333.565
Polishing bag 333.573
Velcro pad 150 mm with gear
wheel 328.200
Polishing sponge Ø160 mm
–blue
–black
–white
304.751
304.824
304.786
Velcro wool pad Ø150 mm 258.704
Book_XC3401.book Seite 19 Mittwoch, 13. September 2006 9:18 09
Polisher XC3401VRG
20
Guarantee
When a new machine is purchased,
FLEX issues the end user with a 2-year
manufacturer’s warranty which comes into
force on the date the machine was
purchased. The guarantee covers only
defectswhichcan beattributedtoa material
and/or production fault as well as non-
performance of warranted characteristics.
When making a claim under the guarantee,
enclose the original sales receipt with
purchase date. Repairs under the
guarantee may be carried out only by
workshops or service centres authorised
by Flex. A claim may be made under the
guarantee only if the power tool has been
used as intended. The guarantee excludes
inparticularoperationalwear,improperuse,
partly or completely dismantled machines
as well as damage caused by overloading
the machine, use of non-permitted,
defective or incorrectly used application
tools. Damage which is caused by the
machine on the application tool or
workpiece, use of force, consequential
damagewhichcan beattributedtoimproper
or inadequate maintenance on the part of
the customer or a third party, damage
caused by external effects or foreign
objects, e. g. sand or stones, as well as
damage caused by non-observance of the
operating manual, e. g. connection to an
incorrect mains voltage or current type.
Claims for insertable tools or accessories
can only be made under the guarantee
provided they are used with power tools
for the intended or permitted use.
Exemption from liability
The manufacturer and his representative
are not liable for any damage and lost profit
due to interruption in business caused by
the product or by an unusable product.
The manufacturer and his representative
are not liable for any damage which was
caused by improper use of the power tool or
by use of the power tool with products from
other manufacturers.
Book_XC3401.book Seite 20 Mittwoch, 13. September 2006 9:18 09
Other manuals for XC3401VRG
2
Table of contents
Other Flex Sander manuals

Flex
Flex PXE 80 10.8-EC User manual

Flex
Flex LBS 1105 VE User manual

Flex
Flex L 1503 VR User manual

Flex
Flex LD 15-10 125 R User manual

Flex
Flex OSE 80-2 User manual

Flex
Flex PXE 80 12.0-EC User manual

Flex
Flex GCE 6-EC User manual

Flex
Flex GE MH 18.0-EC User manual

Flex
Flex ORE 5-150 EC User manual

Flex
Flex XFE 15 125 18.0-EC User manual