manuals.online logo
Brands
  1. Home
  2. •
  3. Brands
  4. •
  5. FLIR
  6. •
  7. IP Camera
  8. •
  9. FLIR Quasar Gen III User manual

FLIR Quasar Gen III User manual

Quick Install Guide
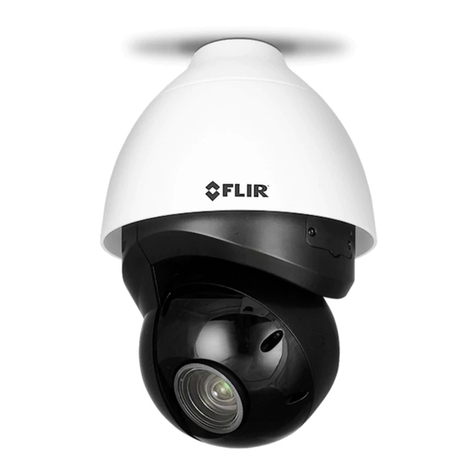
Quasar Gen III
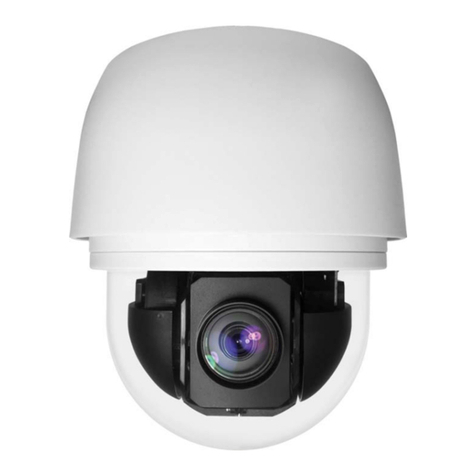
CP-6302-31-I
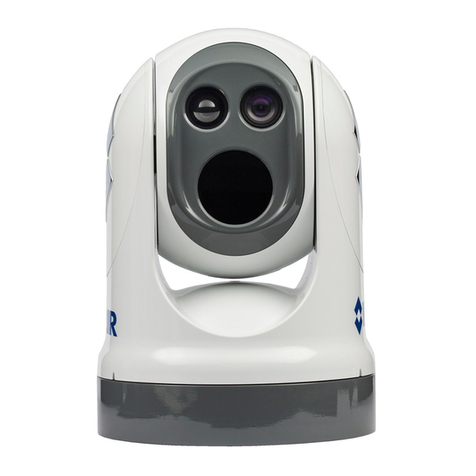
Indoor/Outdoor 30x HD PTZ IP Camera
A. Connect the Unit
1. If using a 12VDC power supply, connect its wires to
the two-pin power connector.
2. Console connector (Technician)
3. Attach a Cat 5e/Cat 6 cable from the switch to the
RJ45 connector for 10/100/1000 Mbps Ethernet and
UPOE. If using UPOE, use CP-POE-60W PoE injector
or equivalent. Verify that there are steady green and
flashing yellow LEDs.
4. If using a 24VAC power supply or a heater, connect
its wires to the three-pin power connector ( See G.
Camera Connectors)
5. Attach coax cable to the BNC connector for video
output to a DVR
6. Attach wires from external devices to the 14-pin
terminal block connector for alarm and audio in/out
( See G. Camera Connectors)
7. To reset factory defaults at any time, press the
Default button for at least 20 seconds.
8. Remove the SD card slot cover with a Phillips
screwdriver. Insert an SDXC card (not supplied) in the
slot to store video clips and snapshots.
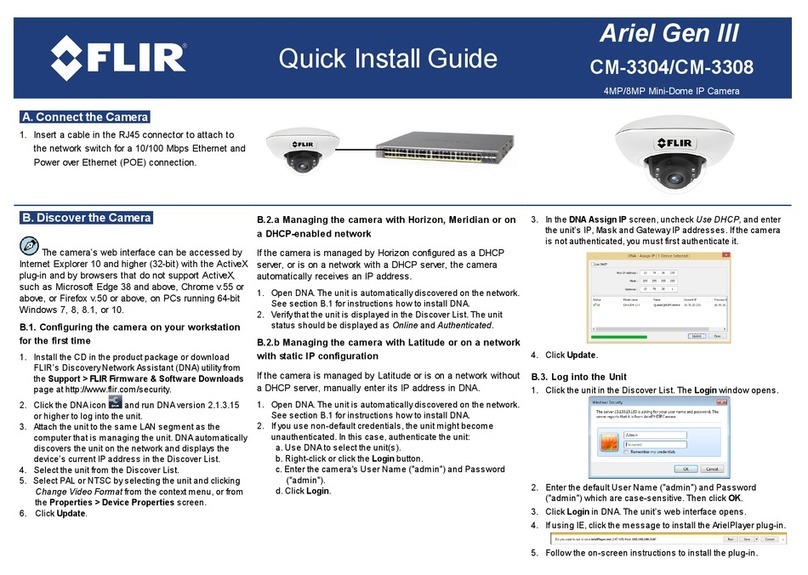
B. Discover the Camera
The camera’s web interface can be accessed by
Internet Explorer 10 and higher (32-bit) with the ActiveX
plug-in on PCs running 64-bit Windows 7, 8, 8.1, or 10.
B.1. Configuring the camera on your workstation
for the first time
1. Install the CD in the product package or download
FLIR’s Discovery Network Assistant (DNA) utilityfrom
the Support > FLIR Firmware & Software Downloads
page at http://www.flir.com/security.
2. Click the DNA icon and run DNA version 2.1.3.15 or
above to log into the unit.
3. Attach the unit to the same LAN segment as the
computer that is managing the unit. DNA automatically
discovers the unit on the network and displays the
device’s current IP address in the Discover List.
4. Select the unit from the Discover List.
5. From the context menu, or from the Properties > Device
Properties screen, select the unit, select PAL or NTSC, click
Change Video Format.
6. Click Update.
B.2.a Managing the camera with Horizon, Meridian or
on a DHCP-enabled network
If the camera is managed by Horizon configured as a DHCP
server, or is on a network with a DHCP server, the camera
automatically receives an IP address. The unit's default IP
address is 192.168.0.250.
1. Open DNA. The unit is automatically discovered on the
network. See section B.1 for instructions how to install DNA.
2. Verifythat the unit is displayed in the Discover List. The unit
status should be displayed as Online and Authenticated.
B.2.b Managing the camera with Latitude or on a
network with static IP configuration
If the camera is managed by Latitude or is on a network
without a DHCP server, manually enter its IP address in
DNA.
1. Open DNA. The unit is automatically discovered. See section
B.1.
2. If you use non-default credentials:
a. Use DNA to select the unit(s).
b. Right-click or click the Login button.
c. Enter the camera's User Name ("Admin") and Password
("1234").
d. Click Login.
3. In the DNA Assign IP screen, uncheck Use DHCP, and enter
the unit’s IP, Mask and Gateway IP addresses. If the camera
is not authenticated, you must first authenticate it.
4. Click Update.
B.3. Log into the Unit
1. Click the unit in DNA’s Discover List. The Login window
opens.
2. Enter the default User Name ("Admin") and Password
("1234"), which are case-sensitive. Then click OK.
3. Click Login in DNA. The unit’s web interface opens.
4. Click the message to install the ActiveX plug-in.
5. Follow the on-screen instructions to install the plug-in.
C. Install the ActiveX Plug-in
1. Ensure that ActiveX controls can be downloaded by (a) changing the ActiveX controls and
plug-in settings or (b) setting the Internet securitylevel to default. For further details, refer
to the camera’s User and Installation Guide.
·
To set ActiveX controls and plug-in settings:
1. Start Internet Explorer.
2. Select Tools > Internet Options from the main menu of the browser.
3. Select the Security tab and click Internet.
4. Click Custom level to change ActiveXsettings.
5. Set all ActiveX controls and plug-ins settings to Prompt or Enable.
·
To set the Internet SecurityLevel:
1. Start Internet Explorer.
2. Select Tools > Internet Options from the main menu of the browser.
3. Select the Security tab and click Internet.
4. Click Default level.
5. Click OK.
6. Close and reopen the browser window.
2. After the request to install the ActiveX control file (install.cab) appears on the screen,
click Yes.
3. After installing the plug-in, in the pop-up securitywarning that opens, click Install to start
downloading the Quasar Player software onto the PC.
4. Click Finish when the Quasar Player installation is completed.
D. Insert and Configure SD Card
An SDXC card (not supplied) must be inserted inside the camera housing in order to
locally store a snapshot or recording triggered by an event. To install the card:
1. Insert an SDXC card (up to 128GB, Class 10) in the card drive. (Replace the camera
bubble when complete).
2. Verifythat the card status is displayed as SD Card Available in the System > Edge
Recording > SD Card screen.
3. Format the card.
4. Configure the camera to store snapshots and recordings from the System > Events
Setup screens.
E. Mount the Camera
1. Verifythat the operating temperature range is between -40°C ~ 50°C (-40° ~ 122°F),
0-90% relative humidity(non-condensing).
2. Be sure to have the required accessories and tools available.
3. Refer to the User and Installation Guide for mounting instructions.
F. Attach to VMS
Once you have completed installation and found the current IP address with DNA, use your VMS
Discovery/Attach procedures to attach the camera to your VMS.
G. Camera Connectors
Power Connector
Pin
Definition
1
AC 24L
2
Ground
3
AC 24N
14-pin Terminal Block
Pin
Definition
Pin
Definition
Pin
Definition
1
Audio-Out
6
Alarm-Out
B2
11
Alarm-In2
2
Ground (Audio
I/O)
7
RS-485 D+
12
Alarm-In 1
3
Alarm-Out A1
8
RS-485 D-
13
Ground (Alarm
I/O and RS-485)
4
Alarm-Out A2
9
Alarm-In 4
14
Audio-In
5
Alarm-Out B1
10
Alarm-In 3
CP-6302_QIG_26Jul17_v1
FLIR Systems, Inc. 6769 Hollister Ave. Goleta, CA 93117
Tel: +1 888.388-3577 product.enterprise.support@flir.com www.flir.com/security

Other manuals for Quasar Gen III

4

This manual suits for next models

1

Other FLIR IP Camera manuals

FLIR Exx series User manual

FLIR

FLIR Exx series User manual

FLIR T420 User manual

FLIR

FLIR T420 User manual

FLIR Quasar CP-6302-31-P User manual

FLIR

FLIR Quasar CP-6302-31-P User manual

FLIR DNE14TL2 User manual

FLIR

FLIR DNE14TL2 User manual

FLIR SyncroIP Camera Series Mounting instructions

FLIR

FLIR SyncroIP Camera Series Mounting instructions

FLIR Voyager III User manual

FLIR

FLIR Voyager III User manual

FLIR EX Series User manual

FLIR

FLIR EX Series User manual

FLIR Quasar Gen III User manual

FLIR

FLIR Quasar Gen III User manual

FLIR 620 Series User manual

FLIR

FLIR 620 Series User manual

FLIR M400 User manual

FLIR

FLIR M400 User manual

FLIR Ariel Gen II CC-3103 User manual

FLIR

FLIR Ariel Gen II CC-3103 User manual

FLIR E series User manual

FLIR

FLIR E series User manual

FLIR Quasar Gen III CM-6308 User manual

FLIR

FLIR Quasar Gen III CM-6308 User manual

FLIR SyncroIP Camera Series Operator's manual

FLIR

FLIR SyncroIP Camera Series Operator's manual

FLIR A3 F series User manual

FLIR

FLIR A3 F series User manual

FLIR DNV14UX2 User manual

FLIR

FLIR DNV14UX2 User manual

FLIR T640 User manual

FLIR

FLIR T640 User manual

FLIR Tau SWIR User manual

FLIR

FLIR Tau SWIR User manual

FLIR Quasar Gen III User manual

FLIR

FLIR Quasar Gen III User manual

FLIR A3 PT series User manual

FLIR

FLIR A3 PT series User manual

FLIR Quasar CM-6206-H1-I Manual

FLIR

FLIR Quasar CM-6206-H1-I Manual

FLIR Ariel Gen II CB-3102 User manual

FLIR

FLIR Ariel Gen II CB-3102 User manual

FLIR EX Series User manual

FLIR

FLIR EX Series User manual

FLIR F-Series User manual

FLIR

FLIR F-Series User manual

Popular IP Camera manuals by other brands

Visionite VCE-F8A0W-1R instruction manual

Visionite

Visionite VCE-F8A0W-1R instruction manual

GeoVision GV-Fisheye GV-FE111 user manual

GeoVision

GeoVision GV-Fisheye GV-FE111 user manual

Raplink SC-19001 Device user manual

Raplink

Raplink SC-19001 Device user manual

Foscam C Lite Quick installation guide

Foscam

Foscam C Lite Quick installation guide

XCEL Hunting Edition user manual

XCEL

XCEL Hunting Edition user manual

Allnet ALL2213 user manual

Allnet

Allnet ALL2213 user manual

ACT AC7990 Quick install

ACT

ACT AC7990 Quick install

Nexcom NCr-661-VHA user manual

Nexcom

Nexcom NCr-661-VHA user manual

Megapix PANO DWC-PF5M1TIR manual

Megapix

Megapix PANO DWC-PF5M1TIR manual

Edimax NC-213 Series user manual

Edimax

Edimax NC-213 Series user manual

NetworkTV NTV74U4K user manual

NetworkTV

NetworkTV NTV74U4K user manual

DynaColor W series quick guide

DynaColor

DynaColor W series quick guide

HomeSeer HS-CAM-O manual

HomeSeer

HomeSeer HS-CAM-O manual

KlisLite 40IR-OSD Operation manual

KlisLite

KlisLite 40IR-OSD Operation manual

Cloud CM-IPMP user manual

Cloud

Cloud CM-IPMP user manual

Eyeris ERN-R1247P Installation and operating instruction manual

Eyeris

Eyeris ERN-R1247P Installation and operating instruction manual

NAPCO iSeeVideo ISEE-VCAM1 installation guide

NAPCO

NAPCO iSeeVideo ISEE-VCAM1 installation guide

Digitus DN-16087 Quick installation guide

Digitus

Digitus DN-16087 Quick installation guide

manuals.online logo
manuals.online logoBrands
  • About & Mission
  • Contact us
  • Privacy Policy
  • Terms and Conditions

Copyright 2025 Manuals.Online. All Rights Reserved.