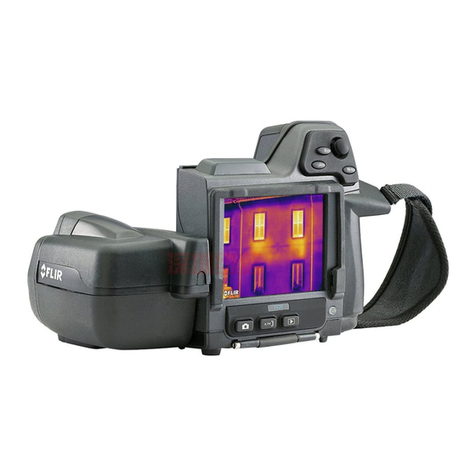
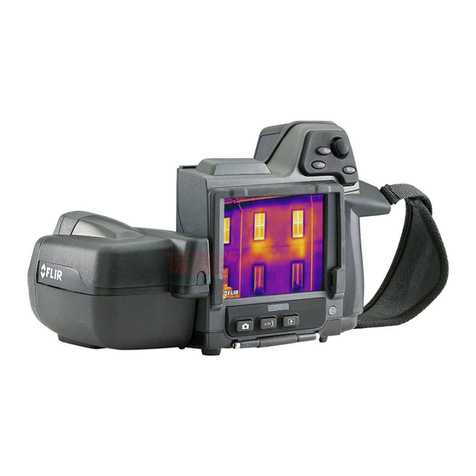
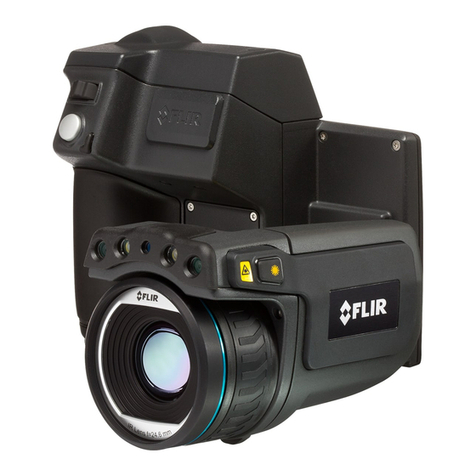
FLIR T43 User manual

Instruction Manual
FLIR T43 Series Thermal
Camera


Instruction Manual
FLIR T43 Series Thermal
Camera
#LX400062; r. 1.0/24298/24299; en-US iii


Table of contents
1 Overview............................................................................................1
2 Thermal Imaging Overview ...................................................................2
3 Tri-Mode IP/MPX/Analog Overview.........................................................3
4 Web Configuration Setup .....................................................................4
4.1 Supported Browsers....................................................................4
4.2 Internet Explorer Setup ................................................................4
4.3 Safari Setup............................................................................... 4
4.4 Firefox Setup .............................................................................5
4.5 Google Chrome Setup ................................................................. 6
5 Live View............................................................................................8
6 Setup ............................................................................................... 10
6.1 Camera .................................................................................. 10
6.1.1 Settings ....................................................................... 10
6.1.2 Region of Interest (ROI) ................................................... 14
6.1.3 Setting ROI to Match Motion Detection Areas ....................... 15
6.1.4 Video........................................................................... 16
6.1.5 Snapshot...................................................................... 17
6.1.6 Overlay ........................................................................ 18
6.1.7 Privacy Masking............................................................. 19
6.1.8 Path ............................................................................ 20
6.1.9 Audio........................................................................... 20
6.2 Network.................................................................................. 21
6.2.1 TCP-IP......................................................................... 21
6.2.2 Connection ................................................................... 21
6.2.3 ONVIF ......................................................................... 22
6.2.4 PPPoE......................................................................... 23
6.2.5 DDNS.......................................................................... 23
6.2.6 IP Filter ........................................................................ 24
6.2.7 SMTP (Email)................................................................ 24
6.2.8 UPnP........................................................................... 25
6.2.9 Bonjour........................................................................ 25
6.2.10 Multicast (Advanced) ...................................................... 26
6.2.11 QoS (Service Only)......................................................... 27
6.3 Event ..................................................................................... 27
6.3.1 Motion Detect................................................................ 27
6.3.2 Relay Activation (Cameras with Alarm I/O Only) .................... 29
6.3.3 System Alerts ................................................................ 30
6.3.4 Network ....................................................................... 34
6.3.5 Illegal Access ................................................................ 34
6.4 Storage .................................................................................. 35
6.4.1 Record Schedule ........................................................... 35
6.4.2 Snapshot Schedule ........................................................ 36
6.4.3 Holiday Schedule ........................................................... 37
6.4.4 Path ............................................................................ 38
6.4.5 Local........................................................................... 38
6.4.6 FTP............................................................................. 38
6.4.7 NAS ............................................................................ 39
6.4.8 Record Control .............................................................. 39
6.5 System................................................................................... 40
6.5.1 General........................................................................ 40
#LX400062; r. 1.0/24298/24299; en-US v

Table of contents
6.5.2 Date & Time.................................................................. 40
6.5.3 Account ....................................................................... 41
6.5.4 Default......................................................................... 43
6.5.5 Import / Export............................................................... 43
6.5.6 Auto Maintain ................................................................ 44
6.5.7 Upgrade....................................................................... 44
6.6 Information .............................................................................. 45
6.6.1 Version ........................................................................ 45
6.6.2 Log ............................................................................. 45
7 Playback (Cameras with microSD only)................................................ 47
7.1 Playback Controls ..................................................................... 48
7.2 Backing up Video Files............................................................... 49
8 Connecting a Camera in MPX Mode ..................................................... 50
8.1 MPX On-Screen Display (OSD).................................................... 50
8.1.1 Accessing the OSD Menu ................................................ 50
8.1.2 OSD Menu Tree ............................................................. 52
9 Connecting to Cameras with FLIR Cloud™ CMS.................................... 53
9.1 System Requirements................................................................ 53
9.2 Installing FLIR Cloud™ Client ...................................................... 53
9.3 Adding a Camera over the Local Network (LAN) .............................. 54
9.4 Adding a Camera over the Internet using a DDNS Address ................ 55
10 Using FLIR Cloud™ Client for PC or Mac .............................................. 58
10.1 Home Page ............................................................................. 58
10.2 Live View ................................................................................ 58
10.2.1 Live View Controls.......................................................... 59
10.2.2 Opening Live View in Multiple Monitors ............................... 60
10.3 Controlling PTZ Cameras ........................................................... 61
10.3.1 PTZ Presets.................................................................. 62
10.3.2 PTZ Tours..................................................................... 63
10.3.3 PTZ Pattern .................................................................. 64
10.3.4 PTZ Scan ..................................................................... 65
10.3.5 PTZ Pan....................................................................... 65
10.4 Playback................................................................................. 65
10.5 Playback Controls ..................................................................... 67
10.6 Downloading Video to your Computer Hard Drive............................. 68
10.7 Alarm ..................................................................................... 69
10.8 Log........................................................................................ 70
10.9 E-map .................................................................................... 71
10.10 Devices .................................................................................. 73
10.11 Device Config .......................................................................... 74
10.12 Alarm CFG .............................................................................. 74
10.13 Tour & Task ............................................................................. 77
10.14 Account.................................................................................. 78
10.14.1 Managing User Accounts ................................................. 78
10.14.2 Managing Roles............................................................. 80
10.15 General .................................................................................. 81
10.15.1 Basic........................................................................... 81
10.15.2 File ............................................................................. 81
10.15.3 Alarm Prompt ................................................................ 82
10.15.4 Version ........................................................................ 83
#LX400062; r. 1.0/24298/24299; en-US vi

Table of contents
11 Smartphone and Tablet Apps .............................................................. 84
11.1 iPhone.................................................................................... 84
11.1.1 Prerequisites................................................................. 84
11.1.2 Connecting to your IP camera on an iPhone ......................... 84
11.1.3 Live View Interface ......................................................... 85
11.1.4 Controlling PTZ Cameras................................................. 86
11.1.5 Viewing Snapshots and Videos with Local Files .................... 87
11.1.6 Using Playback Mode on iPhone ....................................... 87
11.1.7 Enabling Push Notifications .............................................. 89
11.1.8 Using the Event List ........................................................ 91
11.1.9 Using Favorites.............................................................. 92
11.1.10 Using the E-Map ............................................................ 93
11.1.11 Device Manager............................................................. 95
11.2 iPad ....................................................................................... 96
11.2.1 Prerequisites................................................................. 96
11.2.2 Connecting to your IP Camera on an iPad............................ 97
11.2.3 Live View Interface ......................................................... 98
11.2.4 Controlling PTZ Cameras................................................. 98
11.2.5 Using Playback Mode on iPad......................................... 100
11.2.6 Using Local File to View Manual Recordings ...................... 101
11.2.7 Enabling Push Notifications ............................................ 102
11.2.8 Using the Event List ...................................................... 104
11.2.9 Using Favorites............................................................ 105
11.2.10 Using the E-Map .......................................................... 106
11.2.11 Using the Device Manager ............................................. 108
11.3 Android ................................................................................ 108
11.3.1 Prerequisites............................................................... 108
11.3.2 Connecting to your IP camera on Android .......................... 109
11.3.3 Live View Interface ....................................................... 109
11.3.4 Controlling PTZ Cameras............................................... 110
11.3.5 Viewing Snapshots and Videos with Local Files .................. 111
11.3.6 Using Playback Mode on iPhone ..................................... 112
11.3.7 Enabling Push Notifications ............................................ 113
11.3.8 Using the Event List ...................................................... 115
11.3.9 Using Favorites............................................................ 116
11.3.10 Using the E-Map .......................................................... 117
11.3.11 Device Manager........................................................... 119
12 RTSP Streaming (Advanced)............................................................. 121
13 Firmware Upgrade Tool .................................................................... 123
13.1 Installing a Firmware Upgrade Over the LAN................................. 123
13.2 Installing a Firmware Upgrade Over the Internet............................. 124
#LX400062; r. 1.0/24298/24299; en-US vii

Overview
1
This manual covers the following topics related to your FLIR T43 series thermal camera:
•Web browser configuration interface: See 4 Web Configuration Setup, page 4.
•Firmware upgrade tool: See 13 Firmware Upgrade Tool, page 123.
•Central Management Software for PC / Mac: See 9 Connecting to Cameras with
FLIR Cloud™ CMS, page 53.
•Smartphone / tablet apps: See 11 Smartphone and Tablet Apps, page 84.
NOTE
• For physical installation instructions, please refer to the Quick Connection Guide for your camera
model.
• Some settings described in this manual may not be available depending on the features supported by
your camera model.
#LX400062; r. 1.0/24298/24299; en-US 1

Thermal Imaging Overview
2
The Tri-Mode IP/MPX/Analog Thermal camera is a state-of-the-art thermal imaging device
that will provide excellent night visibility and situational awareness without any form of nat-
ural or artificial illumination. The sensors do not produce images from visible light like an
ordinary camera or the human eye does. Thermal cameras use energy in the infrared
band to produce images by sensing subtle differences in temperature and generating im-
ages based on those differences.
By using a thermal camera, you are viewing heat, not light. If there is a person in the live
view image, you can see there is a person, but identifying who that person is may be im-
possible regardless of the resolution of your thermal sensor. Similarly, while a higher reso-
lution sensor will detect a person at a greater distance, a low resolution sensor in many
cases will still detect the same motion.
The thermal imaging sensor relies on the fact that all objects, even very cold objects like
ice, emit thermal energy in the portion of the spectrum that the sensor can detect, the long
wave infrared (LWIR). Therefore, unlike a visible-light camera, the thermal imaging sensor
produces images based on directly radiated rather than reflected energy.
Any scene displayed by the sensor contains a range of thermal energy (temperatures),
from the lowest to the highest, that is present in the scene. These temperatures are
grouped by the sensor into a maximum of 256 “shades of gray” based on the thermal im-
age processing settings. Since the T43 Series camera is sensitive enough to distinguish
many more than 256 different temperatures, each “shade of gray” will represent a range of
temperatures.
For example, in a simplistic case, an image comprised of 60% sky (very cold) will devote
60% of the available “shades of gray” to the sky, leaving only 40% for the remainder of the
image. The temperature range assigned to each “shade of gray” is controlled by the
choices in the Camera Settings menu or the MPX on-screen display (OSD).
FLIR Systems, Inc. offers a comprehensive selection of training courses to help you to get
the best performance and value from your T43 Series cameras. You can find out more at
www.flir.com/training.
#LX400062; r. 1.0/24298/24299; en-US 2

Tri-Mode IP/MPX/Analog
Overview
3
The cameras offer three video output modes: standard analog, high definition (MPX), and
IP.
•IP / PoE: Provides high definition video output through Ethernet. If you are not using
PoE, make sure to connect the camera to a power source.
•MPX: Provides high definition video output through a BNC connector. To use MPX
mode, insert the MPX terminator into the camera’s Ethernet cable before you power on
the camera. When the terminator is installed, IP / PoE mode is not available. If the cam-
era is powered up without the terminator installed, IP and analog mode is enabled.
MPX terminator
•Analog: Provides high definition video output through a BNC connector.
NOTE
After the camera is powered on, it may take up to 2 minutes for the camera to fully boot up and show a
picture.
#LX400062; r. 1.0/24298/24299; en-US 3

Web Configuration Setup
4
The camera includes a built-in web interface that can be accessed using a web browser.
4.1 Supported Browsers
• Google Chrome™, Mozilla Firefox®, and Apple Safari® (via Webplugin)
• Microsoft Internet Explorer® 8.0 or later, 32-bit version (via ActiveX®)
4.2 Internet Explorer Setup
1. Open Internet Explorer® and enter the camera’s IP address in the address bar in the
following format: http://IP address:HTTP Port.
• For example: http://192.168.0.100:80
• The IP address can be found using the FLIR Cloud CMS. See 9.3 Adding a Camera
over the Local Network (LAN), page 54 for details.
2. A notification bar appears asking if you would like to install ActiveX® plugins. Click In-
stall or Allow to install the plugins.
3. Enter the camera user name (default: admin) and password (default: admin) and click
Login.
4.3 Safari Setup
1. Open Safari® and enter the camera’s IP address in the address bar in the following
format: http://IP address:HTTP Port.
• For example: http://192.168.0.100:80
• The IP address can be found using the FLIR Cloud CMS. See 9.3 Adding a Camera
over the Local Network (LAN), page 54 for details.
#LX400062; r. 1.0/24298/24299; en-US 4

Web Configuration Setup
4
2. A notification appears asking if you want to use the NPMedia plug-in. Click Trust to
use the plug-in.
3. Enter the camera user name (default: admin) and password (default: admin) and click
Login.
NOTE
If video from the camera does not appear after installation, quit Safari® by right-clicking on the Sa-
fari® icon in the dock and then selecting Quit. Then restart Safari® and log back into your camera.
4.4 Firefox Setup
1. Open Firefox® and enter the camera’s IP address in the address bar in the following
format: http://IP address:HTTP Port.
• For example: http://192.168.0.100:80
• The IP address can be found using the FLIR Cloud CMS. See 9.3 Adding a Camera
over the Local Network (LAN), page 54 for details.
2. A notification appears asking if you want to use the MMX plug-in. Click Allow... to use
the plug-in.
#LX400062; r. 1.0/24298/24299; en-US 5

Web Configuration Setup
4
3. Enter the camera user name (default: admin) and password (default: admin) and click
Login.
NOTE
If video from the camera does not appear after installation, quit Firefox® by closing the browser win-
dow. Then restart Firefox® and log back into your camera.
4.5 Google Chrome Setup
1. Open Chrome™ and enter the camera’s IP address in the address bar in the following
format: http://IP address:HTTP Port.
• For example: http://192.168.0.100:80
• The IP address can be found using the FLIR Cloud CMS. See 9.3 Adding a Camera
over the Local Network (LAN), page 54 for details.
2. Click Please click here to download and install the plug-in.
3. The plug-in downloads automatically. When finished, double-click the plug-in in the
downloads bar at the bottom of the browser window.
#LX400062; r. 1.0/24298/24299; en-US 6

Web Configuration Setup
4
4. Enter the camera user name (default: admin) and password (default: admin) and click
Login.
NOTE
If video from the camera does not appear after installation, quit Chrome™ by closing the browser
window. Then restart Chrome™ and log back into your camera.
#LX400062; r. 1.0/24298/24299; en-US 7

Live View
5
Upon login, the web interface opens to the Live View.
NOTE
Some functions are not available on all IP camera models, based on the features available.
1. Stream/Protocol Select: Allows you to select the video stream and protocol used in
Live View.
•Main Stream: Click to view the Main Stream. The Main Stream provides better pic-
ture quality and resolution, but requires higher bandwidth.
•Sub Stream: Click to view the Sub Stream. The Sub Stream is recommended for
better performance when viewing the camera over the Internet.
•Protocol: Select the protocol that will be used to stream video: TCP or UDP.
2. Video Display Controls ()
•Original Size: Click to view the video in its original size. This depends on the
resolution and if you are viewing the Main Stream or Sub Stream.
•Full Screen: Click to view the video in full screen. Double-click or press ESC
to exit full screen mode.
•Width / Height Ratio: Click to select Original to use the original proportions
of the image or Adaptive to adapt the image proportions to the size of the screen.
•Realtime / Fluency: Click to select Realtime,Normal, or Fluency.
#LX400062; r. 1.0/24298/24299; en-US 8

Live View
5
3. Menu Tabs
•Live: Click to access Live View.
•PTZ: On micro PT cameras, the PTZ Control Panel is opened using the PTZ tab,
which replaces the button on the Video Display Controls panel.
•Playback: Click to playback video from the camera’s microSD card (cameras that
support microSD only).
•Setup: Click to setup camera functions.
•Alarm: Click to configure alarms.
•Logout: Log out of the camera.
4. Live View Functions ()
•Alarm Output: Click to activate an alarm output device connected to the cam-
era (cameras with alarm I/O only).
•Digital Zoom: Click to activate digital zoom mode. Click-and-drag in the video
area to select an area to zoom to, then drag to move the zoomed area or follow mo-
tion in the video. Right-click to return to full frame view.
•Snapshot: Click to save a snapshot from the camera to your computer hard
drive. To configure the folder where snapshots are saved, see 6.1.8 Path, page 20.
NOTE
Depending on your computer’s security settings, you may need to run your browser as administra-
tor to save snapshots or manual recordings.
•Triple Snapshot: Save the next three frames from the camera as snapshots.
•Manual Record: Click to start manually recording live video to your computer
hard drive. Click again to stop recording. To configure the folder where manual re-
cordings are saved, see 6.1.8 Path, page 20.
•Manual Focus (motorized lens cameras only): Click to display the AF Peak
and AF Max parameters for auto focus. The closer AF Peak and AF Max are, the
better the focus effect is.
•Audio Output: Click to mute / un-mute audio coming from the camera (audio-
enabled cameras only; must have self-powered microphone connected to the
camera).
#LX400062; r. 1.0/24298/24299; en-US 9

Setup
6
The Setup menus allows you to configure camera settings.
6.1 Camera
The Camera tab allows you to set the camera’s thermal image processing (Settings), the
video stream parameters (Video), and the audio settings for a camera with a microphone
(Audio).
NOTE
For the T43 Series Mini Bullet cameras, the only camera setting available is the region of interest (ROI).
See 6.1.2 Region of Interest (ROI), page 14 for more information.
6.1.1 Settings
The Settings menu allows you to configure the image sensor settings for the camera. As
you make adjustments, the effects will be shown in the video display.
#LX400062; r. 1.0/24298/24299; en-US 10

Setup
6
To configure the thermal image profile:
1. Click Indoor,Outdoor, or General (called Default if the camera is in MPX mode) to
change the camera image profile.
Indoor (Sharpness = 0, Gamma = 3, Smart Scene = 50%)
Outdoor (Sharpness = 20, Gamma = 5, Smart Scene = 15%)
General (Sharpness = 10, Gamma = 3, Smart Scene = 15%)
2. If needed, you can make fine-tune adjustments using the Sharpness (DDE), Gamma
(ACE), and Smart Scene Optimization (SSO) settings. Select Restore to set all values
back to their default settings.
#LX400062; r. 1.0/24298/24299; en-US 11

Setup
6
NOTE
Preset mode settings are highly subjective and vary considerably depending upon scene content and
viewing or recording preferences. Individual settings may be optimized for each your particular environ-
ment. For more information, technical details, or background theory regarding these settings, visit
www.flir.com/.
To configure thermal image settings:
1. Under Brightness (also known as ITT Mean, ITT Offset, or ITT Midpoint), select a val-
ue from 0 – 100. This setting determines the temperature that is at the middle of the
256 “shades of gray” available to the camera. Higher values allow more detail in hotter
scenes, while lower values allow more detail in lower temperature scenes.
2. Under Sharpness (also known as Digital Data Enhancement), select a sharpness val-
ue. Sharpness is used to enhance image details and/or suppress fixed pattern noise.
Higher values increase Sharpness, while lower values soften (blur) the image and filter
fixed pattern noise.
3. Under Gamma (also known as Active Contrast Enhancement), select a Gamma value.
Gamma provides a contrast adjustment dependent on the relative scene temperature.
Gamma values greater than 0 give more contrast to the hotter scene content and de-
crease contrast for the colder scene content. Gamma values less than 0 do the oppo-
site by decreasing the contrast for hotter scene content and leaving more of the
“shades of gray” to represent the colder scene content.
4. Under EZoom, select the digital zoom factor. Digital zoom factor is continuously varia-
ble; 16 steps for 320-pixel cameras and 24 steps for 480-pixel or 640-pixel cameras.
The zoom factor is stored so that at power-up the last saved field of view is maintained.
5. Under Smart Scene, select a Smart Scene Optimization (SSO) value. This value de-
fines the percentage of the scene that will be allotted a linear mapping. With SSO en-
abled, the difference in gray shades between two objects is more representative of the
difference in temperature, although the optimization in local contrast can be lost.
#LX400062; r. 1.0/24298/24299; en-US 12
Table of contents
Other FLIR Thermal Camera manuals

FLIR
FLIR T Series User manual

FLIR
FLIR Exx series User manual

FLIR
FLIR FB-Series O Manual

FLIR
FLIR M-Series User manual

FLIR
FLIR Duo Pro R User manual

FLIR
FLIR Scout Bi-Ocular User manual

FLIR
FLIR T420 User manual

FLIR
FLIR A6 Series User manual

FLIR
FLIR ThermaCAM BX320 User manual

FLIR
FLIR K 5 Series User manual
Popular Thermal Camera manuals by other brands

Planck VISION SYSTEMS
Planck VISION SYSTEMS ThermaCheck M1 user manual

Perfect Prime
Perfect Prime IR0280H instruction manual

InfiRay
InfiRay RICO MICRO Series user manual

Teledyne
Teledyne FLIR ONE Series Getting started

L3 Communications
L3 Communications Thermal-Eye X-50 user manual

Master cool
Master cool 52300 operating instructions