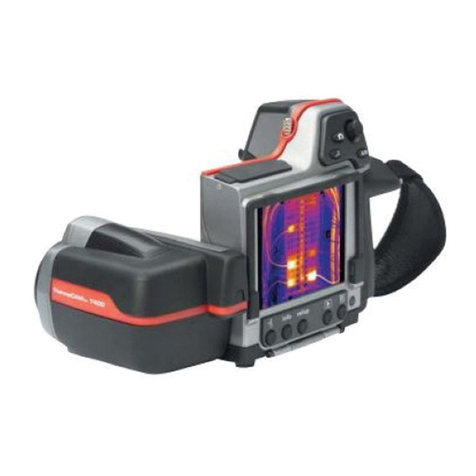
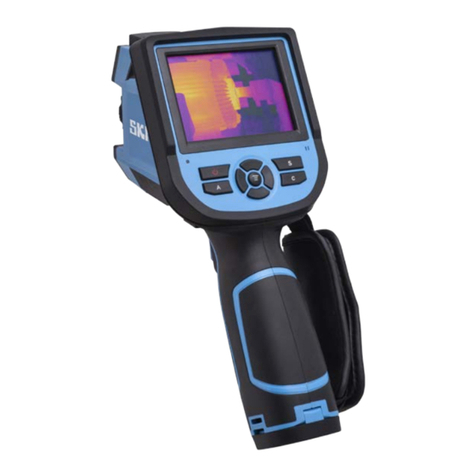
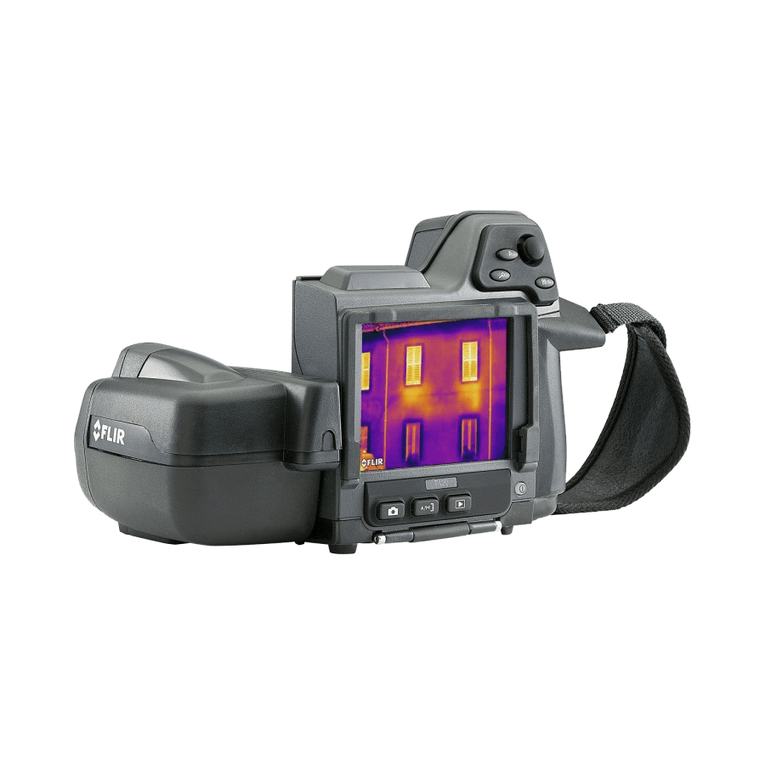
FLIR T8 Series User manual

Getting started
FLIR T8xx series


Getting started
FLIR T8xx series
#T810412; r. AA/55455/55455; mul


Table of contents
1 List of contents ............................. ... . . .. . . . . . .. . ................. . .. 1
2 Illustrations .... . ... . . . . . . . . ................. ... . . .. . . . . . .. . ................. . .. 2
3 EN-US English ..... ... . . .. . . . . . .. . ................. . .. . . . . . .. . . ................ 6
4 CS-CZ čeština.. .... . .. . . . . . .. . . ................ . ... . . . . . . . . ................. ..11
5 DA-DK Dansk. . . . . ................... . . . . . . ................... . . . . . . ...........17
6 DE-DE Deutsch . . . . . .. . . ................ . ... . . . . . . . . ................. ... . . .. . .22
7 EL-GR Ελληνικά ... . . . . . ... ................. . .. . . . . . ... . ................ . ... . .28
8 ES-ES Español. . . ... ................ . . .. . . . . . ... . ................ . ... . . . . . . . . .34
9 ET-EE Eesti keel ............. .... . .. . . . . . . . . . ................ . ... . . .. . . . . . .. . .40
10 FI-FI Suomi .. . .... ................ . . . . . .. . . ................ . .. . . . . . . . . . ........45
11 FR-FR Français .............. . . . . . .... ................ . . . . . .. . . ...............50
12 HU-HU Magyar ........ . . . . . ... . ................ . . .. . . . . . .. . ................. . .56
13 IT-IT Italiano . . . . . . ................... . . . . . . .. . ................ . . .. . . . . . .. . . ....62
14 JA-JP 日本語.... . . . . . .................... . . . . . .................... . . . . . ... . ....68
15 KO-KR 한국어. .. . . ................ ... . . .. . . . . . ... . ................ . ... . . . . . . . . .74
16 NB-NO Norsk. ................ . . .. . . . . . ... . ................ . .. . . . . . . . . . ........79
17 NL-NL Nederlands. . .................... . . . . . ... . ................ . . .. . . . . . .. . .84
18 PL-PL Polski. . . . . . ................... . . . . . . ................... . . . . . . ... ........90
19 PT-PT Português.......... . . . . . ... ................. . . . . . . . . ................. ..96
20 RU-RU Русский. . ................... . . . . . . ................... . . . . . . ... ...... 102
21 SV-SE Svenska............... . ... . . . . . . . . . ................ ... . . .. . . . . . .. . . .. 108
22 TR-TR Türkçe....... . . . . . ... ................. . . . . . . . . ................. ... . . .. 113
23 ZH-CN 简体中文 ........... . . . . . .. . ................. . .. . . . . . .. . . ............. 119
24 ZH-TW 繁體中文 ........... . . . . . ... ................. . .. . . . . . .. . . ............. 124
#T810412; r. AA/55455/55455; mul v
1 List of contents
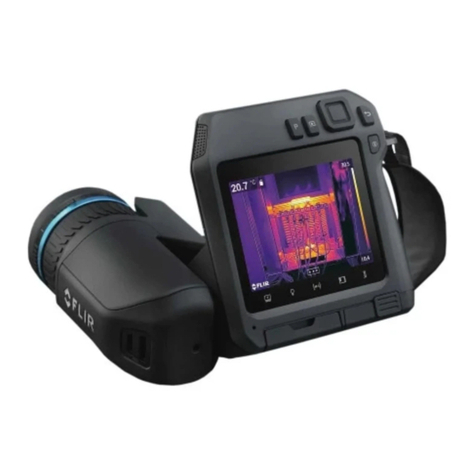
• Infrared camera
• Accessory box I:
◦ Power supply for battery charger
◦ Power supply, 15 W/3 A
◦ Printed documentation
◦ SD card (8 GB)
◦ USB 2.0 A to USB Type-C cable
◦ USB Type-C to HDMI and PD adapter
◦ USB Type-C to USB Type-C cable (USB 2.0 standard)
• Accessory box II:
◦ Lens cap strap
◦ Lens cleaning cloth
◦ Neck strap
◦ Small eyecup
• Battery (2 ea)
• Battery charger
• Hard transport case
• IR lens, f = 10 mm (0.39 in.), 42°1
• IR lens, f = 18 mm (0.71 in.), 24°1
• IR lens, f = 29 mm (1.41 in.), 14°1
• Lens cap, front
• Lens cap, front and rear (only for extra lenses)
Note FLIR Systems reserves the right to discontinue models, parts or acces-
sories, and other items, or to change specifications at any time without prior
notice.
#T810412; r. AA/55455/55455; mul 1
1. The inclusion of this item is dependent on model.

3 EN-US English
3.1 Thank you!
Thank you for choosing a product from FLIR Systems. We hope that the product
will meet your expectations and that you will consider us again for your future
needs.
3.2 Read the manual before use
Go to the following website to read or download the
manual:
http://support.flir.com/resources/vj2p
3.3 Extend your product warranty
Our aim is to provide the best quality and workmanship in the industry. To prove
this, we offer the most generous extended warranty on the market.
Register your product now to get:
• 2 years camera warranty
• 10 years detector warranty
Go to the following website to activate your extended warranty:
http://support.flir.com/camreg
For more information about the registration procedure, refer to the user’s manual.
Note Registration must be completed within 60 days of purchase.
3.4 Download FLIR Tools
FLIR Tools lets you quickly create professional inspection reports that clearly
show decision makers what you’ve found with your camera.
#T810412; r. AA/55455/55455; mul 6

3 EN-US English
Import, analyze, and fine-tune images easily. Then incorporate them into concise
documents to share findings and justify repairs.
Go to the following website to download FLIR Tools:
http://support.flir.com/tools
3.5 Check out our FLIR apps
Use our apps to analyze your IR images, create reports, and share your reports
using Dropbox, Box.net, FTP, e-mail, etc.
Use your mobile device to go to the following website and download the apps:
http://onelink.to/tools
3.6 Quick start guide
Follow this procedure:
1. Before starting the camera for the first time, charge the battery for 3 hours
using the stand-alone battery charger.
2. Put the battery into the camera battery compartment.
3. Insert a memory card into the card slot.
Note Empty or use a memory card that has not previously been used in an-
other type of camera. The cameras may organize files differently on the
memory card. There is therefore a risk of losing data if the same memory
card is used in different types of cameras.
4. Push the on/off button to turn on the camera.
5. Aim the camera toward the object of interest.
6. Adjust the infrared camera focus.
Note It is very important to adjust the focus correctly. Incorrect focus ad-
justment affects how the image modes work. It also affects the temperature
measurement.
7. Push the Save button to save an image.
8. Download and install FLIR Tools/Tools+ or FLIR Report Studio on your
computer.2
9. Start FLIR Tools/Tools+ or FLIR Report Studio.
#T810412; r. AA/55455/55455; mul 7
2. FLIR Tools+ and FLIR Report Studio are licensed software.

3 EN-US English
10. Connect the camera to the computer using the USB cable.
11. Import the images into FLIR Tools/Tools+ or FLIR Report Studio and create
an inspection report.
12. Send the inspection report to your client.
3.7 View from the front
See Figure 2.1 View from the front, page 2.
1. Autofocus button.
2. Save button.
3. Viewfinder.
4. Knob to change the dioptric correction for the viewfinder.
5. Attachment point for the neck strap.
6. Laser receiver.
7. Laser transmitter.
8. Camera lamp (left and right sides).
9. Infrared lens.
10. Digital camera.
3.8 View from the rear
See Figure 2.2 View from the rear, page 3.
1. Focus ring.
2. Speaker.
3. Programmable button.
4. Image archive button.
5. Navigation pad with center push.
6. Back button.
7. On/off button.
8. Hand strap.
9. Multi-touch LCD screen.
10. Light sensor.
11. Microphone.
12. Attachment point for the neck strap.
3.9 View from the bottom
See Figure 2.3 View from the bottom, page 3.
1. Laser button.
2. Programmable button.
#T810412; r. AA/55455/55455; mul 8

3 EN-US English
3. Tripod mount.
4. Cover for the connector compartment.
5. Battery.
3.10 Screen elements
See Figure 2.4 Screen elements, page 4.
1. Result table.
2. Status icons.
3. Measurement tool (e.g., spotmeter).
4. Temperature scale.
5. Menu system button.
3.11 Menu system
See Figure 2.5 Menu system, page 4.
1. Recording mode button.
2. Measurement parameters button.
3. Image mode button.
4. Measurement button.
5. Color button.
6. Settings button.
7. Main menu.
8. Submenu.
3.12 Soft buttons
See Figure 2.6 Soft buttons, page 5.
1. Work folder button: Touch to open a menu where you can create new folders
and change the active folder.
2. Lamp button: Touch to turn on/off the camera lamp.
3. Continuous autofocus button: Touch to enable/disable continuous autofocus.
4. Overlay button: Touch to show/hide all overlay graphics and image overlay
information.
5. Temperature scale button: Touch to switch between the automatic and man-
ual image adjustment modes.
3.13 To keep in mind
• Adjust the focus first. When the camera is out of focus, the measurement will
be wrong.
#T810412; r. AA/55455/55455; mul 9

3 EN-US English
• By default, most cameras adapt the scale automatically. Use this mode first,
but do not hesitate to set the scale manually.
• A thermal camera has a resolution limit. This depends on the size of the de-
tector, the lens, and the distance to the target. Use the center of the spot tool
as a guide to the minimum possible object size, and get closer if necessary.
Make sure to stay away from dangerous areas and live electrical components.
• Be careful when holding the camera perpendicular to the target. Be observant
of reflections, especially at low emissivities—you, the camera, or the sur-
roundings may become the main source of reflection.
• Select a zone of high emissivity, e.g., an area with a matte surface, to perform
a measurement.
• Blank objects, i.e., those with low emissivities, may appear warm or cold in
the camera, because they mainly reflect the environment.
• Avoid direct sunlight on the details that you are inspecting.
• Various types of faults, e.g., those in a building’s construction, may result in
the same type of thermal pattern.
• Correctly analyzing an infrared image requires professional knowledge about
the application.
3.14 Training
Let the Infrared Training Center help you maximize your investment in thermal
imaging:
www.infraredtraining.com [email protected]
www.irtraining.eu [email protected]
www.irtraining.com itc@flir.se
3.15 Customer support
Do not hesitate to contact our Customer Support Center at http://support.flir.com
if you experience problems or have any questions about your product.
#T810412; r. AA/55455/55455; mul 10

4 CS-CZ čeština
4.1 Děkujeme!
Děkujeme vám za to, že jste si vybrali výrobek společnosti FLIR Systems. Do-
ufáme, že splní vaše očekávání a že zvážíte zakoupení našich výrobků
i v budoucnosti.
4.2 Před použitím si přečtěte příručku
Uživatelskou příručku si můžete přečíst nebo stáhnout
na následující webové stránce:
http://support.flir.com/resources/vj2p
4.3 Prodloužení záruky výrobku
Naším cílem je poskytovat nejlepší kvalitu a zpracování v oboru. Abychom to pro-
kázali, nabízíme nejdelší prodloužení záruky na trhu.
Zaregistrujte svůj produkt nyní a získáte:
• záruku na kameru 2 roky
• záruku na detektor 10 let
Prodloužení záruky si můžete aktivovat na následující webové stránce:
http://support.flir.com/camreg
Další informace o postupu registrace naleznete v uživatelské příručce.
Poznámka Registraci je nutné dokončit do 60 dní od zakoupení.
4.4 Odkaz ke stažení FLIR Tools
Aplikace FLIR Tools vám umožní rychle vytvářet inspekční zprávy z měření, které
řídicím pracovníkům ukáží, co přesně jste s kamerou nalezli.
#T810412; r. AA/55455/55455; mul 11

4 CS-CZ čeština
Jednoduše importujte, analyzujte a upravujte snímky a poté je začleňte do výsti-
žných dokumentů, ve kterých se můžete podělit o své poznatky a odůvodnit na-
vržené opravy.
Aplikaci FLIR Tools si můžete stáhnout na následující webové stránce:
http://support.flir.com/tools
4.5 Vyzkoušejte naše aplikace FLIR
Používejte naše aplikace k analýze infračervených snímků, vytváření zpráv a sdí-
lení zpráv pomocí služeb Dropbox a Box.net, serveru FTP, e-mailu apod.
V mobilním zařízení přejděte na následující webovou stránku, kde si aplikace mů-
žete stáhnout:
http://onelink.to/tools
4.6 Stručný návod ke spuštění kamery
Použijte následující postup:
1. Před prvním spuštěním kamery nabíjejte baterii 3 hodiny pomocí samostatné
nabíječky.
2. Vložte baterii do prostoru pro baterii v kameře.
3. Vložte paměťovou kartu do příslušného slotu pro kartu.
Poznámka Vymažte paměťovou kartu nebo použijte kartu, která předtím
nebyla použita v jiném typu kamery. Kamery mohou ukládat soubory různými
způsoby. Proto v případě použití stejné paměťové karty v různých typech ka-
mer existuje riziko ztráty dat.
4. Tlačítkem Zap/Vyp zapněte kameru.
5. Namiřte kameru na požadovaný objekt.
6. Nastavte zaostření infračervené kamery.
Poznámka Správné zaostření je velmi důležité. Nesprávné zaostření naru-
šuje činnost režimů snímků. Ovlivňuje také měření teploty.
7. Stisknutím tlačítka Uložit uložte obraz.
8. Stáhněte si a nainstalujte do počítače software FLIR Tools/Tools+ nebo FLIR
Report Studio.3
#T810412; r. AA/55455/55455; mul 12
3. Aplikace FLIR Tools+ a FLIR Report Studio jsou licencovaný software.

4 CS-CZ čeština
9. Spusťte software FLIR Tools/Tools+ nebo FLIR Report Studio.
10. Připojte kameru k počítači pomocí kabelu USB.
11. Naimportujte snímky do softwaru FLIR Tools/Tools+ nebo FLIR Report Stu-
dio a vytvořte inspekční zprávu.
12. Odešlete inspekční zprávu klientovi.
4.7 Pohled zepředu
Viz část Figure 2.1 View from the front, strana 2.
1. Tlačítko automatického zaostření.
2. Tlačítko Uložit.
3. Hledáček.
4. Knoflík pro změnu dioptrické korekce hledáčku.
5. Poutko k uchycení popruhu pro zavěšení na krk.
6. Laserový přijímač.
7. Laserový vysílač.
8. Lampa kamery (levá a pravá strana).
9. Infračervený objektiv
10. Digitální kamera.
4.8 Pohled zezadu
Viz část Figure 2.2 View from the rear, strana 3.
1. Zaostřovací kroužek.
2. Reproduktor.
3. Programovatelné tlačítko.
4. Tlačítko archivu snímků.
5. Navigační ploška se středovým tlačítkem.
6. Tlačítko Zpět.
7. Tlačítko Zap/Vyp.
8. Jisticí řemínek.
9. Multidotyková obrazovka LCD.
10. Snímač světla.
11. Mikrofon.
12. Poutko k uchycení popruhu pro zavěšení na krk.
4.9 Pohled zespodu
Viz část Figure 2.3 View from the bottom, strana 3.
1. Tlačítko laseru.
#T810412; r. AA/55455/55455; mul 13

4 CS-CZ čeština
2. Programovatelné tlačítko.
3. Úchytka na stativ.
4. Kryt konektorů.
5. Baterie.
4.10 Prvky obrazovky
Viz část Figure 2.4 Screen elements, strana 4.
1. Tabulka výsledků.
2. Ikony stavu
3. Měřicí nástroj (např. měření bodu).
4. Teplotní stupnice.
5. Tlačítko systému nabídek.
4.11 Systém nabídek
Viz část Figure 2.5 Menu system, strana 4.
1. Tlačítko Režim záznamu.
2. Tlačítko Parametry měření.
3. Tlačítko Režim snímku.
4. Tlačítko Měření.
5. Tlačítko Barva.
6. Tlačítko Nastavení.
7. Hlavní nabídka.
8. Podnabídka.
4.12 Tlačítka s proměnnou funkcí
Viz část Figure 2.6 Soft buttons, strana 5.
1. Tlačítko pracovní složky: Dotknutím otevřete nabídku, ve které můžete vytvo-
řit nové složky a změnit aktivní složku.
2. Tlačítko lampy: Dotknutím se zapnete/vypnete lampu kamery.
3. Tlačítko kontinuálního automatického ostření: Dotknutím se povolíte/zaká-
žete kontinuální automatické ostření.
4. Tlačítko překryvu: Dotknutím se zobrazíte/skryjete veškerou překryvnou gra-
fiku a překryvné informace o snímku.
5. Tlačítko teplotní stupnice: Dotknutím se přepnete mezi režimy automatické
a ruční úpravy snímku.
#T810412; r. AA/55455/55455; mul 14
Other manuals for T8 Series
2
Table of contents
Languages:
Other FLIR Thermal Camera manuals