FLOS ARCO User manual

ARCO LED
DESIGN BY ACHILLE AND PIER GIACOMO CASTIGLIONI

2 3
<IT> ISTRUZIONI DI INSTALLAZIONE ED IMPIEGO
ATTENZIONE!
La sicurezza dell’apparecchio é garantita solo rispettando
queste istruzioni sia in fase di installazione che di
impiego; é pertanto necessario conservarle.
AVVERTENZE:
- All’atto dell’installazione ed ogni volta che si interviene
sull’apparecchio, assicurarsi che sia stata tolta la
tensione di alimentazione.
- L’apparecchio non può essere in alcun modo modificato
o manomesso, ogni modifica ne può compromettere la
sicurezza rendendo lo stesso pericoloso. FLOS declina
ogni responsabilità per i prodotti modificati.
- Se il cavo flessibile si danneggia, deve essere sostituito
da FLOS o da personale qualificato al fine di evitare
pericoli.
- Il simbolo riportato sull’apparecchio indica che il
prodotto deve essere smaltito in modo differenziato dai
rifiuti urbani.
- La sorgente luminosa non può essere sostituita dal
cliente. Per informazioni contattare FLOS.
DATI TECNICI
1 LED 28W
ISTRUZIONI PER LA PULIZIA DELL’APPARECCHIO
- Per la pulizia dell’apparecchio utilizzare esclusivamente
un panno morbido eventualmente inumidito con acqua e
sapone.
- Attenzione: non utilizzare alcool o solventi.
<EN> INSTRUCTION FOR CORRECT INSTALLATION AND USE
WARNING!
The safety of this fitting can only be guaranteed if these
instructions are observed, during both installation and
use. Please retain these instructions safety.
REMARKS:
- When installing and whenever acting on the appliance,
ensure that the power supply has been switched off.
- The appliance may in no way be modified or tampered
with, any modification may compromise safety causing
the appliance to become dangerous. FLOS declines all
responsibility for products that are modified.
- Should the external trailing cable get damaged,it must
be replaced by FLOS or by qualified personnel in order to
avoid any danger.
- The symbol shown on the device indicates that the
product must be thrown out in a different manner than
with the urban trashes.
- The light source cannot be replaced by the customer.
Contact FLOS for information.
TECHNICAL DATA
1 LED 28W
CLEANING INSTRUCTIONS
- Use only a soft cloth to clean the appliance, dampened
with water and soap or mild cleanser if needed for
resistant dirt
- Warning: do not use alcohol or other solvents.
<DE> INSTALLATION - UND GEBRAUCHSANWEISUNGEN
ACHTUNG!
Wir garantieren nur dann für die Sicherheit der Leuchte,
wenn diese Anweisungen sowohl bei der Installation als
auch beim Gebrauch genau beachtet werden. Es ist daher
ratsam, sie aufzubewahren.
BEMERKUNGEN:
- Bei der Installation und bei Eingriffen an der Leuchte ist
sicherzustellen, daß die Anlage vom Netz abgeschaltet ist.
- Der Apparat darf auf keinen Fall veraendert oder unerlaubt
geoeffnet werden, jede Veraenderung desselben kann die
Sicherheit in Frage stellen und somit gefaehrlich werden.
FLOS lehnt jede Verantwortung fuer unsachgemaess
behandelte Produkte ab.
- Falls das flexible äußere Kabel beschädigt wird, muß es
von FLOS oder von qualifiziertem Personal ersetzt werden,
um Gefahren zu vermeiden.
- Das auf dem Gerät wiedergegebene Symbol zeigt an, dass
das Produkt getrennt vom Stadtmüll entsorgt werden muss.
-
Die Leuchtquelle kann nicht vom Kunden ausgewechselt
werden. Für Informationen bitte FLOS kontaktieren.
TECHNISCHE DATEN
1 LED 28W
REINIGUNGSVORSCHRIFTEN
- Bei der Reinigung der Leuchte darf man ausschließlich
weiche Tücher verwenden. Eventuell kann man diese
mit Wasser und Seife oder mit einem neutralen
Reinigungsmittel anfeuchten.
- Achtung: Weder Alkohol noch Lösungsmittel verwenden.
<FR> INSTRUCTIONS D’INSTALLATION ET D’EMPLOI
ATTENTION!
La sûreté de cet appareil est garantie uniquement si l’on
respecte ces instructions soit en phase d’installation soit
pendant l’utilisation; il faut donc les conserver.
NOTICES:
- Au moment de l’installation et chaque fois que l’on
intervient sur l’appareil, s’assurer que la tension
d’alimentation ait été coupée.
- L’appareil ne peut être modifié ou altéré de
quelque manière que ce soit, toute modification peut
compromettre la sécurité de celui-ci en le rendant
dangereux. FLOS décline toute responsabilité pour les
produits modifiés.
- Si le cordon flexible externe est endommagé, il doit
être remplacé par FLOS ou par le personnel qualifié afin
d’éviter des dangers.
- Le symbole reporté sur l’appareil indique que le
produit doit être éliminé d’une autre façon que celle avec
les déchets urbains.
- La source lumineuse ne peut pas être substituée par
le client. Pour obtenir des informations, contacter la
société FLOS.
DONNEES TECHNIQUES
1 LED 28W
INSTRUCTIONS POUR LE NETTOYAGE
- Pour le nettoyage de l’appareil utiliser exclusivement un
chiffon doux, humecté si nécessaire, avec de l’eau et du
savon ou avec un détergent neutre pour les salissures
les plus tenaces.
- Attention: ne pas utiliser d’alcool ou solvents.

4 5
<RUS>
ИНСТРУКЦИИ ПО МОНТАЖУ И ПРИМЕНЕНИЮ
ВНИМАНИЕ!
Надёжность устройства гарантируется только при
соблюдении данных инструкций, как в фазе монтажа,
так и при применении, поэтому необходимо обеспечить
их сохранность.
ПРЕДУПРЕЖДЕНИЯ:
- В момент установки и каждый раз при проведении
работ с устройством, убедиться в снятии напряжения
питания.
- Устройство не может изменяться или разбираться,
любые изменения могут нарушить надёжность, делая его
опасным. FLOS не несёт ответственность за измененную
продукцию.
- При повреждении гибкого кабеля он должен заменяться
FLOS или квалифицированным персоналом в целях
предотвращения опасности.
- Символ приведённый на устройстве, указывает на
то, что данная продукция должна быть переработана
отдельно от городских отходов.
-
Источник света не может быть заменен
заказчиком. Для получения информации
связаться с компанией FLOS.
ТЕХНИЧЕСКИЕ ДАННЫЕ EUR
1LED 28Вт.
ИНСТРУКЦИИ ПО ОЧИСТКЕ УСТРОЙСТВА
Для очистки устройства использовать только мягкую
тряпку, смоченную водой с мылом или нейтральным
моющим средством для наиболее стойких загрязнений.
- Внимание: Не использовать спирт или другие
растворители.
<ES> INSTRUCCIONES DE INSTALACIÓN Y DE USO
¡ATENCIÓN!
La seguridad del aparato sólo puede garantizarse con la
condición de que se respeten las siguientes instrucciones,
tanto en la fase de instalación como de uso, por lo cual se
recomienda conservarlas.
ADVERTENCIA:
- Para efectuar la instalación, y toda vez que se efectúe
alguna operación en el aparato, asegurarse de haber
cortado la corriente eléctrica.
- El aparato no puede ser en ningùn caso modificado o
forzado, cualquier modificaciòn puede comprometer la
seguridad haciéndolo peligroso. FLOS declina cualquier
responsabilidad por los productos modificados.
- Si el cable externo se estropea, debe ser sustituido
por FLOS o por personal cualificado con el fin de evitar
situaciones peligrosas.
- El símbolo marcado en el aparato indica que el
producto debe ser eliminado en modo diferenciado del
resto de los desechos urbanos.
- La fuente luminosa no puede ser sustituida por el
cliente. Para más informaciones, ponerse en contacto
con FLOS.
DATOS TECNICOS
1 LED 28W
INSTRUCCIONES PARA LIMPIAR EL APARATO
- Para la limpieza del aparato, utilizar exclusivamente
un paño suave. En caso de suciedad más resistente,
humedecer el paño con agua y jabón o un detergente
neutro.
- Advertencia: no emplear alcohol ni disolventes.
<PT> ISTRUÇÕES INSTALAÇÃO E USO
ATENÇÃO!
A segurança do aparelho é garantida somente se
respeitarmos as instruções tanto na fase de instalação
como na de uso; portanto é necessário conservar tais
instruções.
ADVERTÊNCIA:
- Quando se instala e cada vez que se mexe no aparelho,
ter a certeza que foi desligado da tensão de alimentação.
- De forma alguma o aparelho deve ser modificado ou
alterado, toda e qualquer modificação pode comprometer
a segurança tornando o aparelho perigoso. FLOS declina
toda e qualquer responsabilidade pelos produtos
modificados.
- Se o cabo flexível está danificado, deve ser substituído
pela FLOS ou por pessoal qualificado para evitar qualquer
perigo.
- O símbolo indicado no aparelho indica que o produto
deve ser eliminado de forma diferenciada em relação ao
lixo urbano.
- A fonte luminosa não pode ser substituída pelo cliente.
Para maiores informações contactar FLOS.
DADOS TÉCNICOS
1 LED 28W
INSTRUÇÕES PARA A LIMPEZA DO APARELHO
- Para limpeza do aparelho utilizar exclusivamente um
tecido macio eventualmente úmido com água e sabão ou
detergente neutro para a sujeira mais difícil.
- Atenção: não utilizar álcool ou solventes.
< J > 取り付けおよびご使用方法
危険ですので、器具を改造したり、部品を追加・
変更して使用しないでください。改造した製品
に対しては、FLOSは一切責任を負いません。
警告:
安全な器具の取り付けおよびご使用のために、取
扱説明書に従って作業を行ってください。また、
取扱説明書は必ず保管してください。
注意
‐取り付け作業および取り外しや再取り付け時
には、必ず電源を切ってください。
‐危険ですので、器具を改造したり、部品を追
加・変更して使用しないでください。改造した製
品に対しては、FLOSは一切責任を負いません。
- 器具上の表示 は、一般ごみと区別し 本製品
を廃棄しなければならないことを表しますアメリ
カ対応のみ高温発光です。
-
光源はお客様の手でお取り替えいただけませ
ん。 詳しくはFLOSまでお尋ね下さい。
技術的な仕様
1発光ダイオード 28W.
器具の清掃について
器具の清掃には、柔らかい布を使用してくださ
い。落ちにくい汚れは、柔らかい布を石鹸水また
は薄めた中性洗剤に浸し、十分に絞ってから拭
き取ってください。
- 注 意: アルコールや溶剤などは使用しないで
くだ さい 。

6 7
Fig. 1
E
D
1
2
5
5
3
4
4
F
B
C
A
G
<IT> Fig.1 Far passare il cavo con spinotto (A) attraverso l’asta (B) fino a far fuoruscire il connettore (C) dalla parte
superiore dell’asta, come indicato in figura. Appoggiare l’asta (B) nella sede (D); infilare il raccordo (E) nel foro
della base (F); fissare l’asta (B) alla base (F) con la vite (G) facendo attenzione a non comprimere il cavo con la
testa della vite.
<EN> Fig.1 Insert the plug cable (A) through the shaft (B) until the connector (C) comes out from the upper part of the
shaft, as shown in the picture. Place the shaft (B) in the housing (D); insert the joint (E) into the hole in the base
(F); fix the shaft (B) to the base (F) with the screw (G) being careful not to compress the cable with the head of
the screw.
<DE> Abb.1 Das Kabel mit Steckerstift (A) durch den Stab (B) ziehen, bis der Stecker (C) am oberen Teil des Stabes
austritt, wie in der Abbildung dargestellt. Den Stab (B) in den Sitz (D) legen; das Anschlussstück (E) in die
Bohrung der Basis (F) einführen; den Stab (B) mit der Schraube (G) an der Basis (F) befestigen, wobei darauf zu
achten ist, das Kabel nicht mit dem Kopf der Schraube einzuklemmen.
<FR> Fig.1 Insérer le câble d’alimentation (A) dans la goulotte (B) jusqu’à faire ressortir la prise (C) de la partie
supérieure de la goulotte tel qu’indiqué sur l’illustration. Appuyer la tige (B) dans le logement (D); enfiler le
raccord (E) dans le trou de la base (F); fixer la tige (B) à la base (F) avec la vis (G) en faisant attention de ne pas
comprimer le câble avec la tête de la vis.
<ES> Imag.1 Introduzca el cable con la clavija (A) a través de la varilla (B) hasta que el conector (C) sobresalga por la
parte superior de la varilla, como se muestra en la imagen. Colocar el tubo (B) en su sede (D); introducir la junta
(E) en el agujero de la base (F); fijar el tubo (B) a la base (F) con el tornillo (G) prestando atención para que la
cabeza del tornillo no presione el cable.
<PT> Fig.1 Fazer passar o cabo com a ficha (A) pela haste (B) até fazer sair o conector (C) da parte superior da haste,
como na figura. Colocar a haste (B) no respectivo alojamento (D); enfiar a peça (E) no furo da base (F); fixar a
haste (B) na base (F) com o parafuso (G), tendo cuidado para não comprimir o cabo com cabeça do parafuso.
<RUS>
Рис.1 Пропустить шнур со штеккером (A) через трубку (B), чтобы соединитель (C) вышел
сверху трубки, как указано на рисунке. Вставить трубку (B) в гнездо (D). Вставить втулку (E)
в отверстие основания (F). Прикрепить трубку (B) к основанию (F) посредством винта (G),
соблюдая осторожность, чтобы не передавить кабель головкой винта.
< J > 図1. 図に示されているように端子付きケーブル(A)をコネクタ(C)が軸板の上部から出るよう
に軸板(B)に通す。軸板(B)を所定の位置(D)に配置します。土台(E)にある所定の穴にユニオ
ン継ぎ手(F)を通します。ネジ釘(G)を使って軸板(B)を土台(F)に固定します(その際、ネジの頭
部で軸板内を通っているコードに圧迫を掛けないよう気をつけて下さい)。

8 9
Fig. 2 Fig. 3
B
I
I
HC
L
M
I
Fig. 4
I
O
<IT> Fig.2 Inserire nell’asta (B) la canalina grande (H) avendo cura di far passare il cavo con il connettore (C)
attraverso il foro della canalina grande. Fig.3 Agganciare la canalina media ai rullini (I) in funzione della
posizione desiderata. Fig.4 Appoggiare il riflettore (L) sulla griglia (M), far passare il connettore (O) sotto i rullini
(I) della canalina media, quindi agganciare la canalina piccola ai rullini (I).
<EN> Fig.2 Insert the big conduit (H) into the shaft (B) paying attention to insert the cable with the connector (C)
through the hole of the big conduit. Fig.3 Couple the conduit with the rollers (I) according to the desired
position. Fig.4 Place the reflector (L) on the grid (M), insert the connector (0) under the rollers (I) of the medium
conduit and secure the small conduit to the rollers (I).
<DE> Abb.2 Die große Führungsschiene (H) in den Stab (B) einführen, dabei darauf achten, dass das Kabel mit dem
Stecker (C) durch die Bohrung der großen Führungsschiene geführt wird. Abb.3 Die mittlere Führungsschiene auf
der gewünschten Höhe in den Rollen (I) einhängen. Abb.4 Den Reflektor (L) am Gitter (M) aufsetzen, den Stecker
(0) unter den Rollen (I) der mittleren Führungsschiene durchziehen und dann die kleine Führungsschiene in den
Rollen (I) einhängen.
<FR> Fig.2 Insérer le guide (H) dans la goulotte en faisant attention à bien faire passer le câble et la prise (C) dans
le creux du guide principal. Fig.3 Fixer l’arc intermédiaire aux barrettes (I) en fonction de la position souhaitée.
Fig.4 Placer le réflecteur (L) sur la grille (M), faire passer la prise (O) sous les tiges (I) du guide moyen et fixer le
petit guide aux tiges (I).
<ES> Imag.2 Introduzca la canaleta grande (H) en la varilla (B) con cuidado de pasar el cable con el conector (c) a
través del orificio de la canaleta grande. Imag.3 Enganchar la canaleta intermedia a los rodillos (I) según la
posición que se desee. Imag.4 Apoye el reflector (L) sobre la rejilla (M) y pase el conector (0) por debajo de los
rodillos (I) de la canaleta intermedia. A continuación, enganche la canaleta pequeña en los rodillos (I).
<PT> Fig.2 Introduzir na haste (B) a calha grande (H) tendo o cuidado de fazer passar o cabo com o conector (c)
através do furo da calha grande. Fig.3 Encaixar a calha média nos rolos (I) de acordo com a posição pretendida.
Fig.4 Apoiar o reflector (L) na grelha (M), fazer passar o conector (0) sob os rolos (I) da calha média e prender
a calha pequena aos rolos (I).
<RUS>
Рис.2 Вставить в трубку (B) большой кабель-канал (H), обязательно пропустив шнур с
соединителем (c) через отверстие большого кабель-канала. Рис.3 Зацепить средний кабель-
канал за катушки (I) в нужном положении. Рис.4 Разместить отражатель (L) на решетке
(M), пропустить соединитель (O) под роликами (I) кабель-канала, затем зацепить маленький
кабель-канал за ролики (I).
< J > 図2. コネクタ(C)付きケーブルが大きい伝達経路の穴を通るように注意しながら、大きい伝達
経路(H)を軸板(B)に挿入する。 図3. 中間サイズの伝達経路をローラー(I)と目的に応じた
望みの場所で連結します。 図4. リフレクター(L)を格子(M)の上に乗せ、コネクタ(O)を中間サ
イズの伝達経路のローラー(I)の下に通し、ローラー(I)に小さい伝達経路に連結する。

10 11
Fig. 5
Fig. 6
B
UA
O
NT
P
Q
<IT> Fig.5 Dopo aver posizionato con cura sul fondo delle canaline il cavo elettrico (T), collegare il connettore (N) al
connettore (O) del cavo proveniente dall’asta (B). Tendere il cavo con spinotto (A) avendo cura di far rientrare
i connettori (N) e (O) all’interno dell’asta (B), quindi fissare il passacavo (U). Fig.6 Connettere lo spinotto (P)
all’interruttore a pulsante (Q) bloccandolo con una rotazione di 90° in senso orario, quindi collegare l’apparecchio
alla rete elettrica.
<EN> Fig.5 After having positioned carefully the electric cable (T) on the conduit bottom, connect the connector (N) to
connector (0) of the cable coming from the shaft (B). Stretch the cable with the plug (A) paying attention to insert
connectors (N) and (0) into the shaft (B) and then secure the cable tray (U). Fig.6 Connect the pin (P) to the push
button switch (Q) locking it by turning it 90º clockwise, then connect the device to the mains.
<DE> Abb.5 Nachdem das Stromkabel (T) sorgfältig am Boden der Führungsschienen positioniert wurde, den Stecker (N)
mit dem Stecker (0) des aus dem Stab (B) kommenden Kabels verbinden; Das Kabel mit Steckerstift (A) spannen,
dabei darauf achten, dass die Stecker (N) und (0) wieder in den Stab (B) eingeführt werden, anschließend die
Kabelführung (U) befestigen. Abb.6 Den Steckerstift (P) mit dem Druckschalter (Q) verbinden und mit einer 90°
Drehung im Uhrzeigersinn arretieren. Dann die Leuchte an das Stromnetz anschließen.
<FR> Fig.5 Après avoir placé avec attention le câble électrique (T) à la base du guide, brancher la prise (N) à la prise (O)
du câble qui ressort de la goulotte (B). Étirer le câble muni de la prise (A) en faisant attention à bien replacer les
prises (N) et (O) dans la goulotte (B), puis fixer le passe-câble (U). Fig.6 Raccorder la fiche (P) à l’interrupteur (Q) en
la bloquant par une rotation de 90° dans le sens horaire puis brancher l’appareil sur le secteur.
<ES> Imag.5 Tras haber colocado el cable eléctrico (T) con cuidado en el fondo de las canaletas, una el conector (N)
con el conector (0) del cable procedente de la varilla (B). Estire el cable con clavija (A) teniendo cuidado de
volver a introducir los conectores (N) y (0) en el interior de la varilla (B). A continuación, fije el pasacables (U).
Imag.6 Conectar la clavija (P) al interruptor (Q) bloqueándola con un giro de 90° hacia la derecha y después
enchufar el aparato a la red eléctrica.
<PT> Fig.5 Após colocar com cuidado no fundo da calha o cabo eléctrico (T) ligar o conector (N) ao conector (0) do cabo
preveniente da haste (B); esticar o cabo com a ficha (A) tendo o cuidado de fazer entrar os conectores (N) e (0) no
interior da haste (B), e, por fim, fixar o passa-cabo (U). Fig.6 Ligar a ficha (P) ao interruptor (Q) fixando-a com uma
rotação de 90° para a direita e ligar o aparelho à rede eléctrica.
<RUS>
Рис.5 После того, как Вы уложите электрический шнур (Т) на дно кабель-каналов, соединить
соединитель (N) и соединитель (О) шнура, выходящего из трубки (B); Протянуть шнур со
штеккером (A), осторожно вернув соединители (N) и (0) внутрь трубки (B), затем зафиксировать
заглушкой (U). Рис.6 Вставить штекер (P) в кнопочный выключатель (Q), зафиксировать
поворотом на 90° по часовой стрелке, затем подсоединить прибор к электрической сети.
< J > 図5. 電源ケーブル(T)を注意深く伝達経路の底部に配置した後、コネクタ(N)を軸板(B)か
らのコネクタ(O)に接続する;コネクタ(N)と(O)が軸板(B)の中で再び入り込むように注意
しながら端子付きケーブル(A)を伸ばし、配線を(U)固定する。 図6. 端子(P)を時計回りに
90°回して固定しながら押しボタンスイッチ(Q)に接続し、器具を電源に繋ぐ。

12 13
<PT> Fig.7 Colocar o pino (A) no alimentador (B) utilizando as guias apropriadas até sentir o engate de acoplamento
(utilizar o tipo de pino correcto para a região na qual se instala o aparelho); conectar o pino (C) no alimentador
bloqueando com uma rotação de 90°no sentido horário.
<RUS>
Рис.7 Вставить вилку (A) в блок питания (B) при использовании специальных направляющих
до щелчка сцепления (использовать вилку соответствующего типа для целей, для которых
предназначено устройство); подсоединить штырь (C) к блоку питания, блокируя его
посредством вращения на 90° по часовой стрелке.
< J > 図7. プラグ(A)を電源アダプター(B)にカチっと音が聞こえるまで、しっかりと挿入します(プ
ラグタイプはご利用になる地域に適した物をご利用下さい)。また電源アダプターを固定した
状態で丸プラグ(C)を90度時計回りに回しながら接続します。
A
B
Fig. 7
C
<IT> Fig.7 Inserire la spina (A) nell’alimentatore (B) utilizzando le apposite guide fino ad avvertire lo scatto di
aggancio (utilizzare la tipologia di spina corretta per la regione in cui si installa l’apparecchio); collegare lo
spinotto (C) all’alimentatore bloccandolo con una rotazione di 90° in senso orario.
<EN> Fig.7 Insert the plug (A) into the feeder unit (B). By using the guides snap it inside its apposite slot (use the
correct type of plug for the area in which the device must be installed), connect the plug (C) to the feeder unit
locking it in by rotating it 90° clockwise.
<DE> Abb.7 Stecker (A) über die vorgesehenen Führungen bis zum Einrasten in das Netzgerät (B) einführen (es ist der
in dem entsprechenden Benutzerland des Geräts richtige Steckertyp zu verwenden); Steckerstift (C) mit dem
Netzgerät verbinden und mit einer 90°-Drehung im Uhrzeigersinn blockieren.
<FR> Fig.7 Insérer la fiche (A) dans le boîtier d’alimentation (B) en utilisant les guides prévus jusqu’au verrouillage
des crochets (utiliser le type de prise correcte en fonction du pays où est installé l’appareil); connecter la petite
fiche (C) au boîtier d’alimentation et la bloquer par une rotation de 90° dans le sens des aiguilles d’une montre.
<ES> Imag.7 Introducir el enchufe (A) en el alimentador (B) utilizando las adecuadas guías hasta que se advierta el
golpe de enganche (utilizar la tipologia de enchufe correcto para la región donde se instala el aparato); unir el
enchufe (C) en el alimentador bloqueandolo con una rotación de 90° en sentido horario.

14 15
Fig. 8
<FR> Fig.8 Pour allumer et éteindre l’appareil, appuyer sur le bouton (C); séquence lumineuse: MAXIMUM / MINIMUM
(50%)/ETEINT. Lorsque l’appareil est allumé, la baisse progressive de l’intensité lumineuse jusqu’à 10% peut
être obtenue en maintenant la pression sur le bouton. Une fois atteint le niveau d’intensité désiré, relâcher
la pression du bouton. L’appareil peut aussi être commandé par un interrupteur à distance qui permet
d’allumer et d’éteindre l’appareil en gardant en mémoire la dernière intensité choisie; la fonction variation est
uniquement obtenue avec le bouton (C).
<ES> Imag.8 Para encender/apagar el dispositivo, pulse el botón (C); secuencia luminosa: MÁXIMO / MÍNIMO (50%) /
APAGADO. Con el dispositivo encendido, si mantiene el botón pulsado durante un tiempo prolongado, hará que
la intensidad luminosa se reduzca progresivamente hasta el 10%. Cuando alcance la intensidad que desee,
detenga el contacto con el botón. El dispositivo se puede regular también a través del interruptor remoto, que
permite encender/apagar el dispositivo con la última intensidad luminosa que haya configurado; la función del
atenuador (dimmer) sólo se puede activar con el botón (C).
<PT> Fig.8 Para ligar/desligar o aparelho premir o botão (C). Sequência da iluminação: MÁXIMO / MÍNIMO (50%) /
DESLIGADO. Com o aparelho aceso, um contacto prolongado do botão provoca o decremento progressivo
da intensidade de iluminação até 10%. Ao atingir a intensidade desejada, libertar o botão. O aparelho pode
ser comandado também através do interruptor remoto que permite ligar/desligar o aparelho com a última
intensidade de iluminação escolhida. A função dimmer só pode ser activada com o botão (C).
<RUS>
Рис.8 Для включения /выключения устройства нажмите кнопку (C); последовательность:
МАКС./ МИН. (50%) / ВЫКЛ. При включенном устройстве длительное нажатие кнопки
вызывает постепенное уменьшение интенсивности до 10%. При достижении желаемой
интенсивности света отпустить кнопку. Устройством можно управлять также с помощью
удаленного выключателя, который позволяет включать/выключать устройство с
последней заданной интенсивностью света; функция регулировки света доступна только с
помощью кнопки (C).
< J > 図8. 器具を点灯/消灯するにはボタン(C)を押します。明るさの順番:最大/最低 (50%)/消灯。
器具が点灯している時にボタンに触れ続けると10%.まで明るさの度合いが漸減します。好み
の明るさに達したらボタンから指を離します。器具は最後に選択した明るさの度合いに器具
を 点 灯 / 消 灯 することが で きるリモ ートス イッチ でコントロ ー ル することも可 能 で す。ディマ ー
機能(C)はボタンによってのみアクティブにできます。
C
<IT> Fig.8 Per l’accensione/spegnimento dell’apparecchio premere il pulsante (C); sequenza luminosa: MASSIMO /
MINIMO (50%) / SPENTO. Ad apparecchio acceso, un contatto prolungato del pulsante provoca il decremento
progressivo dell’intensità luminosa fino al 10%. Al raggiungimento dell’intensità desiderata, interrompere il
contatto con il pulsante. L’apparecchio può essere comandato anche con interruttore remoto che permette di
accendere/spegnere l’apparecchio con l’ultima intensità luminosa scelta; la funzione dimmer è attivabile solo
tramite il pulsante (C).
<EN> Fig.8 To switch the device on/off push the button (C); light sequence: MAXIMUM / MINIMUM (50%) / OFF. When
the appliance is switched on, prolonged contact of the button causes a progressive decrease of light intensity
up to 10%. Upon reaching the desired intensity, stop contact with the button. The device can also be operated
with a remote switch that allows you to turn on/turn off the device with the last light intensity choice; the
dimmer function can only be activated with the button (C).
<DE> Abb.8 Zum Ein-/Ausschalten der Leuchte die Taste (C) drücken; Lichtsequenz: MAXIMUM / MINIMUM (50%)
/ AUSGESCHALTET. Wenn die Leuchte eingeschaltet ist, bewirkt ein längerer Tastendruck die fortlaufende
Verringerung der Lichtstärke bis zu 10%. Sobald die gewünschte Lichtstärke erreicht ist, den Kontakt mit der
Taste unterbrechen. Die Leuchte kann auch mit einem Fernschalter gesteuert werden, der das Ein-/Ausschalten der
Leuchte mit der zuletzt gewählten Lichtstärke ermöglicht; die Dimmer-Funktion ist nur mit der Taste (C) aktivierbar.
100% 10%
50%
OFF 100%

16 17
Fig. 9
L
M
H
F
B
<IT> Fig.9 OPERAZIONE DI PULIZIA DEL DIFFUSORE - Sollevare il riflettore (L) dalla griglia (M) facendolo scorrere
lungo la canalina (H) e l’asta (B), appoggiandolo poi sulla sommità della base (F) in marmo dell’apparecchio.
<EN> Fig.9 CLEANING THE DIFFUSER - Lift reflector (L) from the grille (M) by sliding it along the conduit (H) and the
shaft (B) and lean it on the top of the marble base (F) of the appliance.
<DE> Abb.9 REINIGUNG DES DIFFUSORS - Den Scheinwerfer (L) aus dem Gitter (M) heben, indem man ihn an der
Führungsschiene (H) und am Stab (B) entlang gleiten lässt, dann den Scheinwerfer auf den Marmorsockel (F) der
Leuchte legen.
<FR> Fig.9 NETTOYAGE DU DIFFUSEUR - Soulever le réflecteur (L) de la grille (M) en le faisant coulisser le long de l’arc
(H) et de la tige (B), puis le poser sur le dessus de la base en marbre (F).
<ES> Imag.9 OPERACIÓN DE LIMPIEZA DEL DIFUSOR - Libere el reflector (L) de la rejilla (M) deslizándolo a lo largo del
canal de conductores eléctricos (H) y la varilla (B), para apoyarlo a continuación sobre la parte superior de la
base (F) de mármol del aparato.
<PT> Fig.9 LIMPEZA DO DIFUSOR - Levantar o reflector (L) da grelha (M) fazendo-o deslizar ao longo da calha (H) e da
haste (B), apoiando-o posteriormente na ponta da base (F) em mármore do aparelho.
<RUS>
Рис.9 ОЧИСТКА РАССЕИВАТЕЛЯ - Отсоединить отражатель (L) от решетки (M), провести
его по каналу (H) и стержню (B), затем положить на верхнюю часть мраморного основания
(F) устройства.
< J > 図9. ランプシェードの清掃作業 ー リフレクター(L)を伝達経路(H)と軸板(B)に沿ってスライ
ドさせて、格子(M)から持ち上げ、そして器具の大理石の土台(F)の頂上に置く。

18 19
Fig. 10
Fig. 11
S
S
R
24745 - 16/10/2015
<IT> Fig.10 OPERAZIONE DI PULIZIA DEL DIFFUSORE - Svitare le quattro viti di fissaggio (R), quindi rimuovere dalla sua
sede il diffusore (S). ATTENZIONE: conservare con cura le quattro viti per evitare di perderle in quanto, essendo viti
speciali, sono di difficile reperibilità. Fig.11 Provvedere alla pulizia del diffusore (S) utilizzando un panno morbido ed
asciutto. Rimontare poi il diffusore (S) ed il riflettore (L) seguendo, in senso inverso, gli step illustrati alle Figg. 9 e 10.
<EN> Fig.10 CLEANING THE DIFFUSER - Unscrew the four fixing screws (R) and remove then the diffuser (S) from
its housing. WARNING: Be careful not to lose the four screws because they are special screws with limited
availability. Fig.11 Clean the diffuser (S) using a soft dry cloth. Re-assemble then the diffuser (S) and the reflector
(L) by following the instructions shown on Fig. 9 and 10 in the inverse order.
<DE> Abb.10 REINIGUNG DES DIFFUSORS - Die vier Befestigungsschrauben (R) lösen und den Diffusor (S) aus seinem
Sitz entfernen. ACHTUNG: die vier Schrauben sorgfältig aufbewahren, damit sie nicht verloren gehen, da es sich
um Spezialschrauben handelt, die nicht leicht erhältlich sind. Abb.11 Den Diffusor (S) mit einem weichen und
trockenen Tuch reinigen. Den Diffusor (S) und den Scheinwerfer (L) wieder montieren, indem die Arbeitsschritte
aus den Abb. 9 und 10 in umgekehrter Reihenfolge durchgeführt werden.
<FR> Fig.10 NETTOYAGE DU DIFFUSEUR - Dévisser les quatre vis de fixation (R) puis retirer le diffuseur (S). ATTENTION:
les quatre vis sont des vis spéciales qu’il est important de ne pas perdre car elles sont difficiles à trouver.
Fig.11 Nettoyer le diffuseur (S) à l’aide d’un linge doux et sec. Remonter ensuite le diffuseur (S) et le réflecteur
(L) en suivant en sens inverse les étapes illustrées aux fig. 9 et 10.
<ES> Imag.10 OPERACIÓN DE LIMPIEZA DEL DIFUSOR - Afloje los cuatro tornillos de fijación (R) y extraiga a
continuación el difusor de su soporte (S). ATENCIÓN: conserve los cuatro tornillos con cuidado para evitar que se
pierdan ya que, al tratarse de unos tornillos especiales, son difíciles de encontrar. Imag.11 Proceda a la limpieza
del difusor (S) empleando un paño suave y seco. A continuación, vuelva a montar el difusor (S) y el reflector (L)
dando los pasos que se muestran en las imágenes 9 y 10 en orden inverso.
<PT> Fig.10 LIMPEZA DO DIFUSOR - Desapertar os quatro parafusos de fixação (R) e remover o difusor (S) da sua sede.
ATENÇÃO: guardar os quatro parafusos para não os perder, uma vez que são parafusos especiais e será difícil
obter outros. Fig.11 limpar o difusor (S) com um pano suave e seco. Voltar a montar o difusor (S) e o reflector (L)
seguindo, no sentido inverso, os passos indicados nas figuras 9 e 10.
<RUS>
Рис.10 ОЧИСТКА РАССЕИВАТЕЛЯ - Отвинтить четыре крепежных винта (R), после этого
вынуть рассеиватель (S) из гнезда. ВНИМАНИЕ! Во избежание утери этих винтов следует
убрать их в надежное место, поскольку замену специальным винтам трудно будет найти.
Рис.11 Очистить рассеиватель (S), используя мягкую сухую ткань. Затем снова установить
рассеиватель (S) и отражатель (L), выполняя действия, проиллюстрированные на рис. 9 и 10,
в обратном порядке.
< J >
図10. ランプシェードの清掃作業 ー 四本の固定ネジ(R)を抜き、所定の位置からランプシェー
ド(S)を取り外す。 注 意: 特殊なネジで見つけることが難しいので失くさないように大切に四本の
ネジを保管して下さい。 図11. 柔らかく乾いた布を用いてランプシェード(S)の清掃を行う。その後
ランプシェード(S)とリフレクター(L)を図 9 と 10 で示された逆のステップで再び組み立てる。

www.flos.com
Other manuals for ARCO
1
Other FLOS Home Lighting manuals
FLOS
FLOS Tatou F User manual

FLOS
FLOS Jasper Morrison MINI GLO-BALL T User manual
FLOS
FLOS TACCIA LED F6602004 User manual

FLOS
FLOS FU317935 User manual
FLOS
FLOS F1037015 User manual
FLOS
FLOS 548 User manual
FLOS
FLOS TOIO F7600009 User manual
FLOS
FLOS TAB T LED User manual
FLOS
FLOS WireRing User manual
FLOS
FLOS SAWARU F6640030 User manual
FLOS
FLOS KELVIN LED User manual
FLOS
FLOS ROMEO SOFT T1 User manual
FLOS
FLOS RF05307 User manual
FLOS
FLOS F0310000 User manual
FLOS
FLOS BON JOUR UNPLUGGED OPTIC User manual
FLOS
FLOS GLO-BALL BASIC 2 User manual
FLOS
FLOS ROMEO SOFT F User manual
FLOS
FLOS TOIO F7600030 User manual

FLOS
FLOS ACHILLE CASTIGLIONI STYLOS User manual
FLOS
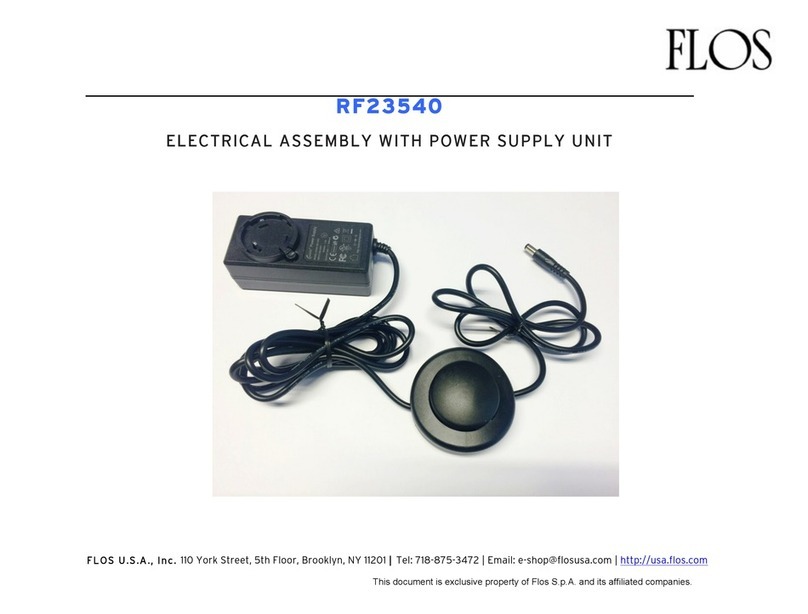
FLOS RF23540 User manual
