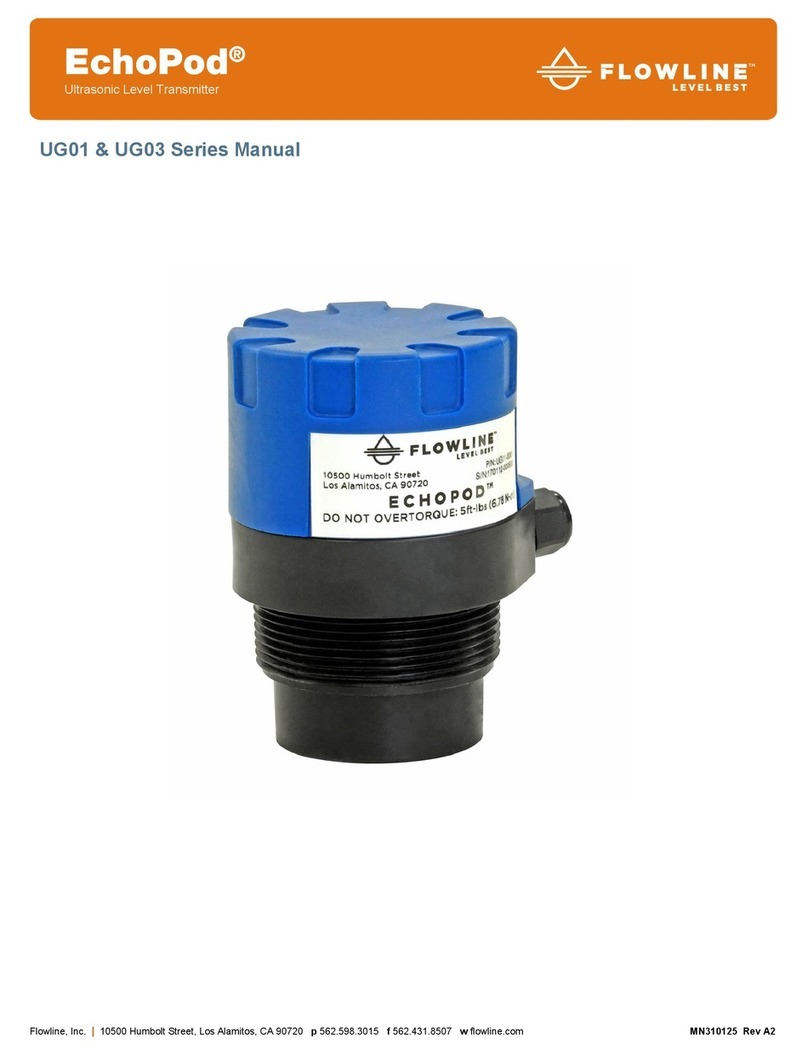
manuals.online logo
Brands
  1. Home
  2. •
  3. Brands
  4. •
  5. FlowLine
  6. •
  7. Transmitter
  8. •
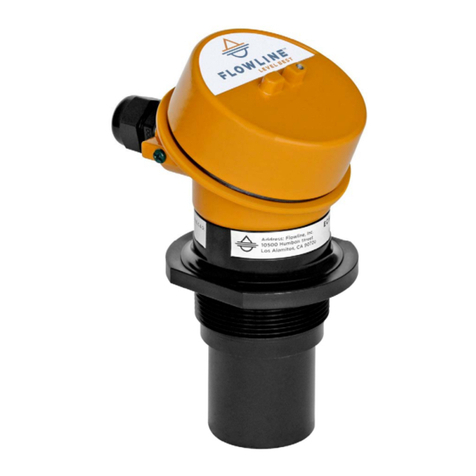
  9. FlowLine EchoSonic II Series User manual

FlowLine EchoSonic II Series User manual

1





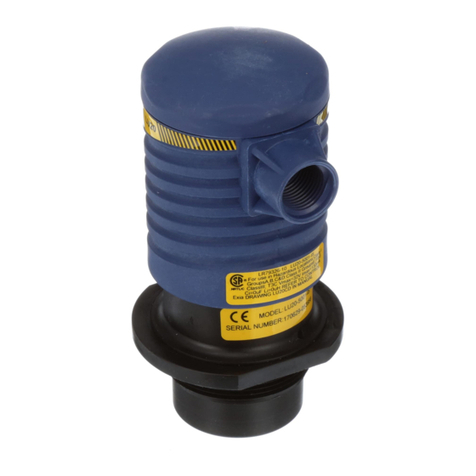
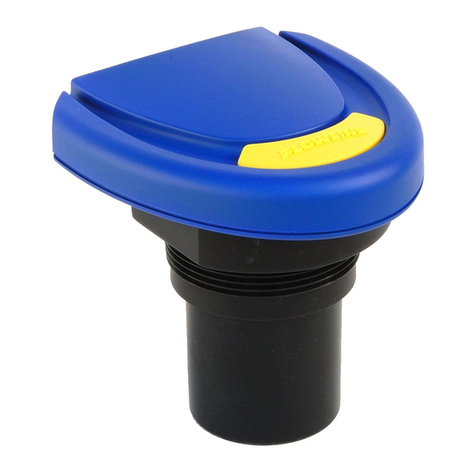
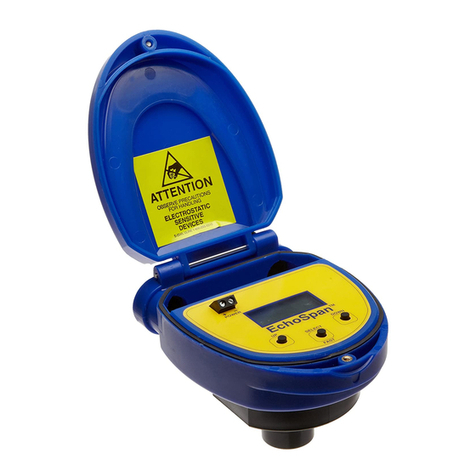
EchoSonic®II
UltrasonicLevelTransmitter
LU23,LU28&LU29SeriesQuickStart
NEMA4XEnclosure































QS300480RevB
©2013Flowline,Inc.
AllRightsReserved10500HumboltStreet,LosAlamitos,CA90720USA
MadeinUSATel:562.598.3015•Fax:562.431.8507•www.flowline.com
2
WelcometotheEchoSonic®IIQuickStart
TheEchoSonic®IIquickstartismeanttoshowsomeofthemorecommonsetup
solutionstogettingtheEchoSonic®IIupandrunningquickly.Ifyourunintoanissue
thatisnotaddressedhereorwishtoinstallorsetupwithanon‐standardconfiguration,
pleaseaddresstheEchoSonic®IIManualorrefertotheFlowlinewebsiteat
www.flowline.com.
WeDoYourLevelBest
ThankyouforpurchasingFlowline’sEchoSonic®II.Thisgeneralpurposeultrasonicsensor
providesnon‐contactdetectionupto32.8”(10m)poweredbythe4‐20mAloop.This
quickstartincludeseverythingyou’llneedtogetthesensorupandrunning.Forcomplete
information,pleaserefertoEchoSonic®IIdocumentationlocatedatwww.flowline.com.
Components
Dependingonhowthesensormodelthatwasshipped,youshouldhavetheEchoSonic®II
andViton®gasketwhicharerequiredtoinstalltheEchoSonic®II.Somemodelswillhave
theUSB®KeyFob(LI99‐1001)includedwiththeEchoSonic®II.Otherwillrequirethe
separatepurchaseoftheFob.ALI99‐1001FobisrequiredtointerfacetoWebCal®and
configurethesensor.



EchoSonic®II
LU23‐40,LU23‐41
LU23‐50,LU23‐51
LU28‐40,LU28‐41
LU28‐50,LU28‐51
LU29‐40,LU29‐41
LU29‐50,LU29‐51
Viton®gasket(2”)
P/N:200129
USB®KeyFob
P/N:LI99‐1001


3
ConfiguringtheEchoSonic®II
Configurationofyoursensorshouldbeperformedpriortomounting,sinceitrequires
connectiontoyourPC.

Step1:InstalltheWebCal™Software
DownloadWebCal™fromwww.flowline.comontoaPCwiththefollowingminimum
specifications:
Windows®2000/XP/Vista/7/8,10MBstoragespace,256MBRAM,1USB2.0port
Double‐clicktheWebCal™icontoinstallbeforeproceedingtoStep2.Youmusthavean
activeInternetconnectiontoinstallWebCal™,asitwillautomaticallyverifydriverupdates.
Step2:ConnecttheUSBFob
NOTE:DonotconnecttheFobuntilafteryou’veinstalledWebCal™.
ThesensorcommunicatestoitsconfigurationsoftwarethroughtheUSBFob.Priorto
connectingtheFob,ensurethatallexternalpowerisdisconnectedfromtheEchoSonic®II
aspowerisprovidedthroughthePC’sUSB2.0port.Donotuseacableconnectingthe
sensortotheFobanylongerthan15feet.

1) Connectthered,green,white,andblackwiresfromtheEchoSonic®IItothe
correspondingcoloredterminalsontheFob(asshowninthediagram).
2) Tightentheterminalscrewswithaslottedscrewdriver.
3) PlugtheFobintoyourPC’sUSBport.



4
Step3:ConfigurethroughWebCal™
TheseinstructionswillwalkyouthroughconfigurationofthesensorthroughWebCal™.For
moreinformation,clicktheWebCal™HELPbuttoninthelowerrightcorneroranywhereon
theWebCal™screenorrefertotheEchoSonic®IImanualfoundatwww.flowline.com.

WebCal™ConfigurationScreen

5

Usingthedrop‐downmenusontheleftoftheWebCal™ screen
settheconfigurationforyourapplicationrequirements.Whena
selectiondoesnotapplytoyourapplication,“NotApplicable”
willappearinthedrop‐down.Makesurealldrop‐downsareset
appropriatelyforyourapplicationbeforemovingtotheTank
Levelsection.
LoopFailSafe.Usethissettingtochoosetheoutputlevel
shouldthesensornotreceiveanecho.
OutputatEmpty.Usethissettingtochangethe4‐20mA
settingfromitsdefault.
StartupCondition.Duringthe15‐20secondsduringwhichthe
EchoSonic®IIstartsup,thisdescribesthelevelatwhichitwill
beginsearchingforthecontentsofthetank.
NOTE:Ifyouwouldliketostartover,clicktheClearScreen
buttonontheright.


ANewfeatureofWebCal™6.0istheabilitytoconfigurethesensorinvolumetricunits
(GallonsorLiters)orintheexistingDistance(HeightofLiquid)units(inches,cm,feetor
meters).TochangetheactualunitsortochangefromDistancetoVolume,presstheTanks
buttonlocatednearthecenterofthewindow.
ShapeSelectionWindow:DimensionalEntryWindow:
Thiswindowwillshowthe
differentoptionsfortank
shapesavailableinWebCal™.




Enterthedimensional
informationforthe
tank.Youmustenter
allofthefieldsshown.
SensorHeight:
FillHeight:
RiserHeight:
TankHeight:
Diameter:
Note:Notallofthe
fieldsapplyforevery
tankconfiguration.

6
Entertheappropriatetanklevelsetpointsforyourapplication.
Units.Displaymeasurementsininches
orcentimeters.
SensorHeight.Distancemeasuredfrom
thebottomoftheemptytanktothe
bottomofthetransducer.Underfactory
configuration,thisbecomesthe4mAset
point.
FillHeight.Distancemeasuredfromthe
bottomoftheemptytanktothe
maximumfillheightwithinthetank.
Underfactoryconfiguration,this
becomesthe20mAsetpoint.
TankLevelSettings
TheoptionsontherightoftheWebCal™ screentofinalizethe
configuration.
WritetoUnit.SendyourconfigurationintoEchoSonic®II.
WiringDiagram.OpenPDFwiringschematicofyour
configuration.
Advanced.Configureadvancedsettings.Readthesection
belowonadvancedsettingoptions
FactoryConfig.ReturnEchoSonic®IItotheoriginalfactory
configuration.
ClearScreen.Clearsthescreenofconfigurationsettings.
ConfigFile.Name,save,openorprintyourconfigurationfor
lateruse.


FinalizeSettings


7
TheAdvancedbuttonisusedforoptionsavailablewhensettingupthesensorwithspecial,
non‐standardfeatures.Manyofthesefeaturesareavailableforspecificapplicationsthat
maychangefromtimetotime.ConsultWebCal™'sHELPfileforthelatestinformationon
theuseofanyofthesefeatures.
ThemorecommonlyusedAdvancedfeatures
aretheInvertRelayandIncreaseOutput
Filteringdescribedbelow.
IncreaseOutputFiltering.Selectthisradio
buttontoaddadditionalfilteringtothe4‐
20mAoutput.
DecreaseOutputFiltering.Selectthis
radiobuttontoremovealloutputfiltering
onthe4‐20mAoutput.
AdvancedSettings
Beforeconfigurationcanbecompleted:
YoumustclicktheWritetoUnitbuttontosavethesettingstotheunit.
Then,clickWiringDiagramforahardcopyofthesensor’ssettings.
Finally,enterthefilenameunderwhichyouwishtosavetheconfigurationfileand
clickSaveConfigFile.
Configurationisnowcomplete.
DisconnecttheUSBFobbeforecontinuingtothenextstep:MountingtheEchoSonic®II.
ForupdatestoWebCal™,ortomakesureyou’reusingthemostup‐to‐dateversion
available,clicktheUpdatetabonthetopoftheWebCal™screen.



8
MountingtheEchoSonic®II
Thesensorshouldalwaysbemountedperpendiculartotheliquidsurfaceusingthe
providedViton®mountinggasket.Insurethattherearenorestrictionsorobstaclesinthe
pathoftheultrasonicsignal.FurthermountinginformationcanbefoundontheFlowline
websiteatwww.flowline.com.
MountingwithaTankAdapter:
Selectatankadapterfitting,suchastheLM52‐2890.
MountingwithaRiser:
Asinstallationswithtall,narrowriserscanimpedetheacousticsignal.2"diameterrisers
shouldbenotallerthan5".Largerdiameterrisersshouldbenotallerthan12".
MountingwithaSideMountBracket:
UseFlowline'sLM50‐1001sidemountbracket.


RiserMounting

SideMounting
withLM50‐1001



9
MountingwithaStand‐Pipe:
Astand‐pipemaybeusedtodampenturbulence,separatesurfacefoamfromthepointof
measurementorincreaseperformanceinheavyvapor.Whenmountingthesensorina
stand‐pipe,theminimumdiameterofthepipeis3”.Largerdiameterpipescanbeused.The
pipeshouldbeattachedwithacouplingandreducerbushing.Thepipelengthshouldrun
themeasurementspanandthebottomofthepipeshouldremainsubmergedatalltimesto
preventfoamfromenteringthepipe.Cutthebottomendofthepipeat45°anddrilla
1/4”pressureequalizationholehighinthedeadband.Thepumpsshouldnotdriveliquid
pasttheopenendofthestandpipewhichcausestheliquidinthepipetooscillate.
Stand‐PipeMounting
IMPORTANTMOUNTINGGUIDELINES:
1) Nevermountthesensoratanangle.
2) Liquidshouldneverenterthedeadband.
3) Mountatleast3”fromthesidewall.
4) Nevermountinavacuum.
5) Donotobstructthesensor’sbeamwidth.

10
WiringtheEchoSonic®II
Aftermountingthesensor,makethenecessaryelectricalconnections.Awiringdiagram
withspecificrecommendationsforthesensor’sconfigurationcanbeprintedfromthe
WebCal™program.Atypicalwiringdiagramisshownonthenextpage.


Red(+)&Black(‐):Red(R/+)andBlack(BLK/‐)leadsareforconnectiontoa24VDCpower
supplyortoa4‐20mAlooppowersource.Theredandblackwirescanbeextendedupto
1,000feetusinga22gaugeorlargerwire;howeverdonotextendthegreenandwhite
wires.
White(T)&Green(R):White(W/T)andGreen(G/R)leadsarereservedforusewith
WebCal™andshouldnotbeconnectedduringusageintheapplication.Thesewiresshould
notbeconnectedtoWebCal™whilepowerissuppliedfromanysourceotherthantheLI99
seriesFob.
Neverallowthewhiteorgreenwirestotouchanypowersupply.


11
WiringtheEchoSonic®II
ThefollowingwiringdiagramcanbeusedwhenwiringtotheEchoSonic®IIrelays.

TypicalWiringDiagram
YourWebCal™WiringDiagrammayvary.
Generalnotesforelectricalconnections,usageandsafety:
Wherepersonalsafetyorsignificantpropertydamagecanoccurduetoaspill,the
installationmusthavearedundantbackupsafetysysteminstalled.
Wiringshouldalwaysbecompletedbyalicensedelectrician.
Supplyvoltageshouldneverexceed28VDC.
Protectthesensorfromexcessiveelectricalspikesbyisolatingthepower,whenever
possible.
Thesensormaterialsmustbechemicallycompatiblewiththeliquidstobemeasured.
Designafail‐safesystemforpossiblesensorand/orpowerfailure.
NeverusethesensorinenvironmentsclassifiedasHazardous.



12
Warranty
Flowlinewarrantstotheoriginalpurchaserofitsproductsthatsuchproductswillbefreefromdefectsin
materialandworkmanshipundernormaluseandserviceinaccordancewithinstructionsfurnishedby
Flowlineforaperiodoftwoyearsfromthedateofmanufactureofsuchproducts.Flowline'sobligation
underthiswarrantyissolelyandexclusivelylimitedtotherepairorreplacement,atFlowline'soption,of
theproductsorcomponents,whichFlowline'sexaminationdeterminestoitssatisfactiontobedefectivein
materialorworkmanshipwithinthewarrantyperiod.Flowlinemustbenotifiedpursuanttotheinstructions
belowofanyclaimunderthiswarrantywithinthirty(30)daysofanyclaimedlackofconformityofthe
product.Anyproductrepairedunderthiswarrantywillbewarrantedonlyfortheremainderoftheoriginal
warrantyperiod.Anyproductprovidedasareplacementunderthiswarrantywillbewarrantedforthefull
twoyearsfromthedateofmanufacture.
Returns
ProductscannotbereturnedtoFlowlinewithoutFlowline'spriorauthorization.Toreturnaproductthatis
thoughttobedefective,gotowww.flowline.com,andsubmitacustomerreturn(MRA)requestformand
followtheinstructionstherein.Allwarrantyandnon‐warrantyproductreturnstoFlowlinemustbeshipped
prepaidandinsured.Flowlinewillnotberesponsibleforanyproductslostordamagedinshipment.
Limitations
Thiswarrantydoesnotapplytoproductswhich:1)arebeyondthewarrantyperiodorareproductsfor
whichtheoriginalpurchaserdoesnotfollowthewarrantyproceduresoutlinedabove;2)havebeen
subjectedtoelectrical,mechanicalorchemicaldamageduetoimproper,accidentalornegligentuse;3)
havebeenmodifiedoraltered;4)anyoneotherthanservicepersonnelauthorizedbyFlowlinehave
attemptedtorepair;5)havebeeninvolvedinaccidentsornaturaldisasters;or6)aredamagedduring
returnshipmenttoFlowline.Flowlinereservestherighttounilaterallywaivethiswarrantyanddisposeof
anyproductreturnedtoFlowlinewhere:1)thereisevidenceofapotentiallyhazardousmaterialpresent
withtheproduct;or2)theproducthasremainedunclaimedatFlowlineformorethan30daysafter
Flowlinehasdutifullyrequesteddisposition.Thiswarrantycontainsthesoleexpresswarrantymadeby
Flowlineinconnectionwithitsproducts.ALLIMPLIEDWARRANTIES,INCLUDINGWITHOUTLIMITATION,
THEWARRANTIESOFMERCHANTABILITYANDFITNESSFORAPARTICULARPURPOSE,AREEXPRESSLY
DISCLAIMED.Theremediesofrepairorreplacementasstatedabovearetheexclusiveremediesforthe
breachofthiswarranty.INNOEVENTSHALLFLOWLINEBELIABLEFORANYINCIDENTALOR
CONSEQUENTIALDAMAGESOFANYKINDINCLUDINGPERSONALORREALPROPERTYORFORINJURYTO
ANYPERSON.THISWARRANTYCONSTITUTESTHEFINAL,COMPLETEANDEXCLUSIVESTATEMENTOF
WARRANTYTERMSANDNOPERSONISAUTHORIZEDTOMAKEANYOTHERWARRANTIESOR
REPRESENTATIONSONBEHALFOFFLOWLINE.Thiswarrantywillbeinterpretedpursuanttothelawsofthe
StateofCalifornia.Ifanyportionofthiswarrantyisheldtobeinvalidorunenforceableforanyreason,such
findingwillnotinvalidateanyotherprovisionofthiswarranty.
Forcompleteproductdocumentation,videotraining,andtechnicalsupport,gotowww.flowline.com.
Forphonesupport,call562‐598‐3015from8amto5pmPST,Mon‐Fri.
(PleasemakesureyouhavethePartandSerialnumberavailable.)



This manual suits for next models

15

Other FlowLine Transmitter manuals

FlowLine EchoPulse LR30 Series User manual

FlowLine

FlowLine EchoPulse LR30 Series User manual

FlowLine EchoPro LR11 Series User manual

FlowLine

FlowLine EchoPro LR11 Series User manual

FlowLine LU30 User manual

FlowLine

FlowLine LU30 User manual

FlowLine Ricochet LA15 User manual

FlowLine

FlowLine Ricochet LA15 User manual

FlowLine EchoPod UG01-03 User manual

FlowLine

FlowLine EchoPod UG01-03 User manual

FlowLine EchoSonic II LU23 Series User manual

FlowLine

FlowLine EchoSonic II LU23 Series User manual

FlowLine EchoSpan LU80 series User manual

FlowLine

FlowLine EchoSpan LU80 series User manual

FlowLine EchoSpan LU80 series User manual

FlowLine

FlowLine EchoSpan LU80 series User manual

FlowLine LU20 User manual

FlowLine

FlowLine LU20 User manual

FlowLine EchoPro LR11 Series User manual

FlowLine

FlowLine EchoPro LR11 Series User manual

FlowLine EchoSonic II User manual

FlowLine

FlowLine EchoSonic II User manual

FlowLine EchoTouch US12 Series User manual

FlowLine

FlowLine EchoTouch US12 Series User manual

FlowLine EchoPod UG06 Series User manual

FlowLine

FlowLine EchoPod UG06 Series User manual

FlowLine LA12 User manual

FlowLine

FlowLine LA12 User manual

FlowLine EchoBeam LR85 Series User manual

FlowLine

FlowLine EchoBeam LR85 Series User manual

FlowLine EchoPod UG06 Series User manual

FlowLine

FlowLine EchoPod UG06 Series User manual

FlowLine MiniMe LU12 User manual

FlowLine

FlowLine MiniMe LU12 User manual

FlowLine EchoPod UG06 Series User manual

FlowLine

FlowLine EchoPod UG06 Series User manual

FlowLine EchoPulse LR10 Series User manual

FlowLine

FlowLine EchoPulse LR10 Series User manual

FlowLine DeltaSpan LD30 Series User manual

FlowLine

FlowLine DeltaSpan LD30 Series User manual

FlowLine EchoSafe XP88 User manual

FlowLine

FlowLine EchoSafe XP88 User manual

FlowLine EchoBeam LR81 Series User manual

FlowLine

FlowLine EchoBeam LR81 Series User manual

FlowLine EchoPod US01-03 User manual

FlowLine

FlowLine EchoPod US01-03 User manual
FlowLine EchoBeam LR80 Series User manual

FlowLine

FlowLine EchoBeam LR80 Series User manual

Popular Transmitter manuals by other brands

Axcera Innovator CU10BT/CU0T-1 instruction manual

Axcera

Axcera Innovator CU10BT/CU0T-1 instruction manual

ATEN VE2812AUST user manual

ATEN

ATEN VE2812AUST user manual

King-Gage ES2 550*-1 Series Installation and operation instructions

King-Gage

King-Gage ES2 550*-1 Series Installation and operation instructions

ARC FLEXEPH 8EPH instruction manual

ARC

ARC FLEXEPH 8EPH instruction manual

Listen lt-800 user manual

Listen

Listen lt-800 user manual

Endress+Hauser CM14 operating instructions

Endress+Hauser

Endress+Hauser CM14 operating instructions

KROHNE BW25 Handbook

KROHNE

KROHNE BW25 Handbook

Kramer TP-185 user manual

Kramer

Kramer TP-185 user manual

Fukuda Denshi LX-7120 Operation manual

Fukuda Denshi

Fukuda Denshi LX-7120 Operation manual

WIKA A-10 operating instructions

WIKA

WIKA A-10 operating instructions

Philips Bodine WHRCT user manual

Philips

Philips Bodine WHRCT user manual

Teledyne OT-2 operating instructions

Teledyne

Teledyne OT-2 operating instructions

Endress+Hauser Liquisys M COM 223 operating instructions

Endress+Hauser

Endress+Hauser Liquisys M COM 223 operating instructions

Monacor IMG Stage Line TXS-820LT quick guide

Monacor

Monacor IMG Stage Line TXS-820LT quick guide

Thorne & Derrick HygroFlex HF7 user guide

Thorne & Derrick

Thorne & Derrick HygroFlex HF7 user guide

EDOBE XDOM IMRF user guide

EDOBE

EDOBE XDOM IMRF user guide

Lightware HDMI-TP-TX50 quick start guide

Lightware

Lightware HDMI-TP-TX50 quick start guide

Kramer VP-428H2 user manual

Kramer

Kramer VP-428H2 user manual

manuals.online logo
manuals.online logoBrands
  • About & Mission
  • Contact us
  • Privacy Policy
  • Terms and Conditions

Copyright 2025 Manuals.Online. All Rights Reserved.