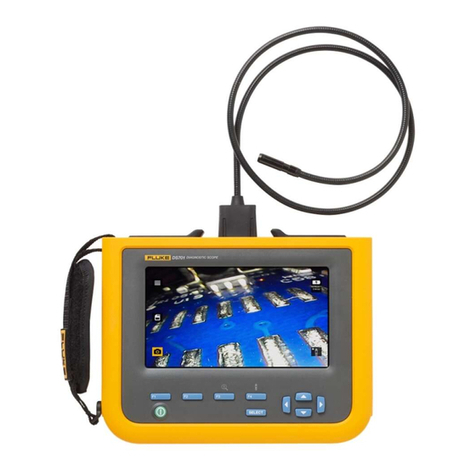
Fluke DS703 FC User manual

DS703 FC
Diagnostic Video Borescope
Users Manual
É
March 2018 (English) Rev. 1, 9/22
© 2018-2022 Fluke Corporation. All rights reserved. Specifications are subject to change without notice.
All product names are trademarks of their respective companies.

LIMITED WARRANTY AND LIMITATION OF LIABILITY
Each Fluke product is warranted to be free from defects in material and workmanship under normal use and
service. The warranty period is two years and begins on the date of shipment. Parts, product repairs, and services
are warranted for 90 days. This warranty extends only to the original buyer or end-user customer of a Fluke
authorized reseller, and does not apply to fuses, disposable batteries, or to any product which, in Fluke's opinion,
has been misused, altered, neglected, contaminated, or damaged by accident or abnormal conditions of operation
or handling. Fluke warrants that software will operate substantially in accordance with its functional specifications
for 90 days and that it has been properly recorded on non-defective media. Fluke does not warrant that software
will be error free or operate without interruption.
Fluke authorized resellers shall extend this warranty on new and unused products to end-user customers only but
have no authority to extend a greater or different warranty on behalf of Fluke. Warranty support is available only if
product is purchased through a Fluke authorized sales outlet or Buyer has paid the applicable international price.
Fluke reserves the right to invoice Buyer for importation costs of repair/replacement parts when product purchased
in one country is submitted for repair in another country.
Fluke's warranty obligation is limited, at Fluke's option, to refund of the purchase price, free of charge repair, or
replacement of a defective product which is returned to a Fluke authorized service center within the warranty
period.
To obtain warranty service, contact your nearest Fluke authorized service center to obtain return authorization
information, then send the product to that service center, with a description of the difficulty, postage and insurance
prepaid (FOB Destination). Fluke assumes no risk for damage in transit. Following warranty repair, the product will
be returned to Buyer, transportation prepaid (FOB Destination). If Fluke determines that failure was caused by
neglect, misuse, contamination, alteration, accident, or abnormal condition of operation or handling, including
overvoltage failures caused by use outside the product’s specified rating, or normal wear and tear of mechanical
components, Fluke will provide an estimate of repair costs and obtain authorization before commencing the work.
Following repair, the product will be returned to the Buyer transportation prepaid and the Buyer will be billed for the
repair and return transportation charges (FOB Shipping Point).
THIS WARRANTY IS BUYER'S SOLE AND EXCLUSIVE REMEDY AND IS IN LIEU OF ALL OTHER
WARRANTIES, EXPRESS OR IMPLIED, INCLUDING BUT NOT LIMITED TO ANY IMPLIED WARRANTY OF
MERCHANTABILITY OR FITNESS FOR A PARTICULAR PURPOSE. FLUKE SHALL NOT BE LIABLE FOR ANY
SPECIAL, INDIRECT, INCIDENTAL OR CONSEQUENTIAL DAMAGES OR LOSSES, INCLUDING LOSS OF
DATA, ARISING FROM ANY CAUSE OR THEORY.
Since some countries or states do not allow limitation of the term of an implied warranty, or exclusion or limitation
of incidental or consequential damages, the limitations and exclusions of this warranty may not apply to every
buyer. If any provision of this Warranty is held invalid or unenforceable by a court or other decision-maker of
competent jurisdiction, such holding will not affect the validity or enforceability of any other provision.
11/99
Fluke Corporation
P.O. Box 9090
Everett, WA 98206-9090
U.S.A.
Fluke Europe B.V.
P.O. Box 1186
5602 BD Eindhoven
The Netherlands
LIMITED WARRANTY AND LIMITATION OF LIABILITY

Documentation and Software Licensing Notice
For software licensing information, visit www.fluke.com/licensing.
For products containing software licensed under the GNU General Public License (GPL) or Lesser GNU General
Public License (LGPL)”, the complete corresponding sources are available. You can order a complete machine-
readable copy of the source code from Fluke Corporation for a period of three (3) years after receipt of the
product.
Send a written request to:
Open Source Request
Fluke Corporation
6920 Seaway Blvd
Everett, WA 98203
Please include:
• Full name
• Company name
• Product model
• Return mailing address
• Email address (if available)
Note
Fluke Corporation may charge a fee to cover the cost of this distribution. This offer is valid to anyone in
receipt of this information.


i
Table of Contents
Title Page
Introduction ........................................................................................................... 1
How to Contact Fluke............................................................................................ 1
Safety Information................................................................................................. 1
Specifications........................................................................................................ 1
Product Familiarization ......................................................................................... 2
Features........................................................................................................... 2
In the Box......................................................................................................... 3
Accessories........................................................................................................... 5
Display ............................................................................................................. 6
Control Panel ................................................................................................... 7
Basic Operation .................................................................................................... 7
Capture an Image ............................................................................................ 7
Record a Video ................................................................................................ 8
Menus ................................................................................................................... 8
Primary Menu .................................................................................................. 8
Image Menu..................................................................................................... 9
Setup Menu ..................................................................................................... 9
Date ............................................................................................................ 10
Time............................................................................................................ 10
Fluke Connect ............................................................................................ 11
Memory Menu.................................................................................................. 11
Review Image or Video .............................................................................. 11
Delete Image .............................................................................................. 12
View Images or Videos ......................................................................................... 12
View on a PC ................................................................................................... 12
View on an HDMI Device................................................................................. 13
View with Fluke Connect ................................................................................. 13
Update Firmware .................................................................................................. 13
Fluke Connect Desktop Software ......................................................................... 13
Neck Strap ............................................................................................................ 14
Maintenance ......................................................................................................... 14
Clean the Product ............................................................................................ 15
Charge the Battery........................................................................................... 15
Product Disposal.............................................................................................. 16
Radio Frequency Data .......................................................................................... 16

DS703 FC
Users Manual
ii

1
Introduction
The Fluke DS703 FC Diagnostic Video Borescope (the Product) is a handheld, imaging camera
for use in many applications. These applications include equipment troubleshooting,
preventive and predictive maintenance, building diagnostics, and research and development.
The Product displays images on a high-visibility, industrial-quality LCD screen. The Product
saves images and videos to internal memory or to memory on a USB storage device. Saved
images and videos can be transferred to a PC through a direct USB connection to the PC.
Saved images can be transferred to Fluke Connectwhere available.
How to Contact Fluke
Fluke Corporation operates worldwide. For local contact information, go to our website:
www.fluke.com
To register your product, view, print, or download the latest manual or manual supplement, go
to our website.
Fluke Corporation
P.O. Box 9090
Everett, WA 98206-9090
+1-425-446-5500
fluke-info@fluke.com
Safety Information
General Safety Information is in the printed Safety Information document that ships with the
Product and at www.fluke.com. More specific safety information is listed where applicable.
A Warning identifies hazardous conditions and procedures that are dangerous to the user. A
Caution identifies conditions and procedures that can cause damage to the Product or the
equipment under test.
Specifications
For a list of the complete specifications go to www.fluke.com.

DS703 FC
Users Manual
2
Product Familiarization
Before you use the Product, read through this manual to familiarize yourself with all the
features, accessories, and operation.
Features
The Product has these features:
Bright 7" high resolution LCD touch screen.
High Definition, dual view imaging probe and adjustable light to provide a clear image.
Large variety of rugged and high resolution accessory probes to address your specific
application needs.
Macro to micro zoom
Up-is-Up™ technology for an appropriate orientation, regardless of the probe location or
position
Asset ID tagging allows you to easily compare asset images over time.
Fluke Connect™ support that includes wireless image transfer.

Diagnostic Video Borescope
Product Familiarization
3
In the Box
Table 1shows the Product and the standard accessories.
Table 1 . St a ndard Acces s o r ies
Item Description Item Description
Control panel Neck strap
Hand strap USB cable
LCD screen (display) HDMI cable
8.5 mm HD DUALVIEW Probe T-Pak magnetic hanger
USB charger not shown Documentation: Safety Information and
Quick Reference Guide
SELECT
F4F3F2F1
2
1
3
4
6
8
9
5
7

Diagnostic Video Borescope
Accessories
5
Tab le 3shows the parts of the 8.5 mm HD DUALVIEW probe that is included with the Product.
Accessories
Tab le 4is a list of the accessories available for the Product.
Tab l e 3 . Probe
Item Description Item Description
Probe head Side LED
Probe cable, 1.2 m Forward camera
Side camera Forward LED
Tab l e 4 . Accessorie s
Video Borescope Probe Description PN
FLK-3.8MM PROBE, 1M,
FORWARD VIEW
3.8 mm wide, 1 m long high definition imaging probe with a
forward view lens. 4962690
FLK-5.5MM PROBE, 1M,
DUAL VIEW
5.5 mm wide, 1 m long high definition imaging probe with
forward and side view camera lenses. 4962713
FLK-8.5MM PROBE, 3M,
DUAL VIEW[1]
8.5 mm wide, 1.2 m long high definition imaging probe with
forward and side view camera lenses. 4962708
FLK-5.5MM/0.7M SCOPE,
WITH ARTICULATING PROBE 5.5 mm wide, One Way Articulation, 0.7 m long 5344767
FLK-9MM PROBE,
FORWARD VIEW 20M, REEL 20 m reel for probe storage. 4962760
[1] Compatible with Up-is-Up™ technology.
2
1
6
5
3
4

DS703 FC
Users Manual
6
Display
Use the control panel (see Control Panel) to select an icon to change parameters or select
functions and options. Use the touch screen as a shortcut to common settings. The display
has a backlight for work in dimly-lit spaces. Table 5lists the functions of the icons on the
display.
Table 5. D ispl ay
Icon Description Touch Screen Function
Primary menu Tap to open the Primary menu.
Memory menu Tap to review or delete captured images and videos.
Image mode Tap to capture an image. See Capture an Image.
Video mode Tap to start recording a video. Tap again to stop recording a
video. See Record a Video.
/Forward/side camera
control Tap to toggle between the front and side camera.
BBattery status Shows the battery level.
Zoom control Touch, hold, and move to the left or right to zoom in or out. To
open this feature, see Control Panel.
Flashlight brightness
control
Touch, hold, and move to the left or right to increase or
decrease the brightness of the flashlight. To open this feature,
see Control Panel.
ABack arrow In the primary menu, tap to go back to live view.
In a submenu, tap to go back to the previous menu.

Diagnostic Video Borescope
Basic Operation
7
Control Panel
Use the control panel to change parameters or select functions and options. Table 6lists the
functions of the buttons on the Control Panel.
Basic Operation
Before you use the Product for the first time, see Charge the Battery.
To use the Product, attach the probe to the probe input. See Table 1.
Capture an Image
To c a p t u r e a n i m a g e :
1. Use the arrow keys to highlight .
2. Push Sto capture an image.
The display flashes briefly, and the image saves to memory.
Table 6. Control Panel
Button Home Screen Function
OPush to turn on or off the Product.
1NA
2Push to open the Primary menu ( ).
3Push to turn on or off the zoom control ( ). Use M/Nto zoom in or out.
4Push to turn on or off the flashlight brightness control ( ). Use M/Nto increase or
decrease brightness.
KLMN With the zoom and flashlight brightness controls off, push to highlight , , /
, or / .
S
With the Primary menu ( ) or the Memory menu ( ) highlighted, push to open the
selected menu.
With highlighted, push to capture an image. See Capture an Image.
With highlighted, push to record a video. See Record a Video.
With / highlighted, push to toggle between the front and side cameras.

DS703 FC
Users Manual
8
Record a Video
To record a video:
1. Select Menu > Image > Video > Done > Cancel to select video mode and return to the home
screen.
2. Push Sto start recording a video.
3. Push Sagain to stop recording a video.
The video saves to memory.
Menus
Use the menus to change and view settings.
To change settings:
1. Push 2to open the Primary menu
2. Push 1to open the Image menu, or push 2to open the Setup menu.
3. Push K/ Lto select an option.
4. If needed, push Mto open a submenu.
5. Push 1, 2, or 3to select an option.
6. Push 4to set the option and return to the previous screen.
Primary Menu
Tab le 7lists the secondary menus available in the Primary Menu.
Ta bl e 7 . Pr im a r y M en u
Secondary Menu Description
Image Set features used to show images on the display and in some saved image
and video files.
Setup Set user preferences.
Cancel Select to return to live view. Does not cancel changes.

Diagnostic Video Borescope
Menus
9
Image Menu
Tab le 8lists the options in the Image menu.
Setup Menu
Tab le 9lists the options in the Setup menu.
Table 8. Image Menu
Option Menu Option Description
Image Mode Image Select to set up the Product to capture an image.
Video Select to set up the Product to record a video.
View Mode
True Color Select to set the view mode.
Use True Color to differentiate similar colors from each other.
Use Texture to emphasize the texture of the target.
Use UV to identify leak detection with UV dye. Images are
clearer when used with the UV accessory.
Use Inspection to Identify cracks, wear points, and fine print.
Texture
UV
Inspection
Color
Standard
Select to set the color palette.Grayscale
Inverted
Rotate 180 Select to rotate the image 180 °.
None Select to view the image with no rotation.
Up is Up On
Select to rotate the image automatically so the orientation of the
image on the display is upright regardless of the position of the
probe.
With On activated, use the Product to:
• View text such as serial numbers.
• Identify the location of items in relation to each other. For
example, if switch A is located to the right of switch B,
switch A shows on the display to the right of switch B.
Off Select to view the image with no orientation correction.
Table 9. Setup Menu
Option Menu Option Description
Auto Off <options> Sets the time before the Product automatically turns off.
Time Stamp ON Turns on/off the time stamp on image and video files.
OFF
Backlight <options> Sets the brightness level of the display.
Date/Time <options> Sets the date format and the date. See Date.
Sets the time format and the time. See Time.

DS703 FC
Users Manual
10
Date
The date shows as: MM/DD/YY, DD/MM/YY or YYYY/MM/DD.
To set the date:
1. Select Menu > Setup > Date/Time.
2. Push 2to open the Date Format menu.
3. Select MM/DD/YY, DD/MM/YY or YYYY/MM/DD.
4. Push Mto open the set date option menu.
5. Push N/ Mto select the day, month, or year.
6. Push K/ Lto change the day, month, or year.
7. Push 4to set the date and return to the previous menu.
Time
Time shows as: 12 hour or 24 hour.
To set the time format:
1. Select Menu > Setup > Date/Time.
2. Push 3to open the Time Format menu.
3. Select 12 hour or 24 hour.
4. Push Mto open the set time option menu.
5. Push N/ Mto select the minutes or hours.
6. Push K/ Lto change the minutes or hours.
7. If you selected the 12 hour format, select AM or PM.
8. Push 4to set the time and return to the previous menu.
Fluke Connect
Wifi (ON) Turns on or off WiFi. Select WiFI ON to pair the Imager to the
Fluke Connect app on a mobile device or to other Fluke
Connect tools. See Fluke Connect.
Note
The Fluke Connect system is not available in all countries.
Wifi (OFF)
Data storage
Internal Saves files to the internal memory.
USB Saves files to a USB storage device.
Eject USB With USB enabled, use to safely remove a USB device.
Language <options> Sets the language to use on the display.
Table 9. Setup Menu (cont.)
Option Menu Option Description

Diagnostic Video Borescope
Menus
11
Fluke Connect
The Product supports the Fluke Connect Wireless system. The Fluke Connect system
wirelessly connects your Fluke test tools with an app on a mobile device. Use the app to
download images saved on the Product and then view on your mobile device.
Note
The Fluke Connect system is not available in all countries.
The Fluke Connect app works with Apple and Android products. The app is available for
download from the Apple App Store and Google Play.
To use the Fluke Connect app with the Product:
1. On the Product:
a. Capture an image.
b. Select Menu > Setup > Fluke Connect > Wifi (ON).
2. On the mobile device:
a. Download the Fluke Connect app.
b. Go to Settings > Wi-Fi.
c. Select the Wi-Fi network that begins with FLUKE...
d. In the password field, enter fluketools.
3. On the Fluke Connect app:
a. Select DS703 FC <Serial Number> from the list. The serial number is located on the back
of the Product.
b. Follow the directions in the app.
Note
Videos cannot be viewed on the app.
Go to www.flukeconnect.com for more information about how to use the app.
Memory Menu
Use the Memory menu to review or delete captured image and video files.
Review Image or Video
To review an image:
1. Use the arrow keys to highlight the Memory menu ( ).
2. Push Sto open the Memory menu.
3. Use the arrow keys to select the preview image of the file for review.
4. Push 1to review the file.
5. If needed, push 2to zoom in or push 3to zoom out.

DS703 FC
Users Manual
12
To r ev i ew a v i d e o :
1. Use the arrow keys to highlight the Memory menu ( ).
2. Push Sto open the Memory menu.
3. Use the arrow keys to select the preview image of the file for review. All video files show Pon
the thumbnail.
4. Push 1to review the file.
5. Push 1to play the video.
Delete Image
To delete images, see Table 10.
View Images or Videos
You can view images and video on a PC or with an HDMI-compatible device. With Fluke
Connect you can view images but not videos.
View on a PC
To view saved files on a PC through a USB connection:
1. Connect the USB A connector end of the USB cable into your PC and the USB-C connector
end of the USB cable into the Product.
The PC will register the Product as a USB device.
2. On the PC, select the file to review.
Table 10. Delete Images
Action Procedure
Delete one file
1. Open the Memory menu.
2. Select a preview image.
3. Push 2to open the Delete menu.
The Product prompts you to delete or cancel.
4. Push 2again to delete the file.
Delete all files
1. Open the Memory menu.
2. Push 3to select Delete All.
The Product prompts you to delete or cancel.
3. Push 2to delete all the files from the memory.

Diagnostic Video Borescope
Update Firmware
13
View on an HDMI Device
HDMI (High-Definition Multimedia Interface) is a compact audio/video interface that transfers
uncompressed data and compressed/uncompressed digital audio data from the Product to a
compatible HDMI device.
To view saved files on an HDMI device:
1. Attach the included HDMI cable to the HDMI input on the Product.
2. Connect the other end to an HDMI video device.
3. On the video device, select the HDMI port number that the HDMI cable is attached to.
4. On the Product, select the file to view.
View with Fluke Connect
To view saved files in the Fluke Connect app, see Fluke Connect.
Update Firmware
For firmware updates, Fluke recommends that you use Fluke Connect Desktop Software. See
Fluke Connect Desktop Software.
Fluke Connect Desktop Software
Go to http://en-us.fluke.com/support/software-downloads/ti-fc-software-update.html for
more information about how to use Fluke Connect Desktop Software with the Product.

DS703 FC
Users Manual
14
Neck Strap
Use the neck strap to carry the Product for an extended period of time. See Figure 1.
Figure 1. Adjustable Neck Strap
Maintenance
To maintain the Product, clean the case and lenses and charge the batteries.
WCaution
To prevent damage to the Product, do not drop the Product. Treat the Product as a
calibrated instrument.
Table of contents
Other Fluke Analytical Instrument manuals
Popular Analytical Instrument manuals by other brands

Depstech
Depstech DS500 user manual

PCE Health and Fitness
PCE Health and Fitness PCE-VE 700 Instructions for use

Stanley
Stanley Fatmax TLM165S user manual

Insight Vision
Insight Vision Xpress user manual

Wohler
Wohler VE 200 operating manual

Thermo Scientific
Thermo Scientific Dionex ICS-2000 Operator's manual