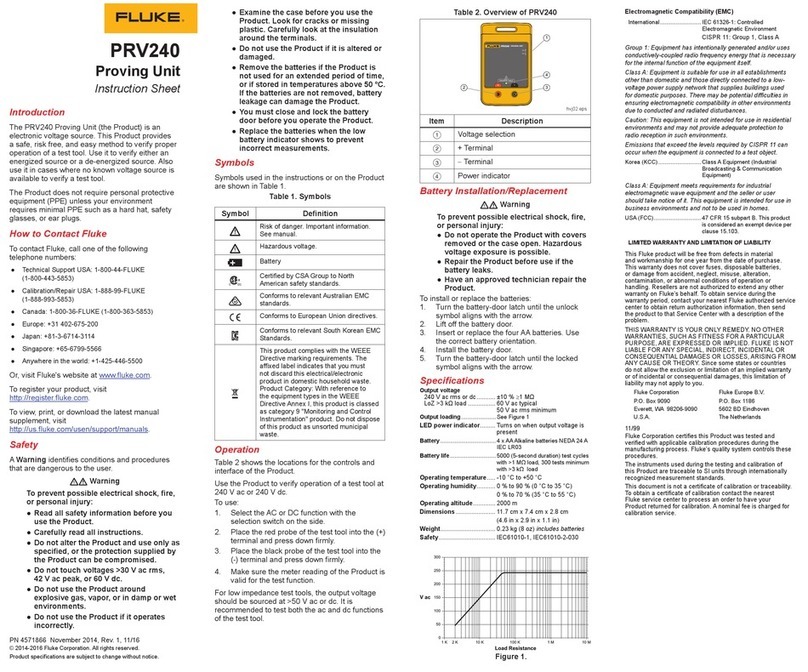
Fluke PM6690 User manual

Timer/Counter/
Analyzer
PM6690
Operators Manual

II
PN 4822 872 20301
April 2005 - First Edition
© 2005 Pendulum Instruments AB. All rights reserved.
Printed in Sweden.

Table of Contents
GENERAL INFORMATION .............VI
About this Manual .................VI
Warranty........................VI
DeclarationofConformity...........VI
1 Preparation for Use
Preface .......................1-2
Introduction ........................1-2
PowerfulandVersatileFunctions ....1-2
NoMistakes.....................1-3
Design Innovations ..................1-3
State of the Art Technology Gives
DurableUse ....................1-3
HighResolution..................1-3
Remote Control .....................1-4
FastGPIBBus...................1-4
Safety ........................1-5
Introduction ........................1-5
Safety Precautions ..................1-5
CautionandWarningStatements ....1-6
Symbols........................1-6
If in Doubt about Safety ............1-6
Unpacking ....................1-7
Check List .........................1-7
Identification .......................1-7
Installation .........................1-7
Supply Voltage...................1-7
Grounding.........................
1-8
OrientationandCooling............1-8
Fold-Down Support ...............1-8
Rackmount Adapter...............1-9
2 Using the Controls
Basic Controls ......................2-2
Secondary Controls ..................2-4
Connectors & Indicators ...........2-4
Rear Panel .....................2-5
Description of Keys ..................2-6
Power .........................2-6
SelectFunction..................2-6
Autoset/Preset...................2-6
MoveCursor....................2-6
DisplayContrast .................2-7
Enter..........................2-7
Save&Exit.....................2-7
Don'tSave&Exit.................2-7
Presentation Modes...............2-7
EnteringNumericValues...........2-8
HardMenuKeys.................2-9
Default Settings ....................2-15
3 Input Signal Conditioning
Input Amplifier ......................3-2
Impedance......................3-2
Attenuation .....................3-2
Coupling .......................3-3
Filter ..........................3-3
Man/Auto.......................3-4
Trig ...........................3-5
How to Reduce or Ignore Noise and
Interference ......................3-6
Trigger Hysteresis ................3-6
How to use Trigger Level Setting.....3-7
III

4 Measuring Functions
Introduction to This Chapter .....4-2
Selecting Function ...................4-2
Frequency Measurements .......4-3
FREQ A, B.........................4-3
FREQ C ...........................4-3
RATIO A/B, B/A, C/A, C/B .............4-4
BURST A, B, C .....................4-4
Triggering ......................4-4
Burst Measurements using Manual
Presetting ......................4-5
Frequency Modulated Signals ..........4-6
Carrier Wave Frequency f0.........4-6
fmax ...........................4-7
fmin ............................4-7
Dfp-p ...........................4-8
Errors in fmax,f
min, and Dfp-p .........4-8
AM Signals ........................4-8
Carrier Wave Frequency ...........4-8
Modulating Frequency .............4-9
Theory of Measurement ..............4-9
Reciprocal Counting ..............4-9
Sample-Hold...................4-10
Time-Out......................4-10
Measuring Speed ...............4-10
PERIOD..........................4-12
SingleA,B.....................4-12
AverageA,B,C.................4-12
Time Measurements ...........4-13
Introduction .......................4-13
Triggering .....................4-13
Time Interval ......................4-14
TimeIntervalAtoB..............4-14
TimeIntervalBtoA..............4-14
TimeIntervalAtoA,BtoB........4-14
Rise/Fall Time A/B..................4-14
Pulse Width A/B ...................4-15
Duty Factor A/B ....................4-15
Measurement Errors ................4-15
Hysteresis.....................4-15
Overdrive and Pulse Rounding .....4-16
Auto Trigger....................4-16
Phase .......................4-17
What is Phase? ....................4-17
Resolution ........................4-17
Possible Errors ....................4-18
Inaccuracies ...................4-18
Voltage ......................4-22
VMAX,V
MIN,V
PP ....................4-22
VRMS ............................4-23
5 Measurement Control
About This Chapter ..................5-2
MeasurementTime...............5-2
GateIndicator...................5-2
SingleMeasurements.............5-2
Hold/Run&Restart...............5-2
Arming.........................5-2
StartArming.....................5-3
StopArming.....................5-3
Controlling Measurement Timing . 5-4
The Measurement Process ............5-4
Resolution as Function of
MeasurementTime...............5-4
MeasurementTimeandRates ......5-5
WhatisArming? .................5-5
Arming Setup Time ..................5-9
Arming Examples ...................5-9
Introduction to Arming Examples.....5-9
#1 Measuring the First Burst Pulse . . . 5-9
#2 Measuring the Second
BurstPulse ....................5-11
#3 Measuring the Time Between
BurstPulse#1and#4............5-12
#4 Profiling ....................5-13
6 Process
Introduction ........................6-2
Averaging ......................6-2
Mathematics .......................6-2
Example:.......................6-2
Statistics ..........................6-3
Allan Deviation vs. Standard Deviation 6-3
SelectingSamplingParameters .....6-3
Measuring Speed ................6-4
Determining Long or Short Time
Instability .......................6-4
StatisticsandMathematics .........6-5
Confidence Limits ................6-5
JitterMeasurements ..............6-5
Limits .............................6-6
Limit Behavior ...................6-6
LimitMode......................6-7
Limits and Graphics..................6-7
IV
7 Performance Check
General Information..................7-2
Preparations .......................7-2
Test Equipment .....................7-2
Front Panel Controls .................7-3
InternalSelf-Tests................7-3
Keyboard Test ...................7-3
Short Form Specification Test ..........7-5
Sensitivity and Frequency Range ....7-5
Voltage ........................7-6
Trigger Indicators and Input Controls. . 7-7
Trigger Level Check ..............7-8
Reference Oscillators .............7-8
ResolutionTest ..................7-9
Rear Inputs/Outputs .................7-9
10MHzOUT....................7-9
EXTREFFREQINPUT............7-9
EXTARMINPUT.................7-9
Measuring Functions ................7-10
Check of HOLD OFF Function ........7-10
Options ..........................7-11
Input C Check ..................7-11
8 Specifications
Introduction ........................8-2
Measurement Functions ..............8-2
Frequency A, B, C ................8-2
Frequency Burst A, B, C ...........8-2
PeriodA,B,CAverage............8-2
PeriodA,BSingle................8-3
RatioA/B,B/A,C/A,C/B...........8-3
Time Interval A to B, B to A, A to A,
BtoB..........................8-3
PulseWidthA,B.................8-3
RiseandFallTimeA,B............8-3
PhaseARel.B,BRel.A...........8-4
DutyFactorA,B .................8-4
Vmax,V
min,V
p-p A,B ...............8-4
TimestampingA,B ...............8-4
Auto Set / Manual Set .............8-5
Input and Output Specifications ........8-5
Inputs A and B ...................8-5
Input C (PM6690/6xx) .............8-6
Input C (PM6690/7xx) .............8-6
Rear Panel Inputs & Outputs ........8-6
Auxiliary Functions ..................8-7
Trigger Hold-Off ..................8-7
ExternalStart/StopArming .........8-7
Statistics .......................8-7
Mathematics ....................8-7
OtherFunctions..................8-7
Display.........................8-8
GPIBInterface...................8-8
USBInterface ...................8-8
TimeView™.....................8-8
Measurement Uncertainties ...........8-9
Random Uncertainties .............8-9
SystematicUncertainties...........8-9
Time Interval, Pulse Width,
Rise/FallTime..................8-10
Frequency & Period..............8-10
Ratio f1/f2......................8-10
Phase ........................8-10
DutyFactor....................8-10
Calibration ........................8-11
DefinitionofTerms...............8-11
General Specifications ..............8-11
EnvironmentalData..............8-11
Power Requirements .............8-11
Explanations ...................8-12
Timebase Options ...............8-12
Dimensions&Weight ............8-13
Ordering Information ................8-13
9 Index
10 Service
Sales and Service office .............10-2
V

VI
GENERAL INFORMATION
About this Manual
This manual contains directions for use that apply to the Timer/Counter/Analyzer PM6690.
In order to simplify the references, the PM6690 is further referred to throughout this manual
as the '90'.
Warranty
The Warranty Statement is part of the Getting Started Manual that is included with the shipment.
Declaration of Conformity
The complete text with formal statements concerning product identification, manufacturer and
standards used for type testing is available on request.

Chapter 1
Preparation for Use

Preface
Introduction
Congratulations on your choice of instrument.
It will serve you well for many years to come.
Your Timer/Counter/Analyzer is designed to
bring you a new dimension to bench-top and
system counting. It offers significantly in-
creased performance compared to traditional
Timer/Counters. The '90' offers the following
advantages:
–12 digits of frequency resolution per sec-
ond and 100 ps resolution, as a result of
high-resolution interpolating reciprocal
counting.
–A variety of HF prescaler options with up-
per frequency limits ranging from 3 GHz
to 8 GHz.
–Integrated high performance GPIB inter-
face using SCPI commands.
–A fast USB interface that replaces the tra-
ditional but slower RS-232 serial interface.
–Timestamping; the counter records exactly
when a measurement is made.
–A high measurement rate of up to
250 k readings/s to internal memory.
Powerful and Versatile
Functions
A unique performance feature in your new in-
strument is the comprehensive arming possi-
bilities, which allow you to characterize virtu-
ally any type of complex signal concerning
frequency and time.
For instance, you can insert a delay between
the external arming condition and the actual
arming of the counter. Read more about Arm-
ing in Chapter 5, “Measurement Control”.
In addition to the traditional measurement
functions of a timer/counter, these instruments
have a multitude of other functions such as
phase, duty factor, rise/fall-time and peak
voltage. The counter can perform all
measurement functions on both main inputs
(A & B). Most measurement functions can be
armed, either via one of the main inputs or via
a separate arming channel (E).
By using the built-in mathematics and statis-
tics functions, the instrument can process the
measurement results on your benchtop, with-
out the need for a controller. Math functions
include inversion, scaling and offset. Statistics
functions include Max, Min and Mean as well
Preparation for Use
1-2 Preface

as Standard and Allan Deviation on sample
sizes up to 2*109.
No Mistakes
You will soon find that your instrument is
more or less self-explanatory with an intuitive
user interface. A menu tree with few levels
makes the timer/counter easy to operate. The
large backlit graphic LCD is the center of in-
formation and can show you several signal pa-
rameters at the same time as well as setting
status and operator messages.
Statistics based on measurement samples can
easily be presented as histograms or trend
plots in addition to standard numerical mea-
surement results like max, min, mean and
standard deviation.
The AUTO function triggers automatically on
any input waveform. A bus-learn mode sim-
plifies GPIB programming. With bus-learn
mode, manual counter settings can be trans-
ferred to the controller for later reprogram-
ming. There is no need to learn code and syn-
tax for each individual counter setting if you
are an occasional bus user.
Design Innovations
State of the Art Technology
Gives Durable Use
These counters are designed for quality and
durability. The design is highly integrated.
The digital counting circuitry consists of just
one custom-developed FPGA and a 32-bit
microcontroller. The high integration and low
component count reduces power consumption
and results in an MTBF of 30,000 hours.
Modern surface-mount technology ensures
high production quality. A rugged mechanical
construction, including a metal cabinet that
withstands mechanical shocks and protects
against EMI, is also a valuable feature.
High Resolution
The use of reciprocal interpolating counting
in this new counter results in excellent relative
resolution: 12 digits/s for all frequencies.
The measurement is synchronized with the in-
put cycles instead of the timebase. Simulta-
neously with the normal “digital” counting,
the counter makes analog measurements of
the time between the start/stop trigger events
and the next following clock pulse. This is
done in four identical circuits by charging an
integrating capacitor with a constant current,
starting at the trigger event. Charging is
stopped at the leading edge of the first follow-
ing clock pulse. The stored charge in the inte-
grating capacitor represents the time differ-
ence between the start trigger event and the
leading edge of the first following clock pulse.
A similar charge integration is made for the
stop trigger event.
When the “digital” part of the measurement is
ready, the stored charges in the capacitors are
Preface 1-3
Preparation for Use

measured by means of Analog/Digital
Converters.
The counter’s microprocessor calculates the
result after completing all measurements, i.e.
the digital time measurement and the analog
interpolation measurements.
The result is that the basic “digital resolution”
of ±1 clock pulse (10 ns) is reduced to 100 ps
for the '90'.
Since the measurement is synchronized with
the input signal, the resolution for frequency
measurements is very high and independent of
frequency.
The counters have 14 display digits to ensure
that the display itself does not restrict the res-
olution.
Remote Control
This instrument is programmable via two in-
terfaces, GPIB and USB.
The GPIB interface offers full general func-
tionality and compliance with the latest stan-
dards in use, the IEEE 488.2 1987 for HW and
the SCPI 1999 for SW.
In addition to this 'native' mode of operation
there is also a second mode that emulates the
Agilent 53131/132 command set for easy ex-
change of instruments in operational ATE
systems.
The USB interface is mainly intended for the
lab environment in conjunction with the op-
tional TimeView™ analysis software. The
communication protocol is a proprietary ver-
sion of SCPI.
Fast GPIB Bus
These counters are not only extremely power-
ful and versatile bench-top instruments, they
also feature extraordinary bus properties.
The bus transfer rate is up to 2000 triggered
measurements/s. Array measurements to the
internal memory can reach 250 k measure-
ments/s.
This very high measurement rate makes new
measurements possible. For example, you can
perform jitter analysis on several tens of thou-
sands of pulse width measurements and cap-
ture them in a second.
An extensive programming manual helps you
understand SCPI and counter programming.
The counter is easy to use in GPIB environ-
ments. A built-in bus-learn mode enables you
to make all counter settings manually and
transfer them to the controller. The response
can later be used to reprogram the counter to
the same settings. This eliminates the need for
the occasional user to learn all individual pro-
gramming codes.
Complete (manually set) counter settings can
also be stored in 20 internal memory locations
and can easily be recalled on a later occasion.
Ten of them can be user protected.
Preparation for Use
1-4 Preface

Safety
Introduction
Even though we know that you are eager to
get going, we urge you to take a few minutes
to read through this part of the introductory
chapter carefully before plugging the line con-
nector into the wall outlet.
This instrument has been designed and tested
for Measurement Category I, Pollution Degree
2, in accordance with EN/IEC 61010-1:2001
and CAN/CSA-C22.2 No. 61010-1-04 (in-
cluding approval). It has been supplied in a
safe condition.
Study this manual thoroughly to acquire ade-
quate knowledge of the instrument, especially
the section on Safety Precautions hereafter
and the section on Installation on page 1-7.
Safety Precautions
All equipment that can be connected to line
power is a potential danger to life. Handling
restrictions imposed on such equipment
should be observed.
To ensure the correct and safe operation of the
instrument, it is essential that you follow gen-
erally accepted safety procedures in addition
to the safety precautions specified in this man-
ual.
The instrument is designed to be used by
trained personnel only. Removing the cover
for repair, maintenance, and adjustment of the
instrument must be done by qualified person-
nel who are aware of the hazards involved.
The warranty commitments are rendered
void if unauthorized access to the interior
of the instrument has taken place during
the given warranty period.
Safety 1-5
Preparation for Use

Caution and Warning
Statements
CAUTION: Shows where incorrect
procedures can cause damage to,
or destruction of equipment or
other property.
WARNING: Shows a potential danger
that requires correct procedures or
practices to prevent personal in-
jury.
Symbols
Shows where the protective ground
terminal is connected inside the instrument.
Never remove or loosen this screw.
This symbol is used for identifying the
functional ground of an I/O signal. It is always
connected to the instrument chassis.
Indicates that the operator should
consult the manual.
One such symbol is printed on the instrument,
below the A and B inputs. It points out that the
damage level for the input voltage decreases
from 350 Vpto 12Vrms whenyouswitchthe
input impedance from 1 MWto 50 W.
If in Doubt about Safety
Whenever you suspect that it is unsafe to use
the instrument, you must make it inoperative
by doing the following:
–Disconnect the line cord
–Clearly mark the instrument to prevent its
further operation
–Inform your Fluke representative.
For example, the instrument is likely to be un-
safe if it is visibly damaged.
Preparation for Use
1-6 Safety
Fig. 1-1 Do not overlook the safety in-
structions!

Unpacking
Check that the shipment is complete and that
no damage has occurred during transportation.
If the contents are incomplete or damaged, file
a claim with the carrier immediately. Also no-
tify your local Fluke sales or service organiza-
tion in case repair or replacement may be re-
quired.
Check List
The shipment should contain the following:
–Counter/Timer/Analyzer, Model 90
–Line cord
–N-to-BNC Adapter (only if one of the
prescaler options has been ordered)
–Printed version of the Getting Started
Manual.
–Brochure with Important Information
–Certificate of Calibration
–Options you ordered should be installed.
See Identification below.
–CD including the following documentation
in PDF:
•Getting Started Manual
•Operators Manual
•Programming Manual
Identification
The type plate on the rear panel shows type
number and serial number. See illustration on
page 2-5. Installed options are listed under the
menu User Options - About, where you can
also find information on firmware version and
calibration date. See page 2-12.
Installation
Supply Voltage
nSetting
The Counter may be connected to any AC
supply with a voltage rating of 90 to 265
Vrms, 45 to 440 Hz. The counter automati-
cally adjusts itself to the input line voltage.
nFuse
The secondary supply voltages are electroni-
cally protected against overload or short cir-
cuit. The primary line voltage side is protected
by a fuse located on the power supply unit.
The fuse rating covers the full voltage range.
Consequently there is no need for the user to
replace the fuse under any operating condi-
tions, nor is it accessible from the outside.
Unpacking 1-7
Preparation for Use

CAUTION: If this fuse is blown, it is
likely that the power supply is
badly damaged. Do not replace the
fuse. Send the counter to the local
Service Center.
Removing the cover for repair, maintenance
and adjustment must be done by qualified and
trained personnel only, who are fully aware of
the hazards involved.
The warranty commitments are rendered
void if unauthorized access to the interior
of the instrument has taken place during
the given warranty period.
Grounding
Grounding faults in the line voltage supply
will make any instrument connected to it dan-
gerous. Before connecting any unit to the
power line, you must make sure that the pro-
tective ground functions correctly. Only then
can a unit be connected to the power line and
only by using a three-wire line cord. No other
method of grounding is permitted. Extension
cords must always have a protective ground
conductor.
CAUTION: If a unit is moved from a
cold to a warm environment, con-
densation may cause a shock
hazard. Ensure, therefore, that the
grounding requirements are strictly
met.
WARNING: Never interrupt the
grounding cord. Any interruption of
the protective ground connection
inside or outside the instrument or
disconnection of the protective
ground terminal is likely to make
the instrument dangerous.
Orientation and Cooling
The counter can be operated in any position
desired. Make sure that the air flow through
the ventilation slots at the top, and side panels
is not obstructed. Leave 5 centimeters (2
inches) of space around the counter.
Fold-Down Support
For bench-top use, a fold-down support is
available for use underneath the counter. This
support can also be used as a handle to carry
the instrument.
Preparation for Use
1-8 Unpacking
Fig. 1-2 Fold-down support for comfort-
able bench-top use.

Rackmount Adapter
If you have ordered a 19-inch rack-mount kit
for your instrument, it has to be assembled af-
ter delivery of the instrument. The rackmount
kit consists of the following:
–2 brackets, (short, left; long, right)
–4 screws, M5 x 8
–4 screws, M6 x 8
WARNING: Do not perform any inter-
nal service or adjustment of this
instrument unless you are qualified
to do so.
Before you remove the cover, dis-
connect mains cord and wait for
one minute.
Capacitors inside the instrument
can hold their charge even if the in-
strument has been separated from
all voltage sources.
nAssembling the Rackmount Kit
–Make sure the power cord is disconnected
from the instrument.
–Turn the instrument upside down.
See Fig. 1-5.
–Undo the two screws (A) and remove
them from the cover.
–Remove the rear feet by undoing the two
screws (B).
–Remove the four decorative plugs (C) that
cover the screw holes on the right and left
side of the front panel.
–Grip the front panel and gently push at the
rear.
–Pull the instrument out of the cover.
Unpacking 1-9
Preparation for Use
Fig. 1-3 Dimensions for rackmounting
hardware.
Fig. 1-4 Fitting the rack mount brackets
on the counter.
Fig. 1-5 Remove the screws and push the
counter out of the cover.

–Remove the four feet from the cover.
Use a screwdriver as shown in the following
illustration or a pair of pliers to remove the
springs holding each foot, then push out the
feet.
–Push the instrument back into the cover.
See Fig. 1-5.
–Mount the two rear feet with the screws
(B) to the rear panel.
–Put the two screws (A) back.
–Fasten the brackets at the left and right
side with the screws included as illustrated
in Fig. 1-3.
–Fasten the instrument in the rack via
screws in the four rack-mounting holes
The long bracket has an opening so that cables
for Input A, B, and C can be routed inside the
rack.
nReversing the Rackmount Kit
The instrument may also be mounted to the
right in the rack. To do so, swap the position
of the two brackets.
Preparation for Use
1-10 Unpacking
Fig. 1-6 Removing feet from the cover.

Chapter 2
Using the Controls

Using the Controls
2-2 Basic Controls
INPUT A
Opens the menu from
which you can adjust all
settings for Input A like
Coupling,Impedance
and Attenuation.
INPUT B
Opens the menu from
which you can adjust all
settings for Input B like
Coupling,Impedance
and Attenuation.
SETTINGS
Select measurement pa-
rameters such as mea-
surement time, number
of measurements, and
so on.
STANDBY LED
The LED lights up when the
counter is in STANDBY
mode, indicating that power
is still applied to an internal
optional OCXO, if one has
been installed.
STANDBY/ON
Toggling secondary
power switch.
Pressing this button
in standby mode
turns the counter
ON and restores the
settings as they
were at
power-down.
MATH/LIMIT
Menu for selecting
one of a set of for-
mulas for modifying
the measurement
result. Three con-
stants can be en-
tered from the
keyboard.
Numerical limits
canalsobeen
-
tered for status re-
porting and
recording
USER OPT.
Controls the follow-
ing items:
1. Settings memory
2. Interface
3. Calibration
4. Self-test
5. About
Basic Controls
A more elaborate description of the front and
rear panels including the user interface with
its menu system follows after this introductory
survey, the purpose of which is to make you
familiar with the layout of the instrument.

Basic Controls 2-3
Using the Controls
HOLD/RUN
Toggles between
HOLD (one-shot)
mode and RUN
(continuous)
mode. Freezes
the result after
completion of a
measurement if
HOLD is active.
RESTART
Initiates one
new measure-
ment if HOLD is
active.
EXIT/OK
Confirms menu
selections and
moves up one
level in the menu
tree.
CANCEL
Moves up one
menu level with-
out confirming
selections made.
Exits REMOTE
mode if not
LOCAL
LOCKOUT.
ENTER
Confirms menu
selections with-
out leaving the
menu level.
STAT/PLOT
Enters one of
three statistics
presentation
modes.
Switching be-
tween the modes
is done by
toggling the key.
VALUE
Enters the nor-
mal numerical
presentation
mode with one
main parameter
and a number of
auxiliary parame-
ters.
MEAS FUNC
Menu tree for
selecting mea-
surement func-
tion.
You can use the
seven softkeys
below the dis-
play for confir-
mation.
AUTO SET
Adjusts input
trigger voltages
automatically to
the optimum lev-
els for the cho-
sen measure-
ment function.
Double-click for
default settings.
CURSOR
CONTROL
The cursor
position, marked
by text inversion
on the display,
canbemovedin
four directions.

Using the Controls
2-4 Secondary Controls
GRAPHIC DISPLAY
320 x 97 pixels LCD with backlight for show-
ing measurement results in numerical as well
as graphical format. The display is also the
center of the dynamic user interface, compris-
ing menu trees, indicators and information
boxes.
SOFTKEYS
The function of these seven keys is menu de-
pendent. Actual function is indicated on the
LCD.
Depressing a softkey is often a faster alterna-
tive to moving the cursor to the desired posi-
tion and then pressing OK.
MAIN INPUTS
The two identical DC
coupled channels A &
B are used for all
types of measure-
ments, either one at a
time or both together.
RF INPUT
(Optional Input C)
A number of RF
prescalers are
available, covering
different frequency
ranges. These units
are fully automatic
and no controls af-
fect the perfor-
mance. The Type
N connector is fit-
ted only if a
prescaler is
installed.
TRIGGER IN-
DICATORS
Blinking LED in-
dicates correct
triggering.
GATE INDI-
CATOR
A pending mea-
surement
causes the
LED to light up.
NUMERIC INPUT KEYS
Sometimes you may want to enter numeric values like the
constants and limits asked for when you are utilizing the
postprocessing features in MATH/LIMIT mode. These
twelve keys are to be used for this purpose.
Secondary Controls
Connectors & Indicators
Other manuals for PM6690
1
Table of contents
Other Fluke Measuring Instrument manuals

Fluke
Fluke VR101S User manual

Fluke
Fluke FindFiber Source User manual

Fluke
Fluke 771 Use and care manual

Fluke
Fluke 381 User manual

Fluke
Fluke i1000s Reference guide

Fluke
Fluke 317 User manual

Fluke
Fluke 365 User manual

Fluke
Fluke MP Series User manual

Fluke
Fluke RaySafe 452 User manual

Fluke
Fluke 279 FC User manual
Popular Measuring Instrument manuals by other brands

edc
edc SM-7204 user guide

PCB Piezotronics
PCB Piezotronics IMI SENSORS 625B10 Installation and operating manual

Endress+Hauser
Endress+Hauser PROFIBUS PA Levelflex FMP56 operating instructions

LSI LASTEM
LSI LASTEM Heat Shield Quick user guide

Clarke
Clarke CM145 User instructions

SICK
SICK NAV200 operating instructions