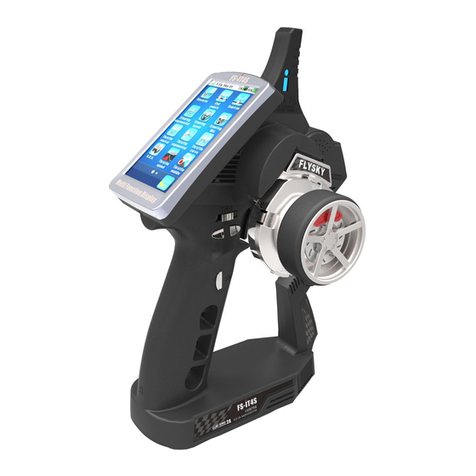
Fly Sky FS-IT4 User manual

Copyright ©2008-2012 Flysky co., ltd
This product is suitable for
15 years old and above
本产品不适合15岁以下儿童使用
用户手册
Digital propotional radio control system
http://www.flysky-cn.com

目录
1,Introduction 简介………………….…………………………………………..…..……………........2
2,Services 服务………………………… …………………………………………………………..........2
3,Special symbols 特殊标志………………………………………………………………...…….....3
4,Safety guide 安全指导…………………………………………………………………..………......3
5,2.4GHz System 2.4G系统……………………………………………………………….……….....6
6,Battery charging notes 电池充电注意事项…………….……………………………..………7
7,Transmitter specifications 发射机参数……………………………………………..…………8
8, Receiver specifications 接收机参数…………………………………………………...………8
8.01,Speed acquisition module 磁感应速度采集模块……………………………….… 9
8.02,Speed acquisition module 光感应速度采集模块…………………………………. 9
8.03,Temperature acquisition module 温度采集模块……...………………………….. 9
8.04,Voltage acquisition module 电压采集模块…………...…………………………… 9
8.05,Serial bus recerver 串行总线接收机………….………………………………….……... 9
9,Receiver and servo connections 接收机与伺服器连接 ……………………………..….10
10,FS-iR4 operation instruction FS-iR4接收机操作说明…………………………….....11
11,Power on 开机…………………………………………………………………………………….......15
12,Shut down 关机…………………………………………………………………………….……...... 15
13,Definition of key functions 按键定义………………………………………………………. 16
14,Main screen 开机画面……………………………………………………………………………... 17
15,Main menu 主菜单……………………………………………………………………………........ 18
16,Top tray 顶部状态栏…………………………………………………………………………….......18
17,Functions interface 功能操作………………………………………………………………… 19
17.01,Reverse 正逆转…………………………………………………………………………….........21
17.02,End points 舵机最大行程…………………………………………………………………..... 21
17.03,Sub trims 记忆微调………………………………………………………………………........ 22
17.04,Steering exponential 方向指数……………………………………………………………22
17.05,Steering speed 方向速度………………………………………………………………….....23
17.06,Steering mix 方向混控……………………………………………………………………......23
17.07,Throttle neutral 油门死区………………………………………………………………......24
17.08,Throttle exponential 油门指数…………………………………………………………….24
17.09,Throttle curve 油门曲线…………………………………………………………………......25
17.10,A.B.S. 自动刹车……………………………………………………………………………......... 26
17.11,Throttle speed 油门速度…………………………………………………………………….. 27
17.12,Throttle middle point 油门中位………………………………………………………… 27
17.13,Throttle idle up 油门怠速…………………………………………………………………....27
17.14,Engine cut 油门锁定……………………………………………………………………….......27
17.15,Boat mode 船模式……………………………………………………………………………....28
17.16,Brake mixing 刹车混控……………………………………………………………………….. 28
17.17,Mixes 混控……………………………………………………………………..……………........ 29
17.18,Display servos 显示舵机……………………………………………………….……………..30
17.19,Race timer 计时器……………………………………………………………………………....31
17.20,Keys function 按键功能………………………………………………………………………. 32
17.21,Models 模型…………………………………………………………………………………....... 33
17.22,RX setup 接收设置………………………………………………………………………….......34
17.23,System 系统…………………………………………………………………………………….....37
18,Transemitter function notes 发射机功能说明……………………………………………39
19,Packaging content 包装内容…………………………………………………………………….42
20,FCC Statement FCC声明………………………………………………………………………… 43
Table of contents
1
Digital propotional radio control system

1. Introduction
2. Services
Thank you for choosing the Fly Sky FS-iT4 4 channels 2.4GHz AFHDS 2 computerized
digitalproportional R/C car and boat system. If it’s your first use of a computerized radio
system, this user manual will bring you easily to a new world of fun and sophistication. In all
cases, please read carefully and completely this user manual as it contains all information
to keep you safe.
如果您使用时遇到任何问题,请参照此说明书。如果您的问题仍然未能解决,请直接联系当地经销商
或者我们网站上的客服人员.
If you encounter any problem during use, please refer to this manual. If the problem still
persists, please contact your local dealer or connect to our service and support website:
感谢您选择富斯出品的FS-iT4四通道2.4G可编程AFHDS第二代遥控系统,该系统可兼容车船两种
模式。如果这是您第一次使用可编程遥控系统,这本使用手册将很快地带给您一个有趣又高端的全新世
界。因此,为了确保您安全使用本产品,请仔细地完整阅读这本使用手册。
http://www.flysky-cn.com
简介
服务
http://www.flysky-cn.com
2

如果使用者不按照说明方法操作,有可能导致使用者严重受伤,甚至致命的危险。
3. Special symbols
4. Safety guide
Do not use it in the night or a lighting storm as the bad weather will make the remote
control out of control.
The shutdown sequence must be to first disconnect the receiver battery then to switch
off the transmitter. If the transmitter is switched off while the receiver is still powered, it
may lead to uncontrolled movement or engine start and may cause an accident.
请不要在夜晚或者雷雨天使用此产品,因为恶劣的天气环境有可能导致遥控设备失控。
操控时, 请先确认模型所有舵机的动作方向与操控方向一致。如果不一致,请调整好正确的
方向。
关闭时,请务必先关闭接收机电源,然后关闭发射机,如果关闭发射机电源时接收机仍然在工
作,将有可能导致遥控设备失控或者引擎继续工作而引发事故。
强制 禁止
当以下标志出现在说明书的时候请注意并且仔细阅读。
如果使用者不按照说明方法操作,有可能导致使用者严重受伤。
如果使用者不按照说明方法操作,有可能导致使用者外伤,甚至严重受伤。
Not following these instructions may expose the user to serious
injuries or death.
Not following these instructions may expose the user to serious
injuries.
Not following these instructions may expose the user to minor
injuries and even to serious injuries.
Prohibited
Please pay attention to the following symbols when they appear in the manual
and read carefully.
特殊标志
安全指导
3
Digital propotional radio control system
Make sure moving direction of all motors be same with the operating direction. If not,
please adjust direction first.
In particular, the 2.4G R/C system will affect the plane or the car nearby after you turn on the transmitter.
特别要注意,如果附近有汽车正在运行或飞机正在飞行, 开机后2.4 GHz RC系统可能会影响到他们。

Be sure to set the Fail Safe function.
一定要启用防失控功能.
Always perform a operating range check prior to using.
Problems with the radio control system as well as improper installation in a model could cause loss of
control.(Simple range test method) Have a friend hold the model, or clamp it down or place it where the
wheels or prop cannot come in contact with any object. Walk away and check to see if the servos follow
the movement of the controls on the transmitter. Should you notice any abnormal operation, and do not
operate the model. Also check to be sure the model memory matches the model in use.
总是在操作模型之前进行全面的检查。
无线电控制系统出现问题以及不正确安装, 都有可能导致模型失控,简单的距离测试方法:
一个人把持模型,或者提起来让轮子与地面无法接触,另一个人持发射机走开,检查该伺服系统运转情况,。测试
时要注意到若有异常出现,请不要操作模型。也检查模型的记忆, 以确保模型的匹配是适当的。
Do not operate outdoors on rainy days, run through puddles of water or use when visibility is limited.
Should any type of moisture (water or snow) enter any component of the system, erratic operation and
loss of control may occur.
不要在户外雨天,有水的地方或当能见度有限的时候使用。可能水分(水或雪)会进入到系统内部,不稳定的运行
和失控可能发生。
Do not operate in the following places.
-Near other sites where other radio control activity may occur.
-Near people or roads.
-On any pond when passenger boats are present.
-Near high tension power lines or communication broadcasting antennas.
Interference could cause loss of control. Improper installation of your Radio Control System in your
model could result in serious injury.
不要操作在以下的地方。
基站附近或其他无线电活跃的地方;
人多的地方或道路附近。
有客船的水域。
高压电线或通信广播天线附近。
干扰可能导致失控。安装不正确,无线电控制系统可能导致模型发生严重的伤害。
Do not operate this R/C system when you are tired, not feeling well or under the influence of alcohol
or drugs.
Your judgment is impaired and could result in a dangerous situation that may cause serious injury to
yourself as well as others.
当你感到疲倦, 饮酒或吸毒后,不舒服的影响下,不要操作这个R / C系统。
判断力下降,而且可能发生危险的情况下, 对自己或他人可能造成严重的伤害。
Do not touch the engine, motor, speed control or any part of the model that will generate heat while the
model is operating or immediately after its use.These parts may be very hot and can cause serious burns.
当模型操作或使用后,请勿触摸发动机、电机、调速器或任何可能发热的部分,这些部分可能非常热,会造成严
重的烧伤。
Turn on the power:
Turning on the power switches,Always check the throttle trigger on the transmitter to be sure it is at the
neutral position.
When making adjustments to the model, do so with the engine not running or the motor disconnected.
You may unexpectedly lose control and create a dangerous situation.
开机时,每次都要检查发射器的油门中位是不是处于中间位置。
当发射机作出调整时,可能模型的引擎没有运行或电机没有连接。可能会发生失控或意外事故的情况。
http://www.flysky-cn.com
4

5
Digital propotional radio control system
Storage:
1 Do not leave the radio system or models within the reach of small children.
A small child may accidentally operate the system. This could cause a dangerous situation and injuries.
2 Do not store your R/C system in the following places.
- Where it is extremely hot or cold.
- Where the system will be exposed to direct sunlight.
- Where the humidity is high.
-Where vibration is prevalent.
-Where dust is prevalent.
-Where the system would be exposed to steam and condensation.
Storing your R/C system under adverse conditions could cause deformation
and numerous problems with operation.
Notice:
do not expose plastic parts to fuel, motor spray, waste oil or exhaust.The fuel, motor spray, waste oil and
exhaust will penetrate and damage the plastic.
存储:
1 不要把无线电系统或模型放在幼儿伸手可及的。
小孩子可能会不小心操作系统,这可能发生危险的情况,造成伤害。
2 不要储存你的R / C系统在以下的地方:
极热或冷的地方。
直接暴露于强光下。
在高湿度环境。
振动频繁的地方。
灰尘多的地方。
在潮湿或者过于寒冷的地方.
存储你的R / C系统在不利条件下,可能会导致变形和许多操作问题。
注意:
请勿放置在燃料,电动机喷雾,废油或排气旁边。燃料,电动机喷雾,废油和排气将渗透和损害塑料。
Fail safe function
Before running (cruising), check the fail safe function.
Check Method; Before starting the engine, check the fail safe function as follows:
(1) Turn on the transmitter and receiver power switches.
(2) Wait at least 30 seconds, then turn off the transmitter. (The transmitter automatically
transfers the fail safe data to the receiver every 5 seconds.)
(3) Check if the fail safe function moves the servos to the preset position when reception fails.
The fail safe function is a safety feature that minimizes set damage by moving the servos to a preset
position when reception fails. However, if set to a dangerous position, it has the opposite effect. When
the reverse function was used to change the operating direction of a servo, the fail safe function must
be reset.
防失控功能;
检查操作步骤如下:
(1) 打开发射机和接收机,启动发射机防失控功能,并设定在正确的位置.
(2) 至少等待30秒钟,然后关掉发射机电源开关。(发射机每5秒会自动发送防失控的数据到接收机)。
(3) 检查在无接收时,接收机会不会使伺服系统处于预定的位置。
这个功能是一个安全功能,接收失败时,预置伺服系统到预定位置,可以最大限度地减少伤害.然而,如果设置为一
个不当的位置,会有相反的效果,必须重置伺服系统操作的位置。
Battery :
(1) Do not make the battery short circuit.
(2) Do not drop the battery or expose it to strong shocks or vibrations.The battery may short circuit
and overheat; electrolyte may leak out and cause burns or chemical damage.
电池:
不要短路电池两极。
不要把电池放置在有强烈冲击和振动的地方。电池可能会发生短路或过热;电解液泄漏出来,可能引起烧伤或
化学损坏。

5. 2.4GHz System 2.4G系统
http://www.flysky-cn.com
6
参数说明:
频率范围: 2.40-2.4835GHz
波段宽度: 500KHz
波段个数: 160个
发射功率: 不高于20dBm(100mW)
发射模式: AFHDS2(第二代自动跳频率数字系统)
编码方式: GFSK
天线长度: 26mm
接收机灵敏度: -105dBm
RF specifications:
RF range: 2.4000-2.4835GHz
Channel bandwidth: 500KHz
Number of channels: 160
RF power: less than 20dBm (100mW)
RF mode: AFHDS 2(Automatic Frequency Hopping
Digital System2)
Modulation type: GFSK
Antenna length: 26mm
RX sensitivity: -105dBm
The 2.4GHz radio band has a completely different
behavior than previously used lower frequency bands.
Keep always your model in sight as a large object can
block the RF signal and lead to loss of control and
danger. The 2.4GHz RF signal propagates in straight
lines and cannot get around objects on its path. Never
grip the transmitter antenna when operating a model
as it degrades significantly the RF signal quality and
strength and may cause loss of control and danger
Always turn on the transmitter first then the
receiver. When turning off the system, always turn
off the receiver first then the transmitter. This is to
avoid having the receiver on itself as it may pick a
wrong signal and lead to erratic servo movements.
This is particularly important for electric powered
models as it may unexpectedly turn on the motor
and lead to injuries or death.
Misuse of this radio system can lead to serious
injuries or death. Please read completely this
manual and only operate your radio system
according to it.
警告!
错误使用遥控设备将可能导致严重的伤害甚至
死亡。请在使用前完整阅读这本使用手册,并且在
使用过程中严格按照此手册的说明操作。
该2.4G无线电波段完全不同于之前所使用的低
频无线电波段。使用时要保持您的模型产品行驶在
您的视线范围内,因为大的障碍物将会阻断无线电
频率信号从而导致遥控失控和危险。2.4G无线电频
率信号是沿直线传播的,它不能绕过障碍物进行传
播。在使用过程中,严禁紧握发射机天线,否则将
会大大减弱无线电传播信号的质量和强度, 导致遥
控设备失控和危险。
警告!
每次使用时,必须先打开发射机,然后再给接收
机通电。停止使用时,必须先断开接收机电源,然
后再关闭发射机。 这样操作可以避免接收机接收到
错误信号而导致的伺服器无规律的抖动。这对于电
动模型来说尤为重要, 因为它有可能导致马达突然
转动而致使人员伤亡。
AFHDS2(第二代自动跳频系统),这个系统是
富斯公司全新专为模型爱好者自主研发,并具有自主
知识产权的一套数字无线系统。它是专门针对模型产
品而研发的,它具有超强的主动和被动抗干扰能力及
极低的使用功耗和极高的接收灵敏度,是目前市面上
最好的系统之一。此系统经过研发人员极端严格的测
试及专业玩家的验证,模型爱好者完全可以放心使用!
AFHDS2 ( automatic frequency hopping digital system
2 ), is developed by FLYSKY for all the Radio Control
model lovers and is patented by FLYSKY at home. The
system is specially developed for all the Radio control
models, that offers super active and passive anti-
jamming capabilities,very low power consumption and
higher receiver sensitivity. With extreme rigorous
testing byengineers and professional players for years,
FLYSKY AFHDS2 is now considered to be one ofthe
best systems available in the market.

This radio system works in the frequency range of 2.4000 to 2.4835GHz. This band has been
divided into 160 independent channels. Each radio system uses 16 different channels and 160
different types of hopping algorithm. By using various switch-on times, hopping scheme and
channel frequencies, the system can guarantee a jamming free radio transmission.
This radio system uses a high gain and high quality multidirectional antenna. It covers the whole
frequency band. Associated with a high sensitivity receiver, this radio system guarantees a
jamming free long range radio transmission.
Each transmitter has a unique ID. When binding with a receiver, the receiver saves that unique ID
and can accepts only data from that unique transmitter. This avoids picking another transmitter
signal and dramatically increases interference immunity and safety.
This radio system uses low power electronic components and a very sensitive receiver chip. The
RF modulation uses intermittent signal transmission thus reducing even more power consumption.
Comparatively, this radio system uses only a tenth of the power of a standard FM system.
此系统工作频率范围是2.4000到2.4835GHz。整个波段被分为160个独立频点。每套遥控系统
使用16个不同频点和160种不同的跳频算法。通过开机时间不同,跳频规律不同和已经不同的频点,
遥控系统能避免干扰传播信号.
此系统采用高质量的增益天线,覆盖整个波段带宽。配合高灵敏度接收机,系统能有效的避免远
距离传播信号的干扰。
每台发射机有一个唯一的ID码, 当和接收机对码之后, 接收机保存这个唯一的ID码并且只接受从
这个ID码发射机发出的信号。 这样可以避免接收到别的发射机信号,大大增强抗干扰能力和安全性。
此系统使用低功率电子元件和高灵敏度接收机芯片。无线电频率模块采用间歇性信号传播,因
此大大降低了发射功率。比较而言,此系统功耗仅为FM版本的十分之一。
System Characteristic 系统特征
7
Digital propotional radio control system
6. Battery charging notes
If your transmitter or receiver uses any type
of rechargeable batteries, please check
them before each flight and make sure they
are in good shape and fully charged
otherwise it may lead to loss of control,
injuries and death.
If you are using rechargeable batteries,
make sure to use a suitable charger with
the right charging current set otherwise it
may lead to battery overheating, fire or
explosion. Disconnect the battery from the
charger as soon as it is fully charged. If you
don’t plan to use your radio system for a
long period of time, remove the batteries from
the transmitter and the model as it may
damage them.
如果您的发射机或者接收机使用任何种类的可充
电电池,请在每次飞行前检查电池,确保电池完好无
损并且满电,否则有可能导致失控或者人员伤亡。
如果您使用的是可充电电池,请确保充电器符合
可充电电池规格并且用适当的电流进行充电否则将导
致电池过热,失火甚至爆炸。充满电后,请立即断开
充电电源.如果长时间不用遥控设备,请将电池从发射
机和模型中取出保存,以免有损遥控设备。
电池充电注意事项
6.01: Transmitter charger
1. 将锂电池按方向装
入发射机或者充电器
(合上发射机电池盖).
2. USB连上适配器
3. 插入发射机或者充
电器充电接口
4. 将适配器插入插座
此系统采用信息回传功能,此功能更好的掌握当前模型的工作状态。从而增添了操控乐趣以及
更加安全控制模型
This system uses the two-way communication, which could control the working state of current
model better and make the operation more enjoyable and safer than before.
适配器
(INPUT:100~240V
OUTPUT:6V-1500mA)
Adapter
PC
适配器
(INPUT:100~240V
OUTPUT:6V-1500mA)
Adapter
PC
1. Install the lipo battery to
the transmitter or charger
with correct direction,
then close the battery
cover.
2. Connect cable USB
with adapter.
3. Connect opposite end
of cable USB to the
transmitter or the charging
interface of the charger.
4. Insert the adapter into
socket.

7. Transmitter specifications
8.Receiver specifications
发射机参数
接收机参数
http://www.flysky-cn.com
8
MODEL:
MODEL:
R
Transmitter specifications:
机种参数
通道个数:4个通道
适合机种:车/船
频率范围:2.4-2.48GHz
波段宽度: 500KHz
波段个数: 160个
发射功率: 不高于20dBm
2.4G模式: 第二代自动跳频数字系统
编码方式: GFSK
通道分辨率: 1024级
低电压报警: 有(低于3.7伏时)
数据输出: 有(USB,HID)
方向盘转动角度:90度(左右各45度)
油门转动角度:45度(前进30度,后退15度)
充电接口: 有
天线长度: 26毫米
机身重量: 347克
输入电源: 3.7伏(1200毫安)
外形尺寸: 157*116*258mm
外观颜色: 黑色
认证: CE0678, FCC
Channels: 4
Model type: car/boat
RF range: 2.4-2.48GHz
Bandwidth: 500KHz
Band: 160
RF power: less than 20 dBm
2.4G system: AFHDS 2
Code type: GFSK
Sensitivity: 1024
Low voltage warning: yes(less than 3.7V)
DSC port: yes(USB HID)
ST range: 90
TH range: 45(F: 30;B:15)
Charger port: yes
Power: 3.7V(1200mAh)
Weight: 347g
ANT length: 26mm
Size: 157*116*258mm
Color: black
Certificate: CE0678, FCC
SPECIFICATIONS:机种参数:
Channels: 4
Model type:
RF range: 2.40-2.48GHz
Band: 160
RF power: less than 20 dBm
2.4G system: AFHDS2
Code type: GFSK
Power: 4.5-6.5V DC
Weight: 15g
ANT length: 26mm
Size: 35.4*29.6*13mm
Color: black
Certificate: Ce0678, FCC
RX Sensitivity: -105 dBm
AS-Bus PORT: yes
Data Acquisition port: yes
car/boat
通道个数: 4
适合机种: 车、船
频率范围: 2.40-2.48GHz
波段个数: 160个
发射功率: 不高于20dBm
接收灵敏度:-
.G: 第二代自动跳频数字系统
编码方式: GFSK
天线长度: 26毫米
机身重量: 15克
输入电源: 4.5-6.5V DC
外形尺寸: 35.4*29.6*13毫米
外观颜色: 黑色
认证: CE0678,FCC
AS-Bus接口: 有
数据采集接口: 有
105dBm
2 4

7
Digital propotional radio control system
9
磁感应速度采集模块
8.01. Speed acquisition module
MODEL: FS-SPD01
SPECIFICATIONS:机种参数:
适合机种: 车、船
采集速度范围: 0-16000转/分钟
机身重量: 10克
输入电源: 4.0-6.5V DC
外形尺寸: 24.4*14*8毫米
外观颜色: 黑色
Model type:
Monitor range of speed16000RPM
Power: 4.0-6.5V DC
Weight: 10g
Size: 24.4*14*8mm
Color: black
car/boat
温度采集模块
8.03. Temperature acquisition module
MODEL: FS-STM01
适合机种: 车、船
采集温度范围:- -100度
机身重量: 10克
输入电源:
外形尺寸: 24.4*14*8毫米
外观颜色: 黑色
40
4.0-6.5V DC
Model type:
Monitor range of temperature: 0-100°C
Power: 4.0-6.5V DC
Weight: 10g
Size: 24.4*14*8mm
Color: black
car/boat
SPECIFICATIONS:机种参数:
适合机种: 车、船
电压采集范围: 4.0-30V DC
机身重量: 10克
输入电源:
外形尺寸: 24.4*14*8毫米
外观颜色: 黑色
4.0-6.5V DC
Model type:
Monitor range of Voltage:
4.0-30V DC
Power: 4.0- . V DC
Weight: 10g
Size: 24.4*14*8mm
Color: black
car/boat
6 5
电压采集模块
:
8.04. Voltage acquisition module
MODEL: FS-SVT01
SPECIFICATIONS:机种参数:
通道个数:4
适合机种: 车、船
机身重量: 12克
输入电源:
外形尺寸: 30*25.6*13毫米
外观颜色: 黑色
ASbus接口: 有
4.0-6.5V DC
Channels: 4
Model type: car/boat
Weight: 12g
Power: 4.0-6.5V DC
Size: 30*25.6*13mm
Color: black
ASbus PORT: yes
串行总线接收机
:
8.05. Serial bus receiver
MODEL: FS-SEV01
SPECIFICATIONS:机种参数:
光感应速度采集模块
MODEL: FS-SPD02
SPECIFICATIONS:机种参数:
适合机种: 车、船
采集速度范围: 0-16000转/分钟
机身重量: 10克
输入电源: 4.0-6.5V DC
外形尺寸: 24.4*14*8毫米
外观颜色: 黑色
Model type:
Monitor range of speed16000RPM
Power: 4.0-6.5V DC
Weight: 10g
Size: 24.4*14*8mm
Color: black
car/boat
8.02. Speed acquisition module

9.Receiver and servo connections 接收机与伺服器连接
9.01. Installation when a motor controller is used:
带马达模型的安装连接
Remark: to guarantee a long range, place the antenna of
the receiver vertically away from any metal part.
注意: 为保证良好的遥控距离,请将接收机天线与模型机身垂直放
置并远离金属物体。
9.02. Installation for gas powered models:
发动机模型的安装
http://www.flysky-cn.com
10

10. FS-iR4接收机操作说明
CH1-CH4: 表示接收机的相应通道;
BIND,VCC: 表示用于对码和输入电源的通道;
OUT:表示输出PPM数据的ASbus接口,用于连接串行
总线接收机,扩展通道;
IN:表示各种传感器数据的输入接口,数据采集模块可
随意串接;
接口说明
对码
Binding
所有的发射机和接收机,在出厂前都己对码好,无需再次对码,若您需要与另的发射机进行对码
和使用,请按以下方法操作:
1. 发射机装上电池,打开电源;
2. 进入主界面,选择“接收机设置”功能。点触“对码”进入对码状态
3.用产品包装所配的对码线,插入接收机B/VCC 通道;
4. 使用6VDC电源,按正确极性,插入CH1-CH4的任一通道,即可进入对码状态,此时LED灯闪烁;
5. 成功对码后,发射机会自动退出对码状态;
6. 拔掉对码线,重启接收机LED常亮,此时即可插入舵机及其它数据采集模块,检测其工作是否正常;
7. 如果对码失败,可重复以上动作,重新对码。
注意:
配对好的发射机与接收机,当发射机或接收机因误操作而进入对码状态后,会出现不能遥控的现象,
一般情况下,关闭电源重开机即可恢复正常,倘若还是不行,则需要重新对码。
11
Digital propotional radio control system
FS-iR4 operation instruction
port instruction
CH1-CH4 represent relevant channel of transmitter.
BIND,VCC represent the channel used for matching
and input power respectively.
OUT: represent ASbus port of outputting PPMS data
and be used for connecting the serial bus
receiver to expand channels.
IN: Represent input ports of all kinds of sensor data,
and data acquisition modules can be connected
in serial optionally.
:
:
All receivers are already bound to their respective transmitter at production time. If you want to
bind it with another transmitter, please operate as follows:
1. Install the battery in the transmitter, and turn on the power.
2. Open the main menu, and select "RX setup" function in the second page, then touch "Bind with a
receiver" to enter bind mode.
3. Insert the standard bind cable into the power supply channel.
4. Connect the 6VDC power connector to any channel from CH1 to CH4 with correct polarity to enter
bind mode. The receiver LED will flash at this time.
5. The transmitter will exit the bind mode automatically after having successfully bound with the
transmitter.
6. Pull off the bind cable and restart the receiver. Please connect the servos and other telemetry
modules to the receiver to check if everything operates normally.
7. If anything is wrong, please repeat the above steps to bind again.
Notice:
The binded transmitter and receiver will work abnormally if the transmitter or the receiver enters the binding state
by mistake.In other words, the receiver cannot be controlled by the transmitter.
If so, just need to restart the transmitter and the receiver. If it still doesn't work,
please bind the transmitter with the receiver again.
battery
Bind Jumper
Receiver
电池
对码线
接收
?
Bind with a receiver
Bind receiver mode
active.
Press the back button
to exit.

FS-SEV01 serial bus receiver connection instruction
串行总线接收机,最多可串联4个模块,共18个通道;按键K1-K4分别对应C1-C4,用于对相应通道的设定;
操作说明:
1、FS-SEV01接收机的“IN”端口对应接收机的“OUT”端口;
2、FS-SEV01接收机的“OUT”端口,用于串接后级的FS-SEV01接收机,以串
联的方式使用。
3、将此总线接收机插入接收机,打开己配对的 ,接收机电源,LED点亮;
4、操作 触控屏,选择接收机设定的主菜单,进入到舵机设定界面;
5、选择需要扩展的通道,此时,总线接收机的LED熄灭;
6、用对码线上的胶针,按下需要的,相应通道的按键,LED自动点亮,表示设定
成功;
7、插入舵机,检查设定是否成功;
8、重复以上操作即可完成总线接收机4个通道的设定;
9、当需要更多的通道扩展时,只需要在第一级总线接收机的“OUT”端口,串接
新的总线接收机即可,设定的操作方法相同。
发射机
发射机
Data telemetry connection 数据采集模块连接
FS-SPD01:磁感应转速采集模块
采集模块的操作使用说明:
操作使用说明:
1、将所配的3PIN插头,一端插入速度采集模块的“OUT”位置,另一端插入
接收机的“IN”位置或接另外的感应器的“IN”位置,如上图所示;
2、将图3的传感器放在磁铁的旁边,磁铁固定在需要测试的轴向转动的地方。
如:模型车的轮毂内侧,如下图所示,传感器与磁铁尽可能的靠近些。
3、打开发射机,接收机电源,在显示屏的接收机窗口内,会发现并显示“
Motor speed 2:0RPM”,试着转动轮子,转速的值会发生变化,则表示安装成功。
http://www.flysky-cn.com
12
磁铁
magnet
串行总线接收机连接说明
Serial bus receiver can connect 4 modules with 18 channels in serial at most. Button K1 and K2 correspond to
C1 and C2 respectively.
Operation:
1. “IN” port of FS-SEV01 receiver corresponds to “Out” port of receiver.
2. The “OUT” port of FS-SEVO1 receiver is used to connect post level FS-SEV01 receiver。
3. Insert the bus receiver to receiver, and then switch on the matched transmitter and receiver. The LED will
be on.
4. Select main menu of receiver setup to enter the interface of servo setup.
5. Select channel which need to be expanded, meanwhile LEDof bus receiver is off.
6. Push relevant channel button by plastic needle of matching line. The setup is successful if LED flashes
automatically.
7. Insert servo to check.
8. Set up 4 channels of bus receiver as above steps.
9. Just connect a new bus receiver with “OUT” port of first stage bus receiver if more channel needed. Set up
the new one as above steps.
Notice:
when the load of serial bus receiver is excessive and electric current is higher than usual, please supply
power directly to the serial bus receiver or it will break cables.
Data operation instruction
FS-SPD01: revolving speed module.
Operation:
1. Insert one end of standard 3 PIN plug into “OUT” port of speed acquisition
module, and insert the other end into “IN” port of receiver or other sensor,
as picture above.
2.
3. Switch on transmitter and receiver. “Motor speed 2:0RPM” will be shown in receiver window in display screen.
Speed value changes as turning wheel, which means installation is successful.
telemetry
Put the sensor beside the magnet as shown in Figure 3; fix the magnet to the position of axle which needs to test.
e.g.: As following picture shows, put the sensor to the magnet as close as possible in the inner wheel hub of car.
注意:当总线接收机的负载过重,电流较大时,请将主接收机的电源分支出来并联接入,单独供电加大负载的能力,
否则可能会因电流过大,烧坏串联的线材。
传感器
Sensor
轮子
Cai wheel

FS-STM01:温度采集模块连接
操作使用说明:
1. 将所配的3PIN连接线,一端插入温度采集模块的“OUT”位置,另一端插入接收机
的“IN”位置或接另外的感应器的“IN”位置;
2. 将温度的传感器本体,使用海棉双面贴粘在适当的位置(如:马达,电池本体上),
并与被测试物表面紧贴;
3. 打开发射机,接收机电源,在显示屏的接收机窗口内,会发现并显示
“Temperature 1:25.0℃”,表示安装成功,25.0℃即为采集到的温度数据。
Digital propotional radio control system
13
FS-STM01: Temperature connection
Operation:
1. Insert one end of standard 3 PIN plug into “OUT” port of temperature module, and insert the other end into
“IN” port of receiver or other sensor, as picture above.
2. Adhere temperature sensor to proper place (such as motor and battery) tightly by sponge double stick.
3. Switch on transmitter and receiver. “Temperature 1:25 0℃” will be shown in receiver window in display screen,
which means installation is successful, and 25 0℃ is the temperature collected.
telemetry
FS-SPD02:光感应转速采集模块
采集模块的操作使用说明:
操作使用说明:
1、将所配的3PIN插头,一端插入速度采集模块的“OUT”位置,另一端插入
接收机的“IN”位置或接另外的感应器的“IN”位置,如上图所示;
2、将图2所示,传感器与反射贴纸固定在轮子的侧面平面上,保持贴纸平整,并与传感器垂直;
(备注:贴纸与轮子的颜色反差要大)传感器和贴纸距离要保持适中。
3、打开发射机,接收机电源,在显示屏的接收机窗口内,会发现并显示“Motor speed 2:0RPM”,试着转动轮子,
转速的值会发生变化,则表示安装成功。
备注: 也可安装在模型车的从动齿轮上,采用相同的方法采集齿轮的转速. 传感器
Sensor
轮子
Cai wheel 反射区
Magnet
Telemetry module
FS-SPD02: optical rotation speed telemetry module
Operation:
1. Connect one end of the standard 3 PIN plug to the "out" port of the
speed telemetry module and the other end to the "in" port of the receiver
or the previous sensors “in” port as pictured above.
2. As picture 2 shows, affix the sensor and the reflection decals on the flat
surface of the side of any rotating part (gear, car wheel…). Keep decals flat and
perpendicular to the sensor. (Remark: high color contrast between decals and rotating part gives better result).
Maintain sufficient safety distance between the sensor and the decals to avoid any damage.
3. Switch on the transmitter and the receiver. “Motor speed 2: 0RPM” will be displayed in the main screen.
The speed displayed will follow the speed of the rotating part monitored by the rotation speed sensor, indicating
a successful installation.
Remark: You can also fix it to the driven gear of the model car. Use the same method to collect RPM data of gear.

14
注意
请不要将采集模块的"IN"和“OUT”接反,否则发射机将无法识别到该模块及相连的后面的模块的编号.
Notice:
http://www.flysky-cn.com
Don't make IN port and OUT port oppositely, or it will cause that the transmitter can't distinguish each
telemetry module and its following telemetry module(s).
FS-SVT01: External voltage connection
Operation instruction:
1. Insert one end of standard 3 PIN plug into “OUT” port of external voltage module, and insert the other end
into “IN” port of receiver or other sensor, as picture above.
2. Switch on transmitter and receiver. “Ext.voltage4:12.40V” will be shown in receiver window in display screen,
which means the installation is successful.
3. Insert red and black contact pin into battery port respectively. The red one is positive pole and the black one
is negative pole. As shown: “Ext.voltage4:12.4v” is shown in the receive widow in display screen, which
means the tested voltage is 12.4v
Attention: the polarity of red and black line can not be reversed, or the receiver will be damaged.
telemetry
FS-SVT01:外部电压采集模块连接
操作使用说明:
1、将所配的3PIN连接线,一端插入电压采集模块的“OUT”位置,另一端插入接收机
的“IN”位置或接另外的感应器的“IN”位置;
2、打开发射机,接收机电源,在显示屏的接收机窗口内,会发现并显示
“Ext.voltage4:0V”,表示安装成功;
3、将用于检测的红黑线插针分别插入电池的插头内,红色线为正极,黑色线为负极,
如图所示;在显示屏的接收机窗口内,显示“Ext.voltage4:12.40V”,表示己检测
到外部的电池电压为:12.40V。
注意:用于检测的红黑线,不能接反,否则会损坏接收机。

11. Power on 开机
12. Shut down
1. Connnect all parts
2. Switch on the transmitter
3. Connect the receiver battery
4. The receiver red LED indicator is solid
indicating the presence of a correct signal
5.
6. Use the radio system
When the error rate of transmitter is less than 5%,
the signal of receiver is stable.
1. Cut off power source of receiver
Turn off the transmitter.2.
1. 连接好所有部件
2. 打开发射机
3. 接通接收机电源
4. 接收机红色指示灯常亮说明信号连接正常.
5.发射机的误码率小于5%,接收信号强度稳定(TX/RX电量
充足时)
6. 操作系统可以使用
1. 断开接收机电源
2. 关闭发射机
关机
注:未断开接收机电源,发射机电源是无法关闭的。
Attention: transmitter cannot be turned off if the power
source of receiver is not cut off.
15
Digital propotional radio control system

13. Definition of key functions 按键定义
LCD
Micro USB
TR2
TR3
SW2
SW1
TR1
TR4
2.4G ANT
SW3
TR5
9
Stylus
16 http://www.flysky-cn.com
Power
Throttle
Trigger
Steering wheel
LED

14. Main screen 开机画面
开机画面显示了富斯公司的标志, 两秒后进入到主菜单. 主菜单显示的具体内容如下图
发射机电池状态
接收机电池状态
方向通道状态
设置图标
帮助图标
接收机模块(传感器)反馈状态
接收信号
模型名称
油门通道状态
3通道状态
4通道状态
方向微调状态
油门微调状态
油门怠速开启
关闭声音
计时器开启
混控开启
刹车混控开启
船模式开启
油门曲线开启
ABS开启
油门锁定开启
The screen display the logo of FLYSKY. Entering the main menu after two seconds . the main menu is as the
following picture:
Model name
Receiver signal
Receiver sensor’s state feedback
Throttle curve
Engine cut
TH trim state
Help icon Settings icon
Setting trim state
4 channel state
3 channel state
Throttle channel state
Steering channel state
Turn sound
Race timer
Mixes
Break mixing
Boat modle
Throttle idle
Receiver battery
Transmitter battery
17
Digital propotional radio control system

15. Main menu
The main menu can be accessed by touching the settings
icon at the bottom of the main screen.
The main menu is organized in horizontal pages. Each
page contains up to 12 icons representing 12 different
functions.
The white balls in the bottom tray indicate which menu page
is displayed. The big white ball represents the currently
displayed page.
To display the next page, touch the current page anywhere
on its right part and slide it to the left.
To display the previous page, touch the current page
anywhere on its left part and slide it to the right.
To enter a function, simply touch its corresponding icon.
To return to the main screen, touch the back button
in the bottom tray.
主菜单
Main menu page 1 Main menu page 2
点触屏幕下方的设置图标 进入主菜单。
主菜单有两个平行页面组成,每个页面包含最多12个图标,
分别代表12个不同的功能。
屏幕底部的白色球体表示显示的菜单页面,大的白色球
体代表当前显示的页面。
点触当前页的任何位置由右向左滑动可显示下一页。
点触当前页的任何位置由左向右滑动可显示上一页。
点触相对应的图标可进入该功能。
点触底部的文件盘上的返回图标 可返回主屏幕。
16. Top tray 顶部状态栏
主菜单第一页 主菜单第二页
The top tray of the screen constantly displays the main status of the whole system.
屏幕顶部一直显示整个系统的主要状态。
displays the signal strength received by the vehicle. The strongest signal is
represented with 5 bars. When the signal strength is lower or equal to two bars, an
audible alarm rings.
displays the status of the receiver battery. If the voltage is too low, an audible alarm
rings and this symbol blinks. See further how to set up the receiver battery alarm
voltage.
显示接收机电池的状态。如果电压太低,可听见警报,并且这个图标将闪烁。如何设置接收
机电池低电压报警将在后文说明。
displays the status of the remote control battery. If the voltage is too low, an audible
alarm rings and this symbol blinks.
显示发射机电池的状态。如果电压太低,可听见警报,并且这个图标将闪烁。
displays the number and the name of the currently selected model.
显示当前选定的模型编号和名称。
显示模型接收到信号的强度。最强信号是5格,当信号强度等于或低于2格,将听到警报。
18 http://www.flysky-cn.com

17. 功能操作
Functions interface
All functions use a set of standard user interface objects.
The bottom tray can contain the following buttons:
The back buttons returns to the previous screen
The default button sets back the current page parameters to their default values.
These 2 buttons respectively enable and disable the current function.
A title bar displays the name of the current function or menu.
A white exclamation mark on the right of a title bar indicates that contextual help
is available. Touch it and it will be displayed.
To scroll down a help page, touch it anywhere on its bottom part and slide it up.
To up down a help page, touch it anywhere on its top part and slide it down.
To return to the calling function, touch the back button in the bottom tray.
所有的功能使用一套标准的用户界面对象。
屏幕底部包含以下图标:
返回图标用于返回上一页面
默认图标可将当前页参数恢复到默认值。
这两个按钮代表当前功能开启和关闭。
标题栏显示当前功能或菜单。
点触标题栏右边的问号可获得操作提示。
点触下方任意地方向上滑动,帮助页面将会向下滚动。
点触下方任意地方向下滑动,帮助页面将会向上滚动。
点触页面下方的返回图标回到上一功能。
A vertical menu allows to select one option among several.
This example selects the ABS parameter to set. The right gray vertical bar
indicates the lengths of the menu and the current position in it.
To scroll down a vertical menu, touch it anywhere on its bottom and slide it up.
To scroll up a vertical menu, touch it anywhere on its top and slide it down.
To select one of the menu items, simply touch it.
可以选择垂直方向的菜单其中一个选项。
此示例显示为设定ABS参数。右边灰色竖条说明菜单的长度和当前位置。
点触下方任意地方向上滑动,垂直方向的菜单向下滚动。
点触上方任意地方向下滑动,垂直方向的菜单向上滚动。
点触选定的菜单项即可完成选择。
Yes No 的意义
Yes: 返回到默认值
No:无操作
Yes: reset to default the current displayed function
No: no operation
19
Digital propotional radio control system
Table of contents
Other Fly Sky Remote Control manuals
Fly Sky
Fly Sky FS-GT2B User manual

Fly Sky
Fly Sky FS-T6 User manual

Fly Sky
Fly Sky FS-TH9X User manual

Fly Sky
Fly Sky Nirvana NV14 User manual

Fly Sky
Fly Sky Noble NB4 User manual

Fly Sky
Fly Sky FS-TH9X User manual

Fly Sky
Fly Sky Eurgle th9x User manual

Fly Sky
Fly Sky FS-GT3 User manual

Fly Sky
Fly Sky FS-i6X User manual
Fly Sky
Fly Sky SM001 User manual

Fly Sky
Fly Sky FS-i6S User manual

Fly Sky
Fly Sky FS-GT3B User manual

Fly Sky
Fly Sky FS-GT3 User manual

Fly Sky
Fly Sky VK-R4A User manual

Fly Sky
Fly Sky FMS-G3 User manual

Fly Sky
Fly Sky FS-GT3B User manual

Fly Sky
Fly Sky FS-VK-G4P User manual

Fly Sky
Fly Sky FS-i10 User manual
Fly Sky
Fly Sky FS-CT6A User manual

Fly Sky
Fly Sky FS-T6 User manual