FLYBIRD JF01-SZJ User manual
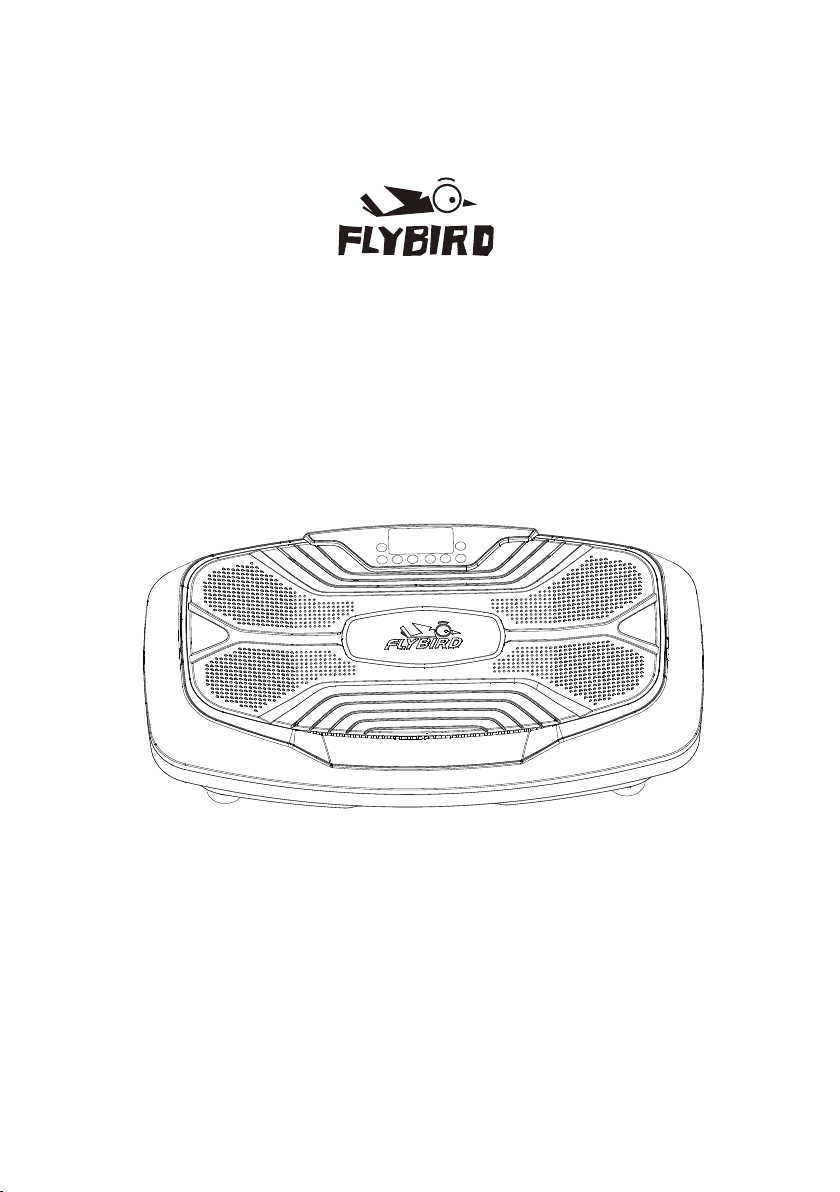
FLYBIRD 4D Vibration Plate
USER MANUAL
JF01-SZJ

SAFETY
PLEASE KEEP THIS MANUAL IN A SAFE PLACE
FOR REFERENCE.
WARNING:
To reduce the risk of burns, fire, electric shock, or injury to persons, read
the following important precautions and information before operating the
product.
DISCLAIMER
1. The health benefits suggested or implied in this user manual, our other
product literature, and website are not certified or endorsed by any
regulatory authority or medical institute.
2. The use of this vibration machine is entirely at the user’s discretion.
Please read all instructions and safety information carefully before using
this product. We assume no responsibility for personal injury or property
damage sustained by or through using this product.
RESPONSIBILITIES
3. It is the responsibility of the owner to ensure that all users of the
product are adequately informed of all warnings and precautions.
4. Use the product only as instructed in this manual.
5. Place the product on a level surface, with at least eight feet of clearance
behind it. Do not place the product on any surface that blocks air openings.
1

DOS AND DON’TS
EXERCISING
14. Consult with a medical professional before beginning a new exercise
program.
15. Get into position before powering on the product.
16. Always wear appropriate clothing and athletic shoes when using the
product.
17. The product is intended for in-home use only. Do not use the product
in any commercial, rental, or institutional setting.
To protect the floor or carpet from damage, place a mat under the product.
6. Keep the product indoors, away from moisture and dust. Do not put the
product in a garage or covered patio, or near water.
7. Do not operate the product where aerosol products are used or where
oxygen is being administered.
8. Keep children under the age of 12 and pets away from the product at all
times.
9. The product should not be used by persons weighing more than 330 lbs.
10. Never allow more than one person on the product at a time.
11. Keep the power cord and the surge suppressor away from all heat
sources.
12. Never leave the product unattended while it is running.
13. Always unplug the power cord when the product is not in use.
2

MAINTENANCE
18. DANGER: Always unplug the power cord immediately after use,
before cleaning the product, and before performing the maintenance
and adjustment procedures described in this manual.
19. Inspect and tighten all external screws periodically (do not remove the
motor hood).
20. Never remove the motor hood unless instructed to do so by an
authorized service representative. Servicing other than the procedures in
this manual should be performed by an authorized service representative
only.
21. Never insert or drop any object into any opening.
3
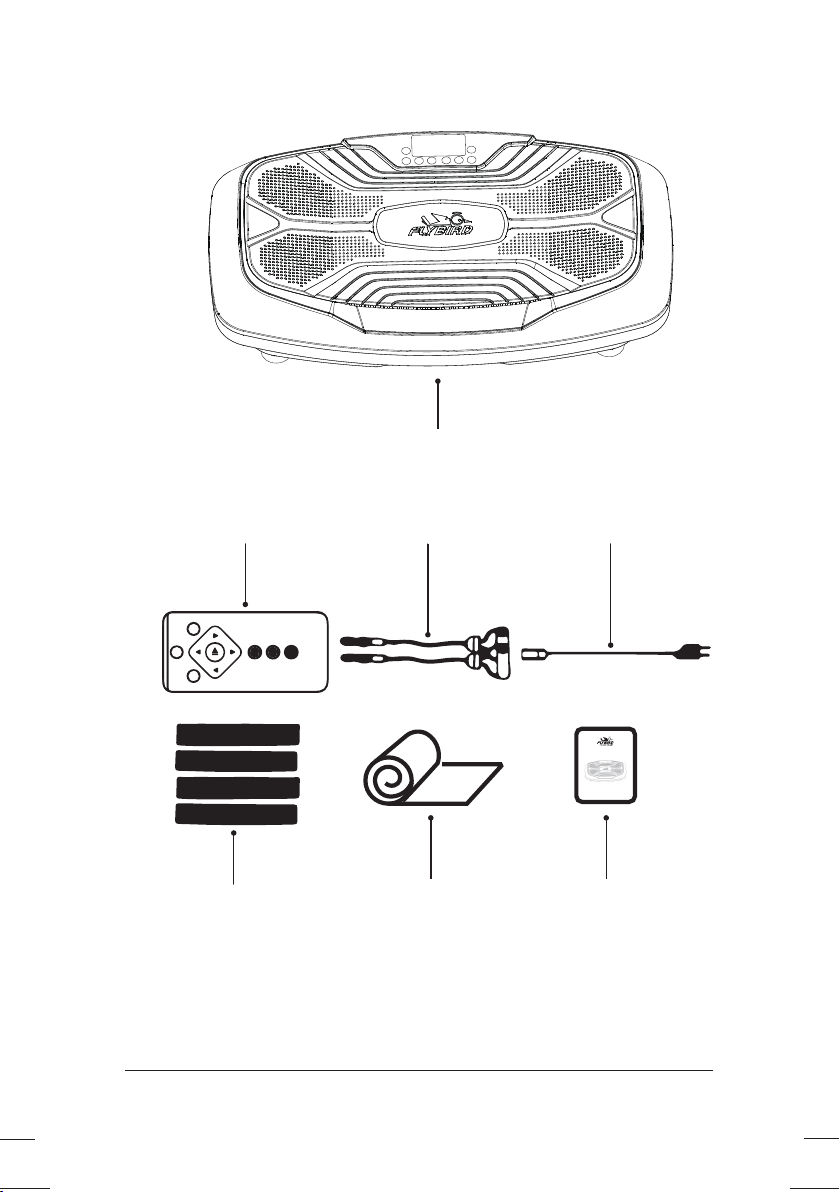
WHAT’S IN THE BOX
FLYBIRD 4D
Vibration Plate
Remote Control
FLYBIRD Bands (4)
Resistance Bands (2) Power Cord
4
Exercise Mat User Guide
FLYBIRD4 D VibrationPlate
USER MANUAL
JF23-SZJ

UNIT SPECS
5
Product Size: 31.5×17.72×6.69in
Net Weight: 47 lbs
Power: 350W+350W+100W
Voltage:
Amplitude: 11mm/6mm/1-2mm
Max User Weight: 330 lbs
120V
Frequency: 5.2-40 Hz
Speed Levels: 99
Preset Programs: P1-P9
Battery: CR2025 battery (included)
EASY-START SETUP GUIDE
1. ACTIVATE THE REMOTE
Remove the plastic insert under the CR2025 battery.
2. ATTACH THE TWO RESISTANCE BANDS
Loosen the carabiner locks on the end of the 2 Resistance Bands.
Attach the 2 Resistance Bands to the holes on the 2 Resistance Band
Fixed Pieces. Then tighten the carabiner lock in place.
NOTE: Make sure the carabiner locks on the end of the 2 Resistance
Bands are tightened in place, to avoid them loose during use.
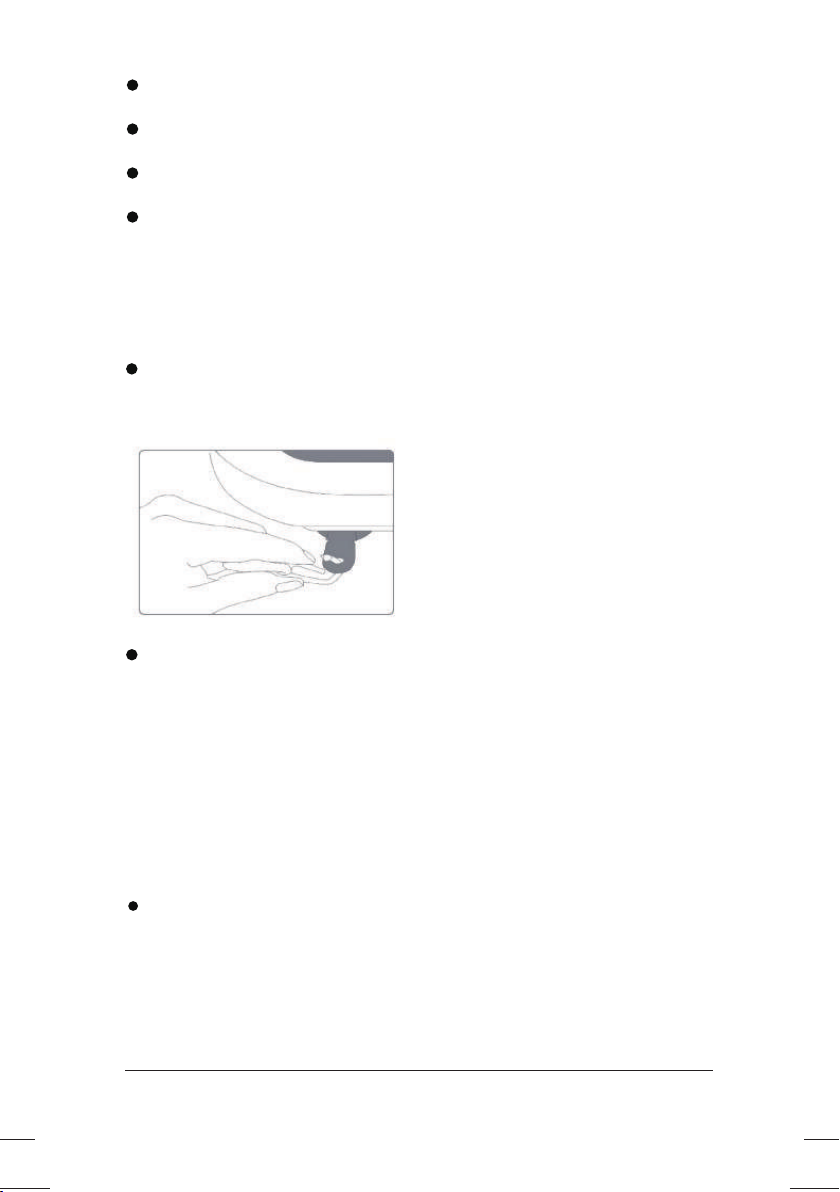
3. CONNECT TO POWER
IMPORTANT NOTE: This machine requires a power source of 110
6

7

8

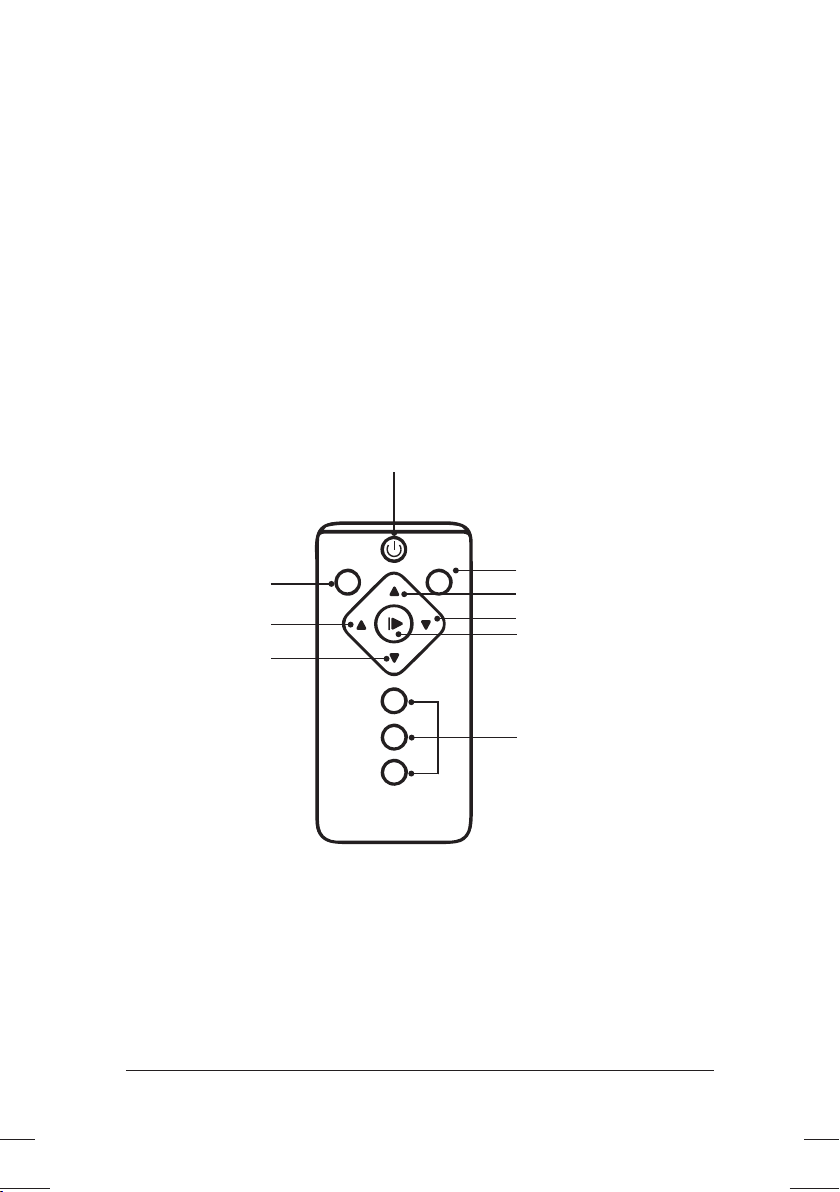
1. POWER: Press the button to power the product on and off.
2. ON / OFF: Start/stop the selected preset program or manual mode
workout.
3. PROGRAM: Toggle through preset programs (P1, P2, P3…...P9).
4. MODE: Toggle through the 7 training modes (Oscillating, Linear
9
Vibration, Oscillating+Linear, Oscillating+Vibration, Linear+Vibration
and Oscillating+Linear+Vibration).
5. TIME+/TIME-: Set time duration for manual mode workout. Each
preset program is 10 minutes long. Time cannot be adjusted for preset
programs.
6. SPEED+/SPEED-: Adjust workout speed after manual mode workout
begins. Speed automatically starts at 1. Speed cannot be adjusted for
preset programs.
7. CALORIE: Shows number of calories burned in current workout.
8. SPEED LIGHT: Shows current workout intensity (Green: 1~30, Blue:
31~60, Red: 61~99). Simultaneously, the light color on both sides of the
product changes following the LED Display.
USE THE BUILT-IN SPEAKERS
Turn ON Bluetooth on your smartphone or other Bluetooth device. Select
the device called "FLYBIRD 4D vibration plate". Once found, click on it
to establish a connection. Once the connection is successful, you can start
playing music.
USING THE REMOTE TO OPERATE THE MACHINE
10
MP
30
90
60
START/STOP
PROGRAM
PAUSE/START
MODE
TIME +
SPEED -
TIME -
SPEED +
SPEED LEVELS

CHOOSING A TRAINING MODE
TRAINING MODES* MOTOR MOVEMENT ACTIVE MOTOR
Oscillation Up-Down Oscillating Motor
Pulsation Pulsating Pulsating Motor
Lateral Side-to-Side Lateral Motor
Oscillating Pulsation Up-Down + Pulsating Oscillating Motor + Pulsating
Motor
3D/Spiral Up-Down + Side-to-Side Oscillating Motor + Lateral
Motor
Lateral Pulsation Pulsating + Side-to-Side Pulsating Motor + Lateral Motor
4D
Up-Down + Pulsating +
Side-to-Side
Oscillating Motor + Pulsating
Motor + Lateral Motor
MANUAL MODE
In manual mode, you can create your own custom workout by choosing
from 7 training modes and then setting a workout time and speed.
11
The machine will be in manual program after the machine is turned on.
You can change the time by pressing or holding the “TIME” button on the
console panel or remote control. Speed level could also be changed by
pressing the SPEED + or – button on the console panel or the remote
control. In manual program, the machine will start at the lowest speed
level, so the user will not be able to decrease the speed. The user could
stop the vibration at any time by pressing the “START/STOP” button on
the console panel or button on remote control.

ROGRAM MODE
PROGRAM MODE
In program mode, you can select from nine preset programs: P1, P2, P3,
P4, P5, P6, P7, P8, P9. Each preset program is 10 minutes long and uses a
different training mode to challenge your body. All the nine preset
programs vary speed and intensity throughout to help keep you on your
toes. NOTE: You cannot adjust the workout time or speed for preset
programs.
12
P1
P4
P7
speed
99
98
96
94
92
9
0
88
86
84
82
8
0
78
76
74
72
7
0
68
66
64
62
6
0
58
56
54
52
5
0
48
46
44
42
4
0
38
36
34
32
3
0
28
26
24
22
2
0
18
16
14
12
1
0
8
6
4
2
TIME/MIN
One cycle for 10 minutes, varying every 1 minute
1 2 3 4 5 6 7 8 9 10
P3
P6
P9
99
98
96
94
92
9
0
88
86
84
82
8
0
78
76
74
72
7
0
68
66
64
62
6
0
58
56
54
52
5
0
48
46
44
42
4
0
38
36
34
33
3
0
28
26
24
22
2
0
18
16
14
11
1
0
8
6
4
2
1 2 3 4 5 6 7 8 9 1
0
speed
TIME/MIN
One cycle for 10 minutes, varying every 1 minute
P2
P5
P8
99
98
96
94
92
9
0
88
86
84
82
8
0
78
76
74
72
7
0
68
66
64
62
6
0
58
56
54
52
5
0
48
46
44
42
4
0
38
36
34
32
3
0
28
26
24
22
2
0
18
16
14
12
1
0
8
6
4
2
1 2 3 4 5 6 7 8 9 10
speed
TIME/MIN
One cycle for 10 minutes, varying every 1 minute
P1 P2 P3
Swing mode automatic program
P4 P5 P6
Horizontal mode bot
P7 P8 P9
Vibration mode automatic program
13
1. Standing stance:
Stand on the machine with your
feet positioned shoulder-width
apart.
2. Squatting stance:
Stand on the machine with your feet
shoulder-width apart while
maintaining a squat position.
3. Upper body workout:
Place your hands shoulder-width
apart on the pad while kneeling on
your knees.
4. Lower leg workout:
Rest your lower legs on the pad and
support yourself by placing your
hands on the ground behind you.
HOW TO USE THE FLYBIRD 4D VIBRATION
PLATE

14
5. Arm workout:
Bend at the waist with your
feet
and extend your arms straight
to rest on the pad
shoulder-width apart
.
6. Single-foot stance:
Place one foot on the machine
and stand in a relaxed and
upright position.
7. Sitting stance I:
Sit securely on the pad with
your legs crossed.
8. Sitting stance II:
Place your legs on the pad while
sitting on a stool or chair.

15
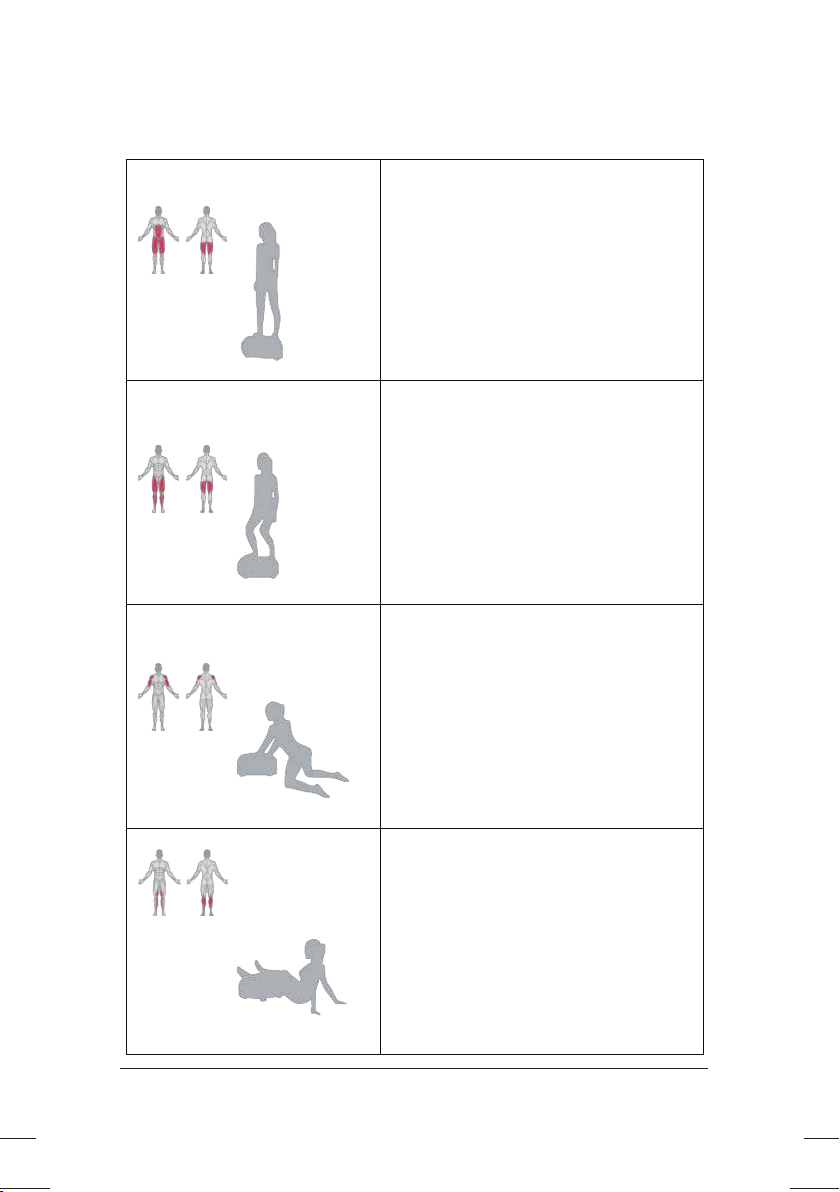
1. Push-up
Starting position:
Place your legs on the vibration plate, with your knees bent and hands behind
your head.
Exercise:
Raise your upper body off the plate, but not fully, and then lower it back down.
2. Sit-ups
Starting position:
Place your legs on the vibration plate, with your knees bent and hands
behind your head.
Exercise:
Raise your upper body off the plate, but not fully, and then lower it back
down.

16
3. Triceps Dip
Starting position:
Face away from the device, place your hands firmly on the plate, and
support yourself on it.
Exercise:
Push your body up, slightly bending your elbows and lowering your
upper body. Keep your shoulder blades pressed together. Alternatively,
you can extend your legs.
4. Bridge on One Leg
Starting position:
Lie on your back on a mat in front of the device, with one foot stepping on
the plate.
Exercise:
During the vibration, lift and extend one leg at a time, switching legs every
3-5 seconds. Make sure to keep your pelvis stable and not tilted to one side.

17
5. Lunge with Bands
Starting position:
Place one foot in the middle of the device and extend the other leg
backward. Hold one resistance band firmly.
Exercise:
Keep your back straight and firmly press your foot onto the plate,
engaging the leg muscles. Bend your forearm and alternately pull the
resistance band upwards and back.
6. Biceps Curls
Starting position:
Stand on the device and holdboth resistance bands firmly.
Exercise:
Maintain a straight back and wrists.
Bend your elbows and pull the band firmly upward.

18
7. Lunge
Starting position:
Place one foot in the middle of the device, with the other leg extended
backward.
Exercise:
Maintain a straight back and firmly press the front foot onto the vibration
plate. Engage your leg muscles and cross your arms in front of your body.
8. Squat
Starting position:
Stand on the device with your feet shoulder-width apart.
Exercise:
Maintain a straight back, slightly bend your knees and upper body forward,
and engage your leg muscles. Alternatively, move up and down in a
squatting motion.

19
1. Place the band around your legsjust above the ankles.
Place both feet on the plate, shoulder width apart.
2. Withyourhands at yourchest or your hips,
shift all your weight onto yourleft leg.
Tense your stomach and push your right leg
keeping tension in the band, for 10-12 rep
3.
Switch legs and repeat.
backas far asyoucan. Keep the leg straight.
4. Return your right foot to the plate,
5.
1. Place the tubing around the ankles. To add stability
out to the side, with your foot still facing forward.
3. Try tokeep yourhips parallel to the floor
to the exercise you can holdonto a stationary object
for support if needed.
2. Withyour legs shoulders width apart raise one leg
;
movingonto the other leg.
don’t lean too much to one side
4. Slowly return the leg to the starting position.
5. Repeat thisexercise 10-12 times before
STANDING KICKBACK
STANDING HIP ABDUCTORS
Table of contents
Other FLYBIRD Fitness Equipment manuals


