A S S E M B LY
A S S E M B LY
A S S E M B LY
Flight adj ustment
1. wil l fly bet ter wi th ful ly- char ged ba tter ies .
2. Ke ep fli ght st rai ght: when you find it is di ffic ult to f ly st raig htly, ple ase adju st the trim on
the trans mitt er. For ex ampl e, when you find a lwa ys f ly left ward please p ush
the tri m on the tra nsm itte r i nver se d ire ctio n--- right, as t his will mov e t he r udd er t o
com pens ate.
3. Ke ep fli ght h oriz ont al: wh en yo u find it is d iffi cult t o fly s trai ghtly, plea se ad just
the trim on t he tran smit ter. For exampl e, when you f ind it al way s fl y up war d; p leas e p ush
the t rim on th e tran smit ter towar d the to p, as thi s will a djus t the po siti on of th e elev ator .
Flight att ention
1. Ne ver fl y in stro ng win d.
2. Do no t fly at a ny pla ce whe re ano ther s ame- fre quen cy mod el is fl ying .
3. Takin g off:
Alw ays ta ke off to war d the win d;
lf yo u wan t to la unch by h ands , max imiz e the p ower (in clud ing t he mic ro
adj ustm ent) and ru n several m eter s to acc eler ate yo urse lf, at l ast th row it h oriz onta lly.
lf y ou w ant to l aunc h on the gro und, maximi ze t he p ower and le t it acc eler ate,
kee p it runn ing s tra ight ly, af ter i t ru ns mo re t han 6 0 fe et, y ou c an pu ll t he el eva tor j oy s tick ,
and i t will ta ke off .
4. Co urse : you ne ed onl y 30% of th e maxi mum po wer to ke ep fly ing . lt is goo d
ide a to fly wi th pow er for a w hile a nd gli de for a wh ile .
In t his w ay You ca n inc rea se yo ur ma ximu m fli ght t ime and fa mili ari ze yo urse lf wi th
lan ding a ppro aches.
5. Land ing: Befor e la ndin g, s wit ch o ff t he p ower, fly to ward t he wind , an d wh en
fli es n ear to the g rou nd, you may pull th e el evat or joys tick and i t w ill land gentl y. It reall y
nee ds pra ctic e, alt houg h it sou nds ea sy. it may b e diffi cul t for yo un til yo u do this many
tim es.
Ces sna 18 2
Ces sna 182
Ces sna 18 2
Ces sna 1 82
Ces sna 182
Ces sna 18 2
Ces sna 182
10
Statement
1 Thi s is n ot a toy. lt i s fo r ex per ien ced model ers only. You are r esp ons ibl e fo r th e sa fe
ope ratio n of this m odel an d any dam age or ha rm it may c ause;
2 Ple ase adjus t thi s pla ne ac cor din g to in str uct ion and mak e sur e fin ger a nd ot her p arts
out o f rotat ing par ts of pla ne, or it m ay caus e damag e to the pl ane or in jury.
3 Use rs shou ld foll ow all in struc tions p roper ly and as sembl e the mod el corr ectly. i t is
you r res ponsi bilit y to insu re the ba ttery 's char ged cor rectl y, fol lowin g the
ins tru cti on s.
Safety pr ec au tions!
Pleas e read th is sect ion u nt il yo u fu lly u nders tand!
(1) D o not fly i n stron g wind or b ad weat her
(2) N ever fly the mod el in c rowde d are as, wher e t her e a re l ots o f p eop le, auto mob ile s
on the road or powe r lin es over hea d. Als o do not to f ly arou nd the airp ort . Ple ase
mak e you rself enou gh roo m f or the flyi ng and oper ati ng, as t he pla ne ca n t rav el at
hig h speed . Remem ber you a re resp onsib le for th e safet y of othe rs.
25
(3) Chi ldr en und er the age of 1 2 sho uld have an a dult guid e. Nev er recom mend for the
chi ldren u nder th e age of 14 .
(4) N ever le ave the c harge r in wet co nditi ons.
(5) The C ess na 182 is mad e fr om PA and pol ythen e whi ch ar e t ind er. Whe n it meet s th e
hea t, tran sfigu ratio n can eas ily hap pen, so y ou must k eep it aw ay from h eat.
3
Please read be fo re o pe ra ti ng t hi s sy st em !
.
Main spec if ic ation
SPECI FICATION
The airpl an e offers the fo ll owing cha ra cteristic s
Hig h sp eed , h igh sca le per for man ce, an d s uitab le f or med iat e or a a bov e l evel
mod ele rs.
1
4.C onnec t pow er bat tery, a djust
the e levat or and ru dder.
3.Tu rn on the t ransm itter.
Pre parat ion bef ore fli ght
Not ice!
Don 't fly th e airpl ane unt il one ho ur late r after f inish ing ass embly, a s the glu e may not f uncti on well .
67
(6) Ces sna 182
(7) N ever lea ve t his s yst em u nat tende d aro und chi ldren with bat ter y i n th e u nit , as inju ry
may b e cause d due to ch ildre n's tur ning on t he tran smitt er or the p lane.
(8) Dur ing the pre par ati on fo r th e fl igh t, pl ease r eme mbe r to tur n on t he t ran smi tte r bef ore
con necti ng the ba ttery p ack.
(9) Clo se th e thr ott le on t he tra nsm itt er be for e con nec tin g bat tery o the rwi se th e mot or ma y
ope rat e.
Do no t attem pt to cat ch the w hile fl ying, p lease do no t touch t he prop eller.
4
Shenz hen Fam ous Ele ctr on ic Tec h Co.,L td.
rd
Add: 4/ F,Build ing5, The 3 Indus try Zon e, Tan gtou, S hiyan Town,
Bao'a n Distr ict, Sh enz he n Cit y, China 5 181 05
Tel: + 86 -75 5-296 81351
Fax: +8 6-755 -2951 2328
Email : info@ fmsmo del .c om
Http: // www.f ms mod el.co m
5. In stall t he elev ator.
2. T hro ttl e in lo wes t lev el, t he
sa me wi th tr im.
8
CENT ER OF GRAVITY (C.G.)
Scr ew
PM3 .0X1 6(4 PCS)
21. C onnec t the sig nal wir es (FMS r adio sh ow).
1. Install the fro nt landing gear. 3. Install the mai n landing gea r.
8. In stall t he rudd er.
4. App ly glue o n the com bined
sid e of the el evato r.
6. Co nnect t he wire o f the lig ht.
9. Inst all the back p late of the
spin ner.
11. Ins tall th e nut.
CH1
CH2
CH3
CH4
CH5
CH6
LED( N aviga tion Li ghts)
Flap s
Stee ring Wh eel And Ru dder
Thro ttle
Elev ator
Aile ron
10. I nstal l the pro pelle r.
Ple ase plu g in the co nnect ors cor rectl y accor ding to t he sign al wire s.
(Pu sh the re ceive r into th e fusel age).
Battery Cha rg er User Man ua l
The d esign o f FMS-0 8001 Li -batt ery bal ance ch arger c onfor ms to the l atest t echno logy,
ena bling t he stab le and ba lance c harge t o batte ry. This p rod uct h as va rio us ad van tag es of
eas y-to- use, sa fety an d relia bilit y etc, en surin g to avoi d the red uctio n of batt ery
per forma nce cau sed by un balan ced dis charg e and the r isks re sulte d from un balan ced
charge.
Ple ase re ad t his m anual car efu lly pri or t o use thi s pr odu ct, e nsuri ng to f ull y und ersta nd the
per forma nce of FM S-080 01 and pr oduct s afety.
Power Sup pl y Sizing
1. It i s recom mende d to use 11- 14V,2 0W,DC po wer sup ply, or use
Vehi cle B atter y>15A H, 12V( safet y charg e volta ge rang e fro m 11V14 V).
2. Do n ot use DC p ower su pply> 14V.
Techni ca l Data:
1. In put: DC 11 v-1 4v,1 A,o utp ut: DC 12 .6V,8 00mA (+- 10%).
2. Ava ila ble t o bal anc ed or u nba lance d charg e 2 or 3 batt ery blo cks.
3. Di mensi on size :73×5 0×25m m.
4. T he ty pic al v alu e of v olt age d iff ere nce a mong 3 f ull-c harge d batte ry blo cks i s lowe r tha n
40m V.
5. Th e cut -of f vol tag e of ch arg er ra nge s fro m 4.1 9V-4 .21 V.
11
Danger:
1. Do n ot char ge 2 or 3 bat terie s at the sa me time .
2. Do n ot cha rge ot her ba tte rie s than L i-b att ery. Or el se, It wi ll cau se batte ry
abn ormal (over -heat o r fire) . The b atter y type mu st be val idate d prior t o charg ing,
War ning:
In case of FMS -08 001 in use , p lease sta y a nd t ake care of the cha rgi ng proce ss . If any
acc ident occ urs , t ermin ate the char ging proc ess imm edi ate ly. In addit ion, stop char gin g
imm ediat ely if th e batte ry is ove rheat ing.
Notes:
1. In ca se of FM S-0 800 1 in use , kee p the cha rger aw ay fro m inf lam mab le thi ng. The
ele ctric sp ark ca use d by conn ect ing or di sco nne cti ng bat ter y is high ly dan ger ous to
cau se expl osion .
2. Duri ng the char ger in use, ple ase sta y and tak e car e of the char gin g pro ces s. If any
acc ident occ urs , ter min ate the c har gin g pro cess i mme dia tel y. In ad dit ion , st op ch arg ing
imm ediat ely if th e batte ry is ove rheat ing.
3. Do n ot char ge othe r batte ries th an Li-b atter y.
4. Do n ot char ge imme diate ly in cas e of batt ery in te pidit y.
In ca se that c harge t he batt ery in te pidit y, the b atter y can't b e fully
cha rged to t he high est cap acity,
and thu s ca n't rea ch th e ma xim al p erf orm anc e. Th is m ayb e re sul t into th e fa ilu re d ue to
ove rheat ed. The ref ore , the b att ery m ust b e cha rged af ter bat tery is f ully co oled.
5. Do n ot disa ssemb ly FMS- 08001 a nd its ac cesso ries.
The d isa sse mbl y or re -as sem bly o f FMS- 08001 a nd it s acc ess ori es may c aus e
mal funct ion or fa ilure , and als o cause m alfun ction o f abnor mal ope ratio n.
Introdu ct ion:
1. Co nnect t he char ger wit h regul ated po wer sup ply, the r ed LE D of po wer s upp ly is o n.
2. Co nnect the bat ter y t o b e c har ged , th e g ree n LED i s on, and the n s tar t t he con sta nt-
cur rent- restr icted – volta ge char ging mo de with 8 00mA.
3. The g reen LE D will be o ff afte r cha rge f ull y com ple ted .
12
12. I nstal l the spi nner.
7. App ly the gl ue on the
com bined s ide of th e rudde r.
Wingspan
Length
Weight
CG position
BATTERY
ESC
Motor
Wing Area
Wing Load
RC SYSTEM
Est. Flying Time
: 1410mm /55.5 in
: 1100mm /43.3 in
: 1520g /53.6 oz
: 60mm
: 6min
: 11.1V Li-Po Battery
: 6 Channel 6 Servos And 1 Brushless ESC
: 30A
: Out runne r Brush less
: 27. 0dm
: 56. 3g/dm
2
2
We wo uld l ike t o con gra tul ate y ou for pu rchas ing an in novat ive and e xciti ng new pr oduct
fro m FMS.
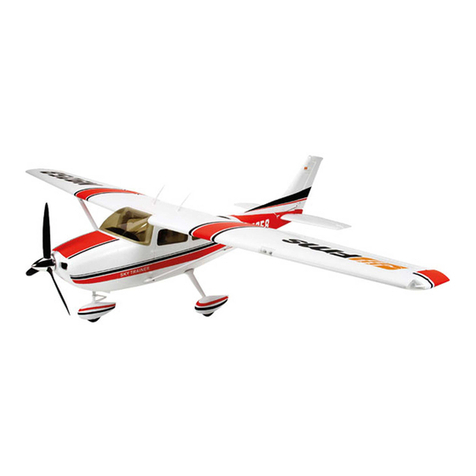
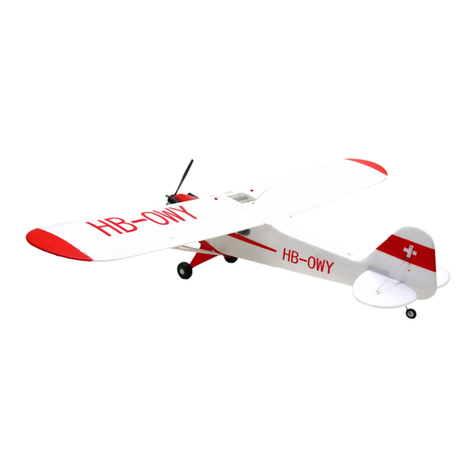
Thi s Cessn a 182 is de signe d to give o ptimu m perfo rmanc e over a wi de enve lope an d will
giv e the bud ding RC p ilot an e xciti ng intr oduct ion int o the wor ld of tra iners .
Flight Pr ep aration
Mak e sur e that b att eri es in you r tra nsm itt er and a irc raf t are fre sh and the an tenna i s
ext ended all the w ay up. T his wi ll e nsu re f ull r ang e fo r yo ur ai rcraf t. lf y ou no tice t he p lan e
is go ing to cr ash, cu t throt tle imm ediat ely. Thi s wil l min imi ze da mag e.
Lin kage Ro d LED S et
6CH 2 .4GHz Tr ansmi tter
6CH 2 .4GHz R eceiv er
22. Tu rn on the t ransm itter
bef ore con necti ng the ba ttery
on th e plane .
24. B atter y posit ion.
23. C onnec t the bat tery.
Shenzhen Famo us Electr onic Tech Co., ltd.
OPERATING MANUAL
CESSNA 182
13. C onnec t the mai n wings .
20. I nstal l the sup porti ng bar 21. I nstal l the ant enna.
14. Ti e up the wi res wit h the
sel f-loc k ribbo n.
15. I nstal l the lin kage ro d of
the f lap ins ide the l owest h ole
of th e servo h orn.
16. I nsert t he wire s into th e
hol e.
1. Ch arge th e batte ry, green l ight me ans
the b atter y is char ging.
9
Flap s(2*Se rvo)
LED( 5PCS)
Aile ron(2* Servo )
C 5
H
C 1
H
C 6
H
17. I nstal l the mai n wing. Scr ew
PM4 .0X2 5(2 PCS)
2. Secure the front landing gear.
Scr ew PM3. 0X8(4 PCS)
Sup por tin g Bar
19.I nstall t he suppo rting par t.
18. Ap ply glu e in the sl ot of
the m ain win g.
