Fogmaster 2239 User manual

Clock Module
The clock module stores start and stop times and
the repeat frequency for up to six events. Event fre-
quency can be:
- Every day (Sun - Sat);
- Every weekday only (Mon - Fri);
- Every weekend only (Sat - Sun); or
- A specific day of the week.
If the unit is unplugged, a 3V rechargeable lithium
battery (CR2032) will maintain clock and event set-
tings for about a month.
ON AUTO OFF
AM
12:00 00
Su
Mo Tu We Th Fr Sa
2ON
OFF
MANUAL
DAY
HOUR
MIN
TIMER
CLOCK
ON P
REPEAT CYCLE TIMER
1 2 3 4 5
1
0
2
0
3
0
4
0
5
0 1 2 3 4 5
1
0
2
0
3
0
4
0
5
0
ON time, min OFF time, min
Cycle
Cont.
Cycle time is TOTAL of UP switches
RESET
BUTTON
Overview
The 2239 timer lets you operate a fogger or other
electrical appliance on a programmed schedule. Just
plug the 2239 into a nearby outlet, and plug the
fogger into the outlet receptacle of the 2239.
A seven-day clock controls timing events. During
each event, the fogger can operate continuously or
intermittently. Output contacts are rated 10A.
The unit is available in two voltage ranges:
Model Voltage
223910 100-120V, 1ø
223920 220-240V, 1ø
The CYCLE/CONT switch determines if the receptacle
is powered continuously (switch = CONT) or in
repeated on-off cycles (switch = CYCLE).
Repeating Cycle Module
When cycling is enabled (CYCLE/CONT switch set to
CYCLE), the fogger turns on and off until the end of
the event.
Dip switches specify ON and OFF cycle lengths
with time values of (left to right): 1, 2, 3, 4, 5, 10, 20,
30, 40, and 50 minutes. Add switch values to get the
total fogging time. The minimum cycle length is
one minute, and the maximum is 165 minutes (all
switches on = 1+2+3+...+50 = 165).
As an example, for a cycle of 3 minutes on and 17
minutes off, set all switches on the left switch bank
down except “3”, and all switches on the right bank
down except “10”, “5” and “2” [10+5+2=17 min-
utes]. You could use 8+9, or 4+6+7 for the same
result.
2239 REPEATING CYCLE TIMER
W90012239 0909

Clock Operation
The clock has two modes: Program, and Operate. In
program mode, the display shows event data (day,
start and stop time); in operate, it shows the current
time and day.
- Press TIMER to enter program mode and display
or enter events.
- Press CLOCK to put the unit into operate mode.
Press RESET with a pencil or ball point pen to clear
all memory data, including day and time.
In operate mode, pressing the MANUAL button
repeatedly shifts the unit to on, off or auto as indi-
cated by a small bar above the text:
-On. Output is energized
-Off. Output is deenergized
-Auto. Output is energized according to the
event schedule in clock memory.
Press MANUAL repeatly to shift the clock to its next
state (on -> auto -> off -> auto ->).
When output is energized, the red LED is lit and
control is transferred to the CYCLE/CONT switch.
- If the switch is set to CONT, the receptacle is
energized directly.
- If the switch is set to CYCLE, the repeating cycle
(dip switch) timer is enabled. It powers the
receptacle during the “on” cycle only. In cycle,
therefore, power to the receptacle requires both
the red LED to be lit and the dip switch timer
be in an “on” phase.
To set clock day and time
Push and hold CLOCK and press the DAY button to
advance the day setting. Release both buttons to
set.
Push and hold CLOCK and press the HOUR button to
advance the hour. Release both buttons to set.
Push and hold CLOCK and press the MIN button to
advance the minute. Release both buttons to set.
To display, enter or change events in memory
Press TIMER button to enter program mode. The dis-
play shows “1ON” – the scheduled start time of
event 1. Small bars show the days of the event.
Press the HOUR and MIN buttons to set or change the
event start time.
Press DAY repeatedly to rotate among available day
options: Su thru Sa (all 7 days); Mo thru Fr (week-
days only); Sa thru Su (weekends only); or a single
day (Su; Mo; Tu; We; Th; Fr; or Sa only).
Press TIMER again to save “1ON” start data and show
the “1OFF” setting. Use the HOUR,MIN and DAY but-
tons as above to change the Event 1 end time.
Press TIMER again to access Event 2 start. Repeat for
all events. When finished, press CLOCK to exit pro-
gram mode.
To enable automatic operation
Press CLOCK, then press MANUAL to enter the auto
setting.
- If you enter auto from on (on -> auto), output
remains on until the next scheduled Off time;
- If you enter auto from off (off -> auto), output
remains off until the next scheduled On time.
To clear timer memory
Press RESET button to clear time and day settings
and all programs.
To override program settings
To stop fogging during a program event, press the
MANUAL button to the off position.
To begin fogging outside a program event, press the
MANUAL button to the on position.
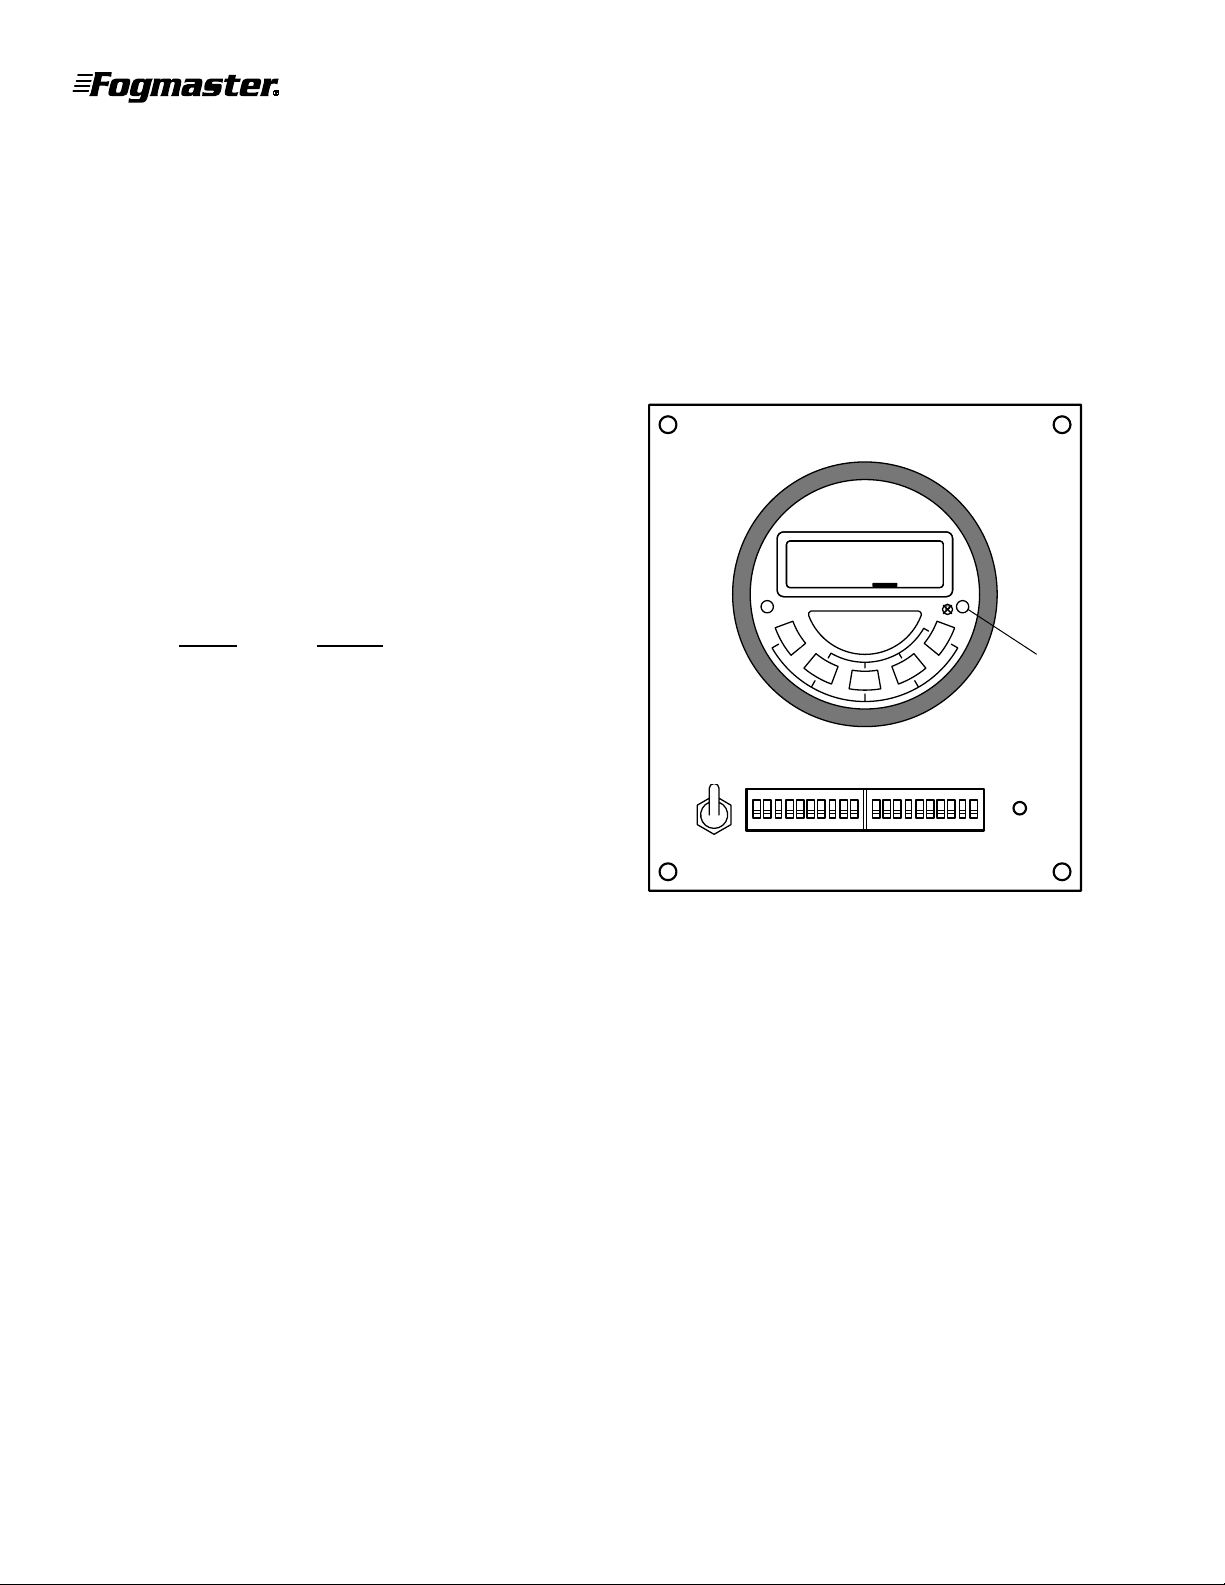
To replace the battery
Open the box cover, unscrew four large-head
screws and lift the unit out from the enclosure. Turn
unit over. The circular cover of the battery enclo-
sure is beneath the circuit diagram approximately
as shown.
Remove the label, or cut along the outline of the
cover with a sharp knife. Twist the cover to release.
Replace with 3V CR2032 battery.

The 2239 offers great flexibility of output styles –
manual control, program control, or “one-shot”
countdown timer control.
Output can be continuous or intermittent in any
operating style depending on the position of the
CYCLE/CONT switch.
Manual Operation
For steady output, put the CYCLE/CONT switch in the
CONT position (for continuous output) and press
MANUAL button to on.
For intermittent output, set the length of the ‘on’ and
‘off’ cycles in the dip switches. Set CYCLE/CONT
switch to CYCLE. Press the MANUAL button to on.
Programmed Operation
Fogging occurs during each program event.
Scheduled event: continuous output
Enter event days and times into the Day/Week
timer memory.
Set CYCLE/CONT switch to CONT (continuous output).
Press MANUAL button to auto to begin program
operation.
Scheduled event: intermittent output
Enter event days and times into the Day/Week
timer memory. Choose on and off cycle lengths and
enter settings in dip switches.
Set CYCLE/CONT switch to CYCLE (repeating cycle
operation). Press MANUAL button to auto to initiate
program operation.
Countdown Operation
To make the 2239 can act like a countdown timer,
program a single event of the desired length.
Press RESET to clear all events from timer memory,
then set the clock to the current day and time. Set
cycle times on the dip switches and the CYCLE/CONT
switch as desired.
Enter a single event into memory (see above).
Specify the proper day for the event as well as the
start and stop times.
Press CLOCK to return to operating mode.
The event can begin immediately, or after a delay:
- For an immediate start, press MANUAL to on ->
auto. The unit will turn off at the programmed
end time.
- For a delayed start, press MANUAL to off ->
auto. The unit will start at the designated start
time and turn off at the end time.
NOTE: When the single event has finished, turn off
the timer (auto -> off), delete the programmed
event, or RESET the clock. Otherwise the event will
repeat at its next programmed time.
SUMMARY OF OPERATION
SPECIFICATIONS
Voltage Plug/Outlet
Model 50/60Hz, 1ø Configuration
223910 110-120V NEMA 5-15
223910J 100V UC831A
223920 220-240V NEMA 6-15
223920E 220-240V Schuko
223920U 220-240V UK
223920A 220-240V Australia/China
Contact Rating 10A @ 240V (inductive load)
Cycle Time 1-100 minutes, adjustable

1051 SW 30th Avenue •Deerfield Beach, FL, USA 33442
Tel: 954.481.9975 •Fax: 954.480.8563
e-mail: info@fogmaster.com •http://www.fogmaster.com
SUMMARY OF CONTROLS AND FUNCTIONS
Control Function
On LED When illuminated, output circuit of clock module is active. Power to the out-
let receptacle depends on the setting of the CYCLE/CONT switch (see below)
CLOCK Press to enter operating mode
Hold down and press DAY, HOUR or MIN to set clock
TIMER Press to enter program mode
DAY Advances day of week when setting clock or entering events. Values are:
weekdays only; weekends only; all days; Monday; Tuesday; Wednesday;
Thursday; Friday; Saturday; or Sunday.
HOUR Advances hour (including am/pm) when setting clock or entering events.
Hold down to advance rapidly.
MIN Advances minute when setting clock or entering events. Hold down to
advance rapidly.
RESET button Press briefly to erase event settings. This also resets clock to Sunday, 12:00:00
AM
Dip Switches Set duration of ‘on’ and ‘off’ cycles. Move switch ‘up’ to enable. Switches
have values of 1, 2, 3, 4, 5, 10, 20, 30, 40, and 50 minutes. Cycle time is the
total value of enabled switches.
CYCLE/CONT Toggle switch directs output from the clock module.
CONT position – power is applied continuously to the output receptacle
CYCLE position – control is delegated to the cycle timer. It delivers power to
the output receptacle during its ‘on’ cycles.
Warranty
This product is warranted for one year from the purchase date against defects in materials and
workmanship. If you have a warranty claim, return the unit freight prepaid to The Fogmaster Corporation.
We will repair or replace (at our option) any defective parts and return the unit to you.
Motor brushes and tank gaskets are not covered under warranty.
This warranty does not apply to any unit which has been: subject to misuse, neglect or accident; used
for a purpose for which it is not designed; altered in any manner; serviced by unauthorized parties; or
subjected to any but the specified voltage.
This warranty is limited to the original purchaser only, and does not include claims for incidental or
consequential damages resulting from the non-function or malfunction of this product or for breach of any
express or implied warranties.
Some states do not allow the exclusion or limitation of incidental or consequential damages, so the
above limitation or exclusion may not apply to you. This warranty gives you specific legal rights, and you
may also have other rights which vary from state to state.
This Limited Warranty notice replaces any other warranty or guarantee information accompanying this
product or appearing in any literature referring to this product. Any implied warranties, including
merchantability or fitness for a particular purpose, shall not extend beyond the warranty period.
W90012239 0909 © 2009, The Fogmaster Corporation
This manual suits for next models
2
Other Fogmaster Timer manuals
Popular Timer manuals by other brands

Interspace Industries
Interspace Industries CountDown Touch user manual

Pixsys
Pixsys TCT201-1ABC manual

Wieland
Wieland flare TIME FM6-2 230 V instruction manual

NSi INDUSTRIES
NSi INDUSTRIES TORK 457Z Programming instructions

Coitech
Coitech EMT757-UK instruction manual

ALFTECH
ALFTECH DPT-EN3 installation manual