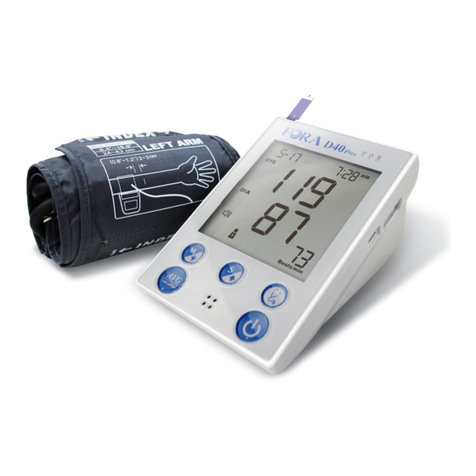
FOR-A D40 Pro Reference guide

BLOOD GLUCOSE PLUS BLOOD PRESSURE
MONITORING SYSTEM
Operations & Procedures Manual
Long-Term Care
D40 Pro


3
Thank you for purchasing the FORA D40 Pro Blood Glucose Plus Blood Pressure
Monitoring System. This manual provides important information to help you use
the system properly. Before using this product, please read the following contents
thoroughly and carefully.
If you have other questions regarding this product, please contact the place of purchase
or call Customer Service at 1-888-307-8188.
The FORA D40 Pro is intended for multi-patient use in a long-term care or home health
care setting. Please note that the following procedures are provided only as a model
to help your facility establish its own policy and procedures. Your own policy may differ
depending upon the existing procedures. Please consult with the Director of Nursing for
further guidance.
CAUTION: Please carefully read the User’s Manual and all product instructions before
using this Long-Term Care and Home Health Care Manual and administering blood
glucose and blood pressure tests.

4
TABLE OF CONTENTS
IMPORTANT SAFETY PRECAUTIONS 06
Interfering Substances 07
BEFORE YOU BEGIN 08
INTENDED USE 08
TEST PRINCIPLE 08
METER OVERVIEW 09
Display Screen 10
Test Strip 10
Setting the Meter 11
THE FOUR MEASURING MODES 12
BEFORE TESTING 13
Control Solution Testing 13
Performing a Control Solution Test 13
BLOOD GLUCOSE TESTING 15
Preparing the Puncture Site 15
Alternative Site Testing 16
Performing a Blood Glucose Test 17
TESTING THE BLOOD PRESSURE 18
Before Measurement 18
Fitting the Cuff Correctly 19
Proper Measurement Position 19
Taking Measurements 20
METER MEMORY 21
Reviewing Test Results 21
Reviewing Day Average Results 22
MAINTENANCE 22
Battery 22
Replacing the Battery 23
Recharging the Battery 24

5
CLEANING AND DISINFECTING PROCEDURES 24
Caring for Your Meter 24
Disinfecting Procedures 25
Cleaning 26
Meter Storage 26
Important Test Strip Information 27
Important Control Solution Information 27
SYSTEM TROUBLESHOOTING 28
Result Readings 28
Error Messages 28
Troubleshooting 29
SPECIFICATIONS 30
TRAINING TOOLS 31
Attachment 1: FORA D40 Pro Blood Glucose Plus Blood Pressure Monitoring System Training Checklist 31
Attachment 2: FORA D40 Pro Blood Glucose Plus Blood Pressure Monitoring System Training Quiz 32
Attachment 3: FORA D40 Pro Blood Glucose Plus Blood Pressure Monitoring System Quality Control 33
Results Record
Notes 34

6
IMPORTANT SAFETY PRECAUTIONS
READ BEFORE USE
Users should adhere to Standard Precautions when handling or using this device. All parts of the
glucose monitoring system should be considered potentially infectious and are capable of transmitting
bloodborne pathogens between patients and healthcare professionals. For more information, refer to
“Guideline for Isolation Precautions: Preventing Transmission of Infectious Agents in Healthcare
Settings 2007”, http://www.cdc.gov/hicpac/2007ip/2007isolationprecautions.html.
● Thesystemshouldbedisinfectedafteruseoneachpatient.ThisBloodGlucoseMonitoringSystem
may only be used for testing multiple patients when Standard Precautions and the manufacturer’s
disinfection procedures are followed.
● Onlyauto-disabling,single-uselancingdevicesmaybeusedwiththisdevice.
1. Use this device ONLY for the intended use described in this manual.
2. DO NOTuseaccessorieswhicharenotspeciedbythemanufacturer.
3. DO NOT use the device if it is not working properly or if it is damaged.
4. DO NOT under any circumstances use the device on newborns or infants.
5. This device does NOT serve as a cure for any symptoms or diseases. The data measured is for
reference only.
6. Before using this device to test blood glucose, read all instructions thoroughly and practice the test.
Carry out all the quality control checks as directed.
7. Keep the device and testing equipment away from young children. Small items such as the battery
cover, batteries, test strips, lancets and vial caps are choking hazards.
8.Keepthedeviceanditsexiblecordawayfromhotsurfaces.
9. DO NOT apply the cuff to areas other than the place directed.
10. Use of this instrument in a dry environment, especially if synthetic materials are present (synthetic
clothing, carpets, etc.) may cause damaging static discharges that may cause erroneous results.
11. DO NOT use this instrument in close proximity to sources of strong electromagnetic radiation, as
these may interfere with the accurate operation.
12. Proper maintenance and periodic control solution tests are essential to the longevity of your
device. If you are concerned about your accuracy of measurement, please contact customer
service or place of purchase for help.

7
Interfering Substances
Interfering substances depend on concentration. The interfering substances listed below will have no
effect up to the limiting concentration level noted.
Substance Limiting Concentration
(mg/dL)
Therapeutic /
Physiological Concentration Range
(or Upper Limit) (mg/dL)
Acetaminophen 6.25 0.45 - 3
Ascorbic Acid 5 2
Dopamine 1.25 0.03
Levodopa 1.4 0.02 - 0.28
Methyldopa 1.25 0.1 - 0.5
Tolazamide 12.5 1.6
Galactose 250 < 5
Mannose 250 1.15
Glutathione Reduced 23 47 - 100 (Intracellular)
Hemoglobin
(Hemolysis Method) 100 2.5
Pralidoxime Iodide 5 ~ 10 (IV Dose 500 mg)

8
BEFORE YOU BEGIN
Severe dehydration and excessive water loss
may cause readings which are lower than actual
values. If the patient is suffering from severe
dehydration, consult a healthcare professional
immediately.
●Ifthepatient’sbloodglucoseresultsarelower
or higher than usual, and does not have any
symptomsofillness,rstrepeatthetest.Ifthe
patient has symptoms or continues to get
results which are higher or lower than usual,
follow the treatment advice of a healthcare
professional.
●Useonlyfreshwholebloodsamplestotest
patient’s blood glucose. Using other substances
will lead to incorrect results.
●Ifthepatienthassymptomsthatare
inconsistent with the blood glucose test results
and you have followed all the instructions given
in this owner’s manual, contact a healthcare
professional.
●Wedonotrecommendusingthisproducton
severely hypotensive individuals or patients in
shock. Readings which are lower than actual
values may occur for individuals experiencing
a hyperglycemic-hyperosmolar state, with or
without ketosis. Please consult a healthcare
professional before use.
●Criticallyillpatientsshouldnotbetestedwitha
blood glucose monitoring system.
freshcapillarywholebloodfromthengerand
the following alternative sites: palm, forearm or
upperarm. This system is intended for
multiple-patient use in professional healthcare
settings as an aid to monitor the effectiveness of
diabetes control. This system is only used with
single-use auto-disabling lancing devices.
The system should not be used for the diagnosis
of or screening for diabetes, nor for neonatal use.
Alternative site testing such as the palm, forearm,
and upper arm should be done only during
steady state times (when glucose is not changing
rapidly).
This system is also intended to be used to
non-invasively measure the systolic and diastolic
blood pressure and pulse rate of an adult
individual. The blood pressure is measured by
usinganinatablecuffwrappedaroundthearm.
INTENDED USE
The FORA D40 Pro Blood Glucose Plus Blood
Pressure Monitoring System is intended for use in
the quantitative measurement of glucose in
TEST PRINCIPLE
Your system measures the amount of sugar
(glucose) in whole blood. The glucose testing is
based on the measurement of electrical current
generated by the reaction of glucose with the
reagent of the strip. The meter measures the
current, calculates the blood glucose level, and
displays the result. The strength of the current
produced by the reaction depends on the amount
of glucose in the blood sample.
The blood pressure is measured non-invasively at
the arm based on the Oscillometric method. This
device is NOT able to take measurements in the
presence of common arrhythmia, such as atrial or
ventricularprematurebeatsoratrialbrillation;it
may produce reading errors.

9
METER OVERVIEW Display Screen
RF Button
Assists you with wireless data transmission.
S Button
Enterandconrmthemetersettings.
M Button
Enter the meter memory.
AVERAGE Button
Assists you with blood pressure average
mode.
ON/OFF Button
Starts a single non-invasive blood pressure
measurement.
Power Indicator
Indicates the power status of the device.
RF Indicator
Indicates a wireless data transmission.
Test Slot
Insert test strip here to turn the meter on for
testing.
Battery Compartment
Strip Ejector
Eject the used strip by pushing this button
up.
AC/DC Adapter Port
Connects to a power supply.
Pressure Cuff
Air Tube
Air Plug
Connects to air jack.
Air Jack
1
3
2
4
5
6
9
7
10
8
11
12
13
14
15
16
10
6
1
4
5
2
3
89 7
11
12
13
14
15
16

10
Absorbent Hole
Touch a drop of blood here, blood will
be automatically drawn in.
Test Strip Handle
Hold this part to insert the test strip into the
slot.
Contact Bars
Insert this end of the test strip into the meter.
Pushitinrmlyuntilitwillgonofurther.
Conrmation Window
Thisiswhereyouconrmifenoughblood
has been applied to the absorbent hole in the
strip.
1
3
2
4
Test Strip
ATTENTION:
The front side of the test strip should
face up when inserting test strip.
Test results might be wrong if the contact
bar is not fully inserted into the test slot.
2
3
4
1
NOTE:
The FORA D40 Pro meter should only be used with FORA
D40 Pro Test Strips. Using other test strips with this meter can
produce inaccurate results.
Date
Systolic Pressure Symbol
Measuring Mode
Systolic Pressure Value
Diastolic Pressure Symbol
Diastolic Pressure Value
Volume Symbol
Ketone Warning
Heart Symbol for IHB Detection
(Irregular Heart Beat)
Pulse Rate
Day Average Result
Battery Symbol
Memory Mode Symbol
Unit for Blood Pressure
Unit for Blood Glucose
Time
Test Strip Symbol
Blood Drop Symbol
1
3
2
4
5
9
6
7
8
10
11
12
13
16
14
17
15
18
Display Screen
1
2
3
5
6
7
8
4
1718
13
10
9
11
14
15
16
12

11
Setting the Meter
Beforeusingyourmeterforthersttimeorifyou
change the meter battery, you should check and
update these settings. Make sure you complete
the steps below and have your desired settings
saved.
Entering the Setting Mode
Start with the meter off (no test strip inserted).
Hold S.
1. Setting the date
Withtheyearflashing,pressMuntil the correct
year appears. Press S.
Withthemonthflashing,pressMuntil the correct
month appears. Press S.
Withthedayflashing,pressMuntil the correct
day appears. Press S.
2. Setting the time
Withthehourflashing,pressMuntil the correct
hour appears. Press S.
Withtheminuteflashing,pressMuntil the correct
minute appears. Press S.
3. Setting the time format
Press Mto select the desired time format ‒12h
(AM/PM) or 24h. Press S.
4. Setting the auto-send
Press Mto select the auto-send “On” or “OFF”.
Press S. This function is for the Bluetooth
transmission. If “On” is selected, your results will
be transmitted right after each test.
5. Deleting the memory
If you wish to delete ALL the results, press M
twice when you see “dEL” and a flashing “ ” on
the display. If you do not wish to delete the saved
results, press Sto skip this step.

12
NOTE:
• These parameters can ONLY be changed in the setting mode.
• If the meter is idle for 3 minutes during the setting mode, it will
switch off automatically.
6. Setting the cycle mode
Press Mto choose the desired blood pressure
cycle mode from the following time interval
selections: OFF, 5, 10, 15, 20, 30, 40 or 60
minutes. Press Sto turn off the meter.
Congratulations!
You have completed all settings!
THE FOUR MEASURING
MODES
The meter provides you with four modes for
measuring: General, AC, PC and QC.
You can switch between each mode.
MODES WHEN TO USE
General Tests
(GEN)
Any time of day without regard to time
since last meal
AC No food intake for at least 8 hours
PC 2 hours after a meal
QC Testing with the control solution
2. Press Mto switch between General, AC, PC
and QC mode.
1. Start with the meter switched off. Insert a test
strip to turn on the meter.

13
BEFORE TESTING
Control Solution Testing
Our control solution contains a known amount of
glucose that reacts with test strips and is used
to ensure your meter and test strips are working
together correctly.
Test strips or control solutions may not be
included in the kit (please check the contents on
your product box). They can be purchased
separately. Please make sure you have the items
needed for a control solution test beforehand.
Do a control solution test when:
●Yourstreceivethemeter(optional)
●Occasionally,onceaweekissufcient,
to check the meter and test strips for in-range
readings
●Everytimeyouopenanewcontaineroftest
strips
●Ifyoudropthemeter
●Wheneveryougetunusualresults(highorlow)
●Control solution is NOT used for calibration
of the meter.
Performing a Control Solution
Test
1. Insert the test strip to turn on the meter
Insertateststripintothemeter.Waitforthemeter
to display “ ” and “ ”.
2. Press M to mark this test as a control
solution test
Insertateststripintothemeter.Waitforthemeter
to display “ ” and “ ”.
WARNING:
Whendoingthecontrolsolutiontest,youhavetomarkitso
that the test result will NOT mix with the blood glucose TEST
RESULTS stored in the memory. Failure to do so will mix up the
blood glucose test results with the control solution test results in
memory.

14
4. Read and compare the results
After the meter counts to 0, the result of the
control solution test will appear. Compare the
result with the range printed on the test strip vial.
The result should fall within this range. If not,
please read the instructions again and repeat the
control solution test.
Out-of-range results
If you continue to have test results fall outside
the range printed on the test strip vial, the meter
and strips may not be working properly. Do NOT
test your blood. Go to www.foracare.com or call
customer service for help.
118-160
Normal
NOTE:
• The control solution range printed on the test strip vial is for
control solution use only. It is not a recommended range for
your blood glucose level.
• See the MAINTENANCE section for important information
about your control solutions.
3. Apply control solution
Shake the control solution vial thoroughly before
use. Squeeze out a drop and wipe it off, and then
squeeze out another drop and place it on the
tip of the vial cap. Hold the meter at an angled
position so that the absorbent hole of the test strip
touchesthedrop.Oncetheconrmationwindow
llscompletely,themeterwillbegincounting
down. To avoid contaminating the control solution,
do not directly apply control solution onto the
strip.

15
BLOOD GLUCOSE
TESTING
Werecommendyouperformdisinfection
procedures between each patient. Please refer to
the section MAINTENANCE for complete
instructions. After disinfection, used gloves
should be removed and hands washed before
proceeding to the next patient.
Please refer to the following practice guidelines
for more information about the correct procedure:
● Biosafety in Microbiological and Biomedical
Laboratories (BMBL) found at
http://www.cdc.gov/biosafety/publications/bmbl5/
● “ProtectionofLaboratoryWorkersFrom
OccupationallyAcquiredInfections;Approved
Guideline-Third Edition” Clinical and
Laboratory Standards Institute (CLSI) M29-A3.
WARNING: Potential Biohazard!
Healthcare professionals using this system on multiple patients
should follow the infection control procedure approved by their
facility. All products or objects which come in contact with human
blood, even after cleaning, should be handled as if capable of
transmitting viral diseases.
Only auto-disabling, single-use lancing devices may be
used with this device. To reduce the chance of infection:
• Always wear gloves and follow your facility’s biohazard control
policy and procedures when performing tests involving patient
blood samples.
•Wearanewpairofcleanglovesbeforetestingeachpatient.
Change gloves between patients.
•Wearprotectiveglassesand/orotherprotectiveclothingif
necessary.
• Never share a lancet or the lancing device.
• Avoid getting hand lotion, oils, dirt, or debris in or on the
lancets and the lancing device.
Preparing the Puncture Site
Rubbing the puncture site before blood extraction
hasasignicantinuenceontheaccuracyofyour
test results.
Blood from an alternate site that has not been
rubbed exhibits a measurably different glucose
concentrationthanbloodfromthenger.
Whenthepuncturesitewasrubbedpriortoblood
extraction, the test result will be more precise.
Please follow the suggestions below before
obtaining a drop of blood:
● Wash and dry your hands before starting.
● Selectthepuncturesiteeitheratngertips
or another body part (please see section
“Alternative Site Testing” (AST) on how to
select the appropriate site).
● Rub the puncture site for about 20 seconds
before penetration.
● Clean the puncture site using cotton moistened
with 70% alcohol and let it air dry.
● Fingertip Testing
Holdthelancingdevicermlyagainstthelower
sideofthengertip.Pressthereleasebuttonto
puncturethenger;youwillhearaclickindicating
that the puncture is complete.
NOTE:
• Choose a different spot each time you test. Repeated
punctures at the same spot may cause soreness and calluses.
• It is recommended that you discard the first drop of blood as it
might contain tissue fluid, which may affect the test result.

16
Alternative Site Testing
Important: There are limitations with AST
(Alternative Site Testing).
● AST results should not be used for CGM
calibration.
● AST results should not be used for insulin
dosing calculations. Please consult your
health care professional before you perform
AST.
What is AST?
Alternative site testing (AST) means that people
usepartsofthebodyotherthanthengertips
to check their blood glucose levels. This system
allows you to test on the palm, the forearm, the
upperarmwithresultsequivalenttongertip
testing.
What is the advantage?
Fingertips feel pain more readily because they are
full of nerve endings (receptors). At other body
sites, since nerve endings are not so condensed,
youwillnotfeelasmuchpainasonthengertips.
When to use AST?
Food, medication, illness, stress and exercise
can affect blood glucose levels. Capillary blood
atthengertipreectsthesechangesfasterthan
capillary blood at other sites. Thus, when testing
blood glucose during or immediately after a meal,
physical exercise, or any other event, take a
blood sample from your nger only.
WestronglyrecommendthatyouperformAST
ONLY at the following times:
● In a pre-meal or fasting state (more than 2
hours since the last meal).
● Two hours or more after taking insulin.
● Two hours or more after exercise.
Do NOT use AST if:
● You think your blood glucose is low.
● You often do not notice when your blood
glucose is low.
● You think your blood glucose is high.
● Your AST results do not match the way you
feel.
● Yourroutineglucoseresultsoftenuctuate.

17
Performing a Blood Glucose
Test
3. Obtaining a blood sample
Use the pre-set lancing device to puncture the
desiredsite.Wipeofftherstappeareddropof
blood with a clean cotton swab. The size of the
drop should be at least as big as ( actual size),
whichis0.5microliter(μL)ofvolume.Gently
squeeze the punctured area to obtain another
drop of blood. Be careful NOT to smear the blood
sample.
1. Insert the test strip to turn on the
meter
Insertateststripintothemeter.Waitforthemeter
to display “ ” and “ ”.
2. Select the appropriate measuring mode by
pressing the M button
For selecting the measurement mode, please
refer to “THE FOUR MEASURING MODES”.
5. Read the result
The result of the blood glucose test will appear
after the meter counts down to 0. The blood
glucose result will be stored in the memory
automatically.
4. Bring strip to sample
Whileholdingthemeteratanangledpositionwith
the strip facing down, gently bring the strip to the
sample so that the absorbent hole can sip in the
blood.Conrmationwindowshouldbecompletely
lledifenoughbloodhasbeenapplied.DoNOT
removethengeruntilyouhearabeepsound.
NOTE:
• Do not press the punctured site against the test strip or try to
smear the blood.
• If you do not apply a blood sample to the test strip within 3
minutes, the meter will automatically turn off. You must remove
and reinsert the test strip to start a new test.
• The confirmation window should be filled with blood before
the meter begins to count down. NEVER try to add more blood
to the test strip after the blood sample has moved away.
Discard the used test strip and retest with a new one.
• If you have trouble filling the confirmation window, please
contact your health-care professional or local customer
service for assistance.

18
6. Eject the used test strip
Eject the test strip by pushing the eject button on
the side. Use a sharps container to dispose of the
used test strips. The meter will switch itself off
automatically.
When removing the lancet, follow the
instructions from the lancing device insert.
WARNING:
• The used lancet and test strip may be biohazardous. Please
discard them properly.
•Washyourhandsthoroughlywithsoapandwaterafter
handling the meter, lancing device and test strips to avoid
contamination. For more information, please refer to the
MAINTENANCE section.
TESTING THE BLOOD
PRESSURE
Before Measurement
●Avoidcaffeine,tea,alcoholandtobaccoatleast
30 minutes before measurement.
●Wait30minutesafterexercisingorbathing
before measurement.
●Sitorliedownforatleast10minutesbefore
measurement.
●Donotmeasurewhenfeelinganxiousortense.
●Takea5-10minutebreakbetween
measurements. This break can be longer if
necessary, depending on your patient’s physical
conditions.
●Keeptherecordsforthepatient’sdoctoras
reference.
●Bloodpressurevariesbetweeneacharm.
Always measure your patient’s blood pressure
on the same arm.
●Totakeabloodpressuremeasurementafter
performing a blood glucose test, make sure that
the test strip has been removed from the meter.

19
2. Assemble the cuff as shown. The smooth
surface should be inside the cuff loop and the
metal D-ring should not touch the patient’s skin.
3. Stretch the left or right arm in front of your
patient with the palm facing up. Slide and place
the cuff onto the arm with the air tube and artery
mark region (in red) toward the lower arm.
Wrapandtightenthecuffabovetheelbow.
The red line on the edge of the cuff should be
approximately 0.8 to 1.2 inches (2 to 3 cm)
above the elbow. Align the tube over the main
arteries on the inside.
4. Leave a little free space between the arm
andthecuff;youshouldbeabletot2ngers
between them. Clothing must not restrict the arm.
Remove all clothing covering or constricting the
measurement arm.
INDEX
RED LINE SHOULD BE AT THE INSID
INDEX MUST
12.7”~17.3”
32~44cm
Pile Side Material
Sewn Hook Material
2
~3cm
(0.8”~1.2”)
Fitting the Cuff Correctly
1. Connect the air plug of the tubing to the air jack
of the meter.
5. Pressthehookmaterialrmlyagainstthepile
material. The top and bottom edges of the cuff
should be tightened evenly around the upper arm.
▶The range index of cuff should
fall into this range.
INDEX
RED LINESHOULD BE AT THE INSID
INDEX MUST
Proper Measurement Position
1. Sit down for at least 10 minutes before
measuring.
2. Placetheelbowonaatsurface.Relaxthe
hand with the palm facing up.
3. Make sure the cuff is about the same
height as the location of the patient’s heart.
Remain still and do not talk or move during the
measurement.

20
Taking Measurements
This meter provides three different ways to
measure the blood pressure.
● Single Measurement Mode
Always apply the pressure cuff before turning
on the meter.
1. Press . All the LCD symbols will appear. The
cuffwillbegintoinateautomatically.
2. The heart symbol “ ”willashwhenapulse
isdetectedduringtheination.
3. After the measurement, the meter displays the
systolic pressure, diastolic pressure and pulse
rate.
4. Press to switch off. Or it will switch off
automatically after left idle for 3 minutes.
NOTE:
• If you press during measurement, the meter will be turned
off.
• If the pulse rate symbol is shown as “ ” instead of “ ”,
the symbol means that the measured heart beat is 25% over
the average heart beat.
● Measurement Average Mode
Always apply the pressure cuff before turning
on the meter.
1. Press . The meter will turn on and enter
theaveragingmode.Thecuffwillbegintoinate
automatically.
2. Aftertherstmeasurementiscomplete,the
meter will start counting down before the second
measurement begins. The number on the right
represents the remaining countdown between
each measurement. The meter will take three (3)
measurements consecutively with an interval of
20 seconds.
3. After taking three measurements, the results
are averaged to produce the blood pressure
measurement. Press to turn off the meter.
Other manuals for D40 Pro
2
Table of contents
Other FOR-A Blood Glucose Meter manuals

FOR-A
FOR-A Diamond PRIMA User manual

FOR-A
FOR-A DUO ultima D40 User manual

FOR-A
FOR-A Diamond GD50 User manual

FOR-A
FOR-A Diamond Mini User manual

FOR-A
FOR-A Diamond CUFF BP User manual

FOR-A
FOR-A GD20 User manual

FOR-A
FOR-A Diamond Mini User manual

FOR-A
FOR-A Premium V10a User manual

FOR-A
FOR-A Diamond GD50 User manual

FOR-A
FOR-A G20 User manual

FOR-A
FOR-A D30 User manual

FOR-A
FOR-A G20 User manual

FOR-A
FOR-A MD Reference guide

FOR-A
FOR-A Advanced pro GD40g User manual

FOR-A
FOR-A Diamond Mini User manual

FOR-A
FOR-A DM40 User manual

FOR-A
FOR-A COMFORT plus G30a User manual

FOR-A
FOR-A D15 User manual

FOR-A
FOR-A COMFORT check G40 User manual

FOR-A
FOR-A V12 User manual