How Hard hould You Work?
When exercising, you should try to stay within your target heart rate zone.
Always be aware of how you feel when you exercise. If you feel dizzy or light-headed, stop
immediately and rest. If you are not even breaking a sweat, then speed it up!
tretching Guide
Tips for tretching
•Begin with gradual mobility exercises of all the joints, i.e simply rotate your wrists,
bend your arms and roll your shoulders. This will allow your body's natural lubrication
(synovial fluid) to protect the surface of your bones at the joints.
•Always warm up the body before stretching, as this increases blood flow around the
body, which is turn makes the muscles more supple.
•Start with your legs and work your way up your body.
•Each stretch should be held for at least 10 seconds (working up to 20 to 30
seconds), and usually repeated about 2 or 3 times.
•Do not stretch until it hurts. If there is any pain, ease off.
•Don't bounce. Stretching should be gradual and relaxed.
•Don't hold your breath during a stretch.
•Stretch after exercising to prevent your muscles from tightening up.
•Stretch at least three times a week to maintain flexability.
Calf tretch
•Stand with one leg in front of the other, with both feet
facing forwards and the front leg bent. (Your front knee
should be above your ankle).
•Press the heel of the back leg into the floor until you
begin to feel the calf muscle in the back of your rear leg
starting to stretch.
Note: keep your back and rear leg straight during this stretch.
•Slide your rear leg backwards to increase the stretch if
required.
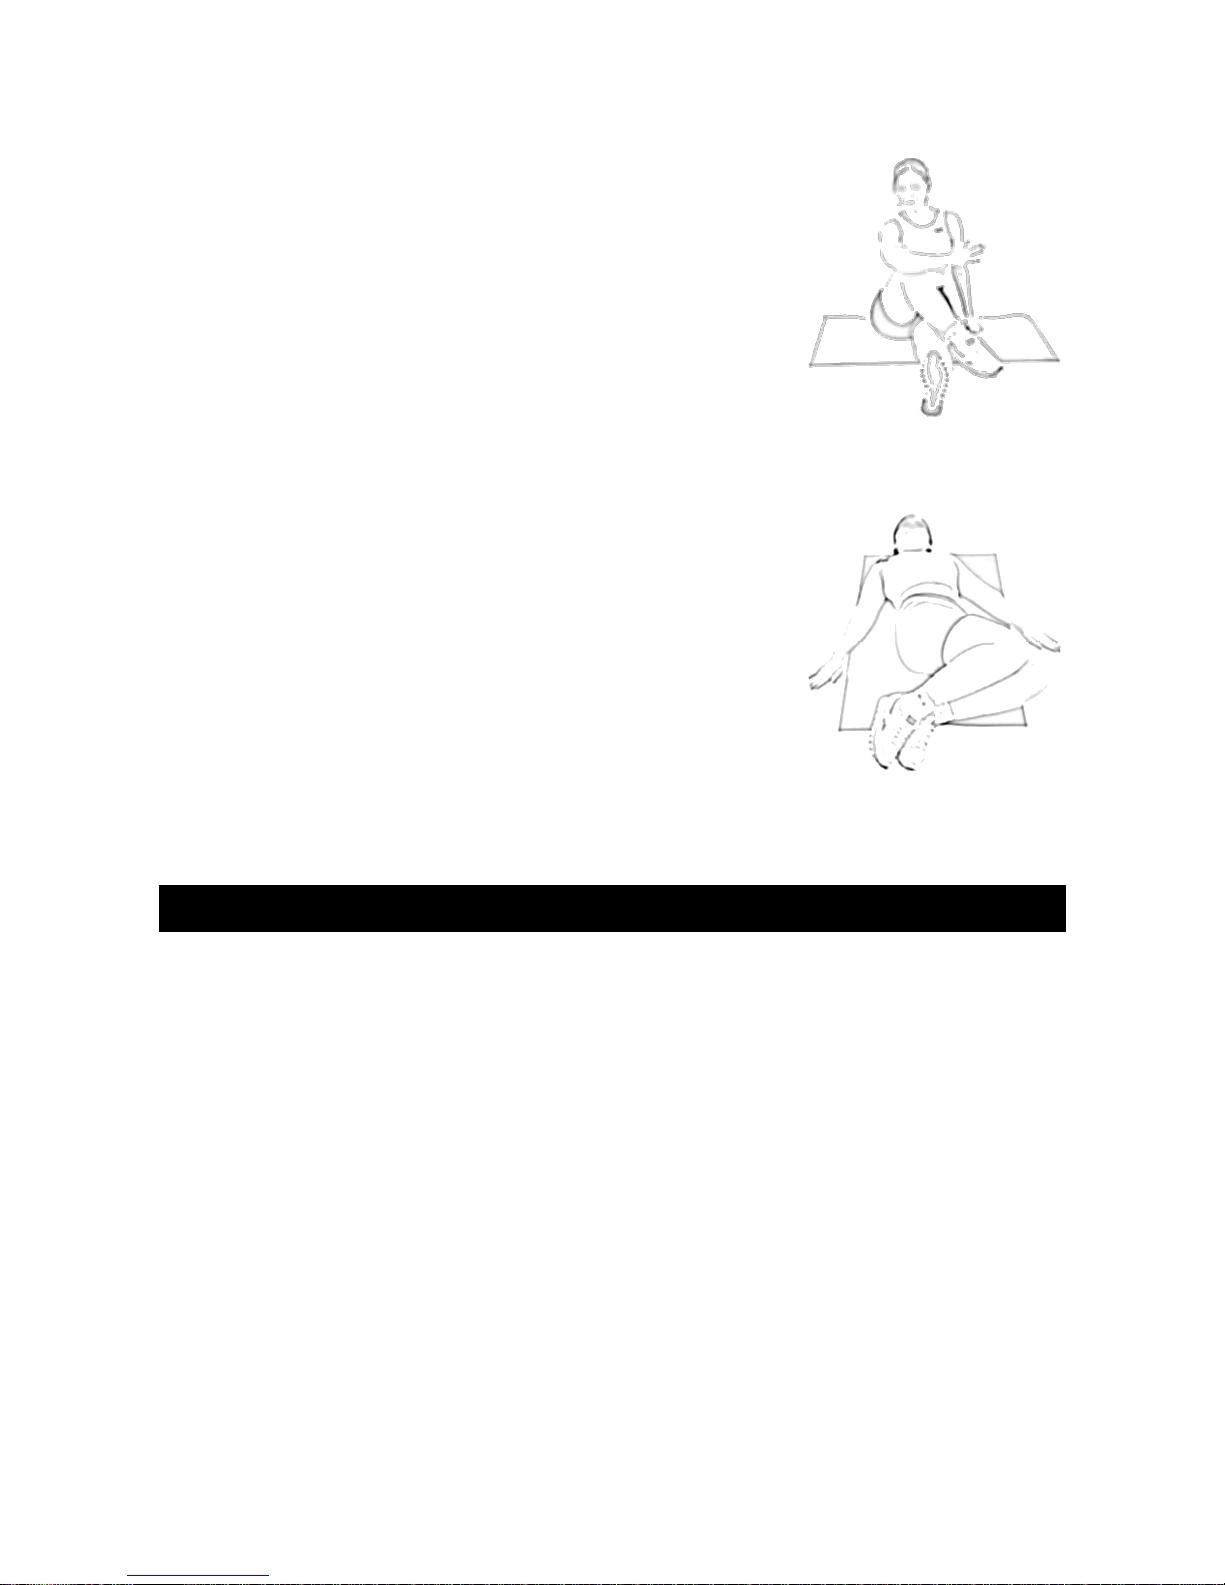
Hamstring tretch
•Sit with one leg extended. Bring the other leg towards
you and rest the sole of that foot onto the inner thigh of
the extended leg.
•Keeping your shoulders square, reach forward towards
your toes as far as possible, then hold for the required
count, then relax.
Note: Keep your back and leg straight during this stretch.
7


 Service manual")