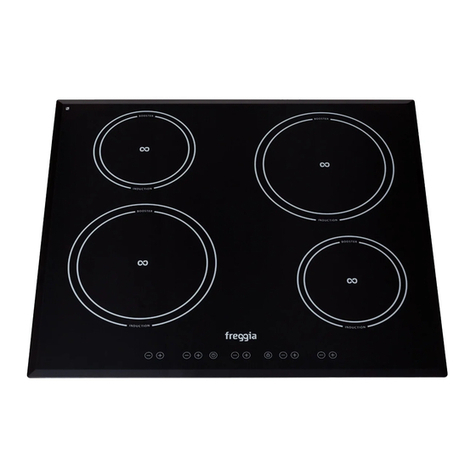
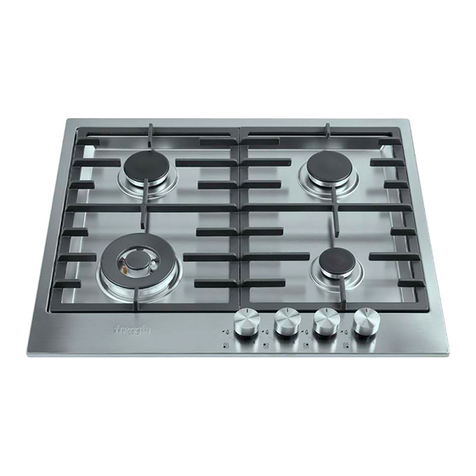
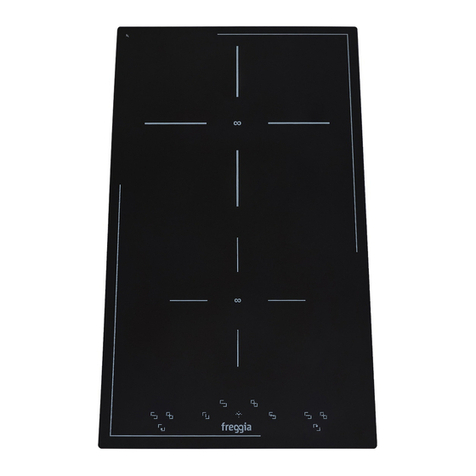
Freggia HCFI64 User manual

BUILT-IN HOB
ВАРОЧНАЯ ПОВЕРХНОСТЬ
ВАРИЛЬНА ПОВЕРХНЯ
PŁYTA DO ZABUDOWY
User manual
Руководство пользователя
Керівництво з експлуатації
Instrukcja obsługi
HCFI64

ATTANTION!
Important safety information.
IMPORTANT:
Edditional recommendations regarding usage.
NOTE:
Care and maintenance.
Thank you for purchasing Freggia household
appliance.
Please carefully read the user manual, as it contains
the instructions for the safe installation, operation
and maintenance of the household appliance.
Save it for future use.

EN
3
TABLE OF CONTENTS
SAFETY........................................................................................................................................4
PRECAUTIONS BEFORE USING..................................................................................................................4
USING THE APPLIANCE..............................................................................................................................4
PRECAUTIONS NOT TO DAMAGE THE APPLIANCE............................................................................4
PRECAUTIONS IN CASE OF APPLIANCE FAILURE...............................................................................5
OTHER PROTECTIONS...................................................................................................................................5
DESCRIPTION OF THE APPLIANCE..................................................................................6
TECHNICAL CHARACTERISTICS.................................................................................................................6
CONTROL PANEL............................................................................................................................................6
USE OF THE APPLIANCE....................................................................................................7
DISPLAY..............................................................................................................................................7
VENTILATION..........................................................................................................................................7
STARTING-UP AND APPLIANCE MANAGEMENT........................................................7
BEFORE THE FIRST USE...........................................................................................................................7
INDUCTION PRINCIPLE..............................................................................................................................7
SENSITIVE TOUCH........................................................................................................................................7
STARTING-UP.......................................................................................................................................8
PAN DETECTION............................................................................................................................................8
RESIDUAL HEAT INDICATION..................................................................................................................8
TIMER.............................................................................................................................................................9
CONTROL PANEL LOCKING......................................................................................................................10
COOKING ADVICES...................................................................................................................10
PAN QUALITY....................................................................................................................................................10
PAN DIMENSION...........................................................................................................................................11
EXAMPLES OF COOKING POWER SETTING.................................................................................11
MAINTENANCE AND CLEANING......................................................................................11
WHAT TO DO IN CASE OF A PROBLEM...............................................................12
ENVIRONMENT PRESERVATION...........................................................................................13
INSTALLATION INSTRUCTIONS............................................................................................13
ELECTRICAL CONNECTION...................................................................................................14
TABLE OF CONTENTS

4SAFETY
PRECAUTIONS BEFORE USING
• Unpack all the materials.
• The installation and connecting of the appliance have to be done by approved specialists.The manufacturer
can not be responsible for damage caused by building-in or connecting errors.
• To be used, the appliance must be well-equipped and installed in a kitchen unit and an adapted and
approved work surface.
• This domestic appliance is exclusively for the cooking of food, to the exclusion of any other domestic,
commercial or industrial use.
• Remove all labels and self-adhesives from the ceramic glass.
• Do not change or alter the appliance.
• The cooking plate can not be used as freestanding or as working surface.
• The appliance must be grounded and connected conforming to local standards.
• Do not use any extension cable to connect it.
• The appliance can not be used above a dishwasher or a tumble-dryer: steam may damage the electronic
appliances.
• The appliance is not intended to be operated by means of external timer or separate remote control
system.
USING THE APPLIANCE
• Switch the heating zones o after using.
• Keep an eye on the cooking using grease or oils: that may quickly ignite.
• Be careful not to burn yourself while or after using the appliance.
• Make sure no cable of any xed or moving appliance contacts with the glass or the hot saucepan.
• Magnetically objects (credit cards, oppy disks, calculators) should not be placed near to the engaged
appliance.
• Metallic objects such as knives, forks, spoons and lids should not be placed on the hob surface since they
can get hot.
• In general do not place any metallic object except heating containers on the glass surface. In case of
untimely engaging or residual heat, this one may heat, melt or even burn.
• Never cover the appliance with a cloth or a protection sheet. This is supposed to become very hot and catch
re.
• This appliance can be used by children aged from 8 years and above and persons with reduced physical,
sensory or mental capabilities or lack of experience and knowledge if they have been given supervision or
instruction concerning use of the appliance in a safe way and understand the hazards involved.
• Children shall not play with the appliance.
• Cleaning and user maintenance shall not be made by children without supervision.
PRECAUTIONS NOT TO DAMAGE THE APPLIANCE
• Raw pan bottoms or damaged saucepans (not enamelled cast iron pots,) may damage the ceramic glass.
• Sand or other abrasive materials may damage ceramic glass.
• Avoid dropping objects, even little ones, on the vitroceramic.
• Do not hit the edges of the glass with saucepans.
• Make sure that the ventilation of the appliance works according to the manufacturer’s instructions.
SAFETY

5
SAFETY 5
• Do not put or leave empty saucepans on the vitroceramic hobs.
• Sugar, synthetic materials or aluminium sheets must not contact with the heating zones. These may cause
breaks or other alterations of the vitroceramic glass by cooling: switch on the appliance and take them
immediately out of the hot heating zone (be careful: do not burn yourself).
WARNING!
Danger of re: do not store items on the cooking surface.
• Never place any hot container over the control panel.
• If a drawer is situated under the embedded appliance, make sure the space between the content of the
drawer and the inferior part of the appliance is large enough (2 cm). This is essential to guaranty a correct
ventilation.
• Never put any inammable object (ex. sprays) into the drawer situated under the vitroceramic hob. The
eventual cutlery drawers must be resistant to heat.
PRECAUTIONS IN CASE OF APPLIANCE FAILURE
• If a defect is noticed, switch o the appliance and turn o the electrical supplying.
• If the ceramic glass is cracked or ssured, you must unplug the appliance and contact the after sales service.
• Repairing has to be done by specialists. Do not open the appliance by yourself.
WARNING!
If the surface is cracked, switch o the appliance to avoid the possibility of electric shock.
OTHER PROTECTIONS
• Note sure that the container pan is always centred on the cooking zone. The bottom of the pan must have
to cover as much as possible the cooking zone.
• For the users of pacemaker, the magnetic eld could inuence its operating. We recommend getting
information to the retailer or of the doctor.
• Do not to use aluminium or synthetic material containers: they could melt on still hot cooking zones.
NEVER try to extinguish a re with water, but switch o the appliance and then cover ame e.g. with a
lid or a re blanket.
THE USE OF EITHER POOR QUALITY POT OR ANY INDUCTION ADAPTOR PLATE FOR NON-MAGNETIC
COOKWARE RESULTS IN A WARRANTY BREACH.
IN THIS CASE, THE MANUFACTURER CANNOT BE HELD RESPONSIBLE FOR ANY DAMAGE CAUSED TO THE
HOB AND/OR ITS ENVIRONMENT.
SAFETY
EN

6DESCRIPTION OF THE APPLIANCE
TECHNICAL CHARACTE
DESCRIPTION OFTHE APPLIANCE
* The given power may change according to the dimensions and material of the pan.
** calculated according to the method of measuring performance (EN 60350-2).
CONTROL PANEL
Type HCFI64
Total power 5600 W
Left front heating zone Ø 185 mm
Minimum detection Ø 100 mm
Nominal power* 1400 W
Standardised cookware category** B
Left rear heating zone Ø 185 mm
Minimum detection Ø 100 mm
Nominal power* 1400 W
Standardised cookware category** B
Right rear heating zone Ø 185 mm
Minimum detection Ø 100 mm
Nominal power* 1400 W
Standardised cookware category** C
Right front heating zone Ø 185 mm
Minimum detection Ø 100 mm
Nominal power* 1400 W
Standardised cookware category** A
Timer keys
[ - ] key
Power display
Timer and Power
display
On/o key
Selection key
[ + ] key
Control light timer

VENTILATION
The cooling system is fully automatic. The cooling fan starts with a low speed when the calories brought out by the
electronic system reach a certain level.The ventilation starts his high speed when the hob is intensively used. The cooling
fan reduces his speed and stops automatically when the electronic circuit is cooled enough.
STARTING-UP AND APPLIANCE MANAGEMENT
BEFORE THE FIRST USE
Clean your hob with a damp cloth, and then dry the surface thoroughly. Do not use detergent which risks
causing blue-tinted colour on the glass surface.
INDUCTION PRINCIPLE
An induction coil is located under each heating zone. When it is engaged, it produces a variable electromagnetic eld
which produces inductive currents in the ferromagnetic bottom plate of the pan. The result is a heating-up of the pan
located on the heating zone.
Of course the pan has to be adapted:
• All ferromagnetic pans are recommended (please verify it thanks a little magnet): cast iron and steel pans,
enamelled pans, stainless-steel pans with ferromagnetic bottoms…
• Are excluded: cupper, pure stainless-steel, aluminium, glass, wood, ceramic, stoneware, …
The induction heating zone adapts automatically the size of the pan. With a too small diameter the pan doesn’t work.
This diameter is varying in function of the heating zone diameter.
If the pan is not adapted to the induction hob the display will show [ U ].
SENSITIVE TOUCH
Your ceramic hob is equipped with electronic controls with sensitive touch keys. When your nger presses the key, the
corresponding command is activated. This activation is validated by a control light, a letter or a number in the display
and/or a“beep” sound.
Important:
In the case of a general use press only one key at the same time.
7
USE OF THE APPLIANCE
USE OFTHE APPLIANCE
DISPLAY
Display Designation Function
0 Zero The heating zone is activated.
1…9 Power level Selection of the cooking level.
U Pan detection No pan or inadequate pan.
E Error message Electronic failure.
H Residual heat The heating zone is hot
L Locking Control panel locking.
EN

IMPORTANT:
If no action is made within 20 second the electronics returns in waiting position.
PAN DETECTION
The pan detection ensures a perfect safety.
The induction doesn’t work:
• If there is no pan on the heating zone or if this pan is not adapted to the induction. In this case it is
impossible to increase the power and the display shows [ U ]. This symbol disappears when a pan is put on
the heating zone.
• If the pan is removed from the heating zone the operation is stopped. The display shows [ U ]. The symbol
[ U ] disappears when the pan is put back to the heating zone. The cooking continues with the power level
setted before.
IMPORTANT:
After use, switch the heat element o: do not let the pan detection [ U ] active.
RESIDUAL HEAT INDICATION
After the switch o of a heating zone or the complete stop of the hob, the heating zones are still hot and indicates [ H ]
on the display.
The symbol [ H ] disappears when the heating zones may be touched without danger.
As far as the residual heat indicators are on light, don’t touch the heating zones and don’t put any heat sensitive object
on them.
Attention!
There are risks of burn and re.
• STARTUP/ SWITCH OFF A HEATING ZONE :
8STARTING-UP AND APPLIANCE MANAGEMENT
STARTINGUP
You must rst switching on the hob, then the heating zone:
• STARTUP/ SWITCH OFF THE HOB :
STARTING-UP AND APPLIANCE MANAGEMENT
Action Control panel Display
Zone selection Press selection key from the zone [ 0 ]
Increase power Press key [ + ] [ 1 ] to [ 9 ]
Decrease power Press key [ - ] [ 9 ] to [ 1 ]
Stop Press key [ - ] or press
simultaneously zone selection and [ - ] [ 0 ] or [ H ]
Action Control panel Display
To start Press key [ 0/l ] [ 0 ]
To switch o Press key [ 0/l ] Nothing or [ H ]

Action Control panel Display
Activate the hob Press key [ 0/l ] [ 0 ] or [ H ]
Select« Timer » Press simultaneously [ - ] and [ + ] [ 00 ]
Decrease the time Press key [ - ] [ 00 ] wents to 30,29….
Increase the time Press key [ + ] time increase
9
STARTING-UP AND APPLIANCE MANAGEMENT
EN
Action Control panel Display
Zone selection Press selection key from the zone [ 0 ]
Increase power Press key [ + ] [ 1 ] … [ 9 ]
To select « Timer » Press simultaneously [ - ] and [ + ] [ 00 ]
Decrease the time Press key [ - ] [ 00 ] wents to 30, 29…
Increase the time Press key [ + ] time increase
Action Control panel Display
Zone selection Press selection key from the zone [ 0 ]
To select « Timer » Press simultaneously [ - ] and [ + ] The remaining time
To stop the « Timer » Press key [ - ] [ 00 ] then stops
TIMER
The timer is able to be used simultaneous with all heating zones and this with dierent time settings (from 0
to 99 minutes) for each heating zone.
• SETTING AND MODIFICATION OF THE COOKING TIME :
• AUTOMATIC STOP AT THE END OF THE COOKING TIME :
As soon as the selected cooking time is nished the timer displays blinking [ 00 ] and a sound rings.
To stop the sound and the blinking it is enough to press any key.
• EGG TIMER FUNCTION :
After a few seconds the control light stops with blinking.
The time is conrmed and the cooking starts until the time reaches [ 00 ].
• TO STOP THE COOKING TIME :
After a few seconds the control light stops with blinking.
As soon as the selected cooking time is nished the timer displays blinking [ 00 ] and a sound rings.
To stop the sound and the blinking it is enough to press any key.
STARTING-UP AND APPLIANCE MANAGEMENT

10 STARTING-UP AND APPLIANCE MANAGEMENT
STARTING-UP AND APPLIANCE MANAGEMENT
CONTROL PANEL LOCKING
To avoid modifying a setting of cooking zones , in particular with within the framework of cleaning the control panel
can be locked (with exception to the On/O key [ 0/l ]).
• LOCKING :
Action Control panel Display
Start Press key [ 0/l ] [ 0 ] or [ H ]
Hob locking Press simultaneously [ - ] and selection key from the front the front right zone [ 0 ] or [ H ]
Repress selection key from the front right zone [ L ]
Action Control panel Display
Start Press key [ 0/l ] [ L ]
In the 5 seconds after
start unlocking the hob
Press simultaneously [ - ] and selection key from the front right zone [ 0 ]
Repress key [ - ] No light on the
displays
• UNLOCKING :
COOKING ADVICES
PAN QUALITY
Adapted materials: steel, enamelled steel, cast iron, ferromagnetic stainless-steel, aluminium with
ferromagnetic bottom.
Not adapted materials: aluminium and stainless-steel without ferromagnetic bottom, cupper, brass, glass, ceramic,
porcelain.
The manufacturers specify if their products are
compatible induction.
To check if pans are compatibles :
• Put a little water in a pan placed on an
induction heating zone set at level [ 9
].This water must heat in a few seconds.
• A magnet stucks on the bottom of the
pan.
Certain pans can make noise when they are placed
on an induction cooking zone. This noise doesn’t
mean any failure on the appliance and doesn’t
inuence the cooking operating.

PAN DIMENSION
The cooking zones are, until a certain limit, automatically adapted to the diameter of the pan. However the bottom of
this pan must have a minimum of diameter according to the corresponding cooking zone.
To obtain the best eciency of your hob, please place the pan well in the centre of the cooking zone.
EXAMPLES OF COOKING POWER SETTING
(the values below are indicative)
EN
11
COOKING ADVICES
COOKING ADVICES
1 to 2 Melting
Reheating
Sauces, butter, chocolate, gelatine
Dishes prepared beforehand
2 to 3 Simmering
Defrosting
Rice, pudding, sugar syrup
Dried vegetables, sh, frozen products
3 to 4 Steam Vegetables, sh, meat
4 to 5 Water Steamed potatoes, soups, pasta, fresh vegetables
6 to 7 Medium cooking
Simmering
Meat, lever, eggs, sausages
Goulash, roulade, tripe
7 to 8 Cooking Potatoes, fritters, wafers
9 Frying, roosting, boiling water Steaks, omelettes, fried dishes, water
P Frying, roosting
Boiling water
Scallops, steaks
Boiling signicant quantities of water
MAINTENANCE AND CLEANING
SWITCHOFF THE APPLIANCE BEFORE CLEANING
Attention!
Do not clean the hob if the glass is too hot because they are risk of burn.
• Remove light marks with a damp cloth with washing up liquid diluted in a little water. Then rinse with cold
water and dry the surface thoroughly.
• Highly corrosive or abrasive detergents and cleaning equipment likely to cause scratches must be
absolutely avoided.
• Do not ever use any steam-cleaner or pressure washer.
• Do not use any object that may scratch the ceramic glass.
• Ensure that the pan is dry and clean. Ensure that there are no grains of dust on your ceramic hob or on the
pan. Sliding rough saucepans will scratch the surface.
• Spillages of sugar, jam, jelly, etc. must be removed immediately. You will thus prevent the surface being
damaged.

12 WHAT TO DO IN CASE OF A PROBLEM
• THE HOB OR THE COOKING ZONE DOESN’T STARTUP :
• The hob is badly connected on the electrical network.
• The protection fuse cut-o.
• The locking function is activated.
• The sensitive keys are covered with grease or water.
• An object is put on a key.
• THE CONTROL PANEL DISPLAYS U :
• There is no pan on the cooking zone.
• The pan is not compatible with induction.
• The bottom diameter of the pan is too small.
• CONTINUOUS VENTILATION AFTER CUTTING OFF THE HOB :
• This is not a failure, the fan continuous to protect the electronic device.
• The fan cooling stops automatically.
• ONE OR ALL COOKING ZONE CUTOFF :
• The safety system functioned.
• You forgot to cut-o the cooking zone for a long time.
• One or more sensitive keys are covered.
• The pan is empty and its bottom overheated.
• The hob also has an automatic reduction of power level and breaking Automatic overheating
• THE CONTROL PANEL DISPLAYS L :
• Refer to the chapter control panel locking page.
• THE CONTROL PANEL DISPLAYS ER03 :
• An object or liquid covers the control keys. The symbol disappear as soon as the key is released or cleaned.
• THE CONTROL PANEL DISPLAYS E2 OR EH :
• The hob is overheated, let it cool and then turn it onagain.
• THE CONTROL PANEL DISPLAYS E3 :
• The pan is not adapted, change the pan.
• THE CONTROL PANEL DISPLAYS E5 :
• Defective network. Control the voltage of the electrical network.
• THE CONTROL PANEL DISPLAYS E6 :
• Defective network. Control the frequency and voltage of the electrical network.
WHATTO DO IN CASE OF A PROBLEM

EN
13
WHAT TO DO IN CASE OF A PROBLEM
• THE CONTROL PANEL DISPLAYS E8 :
• The air inlet of the ventilator is obstructed, release it.
• THE CONTROL PANEL DISPLAYS U400 :
• The hob is not connected to the network. Check the connection and reconnect the hob.
IMPORTANT:
If one of the symbols above persists, call the SAV.
ENVIRONMENT PRESERVATION
IMPORTANT:
The materials of packing are ecological and recyclable.
• The electronic appliances are composed of recyclable, and sometimes harmful materials for
the environment, but necessary to the good running and the safety of the appliance.
• Don’t throw your appliance with the household refuses
• Get in touch with the waste collection centre of your commune that is adapted to the
recycling of the household appliances.
INSTALLATION INSTRUCTIONS
Attention!
The installation comes under the exclusive responsibility of specialists.
The installer is held to respect the legislation and the standards enforce in his home country.
• HOW TO STICK THE GASKET:
The gasket supplied with the hob avoids all inltration of liquids
in the cabinet. His installation has to be done carefully, in
conformity of the following drawing.
Stick the gasket (2) two millimeters from the external edge of the glass,
after removing the protection tape (3).
• FITTING INSTALLING:
• Cut out sizes of the worktop
WHATTO DO IN CASE OF A PROBLEM
Reference Cut-size
HCFI64B 560 x 490 mm
HCFI64W
2 mm
3
2

14 INSTALLATION INSTRUCTIONS
• Ensure that there is a distance of 50 mm between the hob and the wall or sides.
• The hobs are classied as “Y” class for heat protection. Ideally the hob should be installed with plenty of
space on either side. There may be a wall at the rear and tall units or a wall at one side. On the other side,
however, no unit or divider must stand higher than the hob.
• The piece of furniture or the support in which the hob is to be tted, as well as the edges of furniture, the
laminate coatings and the glue used to x them, must be able to resist temperatures of up to 100 °C.
• The mural rods of edge must be heat-resisting.
• Not to install the hob to the top of a not ventilated oven or a dishwasher.
• To guarantee under the bottom of the hob casing a space of 20 mm to ensure a good air circulation of
the electronic device.
• If a drawer is placed under the work, avoid to put into this drawer ammable objects (for example: sprays)
or not heat-resistant objects.
• Materials which are often used to make worktops expand on contact with water. To protect the cut out
edge, apply a coat of varnish or special sealant. Particular care must be given to applying the adhesive
joint supplied with the hob to prevent any leakage into the supporting furniture. This gasket guaranties a
correct seal when used in conjunction with smooth work top surfaces.
• The safety gap between the hob and the cooker hood placed above must respect the indications of the
hood manufacturer. In case of absence of instructions respect a distance minimum of 760 mm.
• The connection cord should be subjected, after building, with no mechanical constraint, such for example
of the fact of the drawer.
WARNING: Use only hob guards designed by the manufacturer of the cooking appliance or indicated by
the manufacturer of the appliance in the instructions for use as suitable or hob guards incorporated in
the appliance. The use of inappropriate guards can cause accidents.
ELECTRICAL CONNECTION
The installation of this appliance and the connection to the electrical network should be entrusted
only to an electrician perfectly to the fact of the normative regulations and which respects them
scrupulously.
• Protection against the parts under tension must be ensured after the building-in.
• The data of connection necessary are on the stickers place on the hob casing near the connection box.
INSTALLATION INSTRUCTIONS

EN
15
ELECTRICAL CONNECTION
• The connection to the main must be made using an earthed plug or via an omnipolar circuit breaking
device with a contact opening of at least 3 mm.
• The electrical circuit must be separated from the network by adapted devices, for example: circuit breakers,
fuses or contactors.
• If the appliance is not tted with an accessible plug, disconnecting means must be incorporated in the
xed installation, in accordance with the installation regulations.
• The inlet hose must be positioned so that it does not touch any of the hot parts of the hob or even.
Caution !
This appliance has only to be connected to a network 230 V~ 50/60 Hz.
Connect always the earth wire.
Respect the connection diagram.
The connection box is located underneath at the back of the hob casing. To open the cover use a medium screwdriver.
Place it in the slits and open the cover.
ELECTRICAL CONNECTION
* calculated with the simultaneous factor following the standard EN 60 335-2-6
• SETTING UP THE CONFIGURATIONS:
Attention!
For the various kinds of connection, use the brass bridges which are in the box next the terminal
• MONOPHASE 230V~1P+N
Put a bridge between terminal L1 and L2.
Put a bridge between terminal N1 and N2.
Attach the earth to the terminate“earth”.
Attach the neutral N to one of the terminals N1 or N2.
Attach the Phase L to one of the terminals L1 or L2.
• BIPHASE 400V~2P+N
Put a bridge between terminal N1 and N2.
Attach the earth to the terminate“earth”,
Attach the neutral N to one of the terminals N1 or N2,
Attach the Phase L1 to the terminals L1
Attach the Phase L2 to the terminal L2.
Caution!
Ensure that you correctly attach the wires and tighten the screws properly.
We cannot be held responsible for any incident resulting from incorrect connection or which could arise from
the use of an appliance which has not been earthed or has been equipped with a faulty earth connection
THE MANUFACTURER DECLINES ALL RESPONSIBILITY FOR EVENTUAL DAMAGES CAUSED BY BREACHING THE
ABOVE WARNINGS.
Mains Connection Cable diameter Cable Protection calibre
230V~ 50/60Hz 1 Phase + N 3 x 2.5 mm² H 05 VV - F
H 05 RR - F 25 A *
400V~ 50/60Hz 2 Phases + N 4 x 1.5 mm² H 05 VV - F
H 05 RR - F 16 A *

!
.
ПОЛЕЗНАЯ ИНФОРМАЦИЯ:
дополнительная информация по эксплуа-
тации устройства.
СОВЕТ:
советы и рекомендации по эксплуатации
устройства.
Благодарим Вас за приобретение
устройства компании Freggia. Пожалуйста,
внимательно прочитайте данное руководство
пользователя, так как в нем содержатся
инструкции по безопасной установке,
эксплуатации и обслуживанию устройства.
Сохраните его для использования в будущем.

RU
17
СОДЕРЖАНИЕ
ТЕХНИКА БЕЗОПАСНОСТИ..................................................................................................18
МЕРЫ ПРЕДОСТОРОЖНОСТИ ПЕРЕД ИСПОЛЬЗОВАНИЕМ.....................................................18
КАК ИСПОЛЬЗОВАТЬ ПРИБОР.............................................................................................................18
МЕРЫ ПРЕДОСТОРОЖНОСТИ ВО ИЗБЕЖАНИЕ ПОВРЕЖДЕНИЯ ПРИБОРА.............18
МЕРЫ ПРЕДОСТОРОЖНОСТИ В СЛУЧАЕ НЕИСПРАВНОСТИ ПРИБОРА.........................19
ДРУГИЕ МЕРЫ ЗАЩИТЫ.........................................................................................................................19
ОПИСАНИЕ ПРИБОРА............................................................................................................20
ТЕХНИЧЕСКИЕ ХАРАКТЕРИСТИКИ........................................................................................................20
ПАНЕЛЬ УПРАВЛЕНИЯ..............................................................................................................................20
ИСПОЛЬЗОВАНИЕ ПРИБОРА...........................................................................................21
ИНФОРМАЦИЯ, ОТОБРАЖАЕМАЯ НА ДИСПЛЕЕ.....................................................................21
ВЕНТИЛЯЦИЯ.........................................................................................................................................21
ВКЛЮЧЕНИЕ И ОБРАЩЕНИЕ С ПРИБОРОМ...........................................21
ПЕРЕД ПЕРВЫМ ИСПОЛЬЗОВАНИЕМ.....................................................................................21
ПРИНЦИП ИНДУКЦИИ.....................................................................................................................21
СЕНСОРНЫЕ КЛАВИШИ........................................................................................................................22
ВКЛЮЧЕНИЕ..................................................................................................................................22
ОБНАРУЖЕНИЕ ПОСУДЫ...........................................................................................................................22
ИНДИКАЦИЯ НАЛИЧИЯ ОСТАТОЧНОГО ТЕПЛА...................................................................22
ТАЙМЕР.............................................................................................................................................................23
БЛОКИРОВКА ПАНЕЛИ УПРАВЛЕНИЯ...............................................................................................23
СОВЕТЫ ПО ПРИГОТОВЛЕНИЮ ПИЩИ..........................................................24
КАЧЕСТВО ПОСУДЫ...............................................................................................................................24
РАЗМЕР ПОСУДЫ........................................................................................................................................24
ПРИМЕРЫ НАСТРОЕК МОЩНОСТИ ПРИ ПРИГОТОВЛЕНИИ.......................................25
ОБСЛУЖИВАНИЕ И ЧИСТКА...........................................................................................25
ЧТО ДЕЛАТЬ, ЕСЛИ ВОЗНИКЛА ПРОБЛЕМА.............................................26
ОХРАНА ОКРУЖАЮЩЕЙ СРЕДЫ...................................................................................27
ИНСТРУКЦИИ ПО УСТАНОВКЕ......................................................................................27
ПОДКЛЮЧЕНИЕ К ЭЛЕКТРИЧЕСКОЙ СЕТИ............................................................28
СОДЕРЖАНИЕ

18 ТЕХНИКА БЕЗОПАСНОСТИ
• Распакуйте все материалы.
• Установку и подключение прибора должны выполнять сертифицированные специалисты. Произво-
дитель не несет ответственности за повреждения, вызванные ошибками при монтаже или подключе-
нии.
• Чтобы использовать прибор, необходимо установить его в полном комплекте на подготовленную и
пригодную рабочую поверхность кухонного оборудования.
• Этот бытовой прибор предназначен исключительно для приготовления пищи и не предназначен для
использования в других бытовых, коммерческих или промышленных целях.
• Снимите все ярлыки и самоклеящиеся этикетки со стеклокерамики.
• Не вносите в прибор изменений и модификаций.
• Поверхность для приготовления нельзя использовать в качестве свободностоящего прибора или
рабочей поверхности кухни. Прибор необходимо заземлить и подключить в соответствии с норма-
ми.
• Не используйте для подключения удлинитель.
• Нельзя использовать прибор над посудомоечной машиной или сушилкой: пар может повредить
электронные устройства.
• Прибор не предусматривает управление с помощью внешнего таймера или отдельной системы дис-
танционного управления.
• Зоны нагрева следует выключать после использования.
• Cледите за варочной поверхностью во время готовки на жиру или масле, которое легко загорается.
• Будьте осторожны: не обожгитесь во время или после использования прибора.
• Убедитесь, что стекло или горячая посуда не соприкасается с кабелями, стационарными или пере-
носными приборами.
• Не кладите рядом с включенным прибором магнитные предметы (кредитные карты, дискеты, кальку-
ляторы).
• Нельзя класть на горячую поверхность металлические предметы, такие как ножи, вилки, ложки и
крышки: они могут сильно нагреться.
• Старайтесь не класть на стеклянную поверхность металлические предметы, за исключением нагре-
ваемых емкостей. Если прибор будет включен или сохраняет остаточное тепло, они могут нагреться,
расплавиться или даже сгореть.
• Ни в коем случае не накрывайте прибор тканью или защитным листом. Они могут сильно нагреться
и загореться.
• Устройство могут использовать дети от 8 лет и лица с ограниченными физическими, сенсорными
или умственными способностями либо недостаточными навыками и знаниями, если они действуют
под наблюдением или руководством касательно безопасного использования прибора и осознают
сопряженные с этим риски.
• Дети не должны играть с прибором.
• Дети не должны заниматься чисткой и обслуживанием прибора без надзора.
• Шероховатое дно или поврежденные кастрюли (неэмалированные чугунные котелки) могут повре-
дить стеклокерамику.
ТЕХНИКА БЕЗОПАСНОСТИ

19
ТЕХНИКА БЕЗОПАСНОСТИ 19
• Песок или другие абразивные материалы могут повредить стеклокерамическую поверхность.
• Не роняйте на стеклокерамику предметы, даже маленькие.
• Избегайте ударов посуды об углы стеклокерамики.
• Убедитесь, что вентиляция прибора работает в соответствии с инструкциями производителя.
• Не ставьте и не оставляйте на стеклокерамических варочных поверхностях пустую посуду.
• Зоны нагрева не должны контактировать с сахаром, синтетическими материалами или алюминие-
выми листами. Это может привести к разрушению или другим изменениям стеклокерамической по-
верхности при охлаждении. Немедленно выключите прибор и уберите эти материалы из горячей
зоны нагрева (осторожно: не обожгитесь).
!
: .
• Ни в коем случае не ставьте горячие емкости на панель управления.
• Если под встроенным прибором расположен выдвижной ящик, убедитесь, что между содержимым
ящика и нижней поверхностью прибора остается достаточно большое расстояние (2 см). Это необхо-
димо, чтобы обеспечить правильную вентиляцию.
• Ни в коем случае не кладите легковоспламеняемые предметы (например, аэрозоли) в ящик, распо-
ложенный под стеклокерамической варочной поверхностью. Ящики для столовых приборов, если
они есть, должны быть термостойкими.
• Обнаружив дефект, выключите прибор и отключите его от сети электропитания.
• Если на стеклокерамической поверхности появилась трещина или надлом, отключите прибор от
электрической сети и обратитесь в службу сервисной поддержки.
• Ремонт должны выполнять специалисты. Не ремонтируйте прибор самостоятельно.
: , , -
.
• Следите, чтобы посуда всегда располагалась по центру варочной зоны. Дно посуды должно покры-
вать как можно большую поверхность варочной зоны.
• Если вы используете кардиостимулятор, магнитное поле может повлиять на его работу. Рекоменду-
ем проконсультироваться об этом с продавцом или врачом.
• Не используйте контейнеры из алюминия или синтетических материалов: они могут расплавиться,
стоя на все еще горячих варочных зонах.
– ,
, .
-
.
/ .
ТЕХНИКА БЕЗОПАСНОСТИ
RU

20 ОПИСАНИЕ ПРИБОРА
ОПИСАНИЕ ПРИБОРА
HCFI64B
HCFI64W
Полная мощность 5600 Вт
Левая передняя зона нагрева Ø 185 мм
Минимальная область обнаружения посуды Ø 100 мм
Номинальная мощность* 1400 Вт
Стандартизированная категория кухонной посуды** B
Левая задняя зона нагрева Ø 185 мм
Минимальная область обнаружения посуды Ø 100 мм
Номинальная мощность* 1400 Вт
Стандартизированная категория кухонной посуды** B
Правая задняя зона нагрева Ø 185 мм
Минимальная область обнаружения посуды Ø 100 мм
Номинальная мощность* 1400 Вт
Стандартизированная категория кухонной посуды** C
Правая передняя зона нагрева Ø 185 мм
Минимальная область обнаружения посуды Ø 100 мм
Номинальная мощность* 1400 Вт
Стандартизированная категория кухонной посуды** A
* Указанная мощность может изменяться в зависимости от размера и материала посуды.
** Значение рассчитано по методу измерения КПД (стандарт EN 60350-2).
Клавиши таймера
Клавиша [ - ]
Индикатор мощ-
ности
Индикаторы таймера
и мощности
Клавиша «Вкл./Выкл.»
Клавиша выбора
Клавиша [ + ]
Контрольный
индикатор таймера
Table of contents
Languages:
Other Freggia Hob manuals

Freggia
Freggia HB604 User manual

Freggia
Freggia HB640 User manual

Freggia
Freggia HCFE43B User manual

Freggia
Freggia HCI320 User manual

Freggia
Freggia HCFE64B User manual

Freggia
Freggia HB320 User manual

Freggia
Freggia HP640VGT User manual

Freggia
Freggia HCFE32E1B User manual

Freggia
Freggia HB430X User manual

Freggia
Freggia HA640 User manual

Freggia
Freggia HCG430VGTB User manual

Freggia
Freggia HCI430 User manual

Freggia
Freggia HCI640 User manual

Freggia
Freggia HC622VGB User manual

Freggia
Freggia HC430VGB User manual

Freggia
Freggia HCFI32B User manual

Freggia
Freggia HA622 User manual

Freggia
Freggia HC640VGT User manual

Freggia
Freggia HCI64 User manual

Freggia
Freggia HCE430 User manual