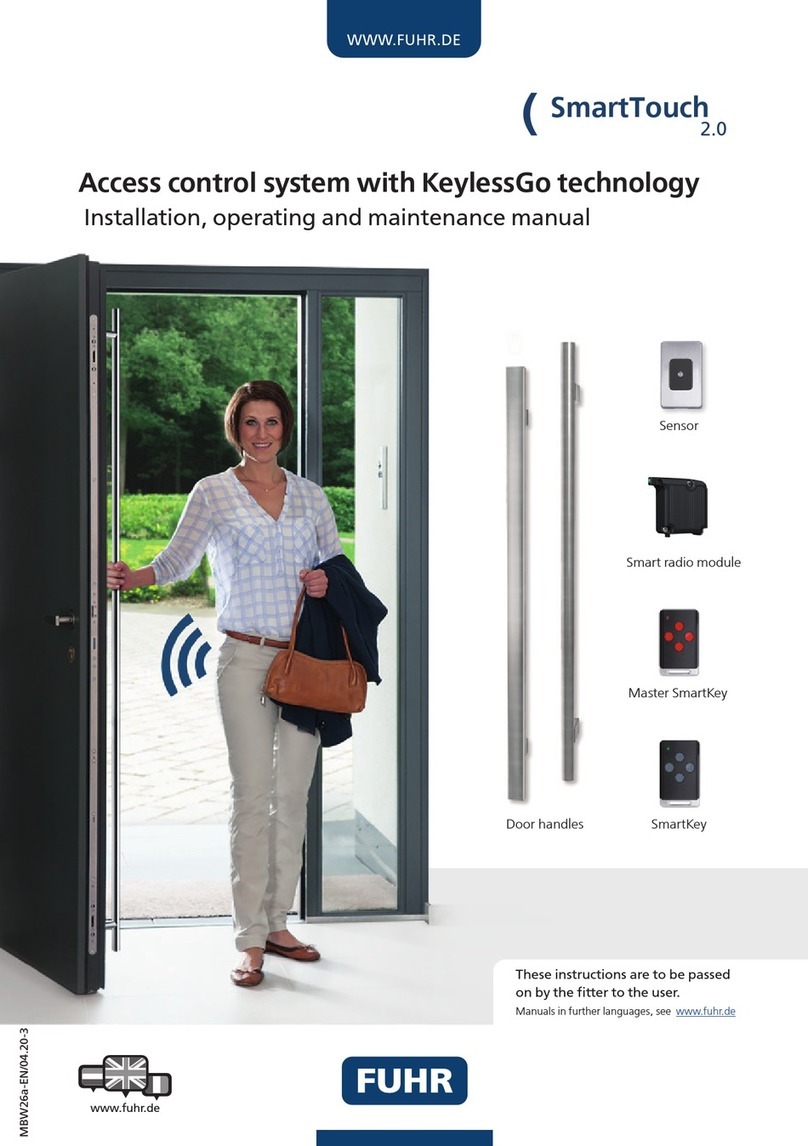
FUHR VNB968 Installation guide

WWW.FUHR.DE
2
SmartTouch
1.0
SmartTouch 1.0 is a state-of-the-art access control system with KeylessGo technology. It allows the convenient,
keyless opening of front doors equipped with the FUHR motorised locks autotronic 834, autotronic 836 or
multitronic 881. The motor locks are unlocked just by touching the sensor in combination with an active Smart-
Key.
1.1 Scope of deivery
SmartTouch 1.0 sensor set
(Art.no.: 9411577/Reference: VNB968):
• Smart radio module with connecting cable
• Sensor with 750 mm connecting cable
and fixing screws
• Stainless steel cover
• Master SmartKey 1.0
• Installation and operating manual
1.2 Function
SmartTouch allows you the convenient door opening via KeylessGo technology. Therefore it is sufficient to carry
a tuned in SmartKey and to move it. For unlocking the door by the motorised lock, simply touch the sensor. The
Smart radio module checks the opening authorization of the SmartKey and then unlocks the motorised lock.
If the KeylessGo function is not desired, it can be disabled for each individual SmartKey or completely for all, see
chapter 6.1 for more information. The door can then still be operated via the SmartKey's transmit button.
1.3 Number of tuned in SmartKeys
The memory of the smart radio module is configured for up to 200 SmartKeys.
As soon as the memory is full, the tuning in process is cancelled and no further SmartKey can be paired.
1.4 Power failure
A power failure has no effect on the stored SmartKeys. Opening the door automatically cannot be effected.
We generally recommend the installation of a mechanical locking cylinder in order to ensure that access
is possible at any time independent of the power supply.
1 General information
Please order separately:
• User SmartKey 1.0
(Art.no.: 9411584/Reference: VNZ80371)

WWW.FUHR.DE 3
SmartTouch
1.0
2 Functions of the individual components
2.1 SmartKeys
SmartKeys are battery-powered electronic keys. Besides the KeylessGo function all SmartKeys have additionally
4 transmit buttons for remote control. The SmartTouch system differentiates between master SmartKey for tuning
in and deleting, and user SmartKey for door opening.
• Master SmartKey
The master SmartKey included in the scope of delivery is paired with the Smart
radio module at the factory and cannot be changed. With the upper button, Smart-
Keys are tuned in to the Smart radio module, deleted and the radio range is set.
The Master SmartKey cannot be replaced and must therefore
be stored in a safe place! Do not use it for daily door opening, but
only for tuning in and deleting the user SmartKeys.
• SmartKey
The SmartKey is intended for regular door opening via the KeylessGo function or
optionally via the transmit button. The other buttons can be tuned in to additional
Smart radio modules by using the separately available FUHR SmartConnect. This
allows, for example, the control of a garage door or a radio socket.
2.2 Smart radio module
The Smart radio module receives the signal from the SmartKey and transmits it as
an opening impulse to the motorised lock. By pressing the integrated programming
button with green LED light the process of tuning in, deleting and adjusting the
radio range will be started. The memory of the Smart radio module can hold up to
200 SmartKeys. These remain permanently stored even if the operating voltage is
interrupted.
Pairing and
deleting button
Programming
button with LED
Transmit
button

WWW.FUHR.DE
4
SmartTouch
1.0
3.1 Installation of the Smart radio module
Place the Smart radio module on top of the motorised drive mechanism and push it
down carefully until it clicks in place. There are two cables at the back of the Smart
radio module. The short cable "A" is the connecting cable to the sensor.
Now connect the cables as follows:
Cable A: The short cable ends in a plug. Connect it with the extension cable of
the door handle or the connecting cable of the sensor. See chapter 3.4.
Cable B: The long 2-core cable ends in a plug. Insert this plug into the plug socket
on the back of the motor. Through this cable, a feedback on the door
status can be sent to the separately available SmartConnect and
received via app.
Cable C: Connect the 3 outgoing cables to the motor plug as follows:
Terminal 4: white cable
Terminal 5: brown cable
Terminal 6: green cable
3.2 Installing the optional LED indicator for the outside of the
door
The control LED (Art.no. 9187229 / Reference: VNZ80067) is used to visually in-
dicate the locking status of the door. For installation, connect the plug at the end of
the cable of the LED with the plug socket on the back of the Smart radio module. The
motorised lock can then be inserted into the door leaf profile.
Please ensure that there are no kinks in the cables and that they are
not squeezed or pulled.
3 Installation
B
C
A

WWW.FUHR.DE 5
SmartTouch
1.0
200
Cable A
Connecting cable
stainless steel
cover
Fit the cover with
the recess pointing
downwards
Hole Ø 8 mm
for connecting
cable
R4
20 mm
35mm
plastic cas-
ing
Tapped drill holes in
aluminium profile for
M3x8: 2,6 - 2,7 mm
M3x8 for Al-
uminium and
PVC profiles
3x20 for timber
profiles
20 mm
Pocket:
at least 25 mm
deep
3.3 Installing the SmartTouch sensor
The sensor is made of a black plastic casing with connecting cable and a stainless steel cover.
Fit the sensor to the outside of the door leaf using the screws supplied. Finally the stainless steel cover is glued on.
For installing the sensor proceed as follows:
1. Mill a 20 x 20 mm opening 200 mm above the door handle hole into the outer profile wall of the door leaf.
Deburr the milling carefully.
2. Guide the connection cable through the opening downwards to the milling of the motor drive.
3. Plug the connecting cable to cable A of the Smart radio module.
4. Screw in the plastic casing of the sensor with the supplied screws into the profile.
5. Clean the adhesive areas of the plastic casing to ensure a perfect hold.
6. Now remove both strips of the protective film from the back of the stainless steel cover.
7. Finally, press the cover firmly onto the plastic casing.

WWW.FUHR.DE
6
SmartTouch
1.0
4 Tuning in and deleting SmartKeys
Note: If you exceed the 20 seconds or use the wrong master SmartKey, the tuning in process
will be cancelled.
4.1 Tuning in the SmartKeys
For security reasons, we recommend to clear the memory of the Smart radio module when first
placing the system into operation. This prevents unauthorised persons from tuning in a Smart
Key. Delete all SmartKeys as described in chapter 4.3 and start afterwards with the tuning in
process.
1 x
2 x
within 20 Sek.
within 20 Sek.
1. Carefully press the programming button on the Smart radio module
for approx. 1 second.
The green LED of the Smart radio module lights up for approx.
2 seconds and then starts flashing slowly.
2. Press the tuning in and opening button on your master SmartKey
within 20 seconds once.
The green LED of the Smart radio module lights up for 2 seconds and
then starts flashing at one-second intervals.
3. Press the transmit button on the SmartKey to be tuned in within
20 seconds, twice.
The green LED of the Smart radio module lights up for 4 seconds and
afterwards turns off automatically.
4. The tuning in process is finished and the SmartKey can be used for
door opening.
ca. 1 sec.

WWW.FUHR.DE 7
SmartTouch
1.0
You can remove the opening authorisation of each SmartKey individually. To delete a single SmartKey from the
memory of the Smart radio module, proceed as follows:
4.2 Delete individual SmartKeys
1 x
within 20 sec.
1. Carefully press the programming button on the Smart radio module
for at least 3 seconds.
As soon as the push-button is released, the green LED of the Smart
radio module starts flashing rapidly.
2. Press the tuning in and opening button on your master SmartKey
within 20 seconds once.
The green LED of the Smart radio module lights up for 2 seconds and
then flashes rapidly again.
3. Press the transmit button on the user SmartKey you want to delete,
within 20 seconds once.
The green LED of the Smart radio module lights up for 4 seconds and
afterwards turns off automatically.
4. The deleting process is completed. Check by pressing the transmit
button on the user SmartKey if the deleting process was successful.
1 x
within 20 sec.
> 3 sec.

WWW.FUHR.DE
8
SmartTouch
1.0
4.3 Deleting all SmartKeys
You can remove the opening authorisation for all SmartKeys at the same time. The master SmartKey cannot be
deleted. To delete all SmartKeys from the memory of the Smart radio module, proceed as follows:
1 x
within 20 sec.
> 3 sec.
1. Carefully press the programming button on the Smart radio module
for at least 3 seconds.
As soon as the push-button is released, the green LED of the Smart
radio module starts flashing rapidly.
2. Press the tuning in and opening button on your master SmartKey
within 20 seconds once.
The green LED of the Smart radio module lights up for 2 seconds and
then flashes rapidly again.
3. Now carefully press the programming button on the Smart radio
module for at least 3 seconds once again.
As soon as the push-button is released, the green LED lights up for
4 seconds and afterwards turns off automatically.
4. The deleting process is completed. Check by pressing the transmit
button on one user SmartKey if the deleting process was successful.
> 3 sec.

WWW.FUHR.DE 9
SmartTouch
1.0
5 Radio range
5.1 Range of the KeylessGo function
The distance in which a SmartKey responds to the radio signal of the Smart radio module varies significantly with
environmental conditions. If the SmartKey is significantly further away than 1 meter from the door, it usually does
not respond. Electrically conductive objects e.g. can increase this distance. The requirement for a SmartKey to
respond after touching the sensor is in any case that it is in motion.
Please note that SmartKeys can also be detected from the Smart radio module when you are
inside the building under the following conditions:
1. The SmartKey is located inside the KeylessGo radio range
(please determine this area individ ually at your own door) and
2. within the last 3 seconds the SmartKey was in motion.
Note the additional security functions in chapter 6.
For safety reasons, we recommend to lay the SmartKey down when you are inside the building.
The motion sensor is then deactivated after 3 seconds and unauthorised opening of the door is
no longer possible.
5.2 Adjusting the range
The KeylessGo range between the Smart radio module and the SmartKeys depends on the door material is there-
fore adjustable. You can increase this range by 2 steps, for example, if the KeylessGo door opening often does
not work.
To change this radio range, proceed as follows:
1. Carefully hold the programming button of the Smart radio module for longer than 10 seconds. The radio
range is indicated by the number of periodic LED flashes of the smart radio module:
1x flashing = smallest radio range
3x flashing = range by delivery
9x flashing = maximum radio range
10x flashing = KeylessGo is disabled for all SmartKeys!
2. Each time the programming button of the Smart radio module is pressed again, the radio range increases
to another level. The maximum radio range is reached by 9x flashing. As soon as the LED flashes 10 times
the KeylessGo function is deactivated for all SmartKeys. By pressing again you will get back to level 1 with
the smallest radio range.
3. After setting the desired radio range, press and hold the programming button on the Smart radio module
again for at least 10 seconds to exit the setting mode.
5.3 Radio range of the remote control function
The radio range of the 4 remote control buttons strongly varies with the environmental conditions. The range is at
least 10 m and cannot be changed. However, depending on the door material this range varies. Objects between
the SmartKey and the Smart radio module may reduce this distance.

WWW.FUHR.DE
10
SmartTouch
1.0
WWW.FUHR.DE10 11
6 Security functions
6.1 Manually turning on/off the KeylessGo function
You can switch the KeylessGo function – in other words the option of opening the door by touching the sensor –
on or off for each SmartKey separately. To enable or disable this function, simply press the transmit button on the
respective SmartKey for at least 5 seconds. The Smart radio module uses acoustical and optical signals to indicate
a change of mode:
Switching off = 2x long glow/beep Switching on = 2x short glow/beep
If KeylessGo is disabled, you can still open the door using the transmit button on the SmartKey!
6.2 Automatically switching off function of the SmartKeys
For safety reasons, all SmartKeys are fitted with a motion sensor. If a SmartKey is not moved for 3 seconds, it
automatically switches off by itself. If the SmartKey is within the detection radius of the Smart radio module, the
deactivation prevents unauthorized door opening via KeylessGo. Furthermore the deactivation mode saves battery
power. You can activate the sensor again by moving the SmartKey and open the door, as usual, via KeylessGo
function.
6.3 Automatic blocking times
For safety reasons, after every complete opening of the door (tappet contact and contact surface do not touch)
and every closing, the possibility to open via KeylessGo is always blocked automatically for 5 seconds. After a
motorised opening touching the door handle it will be disabled for 15 seconds. This prevents an unauthorised
opening of the door. Please await this blocking period for using the KeylessGo function again or just use the
transmit button on the SmartKeys.
Attention. These blocking periods do not apply if your door is equipped with a cable run.

WWW.FUHR.DE 11
SmartTouch
1.0
11
If the motorised lock does not open when touching the sensor, please check first whether one of the safety
functions listed in chapter 6 is active. .
7.1 Trouble-shooting
If the motorised lock cannot be opened when touching the sensor please work through the following points using
a SmartKey step by step:
First, briefly press the opening button of the SmartKey, to open the motorised lock per radio signal.
• If the motorised lock does not open with the SmartKey, please check the following points:
– Is the Smart radio module connected to the motor plug correctly?
– Was the SmartKey tuned in to the Smart radio module (see chapter 4)?
– Were any cables damaged when the system was installed in the door leaf?
– Does the motorised lock have power access?
– Is the SmartKey battery flat? (If there is still charge in the battery, the SmartKey will light up once when the
transmit button is pressed briefly.)
• If the motorised lock opens by pressing the opening button of the SmartKey, check the KeylessGo function.
Please consider the blocking times between the door openings.
7 Errors and failures

WWW.FUHR.DE
12
SmartTouch
1.0
8.1 Charge level of the SmartKey battery
If SmartKey batteries are low, this will reduce the radio range. The SmartKey measures the amount of charge
remaining in the battery by pressing its transmit button. If the battery is too low, the LED of the SmartKey flashes
3 times when its transmit button is pressed. If this happens, please replace the battery promptly. All stored data
remain saved when changing the battery.
Please change the batteries in time, if the batteries are completely empty you cannot open the
door with the SmartKey anymore.
8.2 Battery change
The SmartKey is operated by a battery type CR2032. Immediately it is ready for use just after changing the battery.
Please proceed as follows when changing the batteries:
1. Insert a narrow object (such as a flat-head screwdriver) into the slot at the back of the SmartKey and gently
lever the cover up.
2. Replace the battery, making sure the polarity is correct (the positive pole must be visible).
3. Close the case.
Batterie
CR2032
2.1.
8 Battery

WWW.FUHR.DE 13
SmartTouch
1.0
9.1 Note on pacemakers
It cannot be completely ruled out that the radio of the KeylessGo system SmartTouch (SmartKey: 868.92 MHz)
may affect pacemakers or similar devices. We therefore recommend that you keep a safe distance from the pace-
maker, e.g. do not carry the SmartKey in your breast pocket.
If you have any questions or concerns, please contact your attending physician.
9.2 Disposal information
Old devices and batteries are not allowed to be disposed with household waste!
Dispose of the old devices via a collection point for electronic waste or via your specialist shop.
Dispose of the old batteries in a recycling container for used batteries or via your specialist shop.
Dispose of the packaging material in the collection container for cardboard, paper and plastics.
9 Safety, maintenance and care instructions
• All components must be protected against moisture. They are not suitable for use in areas with high humidity
or for exposure to chemical substances.
• Only genuine FUHR accessories may be used.
• No liability will be accepted in case of incorrect installation or operation.
• Casings and cables must be protected against mechanical damage.
• Damaged or defective components must be taken out of operation and replaced.
• The Smart radio module is maintenance-free.
• If the transmission range of a SmartKey deteriorates, please change its battery.

WWW.FUHR.DE
14
SmartTouch
1.0
10.1 Smart radio module
Frequency: 868,92 MHz
Modulation: FSK
Security: Rolling-Code | AES - 128 bit | master key principle
Anti-collision check: Yes
Antenna: On-board
Power supply: 12VDC
Current consumption: 0,1 bis 50 mA
Activity indicator: Green light-emitting diode
Temperature range: 5°C to 50°C, non-condensing
Dimensions: 43 x 40 x 15 mm
Protection rating: IP 20
Switching impulse: Potential-free
10.2 Master SmartKey and SmartKey
Frequency: 868,92 MHz / 125 kHz
Modulation: FSK
Security: Rolling-Code | AES – 128 bit
Channels: 4
Power supply: 1x 3V battery CR 2032
Temperature range: 5°C to 50°C, non-condensing
Dimensions: 61,5 x 37 x 10,5 mm
10.3 SmartTouch sensor
Power supply: 12 VDC
Cover material: High-quality stainless steel
Cover dimensions: 30 x 50 mm
10 Technical specifications

WWW.FUHR.DE 15
SmartTouch
1.0

SmartTouch
1.0
CARL FUHR GmbH & Co. KG
Carl-Fuhr-Straße 12 D-42579 Heiligenhaus
Tel.: +49 2056 592-0 Fax: +49 2056 592-384
www.fuhr.de · info@fuhr.de
All image, product, dimension and design information in these instructions
corresponds to the current state of development on the day of going to press.
This product is subject to a continuous improvement process at FUHR and is
constantly adapted to technical progress. In the interest of your satisfaction
we must reserve the right to make changes to the product. Model and product
claims cannot be asserted. The latest version of the instructions can be found
on our website www.fuhr.de.
This manual suits for next models
1
Table of contents
Other FUHR Control System manuals