Fulcrum RACING QUATTRO CARBON User manual

Manuale dell’Utilizzatore - User Manual
Handbuch für den Benutzer - Manuel pour l’utilisateur
Manual del Usuario - ユ ー ザ ー ズ・マ ニ ュア ル
RACING QUATTRO CARBON

®
ATTENZIONE!
COMPETENZE MECCANICHE - La maggior parte delle operazioni di manutenzione e riparazione della bicicletta richiedono competenze specifiche, esperienza e attrezza-
tura adeguata. La semplice attitudine alla meccanica potrebbe non essere sufficiente per operare correttamente sulla vostra bicicletta. Non sopravvalutate le vostre capacità
tecniche. Fate eseguire i lavori di montaggio e manutenzione da un meccanico specializzato. Solo così è garantita l’esecuzione corretta dei lavori.
“UN INCIDENTE” – Vi preghiamo di notare che nel presente manuale si fa riferimento al fatto che potrebbe verificarsi “un incidente”. Qualunque incidente può provocare
danni alla bicicletta, ai suoi componenti e, soprattutto, potrebbe essere causa di gravi ferite o persino di morte per voi o per un passante.
USO DESIGNATO - Questo prodotto Fulcrum è stato progettato e fabbricato per essere usato esclusivamente su biciclette del tipo “da corsa” utilizzate solo su strade con asfalto
liscio o in pista. Qualsiasi altro uso di questo prodotto, come tandem, fuori strada o sentieri è proibito.
CICLO VITALE - USURA - NECESSITA’ DI ISPEZIONE - Il ciclo vitale dei componenti Fulcrum,dipende da molti fattori,quali ad esempio il peso dell’utilizzatore e le condizio-
ni di utilizzo. Urti, colpi, cadute e più in generale un uso improprio, possono compromettere l’integrità strutturale dei componenti, riducendone enormemente il ciclo vitale;
alcuni componenti sono inoltre soggetti ad usurarsi nel tempo. Vi preghiamo di far ispezionare regolarmente la bicicletta da un meccanico qualificato, per controllare se vi
siano cricche, deformazioni, indicazioni di fatica o usura (per evidenziare cricche sui particolari si raccomanda l’utilizzo di liquidi penetranti o altri rivelatori di microfratture).
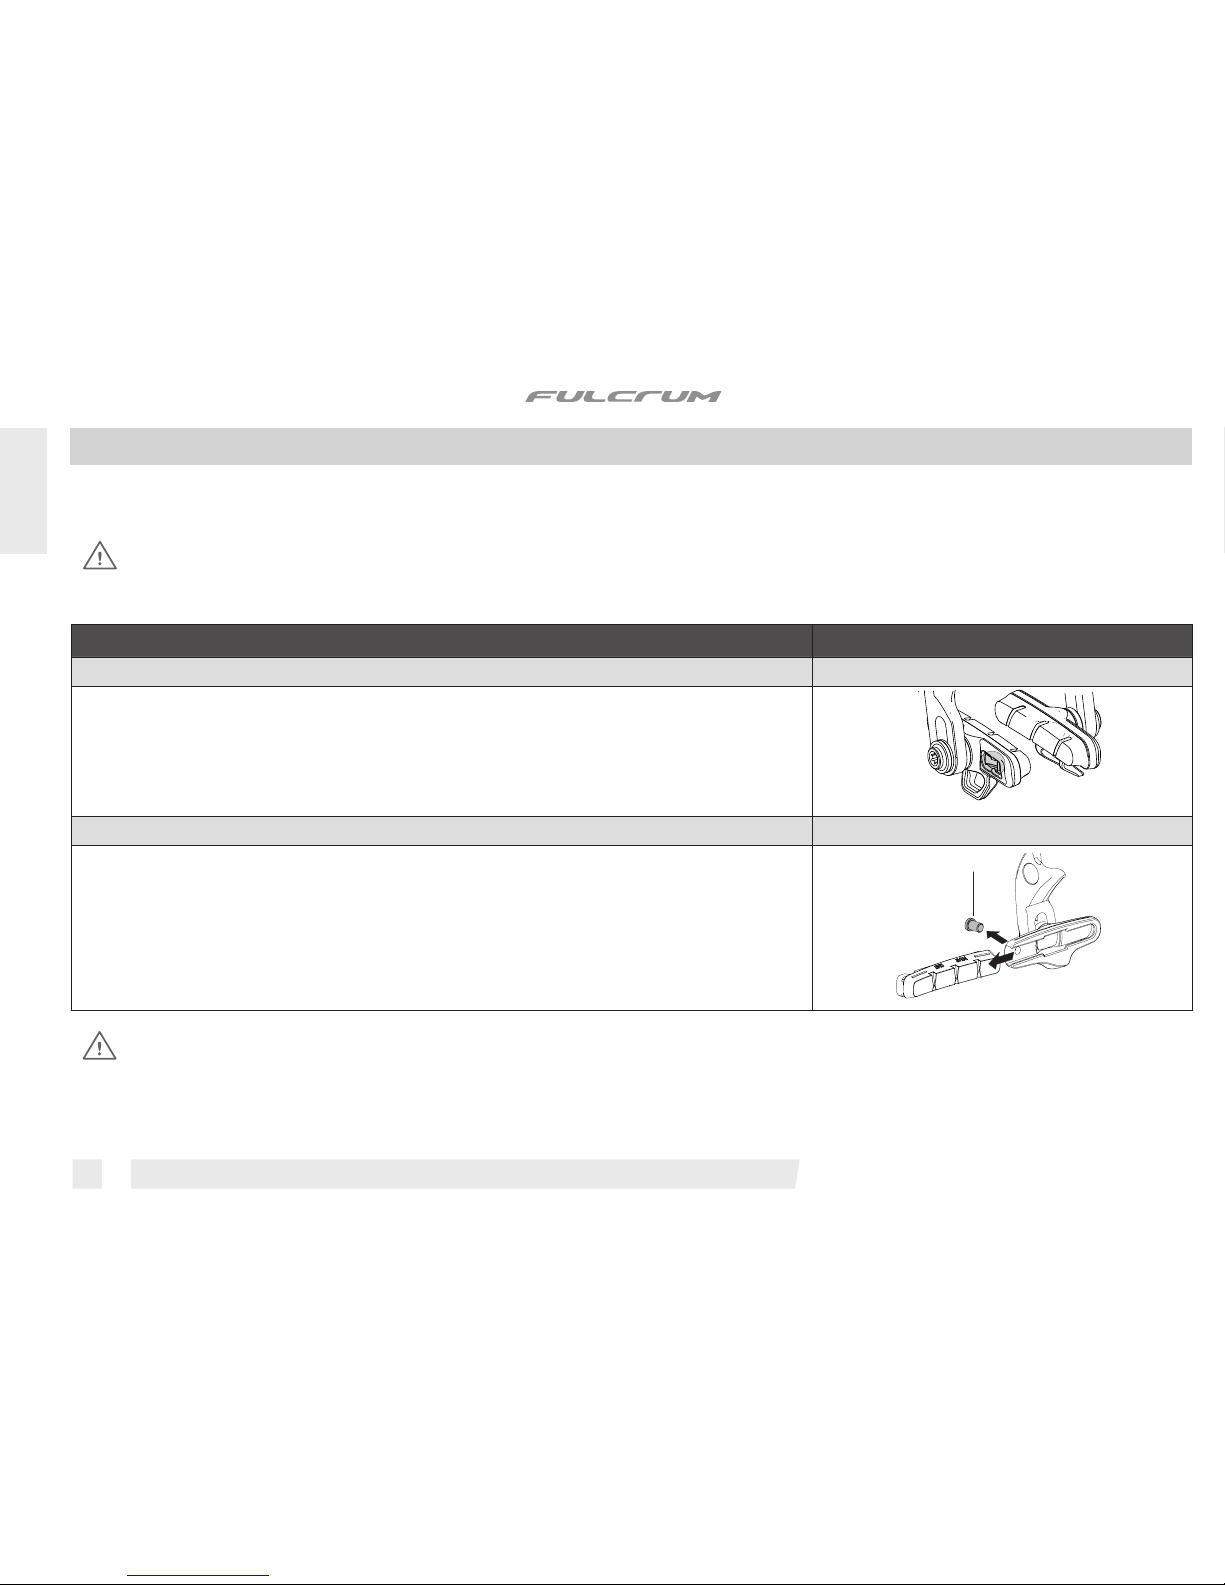
È necessario smontare i componenti della vostra bicicletta, in particolare i pedali, durante questo tipo di controlli Se l’ispezione evidenziasse qualsiasi deformazione, cricca,
segni di impatto o di fatica, non importa quanto piccoli, rimpiazzate immediatamente il componente; anche i componenti eccessivamente usurati devono essere immedia-
tamente sostituiti.
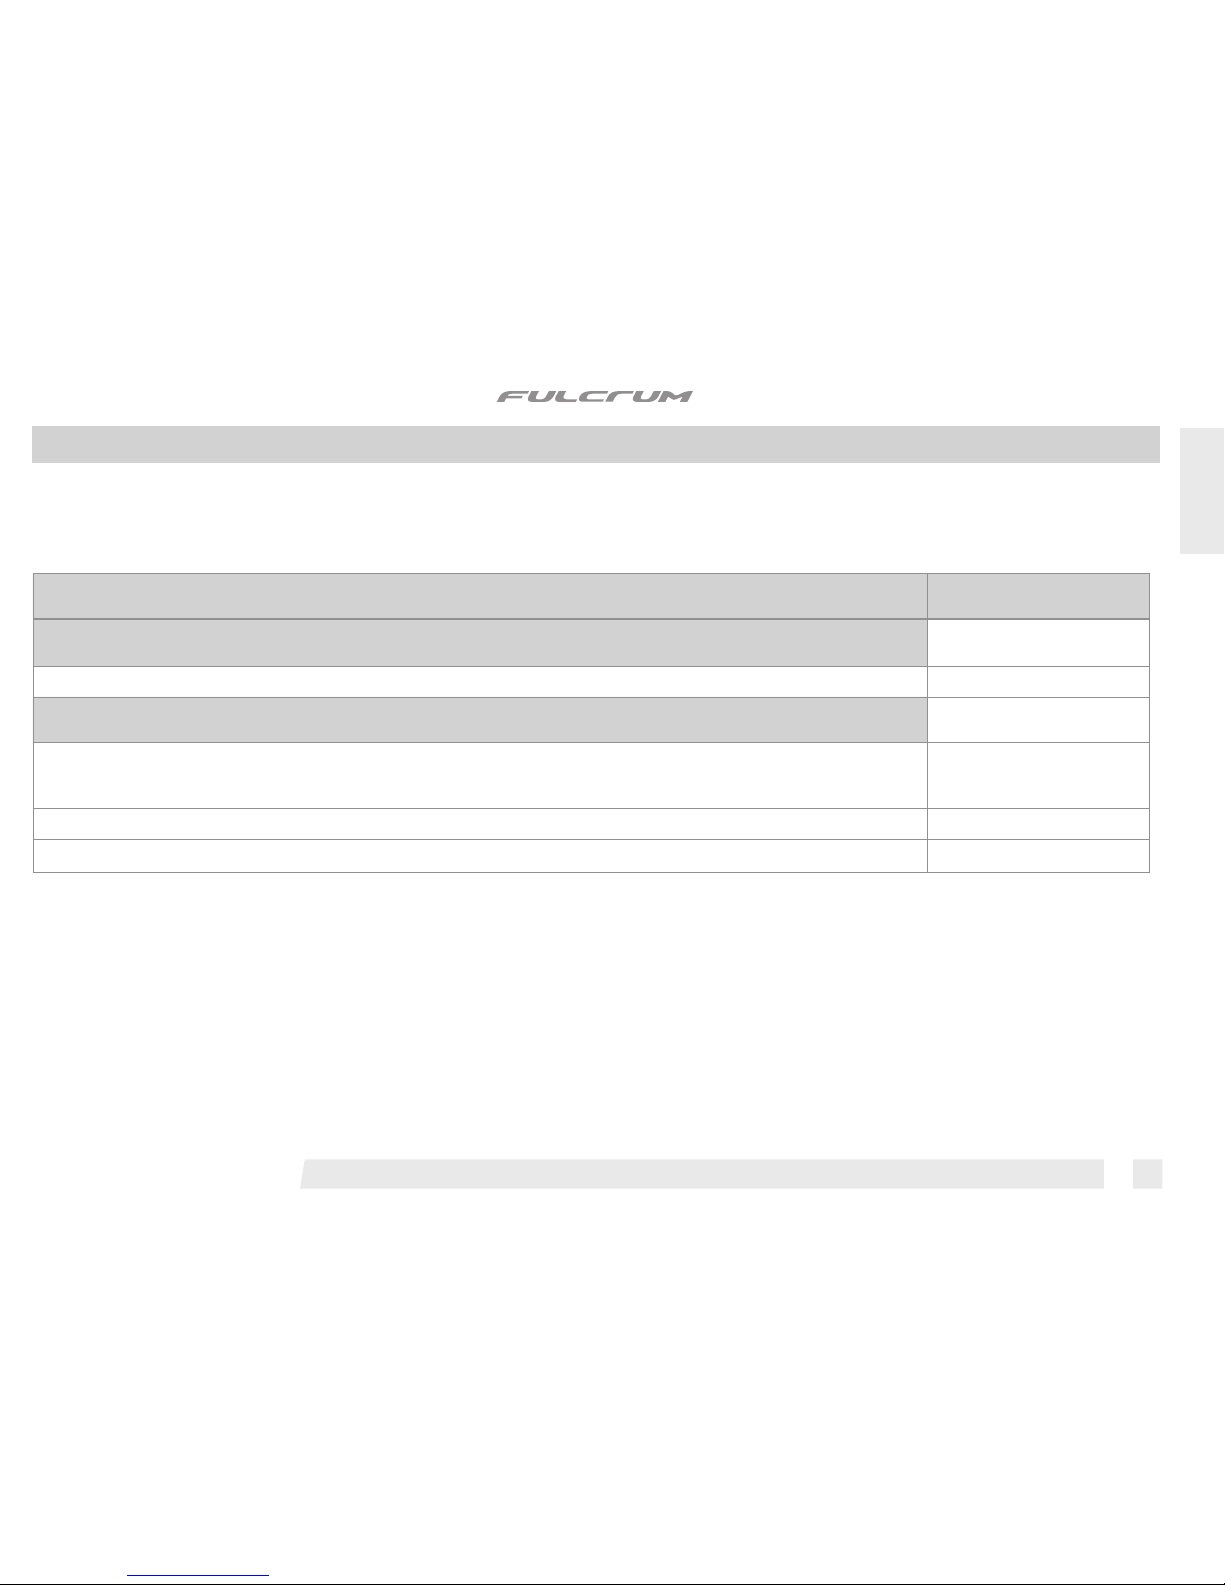
•Se pesate più di 109 kg/240 lbs vi raccomandiamo di non utilizzare queste ruote. La mancata osservanza di questo avvertimento può provocare un
danneggiamento irreversibile del prodotto.
• Se pesate più di 82 kg/180 lbs, dovete prestare particolare attenzione e fare ispezionare la vostra bicicletta con una maggiore frequenza (rispetto a chi
pesa meno di 82 kg/180 lbs). Verificate con il vostro meccanico che le ruote Fulcrum che avete scelto siano adatte all'uso che ne farete e stabilite con lui la frequenza delle
ispezioni.
Nota: Utensili forniti da altri produttori per componenti simili ai componenti Fulcrum®potrebbero non essere compatibili con i componenti Fulcrum®. Similmente, utensili
forniti dalla FulcrumWheels S.r.l.potrebbero non essere compatibili con i componenti di altri produttori.Verificate sempre col vostro meccanico o col fabbricante dell’utensile
la compatibilità, prima di usare gli utensili di un fabbricante sui componenti di un altro fabbricante.
L’utilizzatore di questo prodotto Fulcrum®riconosce espressamente che l’uso della bicicletta può comportare dei rischi che includono la rottura di un componente della
bicicletta come pure altri rischi, dando luogo a incidenti, lesioni fisiche o morte. Acquistando e utilizzando questo prodotto Fulcrum®, l’utilizzatore accetta espressamente,
volontariamente e coscientemente e/o assume tali rischi e accetta di non imputare alla Fulcrum Wheels S.r.l. la colpa di qualsiasi danno che ne potrebbe derivare.
1
ITA
®

ATTENZIONE!
Indossate sempre guanti e occhiali protettivi mentre operate sulle ruote.
NON USATE LA VOSTRA BICICLETTA SE NON SUPERA QUESTO TEST – CORREGGETE EVENTUALI SITUAZIONI ANOMALE PRIMA DI USARE LA BICICLETTA.
• Non usate mai una bicicletta o un componente che non vi è perfettamente familiare, o di cui non sapete come è stato utilizzato e quali interventi di manutenzione ha visto. I componenti
“di seconda mano” possono essere stati usati in modo errato o essere rovinati, perciò potrebbero cedere inaspettatamente provocando un incidente.
• Prima di ogni corsa vericate i pneumatici e la loro pressione. Accertatevi che non vi siano tagli o forature lungo tutta la copertura e sui talloni dello pneumatico.
•Assicuratevi che tutti i componenti della bicicletta, compresi – ma non soltanto – freni, pedali, impugnature, manubrio, telaio e gruppo sellino, siano in perfette condizioni e pronti
all’uso.
•Assicuratevi che nessuno dei componenti della bicicletta sia piegato, danneggiato o fuori asse.
•Verificate e assicuratevi che tutti i bloccaggi di sgancio rapido, i dadi e le viti siano regolati correttamente. Fate rimbalzare la bicicletta sul terreno per verificare la presenza di parti
allentate.
•Assicuratevi che le ruote siano perfettamente centrate assialmente e radialmente. Fate girare la ruota per verificare che non ondeggi e che girando non tocchi la forcella o i pattini dei
freni.
•Verificate che i catarifrangenti siano montati saldamente e siano puliti.
•Assicuratevi che i cavi e i pattini dei freni siano in buono stato.
•Verificate il corretto funzionamento dei freni prima di iniziare la corsa.
•Imparate e rispettate le norme ciclistiche locali e tutti i segnali stradali durante la corsa.
• Indossate abiti aderenti e che vi rendano facilmente visibili (colori uorescenti o altri colori vivaci/ in alternativa colori chiari).
• Evitate il ciclismo notturno poiché è più difcile essere visti dagli altri e distinguere gli ostacoli sulla strada. Se utilizzate la bicicletta di notte, equipaggiatela con luci e catarifrangenti
adeguati.
• Indossate sempre il casco protettivo, allacciatelo correttamente e vericate che esso sia omologato ANSI o SNELL.
CONSIGLI DI SICUREZZA
ITA
2
La Fulcrum Wheels S.r.l. si riserva di modificare il contenuto del presente manuale senza preavviso.
La versione aggiornata sarà eventualmente disponibile su www.fulcrumwheels.com.
®

ATTENZIONE!
Verificate che vengano installati solo raggi originali e del tipo specifico per il Vostro modello di ruota. L’utilizzo di raggi non adatti può essere causa di incidenti,
lesioni fisiche o morte.
Per valutare la corretta tensione della ruota è necessario l’utilizzo di un tensiometro: non fidatevi della tensione avvertita manualmente.E’ fondamentale quindi
far effettuare tutte le operazioni di sostituzione dei raggi da un Fulcrum Store,un Service Center Fulcrum o da un meccanico specializzato nel montaggio e manu-
tenzione delle ruote Fulcrum.I codici di ricambio dei raggi sono disponibili all’interno del catalogo ricambi scaricabile dal nostro sito www.fulcrumwheels.com.
CERCHIO: 700C (622x17C)
DIMENSIONE BATTUTA MOZZO: anteriore: 100 mm posteriore: 130 mm
PRESSIONE DI GONFIAGGIO:vedi pressione di gonfiaggio consigliata dal produttore dello pneumatico.
UTILIZZO: esclusivamente su strade con asfalto liscio o in pista.
1 - SPECIFICHE TECNICHE
1.1 - SPECIFICHE TECNICHE DELLA RUOTA / SPECIFICHE TECNICHE DEI RAGGI
2 - PNEUMATICI
®
ATTENZIONE!
COMPATIBILITÀ CERCHIO/PNEUMATICO
I cerchi Fulcrum® sono realizzati con estrema precisione dimensionale.Nel caso in cui il montaggio del pneumatico su un cerchio Fulcrum®fosse troppo semplice
il pneumatico potrebbe essere troppo grande e ciò può avere grande importanza in termini di sicurezza. Vi consigliamo pertanto di impiegare solo pneumatici
di alta qualità che richiedano l'uso di leve per copertoncini e il cui montaggio necessiti di uno sforzo ragionevole. L'uso di un pneumatico che rimane largo sul
cerchio è molto pericoloso e può causare incidenti, lesioni fisiche o morte.
• La ruota da voi acquistata è progettata per montare copertoncini (clincher).
• Prima di montare i copertoncini controllate che il diametro indicato sul copertoncino sia 622 mm e che la larghezza del copertoncino sia compatibile con la larghezza del cerchio
secondo la tabella ETRTO di compatibilità cerchio/copertoncino ("European Tyre and rim technical organisation standard manual - 2007"- Pag. 4).
3
ITA

ITA
ETRTO LARGHEZZA SEZIONE COPERTONCINO
LARGHEZZA
DEL CERCHIO (mm) 18 20 23 25 28 32 35 37 40 44 47 50 54 57 60 62
15c X X X X
17c XXXXXXXXX
19c XXXXXXXXXXXX
ATTENZIONE!
Un errato accoppiamento cerchio / copertoncino può provocare il suo improvviso sgonfiaggio, scoppio o distacco ed essere causa di incidenti, gravi lesioni o morte.
4
Prestate attenzione a non danneggiare o, comunque, a non piegare alcuna porzione di cerchio durante l’instal-
lazione dello pneumatico.
• Inserite un lato dello pneumatico nell'apposita sede sul cerchio (Fig. 1).
• Posizionate la camera d'aria tra cerchio e pneumatico iniziando con l'inserire la valvola nel foro sul cerchio.
• Al fine di montare correttamente la camera d’aria e lo pneumatico sul cerchio, è necessario prima gonfiare
leggermente la camera d’aria.
• E’ necessario poi montare manualmente la camera d’aria e lo pneumatico sul cerchio, facendo attenzione che
la camera d’aria sia posizionata correttamente all’interno dello pneumatico e che lo pneumatico, a sua volta, sia
posizionato correttamente sul cerchio.
• Inserite il secondo lato dello pneumatico nella sede del cerchio.
• Si può quindi procedere a gonfiare la camera d’aria fino al raggiungimento della corretta pressione di eser-
cizio. Gonfiare la camera d’aria lentamente, assicurandosi di mantenere la stessa e il pneumatico nella corretta
posizione sul cerchio.
2.1 - MONTAGGIO DEL COPERTONCINO
1
®

5
ITA
ATTENZIONE!
•
Un errato montaggio dello pneumatico può provocare il suo improvviso sgonfiaggio, scoppio o distacco ed essere causa di incidenti, gravi lesioni o morte.
•
Non utilizzate assolutamente camere d’aria in lattice poiché l’alta temperatura che si può raggiungere in frenata porterebbe alla foratura della camera d’aria
con il rischio di incidenti, lesioni fisiche o morte.
ATTENZIONE!
Non superate mai la pressione massima consigliata dal fabbricante dello pneumatico.
Una pressione eccessiva riduce l’aderenza dello pneumatico alla strada e aumenta il rischio che lo pneumatico possa scoppiare improvvisamente.
Una pressione troppo bassa riduce le prestazioni della ruota e aumenta la possibilità che lo pneumatico si sgonfi improvvisamente e inaspettatamente. Una
pressione troppo bassa potrebbe inoltre causare danni e usura prematura del cerchio.
Una pressione dello pneumatico non corretta potrebbe causare la rottura dello pneumatico o la perdita di controllo della bicicletta ed essere causa di incidenti,
lesioni fisiche o morte.
• Per gonfiare lo pneumatico: 1) rimuovete il tappo, 2) svitate la valvola, 3) gonfiate lo pneumatico utilizzando un compressore o una pompa con manometro per ottenere la
pressione desiderata, 4) riavvitate la valvola, quindi 5) riposizionate il tappo.
• Per sgonfiare lo pneumatico: 1) rimuovete il tappo,2) svitate la valvola,3) premetela e tenetela premuta fino a raggiungere la pressione desiderata,4) riavvitate la valvola,quindi
5) riposizionate il tappo.
2.2- GONFIAGGIO E SGONFIAGGIO DELLA RUOTA
3 -
MONTAGGIO DELLA RUOTA SUL TELAIO / USO DEL BLOCCAGGIO RAPIDO
Vedi istruzioni “Quick Release”.
4 - MONTAGGIO E SMONTAGGIO DEI PIGNONI
Per tutte le operazioni di montaggio, smontaggio, uso e manutenzione, consultate il foglio istruzioni fornito con i pignoni.
4.1 - PIGNONI 9S / 10S DELLA CAMPAGNOLO S.R.L. (SU CORPO RL PER PIGNONI 9S E 10S DELLA CAMPAGNOLO S.R.L.)
®

6
4)
Nel caso di montaggio senza il supporto in resina,
inserite i pignoni, sciolti o preassiemati, e i distanziali
sul corpo porta pignoni del mozzo, facendo coincidere
il profilo di entrambe le scanalature (Fig. 3). Il profilo
del corpo ruota libera con due scanalature asimmetri-
che (Fig.3) rende la fasatura dei pignoni automatica in
quanto c’è solo una possibilità di montaggio.
5) Utilizzando una chiave dinamometrica (D - Fig. 4)
assieme all’utensile Campagnolo®UT-BB080 (B - Fig.
4), serrate la ghiera (G - Fig. 4), fornita in dotazione con
il pacco pignoni Campagnolo®, sul corpo ruota libera,
rispettando la coppia di serraggio indicata nel foglio
istruzioni del pacco pignoni.
3 4
C
B
D
UT -BB080
40 N.m - 29.5 lb.ft
D
G
UT-BB080
B
CHIUDERE
4.2 - PIGNONI 11S DELLA CAMPAGNOLO S.R.L. (SU CORPO RL PER PIGNONI 11S DELLA CAMPAGNOLO S.R.L.)
4.2.1 - MONTAGGIO
G
H
A
A
G
2
1)
I pignoni sono preassemblati e fasati sul supporto
in resina (A - Fig. 2). La ghiera G (Fig. 2) è dotata di
una rondella preassemblata (H); assicuratevi che sia
posizionata come in fig 2.
2)
Togliete la ghiera (G - Fig. 2).
3)
Inserite il supporto sul fianco del corpetto ruota
libera, allineate i profili scanalati, spingete i pignoni
sul corpetto ruota libera ed estraete il supporto (A) dal
mozzo (Fig. 2).
ITA
®

IMPORTANTE!
CON I CORPETTI RUOTA LIBERA 11S, UTILIZZATE L’ADATTATORE (M - FIG.7) SOLO PER PACCHI PIGNO-
NI 9S E 10S DELLA SHIMANO INC. E SRAM CO. (L'ADATTATORE NON DEVE ESSERE UTILIZZATO CON I
PACCHI PIGNONI 11S DELLA SHIMANO INC.).
Questo adattatore (M - Fig. 7) deve essere inserito sul corpetto ruota libera prima del pacco pignoni 9s e/o 10s
e/o di qualsiasi, eventuale, rondella a corredo del pacco pignoni 9s e/o 10s.
Per le istruzioni di montaggio, smontaggio e manutenzione,fate riferimento al foglio istruzioni fornito dal pro-
duttore del pacco pignoni.
M
4.3 - PIGNONI 9s, 10s, 11s DELLA SHIMANO INC. E PIGNONI DELLA SRAM CORPORATION
(su corpo RL Fulcrum per pignoni 9/10/11s della Shimano Inc. e pignoni della Sram Corporation)
7
ITA
7
5 6
4.2.2 - SMONTAGGIO
C
E
APRIRE
OPEN
ÖFFNEN
UT-CS060
B
UT-BB080
F
G
E
B
F
UT-BB080
UT-CS060
APRIRE
1)
Smontate la ghiera (G - Fig. 5) utilizzando l’utensile
Campagnolo®UT-BB080 (B - Fig. 5) con una chiave
esagonale (E - Fig. 5) da 24 mm e la chiave con catena
Campagnolo®UT-CS060 (F - Fig. 5).
2)
Inserite il supporto portapignoni in resina sul fianco
del corpo ruota libera e allineate i profili scanalati del
corpo con quelli del supporto. Fate scorrere i pignoni
sopra al supporto.
3)
Rimuovete i pignoni dal corpo ruota libera (Fig. 6).
®

RACING QUATTRO CARBON PORTAPATTINO
cod. BR-BO500.... (ROSSI)
Per freni Campagnolo, con mollettina di ritenzione sul portapattini o senza mollettina di ritenzione (per
interferenza).
Non sono compatibili con versioni che prevedono la vite di bloccaggio sul portapattini.
L’utilizzo di qualsiasi altra combinazione pattini-cerchio, potrebbe generare una frenata insufficiente e/o irre-
golare ed essere causa di incidenti, lesioni fisiche o morte. L’ uso di pattini freno diversi da quelli specificati
potrebbe inoltre danneggiare seriamente il cerchio.
cod. BR-BO500X.... (ROSSI)
Per freni Dura-Ace della Shimano Inc. e freni Campagnolo®che prevedono la vite di bloccaggio (F) sul porta-
pattini.
L’utilizzo di qualsiasi altra combinazione pattini-cerchio, potrebbe generare una frenata insufficiente e/o irre-
golare ed essere causa di incidenti, lesioni fisiche o morte. L’ uso di pattini freno diversi da quelli specificati
potrebbe inoltre danneggiare seriamente il cerchio.
F
ATTENZIONE!
Con le ruote RACING QUATTRO CARBON utilizzate solo gli speciali pattini freno:
®
ITA
5 - FRENI
Fate riferimento al Foglio Istruzioni fornito dal produttore dei freni.
ATTENZIONE!
Azionando la leva freno accertatevi che i due pattini ARRIVINO CONTEMPORANEAMENTE in contatto con le superfici del cerchio. Nel caso in cui ciò non
avvenisse verificate che i vostri freni siano correttamente centrati seguendo le istruzioni indicate dal produttore dei freni.
8

INTERVENTO INDICAZIONE KM (MAX)
Controllo presso un meccanico specializzato: 2.000
• verica lubricazione, rotolamento e giochi dei mozzi / verica centratura ruota
Controllo presso un meccanico specializzato: 10.000
•verica lubricazione, rotolamento e giochi mozzi ed eventuale sostituzione particolari di usura dei mozzi e corpo ruota
libera
• verica centratura ruota
• verica usura pista frenante ed eventuale sostituzione cerchio*
• Se i cuscinetti dei mozzi sono USB o Standard, affidate periodicamente la bicicletta ad un meccanico specializzato affinché lubrifichi i cuscinetti dei mozzi e le sfere con grasso specifico
per cuscinetti.
•Evitate che la superficie frenante della ruota e i pattini dei freni vengano a contatto con oli o grassi.
• Alla fine delle operazioni di lubrificazione, sgrassate ACCURATAMENTE pista frenante e pattini freno.
• Per mantenere sempre efficienti i pattini e non usurare i fianchi dei cerchi consigliamo di asportare con una lima eventuali residui di sabbia che possono depositarsi sui pattini special-
mente durante l’uso sotto la pioggia.
• In caso di utilizzo della bicicletta sul bagnato ricordate che la potenza dei freni e l'aderenza dei pneumatici sul terreno diminuiscono notevolmente rendendo più difficile il controllo
del mezzo. Inoltre, a causa del progressivo asciugarsi della superficie frenante durante la frenata, la potenza frenante potrebbe variare bruscamente. Prestate quindi maggiore attenzione
durante la guida sul bagnato per evitare possibili incidenti che potrebbero procurare gravi danni fisici o morte.
Nota
Per tutte le operazioni di montaggio, smontaggio e sostituzione di mozzi, cerchi e raggi, vi consigliamo di rivolgervi ad un meccanico specializzato. Concordate
con lui la frequenza delle ispezioni in funzione delle condizioni di utilizzo e dell’intensità della vostra attività (esempio: agonismo,pioggia,strade salate,strade
fangose, peso dell’utilizzatore ecc.).
®
9
ITA
6 - MANUTENZIONE PERIODICA E CONSIGLI DI SICUREZZA
* La pista frenante presenta delle microincisioni che hanno uno scopo di anticontraffazione e sono destinate a scomparire con l’utilizzo della ruota.
L’efficacia della frenata e la funzionalità della ruota rimangono inalterate anche dopo l’usura delle microincisioni presenti sulla pista frenante.

• Non apportate mai alcuna modica ai componenti di un qualsiasi prodotto Fulcrum.
• Eventuali parti piegate o danneggiate in seguito a urti o incidenti devono essere sostituite con ricambi originali Fulcrum.
• Dopo aver usato la ruota per la prima volta, vericatene la centratura.
ATTENZIONE!
L’utilizzo di ruote non centrate correttamente o con raggi rotti e/o danneggiati può provocare incidenti, lesioni fisiche o morte.
• Non esponete i prodotti a temperature elevate, non lasciateli chiusi in automobili parcheggiate al sole, non conservateli vicino a radiatori o altre fonti di calore, non conservate prodotti
in carbonio o plastica esposti al sole diretto.
Rev00_07_2017
ITA
10
Quando trasportate la ruota separatamente dalla bicicletta o in vista di un periodo di inutilizzo, riponetela nell’apposita borsa per ruote per proteggerla dagli urti e dallo sporco.
6.2 - TRASPORTO E CUSTODIA
Per la pulizia delle ruote usate solamente prodotti non aggressivi come acqua e sapone neutro, oppure prodotti specici per la pulizia delle biciclette asciugate con un panno morbido ed
evitate tassativamente spugne abrasive o metalliche.
NOTA
Non lavate mai la vostra bicicletta con acqua a pressione.
L’acqua a pressione, perno quella che esce dall’ugello di una canna da giardino, può oltrepassare le guarnizioni ed entrare all’in-
terno dei vostri componenti
Fulcrum
, danneggiandoli irreparabilmente. Lavate la vostra bicicletta e i componenti
Fulcrum
pulendo delicatamente con acqua e sapone neutro.
ATTENZIONE!
Gli ambienti salini (come ad esempio le strade in inverno e nelle vicinanze del mare) possono essere causa di corrosione galvanica della maggior parte
dei componenti esposti della bicicletta. Per prevenire danni, malfunzionamenti e incidenti, risciacquare, pulire,asciugare e rilubrificare con cura tutti i
componenti soggetti a tale fenomeno.
6.1 - PULIZIA DELLE RUOTE
®

®
WARNING!
You must always read and comply with all the assembly, maintenance and operating instructions and do not forget that even the best product can
be damaged if it is not treated correctly. This manual is an integral part of the product and must be kept in a safe place for future reference.
If you sell or give away your wheels this booklet must be given to the new owner.
MECHANICAL EXPERTISE - The majority of bicycle maintenance and repair procedures require specific skills and experience and the use of appropriate tools. Basic
mechanical skills and aptitude may not be adequate for working correctly on your bicycle. Never overestimate your technical skills. Have assembly and maintenance work
done by a specialised mechanic. This is the only way to guarantee that the work is carried out correctly.
INTENDED USE - This Fulcrum®product is designed and manufactured for use only on road racing style bicycles that are ridden only on smooth road or track surfaces.Any
other use of this product, such as tandem, off-road or on trails is forbidden.
"AN ACCIDENT" - Please note that throughout this manual, reference is made that "an accident" could occur. Any accident could result in damage to your bicycle, its
components and, more importantly, could cause you or a bystander to sustain severe personal injury or even death.
LIFESPAN - WEAR - INSPECTION REQUIREMENT -The lifespan of Fulcrum®components depends on many factors,such as rider size and riding conditions.Impacts, falls,
improper use or harsh use in general may compromise the structural integrity of the components and significantly reduce their lifespan.Some components are also subject
to wear over time. Please have your bicycle and its components regularly inspected by a qualified mechanic for any cracks, deformation, signs of fatigue or wear (use of
penetrating fluid or other visual enhancers to locate cracks on parts is recommended).Disassembly your bicycle components and especially the pedals, is required during
these inspections. If the inspection reveals any deformation, cracks, impact marks or stress marks, no matter how slight, immediately replace the component; components
that have experienced excessive wear also need immediate replacement.The frequency of inspection depends on many factors; check with your authorized representative
of Fulcrum wheels S.r.l. to select a schedule that is best for you.
•If you weigh over 109 kg/240 lbs we advise you not to use this product. Non compliance with this warning can damage the product irrever-
sibly.
• If you weigh 82 kg/180 lbs or more, you must be especially vigilant and have your bicycle inspected more frequently (than someone wei-
ghing less than 82 kg/180 lbs). Check with your mechanic to discuss whether the wheels you selected are suitable for your use,and to determine the frequency
of inspections.
Note: Tools supplied by other manufacturers for components similar to Fulcrum®components may not be compatible with Fulcrum®components. Likewise, tools supplied
by Fulcrum Wheels S.r.l. may not be compatible with components supplied by other manufacturers. Always check with your mechanic or the tool manufacturer to insure
compatibility before using tools supplied by one manufacturer on components supplied by another.
The user of this Fulcrum®product expressly recognizes that there are risks inherent in bicycle riding, including but not limited to the risk that a component of the bicycle
can fail, resulting in an accident, personal injury or death. By his purchase and use of this Fulcrum®product, the user expressly, voluntarily and knowingly accepts and/or
assumes these risks and agrees to hold Fulcrum Wheels S.r.l. harmless against any resulting damages.
ENG
1

®
Fulcrum Wheels S.r.l. reserves to modify the content of this manual without notice.
The updated version will always be available www.fulcrumwheels.com.
DO NOT RIDE YOUR BICYCLE IF IT DOES NOT PASS THIS PRE-RIDE TEST. CORRECT ANY CONDITION BEFORE YOU RIDE!
• Never use a bicycle or bicycle component unless you are thoroughly familiar with its use and maintenance history. “Used” equipment may have been misused and abused,
and can unexpectedly fail resulting in an accident.
• Be sure that your wheels are perfectly centered. Spin the wheels to be sure that they do not wobble up and down or from side to side, and that they do not make contact
with the brake pads while rotating.
•Be sure that all of the components of your bicycle, including but not limited to your brakes, pedals, handgrips, handlebars, frame and seating system, are in optimum
condition and suitable for use.
•Be sure that none of the components of bicycle are bent, damaged or out of alignment.
• Check to be sure that all quick release fasteners, nuts and bolts are properly adjusted (see the “Quick Release” instruction sheet). Bounce the bicycle on the ground and
listen and look for anything which may be loose.
•Be sure that your wheels are perfectly centred. Spin the wheels to be sure that they do not wobble up and down or from side to side, and that they do not make contact
with the fork legs or brake pads while rotating.
•Check all reflectors to make sure that they are clean, straight and securely mounted.
•Check you brake pads and cables to be sure they are in good condition.
• Test your brakes in the beginning of your ride to make sure that they are operating properly.
•Wear clothes which are snug-fitting and which make you visible to traffic, such as neon fluorescent or other bright colors.
• Avoid biking at night, because it is more difficult for you to be seen by traffic,and it is more difficult for you to see obstructions on the ground. If you do ride at night,you should
equip your bicycle with and use a headlight and a taillight.
• Learn and follow the local bicycle laws and regulations, and obey all traffic signals, signs and laws while you ride.
•Fulcrum Wheelss.r.l. reminds you to always wear a properly fitted and fastened bicycle helmet that has been approved by ANSI or SNELL.
WARNING!
Always wear protective gloves and glasses while working on the wheels.
SAFETY RECOMMENDATIONS
ENG
2

WARNING!
Only use genuine Fulcrum spokes for your specific type and model of wheel. Failure to use correct spokes can result in an accident, personal injury or death.
To correctly assess wheel tension a tensiometer must be used: do not go by the tension you feel manually. It is therefore essential to have all the spoke replace-
ment operations carried out by a Fulcrum Store, a Fulcrum Service Centre or a mechanic specialised in assembly and maintenance on Fulcrum wheels.The spoke
part numbers can be found in the spare parts catalogue which is downloadable from our websitewww.fulcrumwheels.com.
WARNING!
RIM-TIRE COMPATIBILITY
Fulcrum®rims are very precise dimensionally. If a tire is too easy to install on a Fulcrum®rim, that tire is most likely too big and will not seat properly on the
rim. If a tire is too difficult to install, that tire is most likely too small. Use only high quality tires that require the use of tire levers and a reasonable installation
effort. Using talcum powder on the tire will make installation easier. Using a tire that does not fit properly on the rim can cause unexpected tire failure, resulting
in an accident, personal injury or death.
• The wheel you have purchased is designed to use clincher tires.
• Before mounting the clincher tyres, ensure that the diameter indicated on the clincher tyre is 622 mm and that the width of the clincher tyre is compatible with the width of the rim
based on the ETRTO rim/clincher tyre compatibility table ("European Tyre and rim technical organisation standard manual - 2007" - pag. 4).
®
1 - TECHNICAL SPECIFICATIONS
1.1 -
WHEEL TECHNICAL SPECIFICATIONS / SPOKES TECHNICAL SPECIFICATIONS
RIM: 700C (622x17C)
O.L.D: front: 100 mm rear: 130 mm
INFLATION PRESSURE:see the inflation pressure recommended by the producer of the tire.
USE: road racing on smooth road or track surfaces only.
2 - TIRES
ENG
3

®
ETRTO TIRE SECTION WIDTH
RIM WIDTH (mm) 18 20 23 25 28 32 35 37 40 44 47 50 54 57 60 62
15c X X X X
17c XXXXXXXXX
19c XXXXXXXXXXXX
WARNING!
Incorrect rim / clincher tyre coupling may cause it to deflate, burst or detach suddenly and cause accidents, serious injuries or even death.
2.1 - INSTALLING CLINCHER TIRES
1
ENG
4
Be sure that you do not bend or otherwise damage any portion of the rim when installing the tire.
• Insert one side of the clincher into the seat provided on the rim (Fig. 1).
• Slightly inflate the inner tube to facilitate assembly.
• Insert the valve through the hole in the rim, and then position the remainder of the inner tube
between the rim and the tyre.
• In order to install the tube on the rim, inflate the tube slightly first.
• You should then manually set the tube and tire on the rim, making sure that the tube is positioned
correctly within the tire and that the tire is positioned correctly on the rim.
• Insert the second side of the tyre tire into its seat in the rim.
• You may then fully inflate the tube to the correct working pressure. Please inflate the tube slowly,
making sure that you maintain the correct positioning of the tube and tire on the rim.

®
5
WARNING!
• Incorrect tire pressure could cause tire failure or loss of control of the bicycle, resulting in an accident, personal injury or death.
• Never use a latex inner tube because the high temperature that may be reached during braking could lead to puncturing the inner tube with the risk
of accidents, physical injury or even death.
2.2 - INFLATING AND DEFLATING THE TIRE
WARNING!
Never exceed the maximum pressure recommended by the tyre manufacturer.
Excessive tire pressure reduces the grip of the tire on the road and increases the risk that the tire will unexpectedly burst.
Inflation pressure that is too low reduces tire performance and increases the probability of sudden and unexpected loss of tire pressure. In addition,
premature wear and damage to the rim may occur.
Incorrect tire pressure could cause tire failure or loss of control of the bicycle, resulting in an accident, personal injury or death.
• To inflate the tire: 1) remove the cap, 2) unscrew the valve, 3) inflate the tire using a compressor or pump equipped with a pressure gauge to obtain the required pressure,
then 4) tighten the valve and replace the cap.
• To deflate the tire: 1) remove the cap,2) unscrew the valve,3) press and hold down the valve to obtain the required pressure, then 4) tighten the valve and replace the cap.
3 -
FITTING THE WHEEL ON THE FRAME / USING THE QUICK RELEASE
See the “Quick Release” instruction sheet.
4 -
SPROCKET ASSEMBLY AND REMOVAL
Refer to the instruction leaflet enclosed with the sprockets for all the assembly, disassembly, use and maintenance operations.
4.1 - 9S /
1
0S SPROCKETS OF CAMPAGNOLO S.R.L. (ON FW BODY FOR 9S / 10S SPROCKETS OF CAMPAGNOLO S.R.L.)
ENG

®
4)
If installing the sprockets without the plastic sup-
port, install the individual or preassembled sprockets
and the spacers on the sprocket body of the hub
aligning the spline patterns (Fig. 3). The profile of the
freewheel body with two asymmetrical grooves (Fig. 3)
ensures automatic sprocket timing since there is only
one assembly option.
5) Using a torque wrench (D - Fig. 4) together with the
Campagnolo®tool UT-BB080 (B - Fig. 4), tighten the
ring nut (G - Fig. 4) that came with the Campagnolo®
sprocket pack onto the freewheel body, observing the
tightening torque indicated on the instruction sheet of
the sprocket pack.
3 4
C
B
D
UT -BB080
40 N.m - 29.5 lb.ft
D
G
UT-BB080
B
CLOSE
4.2 - 11s SPROCKETS of Campagnolo s.r.l. (on FW body for 11s sprockets of Campagnolo s.r.l.)
4.2.1 - ASSEMBLY
G
H
A
A
G
2
1)
The sprockets are pre-assembled and timed on the
plastic support (A - Fig. 2). The ring G (Fig. 2) is provi-
ded with a preassembled washer (H); ensure that it is
positioned as in fig. 2
.
2)
Remove the ring (G - Fig. 2).
3)
Insert the support on the side of the freewheel
body, align the spline patterns, press the sprockets
onto the freewheel and extract the support (A) from
the hub (Fig. 2).
6
ENG

®
5 6
4.2.2 - DISASSEMBLY
C
E
APRIRE
OPEN
ÖFFNEN
UT-CS060
B
UT-BB080
F
G
E
B
F
UT-BB080
UT-CS060
OPEN
1)
Remove the lockring (G - Fig. 5) using the
Campagnolo®tool UT-BB080 (B - Fig. 5) with a 24
mm hexagonal wrench (E - Fig. 5) and the chain whip
Campagnolo® UT-CS060 (F - Fig. 5).
2)
Insert the plastic sprocket carrier on the side of the
freewheel body and align the spline patterns on the
body with those on the carrier.Slide the sprockets onto
the carrier.
3)
Slide the sprockets, off the freewheel body (Fig. 6).
IMPORTANT!
WITH THE 11S FREEWHEEL BODY, ONLY USE THE ADAPTER (M - FIG.7) FOR 9S AND 10S SPROCKET
PACKS BY SHIMANO INC. AND SRAM CO. (THE ADAPTER MUST NOT BE USED FOR 11S SPROCKET
PACKS BY SHIMANO INC.).
The adapter (M - Fig.7) must be fitted on the freewheel body of the 9s or 10s sprocket pack, or on any washer
supplied together with the 9s or 10s sprocket pack.
See the instruction sheet provided by the sprocket pack manufacturer for installation, removal and maintenance
instructions.
M
7
4.3 - 9S, 10S, 11S SPROCKETS FROM SHIMANO INC. and SPROCKETS FROM SRAM CORPORATION
(on the Fulcrum freewheel body for Shimano Inc. 9/10/11s sprockets and sprockets)
7
ENG

®
8
RACING QUATTRO CARBON BRAKE PAD HOLDER
cod. BR-BO500.... (RED)
For Campagnolo brakes with or without the retaining clip on the brake pad holder (by interference).
They are not compatible with versions that have screw locking on the brake pad holder.
Using any other blocks-rim combination can cause insufficient and/or irregular braking and may lead to acci-
dents, injuries or even death. Using other brake blocks than the specified ones can seriously damage the rim.
cod. BR-BO500X.... (RED)
for Dura-Ace brakes of Shimano Inc. and Campagnolo®brakes with locking screw (F) on the brake pad holder.
Using any other blocks-rim combination can cause insufficient and/or irregular braking and may lead to acci-
dents, injuries or even death. Using other brake blocks than the specified ones can seriously damage the rim.
F
WARNING!
With the RACING QUATTRO CARBON wheels only use the special brake pads:
5 - BRAKES
Please consult the instruction sheet supplied by the manufacturer.
WARNING!
When operating on the brake lever, make sure that the two blocks SIMULTANEOUSLY GET IN CONTACT with the rim surfaces. If that is not done, check
that your brakes are correctly centred according to the instructions indicated by the brakes manufacturer.
ENG

• If the hub bearings are USB or Standard, periodically take the bicycle to a specialised mechanic to have the hub bearings and the balls lubricated with specific grease for bearings.
• Keep the braking surface of the rim and the brake pads free from oil and grease.
• At the end of the lubrication operations, CAREFULLY degrease the braking rim and the brake blocks.
• To maintain the brake pads are in efficient working order and to avoid wear on the sides of the rims, you should remove with a file any residue of sand, debris or foreign objects which
may become embedded in the brake pads, especially during use in the rain.
• When riding in wet conditions, remember that the stopping power of your brakes is greatly reduced and the adherence of the tires to the ground is considerably reduced. Extra care is
required when riding your bicycle in wet conditions to avoid an accident. An accident could result in severe personal injury or death.
®
9
6 - MAINTENANCE
Note : We recommend that you contact a specialized mechanic for all the assembly, disassembly and all hub, rim and spoke replacement operations. Choose with him the
most suitable interval of inspections for you on the basis of the conditions of use and intensity of your activities (e.g. racing, rain, salted roads, muddy roads, cyclist’s
weight, etc.).
TYPE OF OPERATION KMS (MAX)
Check at a specialized mechanic’s: 2.000
•check the lubrication, rolling and clearance of the hubs / check the wheel centering
Check at a specialized mechanic’s: 10.000
•check the lubrication, rolling and clearance of the hubs and replace any worn parts of the hubs and free wheel body
•check the wheel centering
•check the wear of the braking track and replace rim if required*
ENG
* The braking rim is micro-engraved to prevent forgeries, but these elements will gradually disappear as the wheel is used. Braking effectiveness and
wheel operation are not affected by the disappearance of the micro-engraving on the braking rim.
Table of contents
Languages:
Other Fulcrum Bicycle Accessories manuals

Fulcrum
Fulcrum Red carbon xrp User manual

Fulcrum
Fulcrum Red Power User manual

Fulcrum
Fulcrum RED PASSION User manual

Fulcrum
Fulcrum RACING ZERO DB User manual

Fulcrum
Fulcrum Racing 5 User manual

Fulcrum
Fulcrum Racing Sport DB User manual

Fulcrum
Fulcrum Racing Quattro User manual

Fulcrum
Fulcrum Red Fire User manual