Mark Adjustment: Preview Adjustment:
Parameter Test:
To verify the success of the lens calibration process, run the mark adjustment. Ensure that the
speed and power settings remain unchanged, but adjust the size parameter. The size refers to the
dimensions of the square that will be marked, and its value depends on the lens size being used.
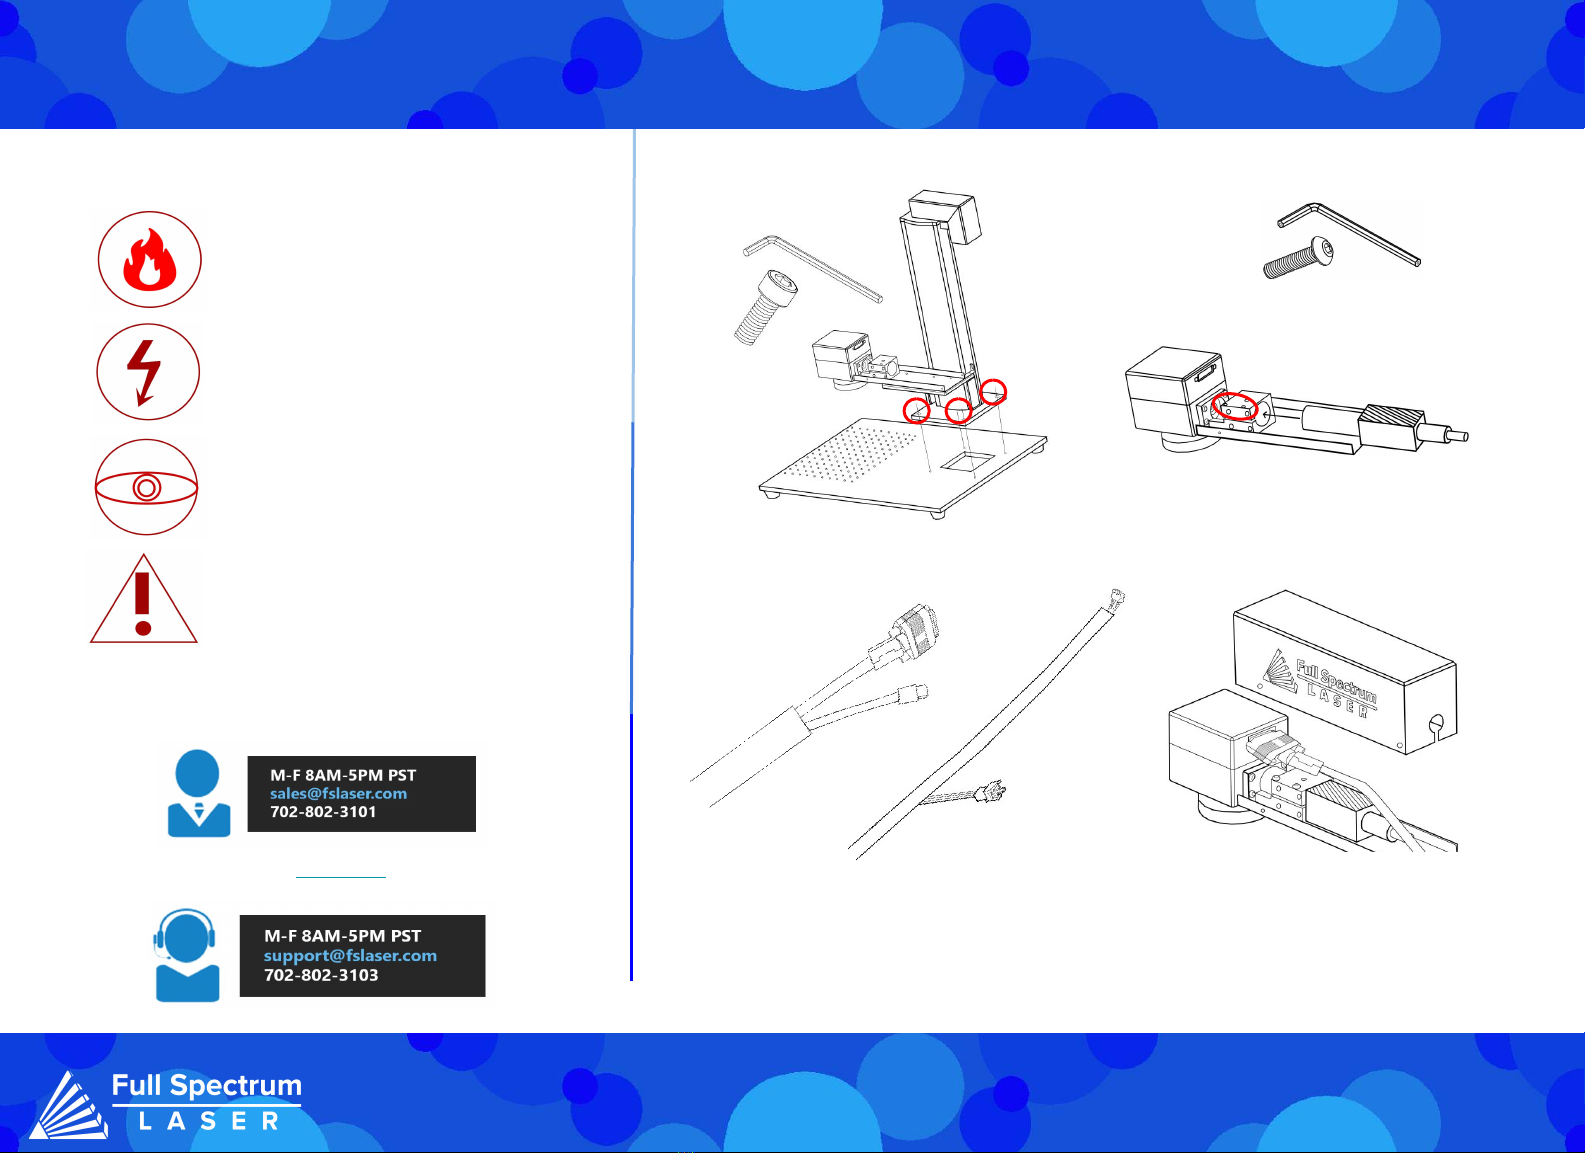
1. Place a flat piece of test material under the laser for marking.
2. Preview the square before proceeding to ensure that only the test material will be marked.
3. Select "Mark Square".
Measure the marked square. It should match the size chosen earlier. If the lens calibration was not
done correctly, the marked square may be off by approximately 2mm. In that case, re-run the lens
calibration and redo the lens adjustment.
Please note that the intentional cut-off of the top left corner of the square.
4. Select "Save Mark Adjustment".
After confirming that the mark adjustment is accurate, proceed to mark a new square by selecting
the "Mark Square" button.
1. Without moving the previously engraved material, press the "Preview Square" button.
2. Make use of the adjustment buttons to align the tracing made by the red dot precisely with the
marked square.
3. Finally, select "Save Preview Adjustment" to save the adjustments made.
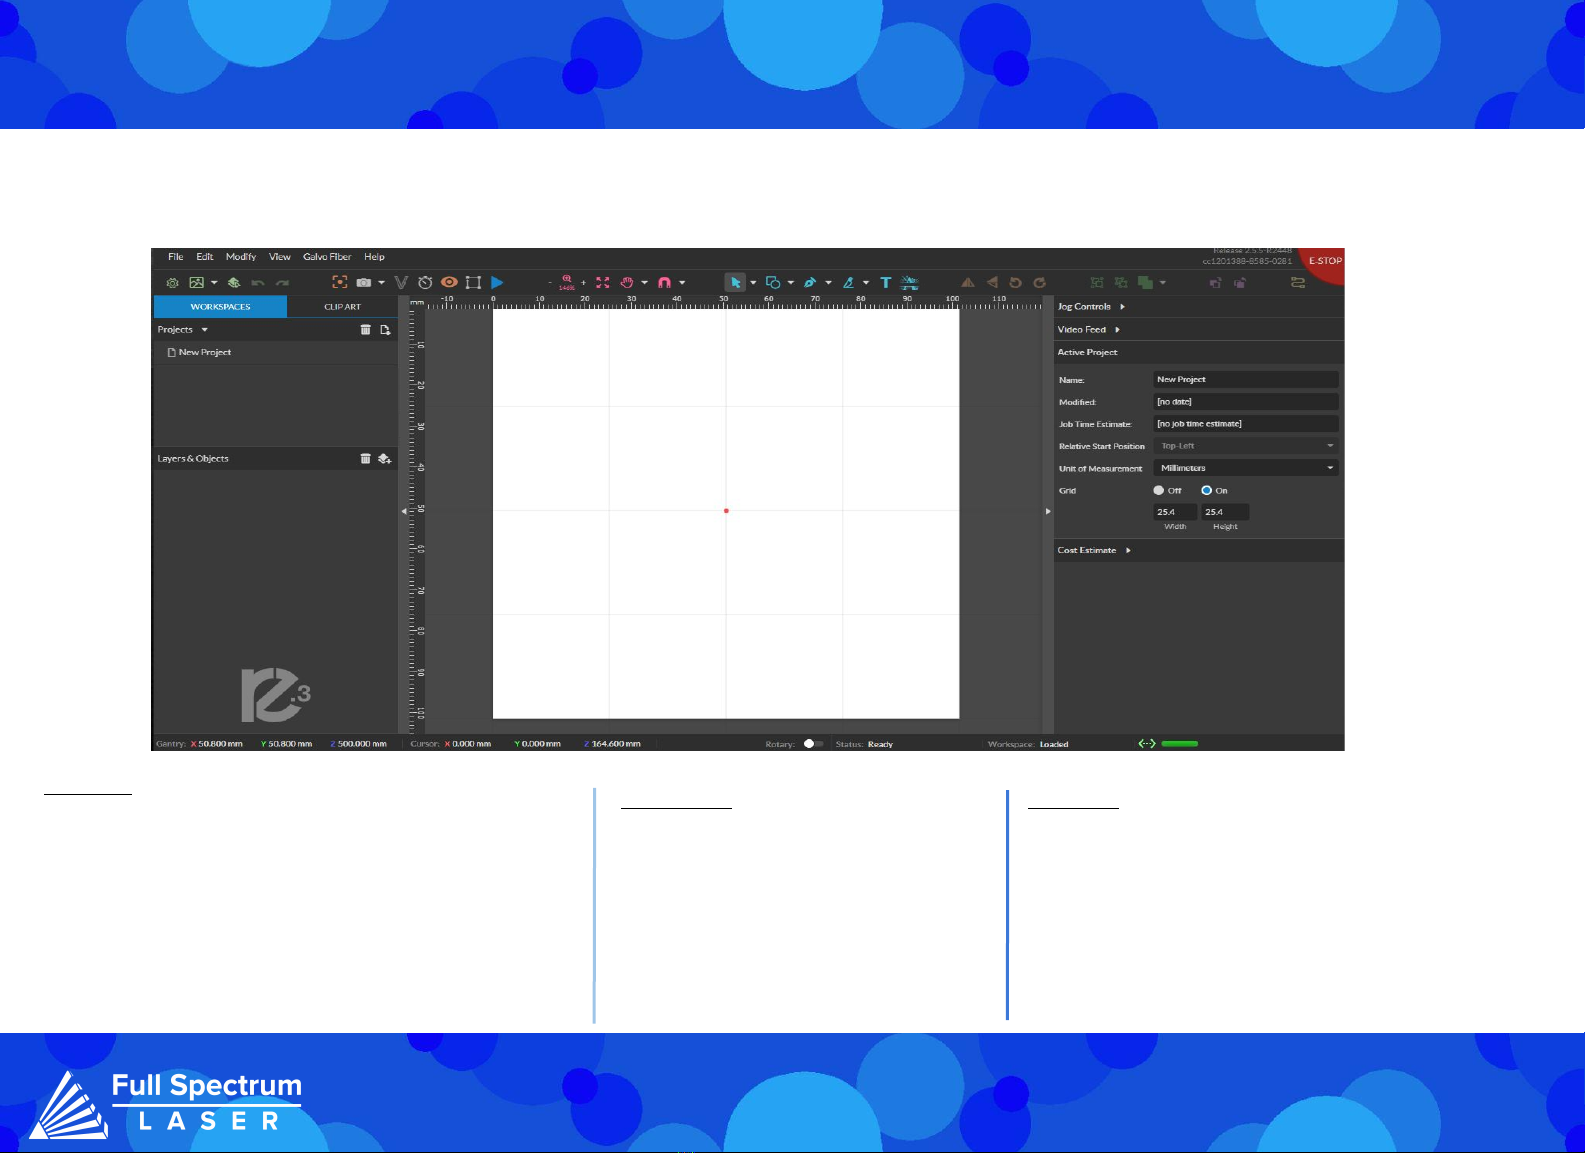
If your not sure what types of settings you want to use for your materials, then try using the Laser
Parameter Test. It can be found directly under the Laser Tools tab on the Setup page. The
Parameters Test will generate a graph to test the two parameters chosen at their minimum and
maximum values, with the spaces in between determined by the grid size. This means that a larger
grid size makes it easier to narrow down your selection.
The parameters you can test are: Power, Speed, Frequency, DPI, and Pulse Width. Pulse Width is a
parameter only used in MOPA machines. To access the Setup page, go to the Machine name, then go
to Diagnostics and select Galvo Calibration. Next, select the Parameters tab.
7