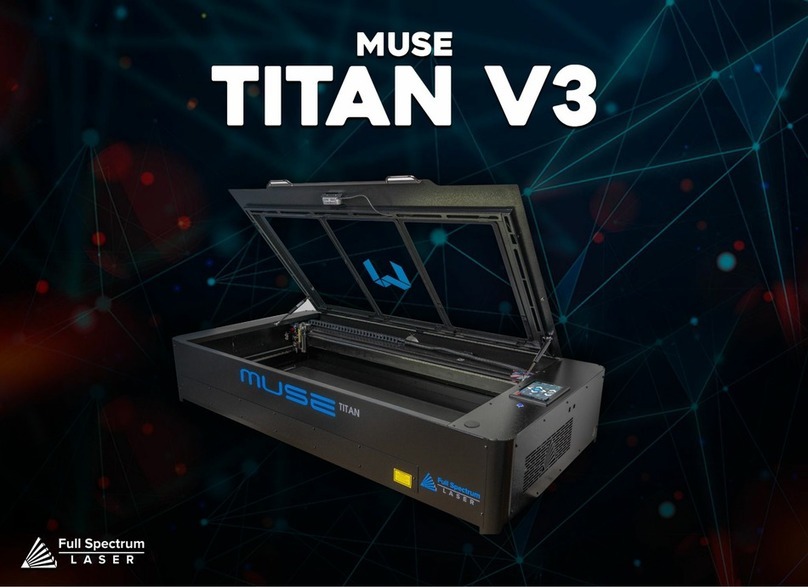
Full Spectrum Laser Muse User manual


Safety Symbols:
Looking for financing or eager to buy, contact Sales:
Need help, visit us at our Help Center or contact Support:
1
Red Icons indicate dangerous situations that could result in serious injury or death.
Indicates a hazardous situation which, if not avoided, will result in death or serious injury.
Safety Warnings:
●This product is rated as a Class 4 machine, however the
enclosure makes the overall rating of the machine Class 3R.
●Keep the enclosure closed during operation to avoid eye &
skin exposure.
●Never stare directly at the laser when the machine is
running.
●Avoid using materials made of carbon or that contain
carbon components.
●Make sure your exhaust in functioning properly before
each use.
●Do not leave your machine unattended.
●Always keep a fire extinguisher and first aid kit nearby.
●Regularly inspect your fire extinguisher to ensure
functionality.
●Do not attempt to access any electrical areas while the
machine is on.
●Unplug the machine and wait for an hour before accessing
panels.
●Inspect your machine before each use. Do not use if the
machine or its accessories are damaged in any way.
●Always maintain a clean work area.

Safety Stickers: Diagrams:
2
Power Switch
Play/ Pause
Button
Exhaust
Water
In/out
Touchscreen
Power
Switch Water
In
Water
Out
Air Inlet
Machine
Control
Rotary Port
Honeycomb
Tray
Ethernet
Port
USB Port

Setting up your Muse:
1. Remove Zip Ties.
2. Connect the
exhaust ducting
to the exhaust..
3. Connect to the
exhaust fan.
FROM MUSE
TO OUTSIDE
VENTILATION/
FUME EXTRACTOR
Unboxing:
1. Cut open the box.
2. Take out the Honeycomb tray.
4. Carefully remove Box 1 and 2 from the
machine. Then remove the foam remaining
under the gantry.
1
2
3. Pull out the Muse Core.
3

Coolbox OnlyHobby Kit Only
4. Get a bucket and fill it with two
and a half gallons of distilled
water.
5. Pull out the water pump and
place its plastic fitting on.
6. Locate the two water tubes. Connect the first one to the Water Out
fitting on your machine and place the other end inside the bucket.
Connect the second one to the plastic fitting on the pump and the Water
In fitting on your machine.
7. Once connected, place the water pump in the water bucket. Cover the
bucket in some way to prevent debris from falling in.
8. Connect one end of the air tube
into the air fitting on your
machine and the other to the air
compressor.
9. Connect the power cables into a power outlet. Your machine is ready for
use.
4. Retrieving the provided water tubes. Connect the first tube to the Water Out fitting on
your machine and to the Water In of the Coolbox. Connect the second tube to the
Water In of the machine and the Water Out of the Coolbox. Verifying that the
connections are secure before continuing.
5. Next, connect the air hose to the air fitting on both the machine and the Coolbox,
ensuring that it is firmly attached.
6. Proceed to connect the machine control cable to the Coolbox and the machine,
double-checking that the connection is secure.
7. Finally, connect the power source to both machines, and verify that they are receiving
power. Your machine is now ready for use.
4

Connecting to Internet: Focusing:
Connect Via Router (Recommended):
To establish a reliable link to RE3, it is recommended to connect the Fiber
Galvo to the router. The Muse Core is equipped with an ethernet cable that
should be plugged into the ethernet ports of both devices
Note: Ethernet port looks the same on all devices
Connect to Wi-Fi:
Make sure that the dongle, a device attached to the USB port of your machine,
is present and connected as it enables your machine to connect to the WiFi
network.
1. To connect to the WiFi network, select the Network button located
on the top right of the Touchscreen.
2. Then, choose the WiFi option and search for your network. Once
you have located your network, select it and enter your password.
Connecting Directly Using Computer:
This option is only advisable when the other two methods are not possible.
The Muse Core can connect to the computer through Ethernet, but an adapter
might be required for your computer.
Preparation: Choose your desired material and retrieve the provided billet.
1. Either access RE3 or use the Touchscreen to maneuver the laser head into
position directly above the material.
2. Position the billet beneath the laser head and use the adjustment knob to set the
appropriate height.
3. Once in place, lower the laser head onto the billet and secure it before removing
the billet.
Your machine is now properly focused. However, it is important to note that you
should refocus your machine each time you switch to a new material.
5

Reference Markers Icon:
Selecting the icon will place a reference point that can be
seen on RE3.
Test Fire Icon:
Selecting the test fire icon will fire the laser.
Run Perimeter Icon:
Selecting the icon will make the machine outline the area of
your project on your workspace.
Movement Controls:
The laser hade can be moved up and down according to
three speed settings. The settings can be changed by
selecting the prism icon.
Touchscreen Interface: Home
The Home screen displays important information such as the device's
IP address, the QR Code for RE3, and controls for the laser head.
Job History
The Job History icon provides easy access to previous projects.
Users can select the file and view its contents, or choose to re-run the
job. Note that an internet connection is not required to use files saved
in this section.
Network ⇨ Wi-Fi
Enables users to connect to a Wi-Fi network.
Mobile Version
A mobile version of the device is accessible by either scanning
the QR Code or entering the device's IP address into the web
browser of a mobile device.
Tools
The Tools icon enables the user to verify and modify the
machine settings, activate rotary attachments, home the laser,
and retrieve relevant information regarding the device.
Machine Indicators:
Wired IP Indicator:
The IP indicator shows if the machine is connected to an ethernet cable.
Connected Not Connected
Wi-Fi Indicator:
The Wi-Fi indicator will indicate if the machine is connected to the Wi-Fi.
Connected Not Connected
Run Job Icon:
Selecting the icon will run the job.
6

8
RetinaEngraveV3 (RE3):
RE3 can be accessed by entering your machines IP address into your web browser. When loaded RE3 will appear like so.
Project
Information
Project
List
Gantry Coordinates Cursor Coordinates Status Indicators
Rotary Switch
Drawing Tools Orientation Tools Grouping Tools
Viewing Tools
Main Toolbar
Main Toolbar
File: Create new projects,import and export existing projects, import image or
drawing, and sync the workspace.
Edit: Select object, delete or duplicated objects, undo and redo changes, access
setting and materials Library.
Modify: Arrange layers, move and modify images, and create compound objects
and paths
View: Adjust magnification, canvas settings, and view other display settings
Machine Name: Use the camera functions, run a job and access the laser tools
page from diagnostics.
Help: Access the user guide, support, tutorials, and the list of keyboard shortcuts.
Workspace Tools
Workspace Tools
Focusing Test: Verify that your laser it in focus
Capture Workspace: Takes images of workspace
Clear Last Workspace Capture: Clears previous
workspace image.
Trace Background Image
Estimate Job Time: Amount of time the job will take.
Show Bounding Perimeter of all Objects: Shows the
space the job will occupy.
Run Job: Start Engraving
Viewing Tools
Zoom (-/+): Enlarges/Reduces workspace screen detail and size.
Fit All: Fits entire captured image on screen.
View
Pan (H): Manually pan project window using mouse.
Zoom (Z): Zoom project window using mouse.
Snap
Use Snapping (Shift+F10): Enable or disable the snapping feature.
Use Snap Zones: Enable or disable the snap zone feature.
7

Drawing Tools:
1. Select: Pointer
Subselect
Lasso
Layer
2. Shape: Line.
Rectangle
Ellipse
Polygon
Triangle
Star
3. Path:Pen
Bezigon
Freehand
4. Knife: Cuts out objects
Freehand Shaping: Initiates “freehand”
mouse pointer for creating paths.
5. Text
6. Monogram
Orientation Tools:
Flip Horizontally: Flip object along horizontal axis.
Flip Vertically: Flip object along vertical axis.
Rotate CCW: Rotates 90 degrees counterclockwise.
Rotate CW: Rotates 90 degrees clockwise.
Grouping Tools:
Group: Group objects
Merge: Union: Combine layers into a single compound layer.
Difference: Combine non-overlapping layers into a
single compound layer.
Intersection: Combine overlapping layers into a
single compound layer.
Subtract: Remove and combine non-overlapping
layers into a single compound layer.
Split: Split up a compound shape or object.
Tracing Parameters:
Tracing is used on rastered images to be made into vector lines for cutting.
Threshold- Pixels to include
Smoothing- smoothens the corners of the selected object
Ignore Area- how much speckling will be removed
Corner Threshold- how sharp corners will look
Optimization Tolerance- determines how many lines are in each curve.
Ex. The greater the tolerance, the fewer lines but it affects accuracy.
Area Type- All- The entire picture is trace.
Outside Only- The border of the picture is traced.
Positioning Tools:
Scaling
Button
Center
Left
Center
Right
Center
Middle
Center
Middle
Center
Bottom
Center
Top
Position Coordinates
Object Size
Object Transformation
8

Stopping your Laser:
Once a project has started, it will run continuously until it is completed. In case of an
emergency, there are several options available to stop the laser immediately:
1. Open the Lid: This will immediately stop the laser from firing. If the laser
doesn't stop, please contact support.
2. Touchscreen Stop/Pause Button: By stopping the job it will be be marked
as finished, selecting Play again will start the project from the beginning.
3. Test Fire/Pause Button: This button usually serves as a test fire button.
However if the machine is running it serves as a pause button.
4. E-Stop Button: Located in the lower left corner of the touch screen, pressing this
button will cut power to the laser instantly. Please handle this button with care as it is
still part of the touch screen and can be fragile
5. RE3 Stop/Pause Button.
6. Power Switch. Turns the machine on and off.
7. Power Outlet. This should be considered a last resort, as unplugging the power
cord of the Muse Titan from the electrical outlet may cause damage to your cables.
9
2
3
16
7

General Maintenance:
10
By following our maintenance instructions, you can ensure your machine will function
at peak performance for a long time. Please keep in mind that the following
maintenance schedule can vary depending on machine usage.
Before each daily use:
Clean your lens with optical grade wipes.
Check your water, and air tubes for any potential leaks.
Make sure your ventilation system is functioning properly.
After weekly use:
Clean your machines workspace with a vacuum to remove small debris.
Clean your honeycomb trays with Oven-off or something similar.
Clean laser tube mirrors with optical grade wipes.
Check fume extractor filters and clean as needed.
Monthly:
Perform an Alignment test monthly to ensure proper engraving.
If cleaning is no longer effective, replace fume extract filters.
Check X and Y belts, tighten if needed.
Clean rails using white lithium grease.
Project Procedure:
Connect to Software
Create or Import Design
Place Material
Focus Lens
Align Material to Engraving Areas
Adjust Object Properties
Run Job
For more information on your machine refer to your user manual. For
information on RE3, refer to the RE3 Guide found in our website.

Belt Replacement:
Y-Belt Replacement:
1. Power Off and Unplug Machine.
2. Locate the Belt Screws. The belt is under the gantry (see below). Adjust the
gantry as necessary to access the screws.
3. Loosen Retaining Screws: Loosen or remove the M4 retaining screws to remove
and discard the old belt.
4. Remove the Belt: Remove one end of the belt, then remove the other.
5. Mount New Belt: Mount the front end of the new belt, thread it through the
mounting slot with the folded part facing up. Secure the belt by tightening the M4
screws, you hands can be used to start the threading.Run the belt along the pulley,
making sure that the belt as straight. Mount the back end of the belt into the
mounting slot.
6. Adjust Belt: Check the tension of the belt by moving the gantry up and down.
Adjust the tension as needed.
X-Belt Replacement:
1. Power Off and Unplug Machine.
2. Locate the Belt Screws. The belt can be found above the adjustment knob. Adjust
the gantry as necessary to access the screws.
3. Loosen Retaining Screws: Loosen or remove the M4 retaining screws to
remove and discard the old belt.
4. Remove the Belt: Remove one end of the belt, then remove the other.
5. Mount New Belt: To mount the first end of the new belt, thread it through the
mounting slot with the folded part facing up. Secure the belt by tightening the M4
screws, you hands can be used to start the threading.Run the belt along the
pulley, making sure that the belt as straight.Mount the second end of the belt into
the mounting slot.
6. Adjust Belt: Check the tension of the belt by moving the gantry up and down.
Adjust the tension as needed.
11

Air Assist Cone Replacement:
Please Note: The Air Assist Cone must be replaced when the lens is switched.
1. Disconnect the air hose by gently removing each end.
2. Using a 1.5 hex wrench (not included) to loosen the “set” screw on the cone. Remove
the Air Assist Cone.
3. Place the new air assist cone under the focus lens and into the slot. Tighten “set”
screw with a 1.5hex wrench. Reattach air hose.
Lens Replacement:
1. Remove the lens by pushing the back of the lens until you hear a click. Then, simply
slide out the old lens.
2. After that, clean the new lens and slide it in.
3. Finally, go to the settings in RE3 to change the lens in use.
12

Troubleshooting:
13
Q: What should I do if my laser isn't marking?
A: Adjust the laser is in its focal height. If the machine is off by even a few millimeters, it
won't engrave. The laser head should be refocused after changing materials.
Still having difficulties? Make sure that your material is compatible with your laser
engraver. Material containing carbon components should not be cut in this machine. For
a list of material compatible with our laser machine, click on the link here.
Q: Why are my marks turning out incorrect?
A: Experiment with different settings to find the ones that work best for you. Here are
some initial guidelines to get started:
● To get darker/lighter engravings, adjust the power or speed.
● To get deeper engravings, decrease the speed or increase passes.
● For clearer engravings, use a picture with a high resolution.
Q: What should I do if my engravings are too shallow?
A: You may need to increase the power and/or decrease the speed. Multiple passes can
also add more depth. For precise engravings, ensure that the laser is fully focused. You
can also use a smaller lens to engrave in more detail.
For a more detailed explanation on how to adjust the settings on your CO2 laser, please
refer to the material settings article linked here.
Q: What should I do if my engravings look wobbly and uneven?
A: Ensure your material is flat while engraving, it may need to be flatten and/or weigh
down your material before engraving to avoid this issue.
Q: How can I solve issues with focusing my laser?
A: The Muse Core can be focused manually using the provided focusing billet.
If your machine’s laser head assembly moves irregularly, check belts. The belt may be
cracked or torn and need to be replaced.
Q: I changed my focus lens and now it’s not engraving like I want.
A: When changing your focus lens you also have to change your air assist cone. Since
different focus lenses have different focal heights, an air assist cone is made to work only
with one lens.
If your having an issue not listed here, visit our Help Center. We provides comprehensive
videos, guided, and useful resources for troubleshooting to helping you get the most out
of your investment in our products.

14
Core Accessories (Sold Seperately):
The Chuck Rotary is a compact rotary that is designed to help object of any size with ease.
The jaws can be swapped out by removing the screws. The rod attachment can be used for
engraving smaller objects such as rings.
Chuck Rotary:
For more information visit the product page here or check out or Zendesk article here.
Low Profile Rotary:
The Low Profile Rotary is a compact rotary that is designed to be used with any Muse machine. Its
adjustable mount makes the Low Profile rotary capable of engraving cylindrical objects ease.
Riser/ Rise-Rotary:
The Muse Core and Muse 3D have a Riser option available for individuals looking to engrave taller objects.
The riser also has a built in pass through making it possible to engrave longer materials with ease.
If your interested in both a rotary and a riser we recommend looking into the Riser-Rotary option here or
contact our sales team for more information.

Other manuals for Muse
6
Table of contents
Other Full Spectrum Laser Cutter manuals

Full Spectrum Laser
Full Spectrum Laser MUSE 3D User manual

Full Spectrum Laser
Full Spectrum Laser HL40-5g Hobby Advanced User manual

Full Spectrum Laser
Full Spectrum Laser Pro Series User manual

Full Spectrum Laser
Full Spectrum Laser Muse User manual

Full Spectrum Laser
Full Spectrum Laser Muse User manual

Full Spectrum Laser
Full Spectrum Laser HL40-5g Hobby Advanced User manual

Full Spectrum Laser
Full Spectrum Laser MUSE TITAN User manual
Full Spectrum Laser
Full Spectrum Laser Muse User manual
Full Spectrum Laser
Full Spectrum Laser MUSE TITAN V3 User manual

Full Spectrum Laser
Full Spectrum Laser MUSE TITAM User manual