manuals.online logo
Brands
  1. Home
  2. •
  3. Brands
  4. •
  5. Furuno
  6. •
  7. Plotter
  8. •
  9. Furuno GP-3500 Manual

Furuno GP-3500 Manual

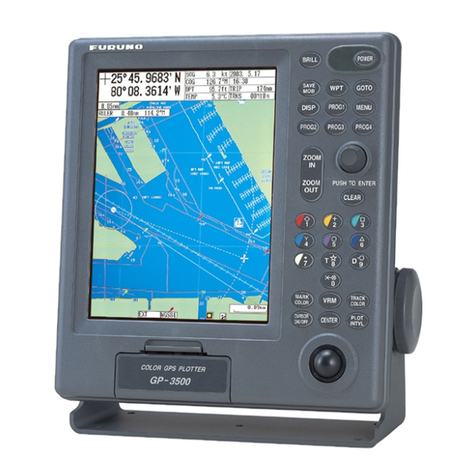
COLOR GPS/PLOTTER GP-3500
Operator’s Guide
The purpose of this Operator's Guide is to provide basic operating procedures for this
equipment. For more detailed information see the Operator's Manual.
Adjusting brilliance
1. Press the [BRILL] key to show the
brilliance adjustment window.
2. Rotate the [ENTER] knob within three
seconds to adjust the brilliance.
3. Press the [ENTER] knob to close the
brilliance adjustment window.
Selecting a display
1. Press the [DISP] key to show the
DISPLAY MODE screen.
2. Press the appropriate numeric key to
choose a display.
Operating the cursor
1. Press the [CURSOR ON/OFF] key to turn
on the cursor.
2. Operate the trackball to move the cursor.
3. To move the cursor position to screen
center, press the [CENTER] key.
Scrolling the display
1. Press the [CURSOR ON/OFF] key to turn
off the cursor.
2. Operate the trackball to scroll the display.
3. To return own ship’s mark to screen
center, press the [CENTER] key.
Changing chart scale range
Press the [ZOOM IN] or [ZOOM OUT] key as
appropriate.
Stopping, restarting plotting of
own ship track
1. To stop the plotting, press the [PLOT
INTVL] key several times to show the H
icon at the bottom of the screen.
2. To restart the plotting, press the [PLOT
INTVL] key again.
Changing own ship’s track
color
1. Press the [TRACK COLOR] key to show
the CHANGE SHIP’S TRACK COLOR
window.
2. Press the appropriate numeric key within
10 seconds to select a color.
Entering marks
1. To enter a mark at the cursor position,
turn on the cursor and then operate the
trackball to place the cursor at the
location where you want to enter a mark.
To enter a mark at own ship’s position,
press the [CURSOR ON/OFF] key to turn
off the cursor.
2. Press the numeric key corresponding to
the mark you wish to enter.
Note: To erase a mark, place the cursor on
the mark you wish to erase and then
press the [CLEAR] key.
All manuals and user guides at all-guides.com
all-guides.com
2
Changing mark color
1. Press the [MARK COLOR] key to show
the CHANGE MARK COLOR window.
2. Press the appropriate numeric key within
10 seconds to choose a color.
Entering waypoints at cursor
position
1. Press the [CURSOR ON/OFF] key to turn
on the cursor.
2. Operate the trackball to position the
cursor where you want to enter a
waypoint.
3. Press the [WPT] key to show the SAVE
WAYPOINT window.
4. If desired, press appropriate numeric
keys within 10 seconds to change the
waypoint number (max. six digits).
5. Press the [ENTER] knob.
Note: To erase a waypoint, operate the
trackball to place the cursor on the
waypoint to erase, and then press the
[CLEAR] key and [ENTER] knob in
that order.
Entering routes
1. Press the [MENU] and [2] keys in that
order to show the ROUTES LIST.
2. Press the [WPT] key.
3. Operate the trackball to change the route
name (max. six characters).
4. Operate the trackball to select “END”,
and then press the [ENTER] knob.
5. Operate the trackball to enter a comment
(max. 13 characters).
6. Operate the trackball to select “END”,
and then press the [ENTER] knob.
7. Roll the trackball in up-down direction to
select a waypoint.
8. Press the [ENTER] knob.
9. Repeat steps 7 and 8 to complete the
route.
10. Press the [WPT] or [MENU] key.
11. Press the [MENU] key several times to
close the menu.
Navigating to cursor position
1. Press the [MENU], [0] and [1] keys in that
order to show the DISPLAY SETUP
menu, go to page 1/2 and then choose
SET GOTO METHOD to “1. 1 POINT.”
2. Press the [MENU] key several times to
close the menu and then, press the
[DISP] key to show the PLOTTER (or
PILOT) NAV INFO 1 display.
3. Press the [CURSOR ON/OFF] key to turn
on the cursor.
4. Operate the trackball to place the cursor
at the location where you want to enter a
“quick waypoint.”
5. Press the [GOTO] key.
Note: To cancel, press the [GOTO] key and
[ENTER] knob in that order.
Setting the arrival alarm
1. Press the [MENU] and [6] keys in that
order to show the ALARMS SETUP
menu.
2. Rotate the [ENTER] knob to choose
ARRIVAL/ANCHOR WATCH.
3. Press the [1] key to select “1. ARRIVAL.”
4. Rotate the [ENTER] knob to select
RANGE TO MONITOR below
ARRIVAL/ANCHOR WATCH.
5. Press the numeric keys to enter the
range value.
6. Press the [ENTER] knob.
7. Press the [MENU] key several times to
close the menu.
Note 1: When the alarm sounds, hit the
[CLEAR] key to silence it.
Note 2: To deactivate the alarm, press the [3]
key at step 3 to choose “3. OFF.”
PUB.NO.OSE–44210–A
(2003/07,HIMA) GP–3500
All manuals and user guides at all-guides.com

Other manuals for GP-3500
3

Other Furuno Plotter manuals

Furuno 1932 MK2 User manual

Furuno

Furuno 1932 MK2 User manual

Furuno GP-1670F User manual

Furuno

Furuno GP-1670F User manual

Furuno GP-1871F User manual

Furuno

Furuno GP-1871F User manual

Furuno RP-17 User manual

Furuno

Furuno RP-17 User manual

Furuno GP-1850DF User manual

Furuno

Furuno GP-1850DF User manual

Furuno GP-1600F User manual

Furuno

Furuno GP-1600F User manual

Furuno GPS Plotter GP1600 User manual

Furuno

Furuno GPS Plotter GP1600 User manual

Furuno Auto Plotter ARP15 User manual

Furuno

Furuno Auto Plotter ARP15 User manual

Furuno Auto Plotter ARP15 User manual

Furuno

Furuno Auto Plotter ARP15 User manual

Furuno GP-3500 Manual
Furuno

Furuno GP-3500 Manual
Furuno GP-3100 Mark-2 User manual
Furuno

Furuno GP-3100 Mark-2 User manual

Furuno RP-250 User manual

Furuno

Furuno RP-250 User manual

Furuno GP-1810 User manual

Furuno

Furuno GP-1810 User manual

Furuno GP-280 User manual

Furuno

Furuno GP-280 User manual

Furuno GP-3500 User manual

Furuno

Furuno GP-3500 User manual

Furuno RP-180 User manual

Furuno

Furuno RP-180 User manual

Furuno GP-1871F User manual

Furuno

Furuno GP-1871F User manual

Furuno FRS-1000A User manual

Furuno

Furuno FRS-1000A User manual

Furuno LP-1000 User manual

Furuno

Furuno LP-1000 User manual

Furuno GP-1810F Manual

Furuno

Furuno GP-1810F Manual

Furuno RP-25 User manual

Furuno

Furuno RP-25 User manual

Furuno GP-25 User manual

Furuno

Furuno GP-25 User manual

Furuno GD-188 User manual

Furuno

Furuno GD-188 User manual

Furuno NavNet TZtouch TZTL9BB Manual instruction

Furuno

Furuno NavNet TZtouch TZTL9BB Manual instruction

Popular Plotter manuals by other brands

Anhui Liyu Computer Equipment Manufacturing TC Series user manual

Anhui Liyu Computer Equipment Manufacturing

Anhui Liyu Computer Equipment Manufacturing TC Series user manual

GCC Technologies puma iii series user manual

GCC Technologies

GCC Technologies puma iii series user manual

iSys V8.5 user guide

iSys

iSys V8.5 user guide

MUTOH SC-PRO Important installation information

MUTOH

MUTOH SC-PRO Important installation information

GCC Technologies P3-60 user manual

GCC Technologies

GCC Technologies P3-60 user manual

GRAPHTEC FC4200-50 user manual

GRAPHTEC

GRAPHTEC FC4200-50 user manual

MIMAKI TS34-1800A Procedures manual

MIMAKI

MIMAKI TS34-1800A Procedures manual

iSys V24 user guide

iSys

iSys V24 user guide

MIMAKI CG-60SR Operation manual

MIMAKI

MIMAKI CG-60SR Operation manual

MIMAKI UJF-605C Supplement for the basic operation manual

MIMAKI

MIMAKI UJF-605C Supplement for the basic operation manual

Canon iPF8000S - imagePROGRAF Color Inkjet Printer Service manual

Canon

Canon iPF8000S - imagePROGRAF Color Inkjet Printer Service manual

SONOPLOT MICROPLOTTER Proto manual

SONOPLOT

SONOPLOT MICROPLOTTER Proto manual

Raymarine Rayplot 700L user guide

Raymarine

Raymarine Rayplot 700L user guide

GRAPHTEC CE3000-40 user manual

GRAPHTEC

GRAPHTEC CE3000-40 user manual

MIMAKI CF2 Series Operation manual

MIMAKI

MIMAKI CF2 Series Operation manual

GRAPHTEC CE7000-40 Service manual

GRAPHTEC

GRAPHTEC CE7000-40 Service manual

Gerber XLp Installation/configuration

Gerber

Gerber XLp Installation/configuration

Cutok NODE 101 user manual

Cutok

Cutok NODE 101 user manual

manuals.online logo
manuals.online logoBrands
  • About & Mission
  • Contact us
  • Privacy Policy
  • Terms and Conditions

Copyright 2025 Manuals.Online. All Rights Reserved.