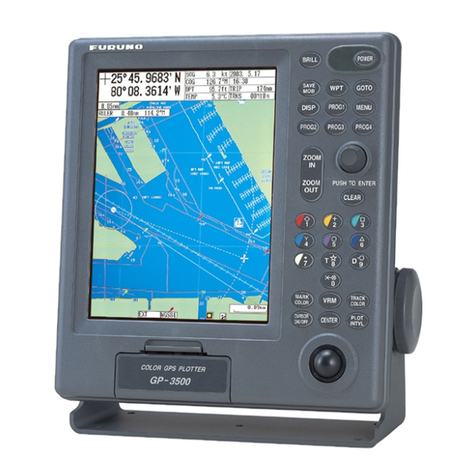
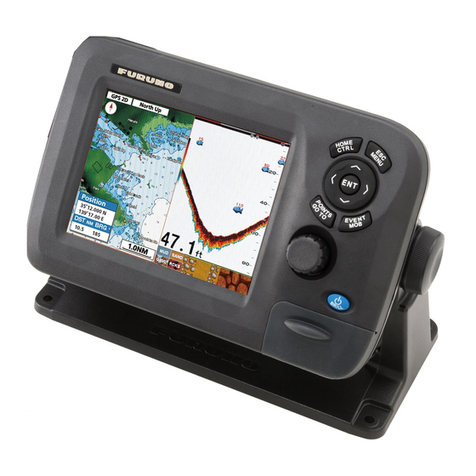
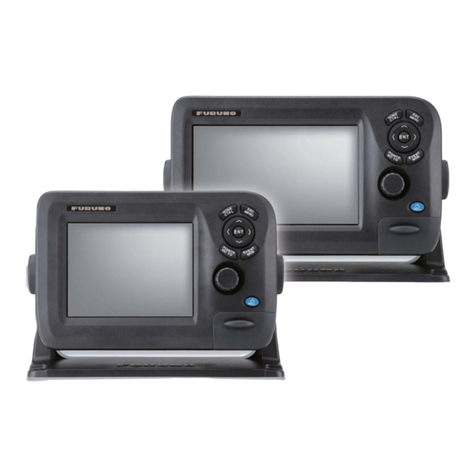
Furuno GP-25 User manual

www.furuno.com
GPS/WAAS PLOTTER
GP-25
GP-27
Model
OPERATOR'S MANUAL

The paper used in this manual
is elemental chlorine free.
・FURUNO Authorized Distributor/Dealer
9 52 Ashihara cho,
Nishinomiya, 662 8580, JAPAN
A
:
JAN
2013
.
Printed in Japan
All rights reserved.
B
:
FEB
.
20, 2014
Pub. No.
OME-44800-B
(
REFU
)
GP-25/27
0 0 0 1 7 6 8 6 6 1 1

i
IMPORTANT NOTICES
General
• This manual has been authored with simplified grammar, to meet the needs of international us-
ers.
• The operator of this equipment must read and follow the descriptions in this manual. Wrong op-
eration or maintenance can cancel the warranty or cause injury.
• Do not copy any part of this manual without written permission from FURUNO.
• If this manual is lost or worn, contact your dealer about replacement.
• The contents of this manual and equipment specifications can change without notice.
• The example screens (or illustrations) shown in this manual can be different from the screens
you see on your display. The screens you see depend on your system configuration and equip-
ment settings.
• Save this manual for future reference.
• Any modification of the equipment (including software) by persons not authorized by FURUNO
will cancel the warranty.
• SDHC Logo is a trademark of SD-3C, LLC.
• All brand and product names are trademarks, registered trademarks or service marks of their
respective holders.
How to discard this product
Discard this product according to local regulations for the disposal of industrial waste. For disposal
in the USA, see the homepage of the Electronics Industries Alliance (http://www.eiae.org/) for the
correct method of disposal.
How to discard a used battery
Some FURUNO products have a battery(ies). To see if your product has a battery, see the chapter
on Maintenance. Follow the instructions below if a battery is used. Tape the + and - terminals of
battery before disposal to prevent fire, heat generation caused by short circuit.
In the European Union
The crossed-out trash can symbol indicates that all types of batteries
must not be discarded in standard trash, or at a trash site. Take the
used batteries to a battery collection site according to your national
legislation and the Batteries Directive 2006/66/EU.
In the USA
The Mobius loop symbol (three chasing arrows) indicates that Ni-Cd
and lead-acid rechargeable batteries must be recycled. Take the used
batteries to a battery collection site according to local laws.
In the other countries
There are no international standards for the battery recycle symbol. The number of symbols can
increase when the other countries make their own recycle symbols in the future.
Cd
Ni-Cd Pb

ii
SAFETY INSTRUCTIONS,
NOTICES
WARNING
WARNING
Do not open the equipment.
The equipment uses high voltage that
can cause electrical shock. Refer any
repair work to a qualified technician.
If water leaks into the equipment or
something is dropped into the equip-
ment, immediately turn off the power
at the switchboard.
Fire or electrical shock can result.
If the equipment is giving off smoke
or fire, immediately turn off the power
at the switchboard.
Fire or electrical shock can result.
If you feel the equipment is acting
abnormally or giving off strange
noises, immediately turn off the
power at the switchboard and contact
a FURUNO service technician.
Do not disassemble or modify the
equipment.
Fire, electrical shock or serious injury
can result.
Make sure no rain or water splash
leaks into the equipment.
Fire or electrical shock can result if water
leaks into the equipment.
Mandatory Action
Prohibitive Action
WARNING
CAUTION
Warning, Caution
The operator must read the safety instructions before attempting to operate the equipment.
Indicates a potentially hazardous situation which, if not avoided,
could result in death or serious injury.
Indicates a potentially hazardous situation which, if not avoided,
could result in minor or moderate injury.
WARNING
Do not operate the equipment with
wet hands.
Electrical shock can result.
Use the proper fuse.
Use of the wrong fuse can cause fire or
electrical shock.
In order to prevent problems such as
malfunctions, failures or electrical
leakages from occurring, do not use
this equipment in the following
environments:
- Where the ambient temperature will
go outside the range of -15 to 55˚C.
- Where combustible or flammable
gases are present.
- Where corrosive gases such as
sulfurous acid gas and ammonia are
present.
- Where a lot of dust or iron powders
are present.
- Where organic solvents such as
benzene, thinner and alcohol, or strong
alkaline substances such as ammonia
and caustic soda may adhere to this
equipment, or where they are present.
- Where high-tension lines, high-voltage
equipment, power lines, power-driven
machinery, equipment containing a
transmitter such as a ham radio, or
equipment that generates a large
switching surge are present.

SAFETY INSTRUCTIONS, NOTICES
iii
WARNING
Do not place liquid-filled containers
on or near the equipment.
Fire or electrical shock can result if a
liquid spills into the equipment.
Be sure to securely connect the
connector.
The heat generated from a loose
connection may burn out the connector.
Use the equipment within the rated
source voltage range.
Connecting a non-rated source voltage
may lead to fire or equipment failure.
CAUTIO
CAUTION
Handle the LCD carefully.
The LCD is made of glass, which can
cause injury if broken.
The data presented by this equipment
is intended as a source of navigation
information.
The prudent navigator never relies
exclusively on any one source of naviga-
tion information, for safety of vessel and
crew.
Follow the compass safe distances
shown below to prevent interference to
a magnetic compass.
Standard
compass
Steering
compass
GP-25
GP-27
0.35 m
0.55 m
0.30 m
0.35 m

SAFETY INSTRUCTIONS, NOTICES
iv
When connecting the wire or after connect-
ing the wire, fix the wiring to ensure no
force is applied to the connector body and
terminal parts.
The parts and circuit may be damaged.
Do not use the equipment if it has been
accidentally dropped.
Using the equipment in such a state may cause
damage or result in equipment failure.
If the screen becomes dirty, wipe it using a
soft cloth while taking care not to scratch it.
Using a hazardous solvent may affect the color
or quality of the resin case, LCD or other parts.
Before wiping the screen, brush away any dust
on the screen to avoid scratching it. Note that if
you use a cleaner containing brine to wipe the
screen, you may scratch the LCD.
A certain number of bright spots and black
spots appear on the screen.
However, this is an inherent aspect of color
LCDs and does not indicate a failure.
Do not apply excessive pressure to the LCD
screen or apply pressure to it with a sharp
metallic object.
Doing so may damage the screen, leading to
deterioration of the insulation capacity and
waterproofing properties.
A load exceeding the durability level may cause
the equipment to malfunction or fail to operate.
If you are using a USB with the memory card
cover open, the dust-proofing and water-
proofing properties will not be effective.
When updating the program, save the
backup data containing points and other
information to the SD card to ensure data
security.
Do not apply excessive force when inserting
or removing the SD card.
Doing so may damage the connector area and
this equipment.
To remove the SD card while power is
turned on, tap [Eject SD] on [Menu] in
advance.
If you remove the SD card while data is being
read or written, the data may be destroyed.
Note that if you use an SD card other than
the one tested at FURUNO for storage and
regeneration of information such as the
waypoint data, the SD card may fail to store
or register information.
Do not apply excessive force when inserting
or removing the USB connector.
Doing so may damage the connector area and
this equipment.
Do not press the Force Shutdown button
with excessive force.
Doing so may damage the switch part and this
equipment.
Do not apply excessive force to the Power
key or apply pressure to it with a sharp
metallic object.
Doing so may damage the Power key part and
this equipment.
Do not subject the LCD display to direct
sunlight.
Direct sunlight can decrease the level of
visibility. Install the unit away from direct
sunlight.
NOTICE
NOTICE
NOTICE
NOTICE

v
TABLE OF CONTENTS
FOREWORD................................................................................................................. viii
SYSTEM CONFIGURATION .......................................................................................... ix
EQUIPMENT LISTS......................................................................................................... x
1. OPERATIONAL OVERVIEW.................................................................................1-1
1.1 Controls ......................................................................................................................1-1
1.2 How to Turn the Power On or Off...............................................................................1-5
1.3 How to Adjust the Display Brilliance...........................................................................1-5
1.4 Plotter Display ............................................................................................................1-6
1.5 How to Tap an Object.................................................................................................1-7
1.5.1 Pop-up menus ................................................................................................1-7
1.5.2 Object information ..........................................................................................1-7
1.5.3 Tide information..............................................................................................1-8
1.5.4 Tidal stream station ......................................................................................1-11
1.6 The Cursor................................................................................................................1-12
1.6.1 How to display the cursor .............................................................................1-12
1.7 Own Ship Icon ..........................................................................................................1-13
1.7.1 How to move the own ship icon to the center of the display ........................1-14
1.8 Display Range ..........................................................................................................1-15
1.9 Home Operation .......................................................................................................1-15
1.9.1 Radio button operation .................................................................................1-16
1.9.2 Numeric keypad operation ...........................................................................1-17
1.9.3 Latitude/Longitude selection pad operation..................................................1-17
1.9.4 Character pad operation...............................................................................1-18
1.10 Menu Operation........................................................................................................1-19
1.11 Orientation Mode ......................................................................................................1-20
1.12 Man Overboard (MOB) .............................................................................................1-21
1.12.1 How to mark MOB position...........................................................................1-21
1.12.2 MOB mark pop-up menu ..............................................................................1-21
1.13 Navigation Data Boxes .............................................................................................1-22
1.13.1 How to display the navigation data box........................................................1-22
1.13.2 How to select the data to display in a box ....................................................1-22
2. TRACK...................................................................................................................2-1
2.1 How to Start or Stop Recording Track........................................................................2-1
2.2 How to Select Recording Method, Recording Interval................................................2-1
2.3 How to Change the Color of Your Boat’s Track..........................................................2-2
2.4 How to Change the Color of Your Boat’s Track with Sea Surface Temperature........2-2
2.5 How to Hide, Show Track by Color.............................................................................2-2
2.6 How to Delete Track by Color.....................................................................................2-3
3. POINTS ..................................................................................................................3-1
3.1 What is a Point? .........................................................................................................3-1
3.2 How to Enter a Point...................................................................................................3-2
3.2.1 How to enter a point by tapping the cursor.....................................................3-2
3.2.2 How to enter a point by tapping the [Point] key..............................................3-2
3.2.3 How to enter a point from the Points List .......................................................3-2
3.3 Point Symbol Pop-up Menu........................................................................................3-3
3.4 Points List...................................................................................................................3-4
3.4.1 How to display the Points List ........................................................................3-4
3.4.2 Points List Function buttons (at the bottom of the screen) .............................3-4

TABLE OF CONTENTS
vi
3.4.3 Points List pop-up menu ................................................................................ 3-5
3.5 How to Edit a Point..................................................................................................... 3-5
3.5.1 How to edit a point from the pop-up menu..................................................... 3-5
3.5.2 How to edit a point from the Points List.......................................................... 3-6
3.6 How to Move a Point ..................................................................................................3-9
3.7 How to Select Visibility for Points............................................................................. 3-10
3.8 How to Search, Sort Points on the Points List ......................................................... 3-10
3.8.1 How to search points.................................................................................... 3-10
3.8.2 How to sort points ........................................................................................ 3-10
3.9 How to Filter Points by Shape.................................................................................. 3-11
3.10 How to Delete Points................................................................................................ 3-11
3.10.1 How to delete a point from the point symbol pop-up menu.......................... 3-11
3.10.2 How to delete points on the Points List........................................................ 3-11
3.11 How to Display a Point from the Points List ............................................................. 3-12
4. ROUTES.................................................................................................................4-1
4.1 What is a Route?........................................................................................................ 4-1
4.2 How to Create a Route............................................................................................... 4-1
4.2.1 How to create a route from [Home]................................................................ 4-1
4.2.2 How to create a route from [Menu].................................................................4-3
4.3 Routes List and Route Edit Screens .......................................................................... 4-4
4.3.1 How to display the Routes List....................................................................... 4-4
4.3.2 Route Edit screen........................................................................................... 4-5
4.4 How to Move a Point in a Route on the Screen ......................................................... 4-6
4.5 How to Skip a Point in a Route on the Screen ........................................................... 4-6
4.6 How to Display a Route.............................................................................................. 4-7
4.7 How to Connect Two Routes .....................................................................................4-7
4.8 How to Rename a Route............................................................................................ 4-8
4.9 How to Delete Routes ................................................................................................ 4-8
5. NAVIGATION .........................................................................................................5-1
5.1 How to Navigate to a Quick Point .............................................................................. 5-1
5.2 How to Navigate to a Saved Point ............................................................................. 5-2
5.2.1 How to navigate to a saved point selected on the screen.............................. 5-2
5.2.2 How to navigate to a point selected from the Points List ............................... 5-2
5.3 How to Select a Route for Navigation ........................................................................ 5-2
5.4 Functions Available in Navigation .............................................................................. 5-3
5.4.1 How to show the functions for navigation....................................................... 5-3
5.4.2 Restart navigation .......................................................................................... 5-5
5.4.3 How to follow a route in reverse order ........................................................... 5-6
5.4.4 How to stop following a route......................................................................... 5-6
5.4.5 How to start navigation from a point on a route ............................................. 5-6
5.4.6 How to skip a leg in a route............................................................................ 5-6
6. MAP SETTINGS.....................................................................................................6-1
6.1 Map Setup.................................................................................................................. 6-1
7. VISUAL ALARMS ..................................................................................................7-1
7.1 Alarm Menu................................................................................................................ 7-1
7.2 Arrival Alarm...............................................................................................................7-2
7.3 XTE Alarm.................................................................................................................. 7-3
7.4 Shear Alarm ............................................................................................................... 7-3
7.5 Depth Alarm ............................................................................................................... 7-3
7.6 Anchor Alarm ............................................................................................................. 7-4
7.7 Trip Alarm...................................................................................................................7-4
7.8 Speed Alarm .............................................................................................................. 7-5
TABLE OF CONTENTS
vii
8. MEMORY CARD OPERATIONS ...........................................................................8-1
8.1 The Memory Card Screen ..........................................................................................8-1
8.2 How to Initialize SD Cards..........................................................................................8-1
8.3 How to Eject an SD Card............................................................................................8-2
8.4 How to Save Data to an SD Card...............................................................................8-2
8.5 How to Rename Files on an SD Card ........................................................................8-3
8.6 How to Delete Files from an SD Card ........................................................................8-3
8.6.1 How to delete individual files from an SD card...............................................8-3
8.6.2 How to delete all files from an SD card ..........................................................8-3
8.7 How to Import Data from an SD Card.........................................................................8-3
9. OTHER FUNCTIONS ............................................................................................9-1
9.1 DSC Message Information .........................................................................................9-1
9.2 TLL Point Information .................................................................................................9-1
9.3 How to Select Output Data.........................................................................................9-2
9.3.1 How to select output data...............................................................................9-2
9.3.2 How to select version .....................................................................................9-3
10. CUSTOMIZING YOUR UNIT ...............................................................................10-1
10.1 General Menu...........................................................................................................10-1
10.2 Plotter Menu .............................................................................................................10-2
10.3 System Menu............................................................................................................10-3
11. MAINTENANCE, TROUBLESHOOTING ............................................................11-1
11.1 Maintenance.............................................................................................................11-1
11.2 How to Replace the Fuse .........................................................................................11-2
11.3 Troubleshooting........................................................................................................11-2
11.4 GPS Status Display ..................................................................................................11-3
11.5 How to Restore Defaults, Clear Memory ..................................................................11-4
11.6 How to Update the System.......................................................................................11-4
11.7 Test, Touch Screen Calibration ................................................................................11-5
12. INSTALLATION ...................................................................................................12-1
12.1 Installation of Display Unit ........................................................................................12-1
12.2 Installation of Antenna Unit GPA-017 (option)..........................................................12-2
12.3 Wiring .......................................................................................................................12-3
12.4 Initial Settings ...........................................................................................................12-4
12.4.1 Installation Menu ..........................................................................................12-4
APPENDIX 1 MENU TREE .......................................................................................AP-1
APPENDIX 2 ABBREVIATIONS, ICONS .................................................................AP-3
SPECIFICATIONS ..................................................................................................... SP-1
PACKING LISTS ......................................................................................................... A-1
OUTLINE DRAWINGS ................................................................................................ D-1
INTERCONNECTION DIAGRAM ................................................................................ S-1
INDEX ......................................................................................................................... IN-1

viii
FOREWORD
A Word to GP-25, GP-27 Owners
Congratulations on your choice of the FURUNO GP-25, GP-27 GPS/WAAS Plotter. We are con-
fident you will see why the FURUNO name has become synonymous with quality and reliability.
Since 1948, FURUNO Electric Company has enjoyed an enviable reputation for innovative and
dependable marine electronics equipment. This dedication to excellence is furthered by our ex-
tensive global network of agents and dealers.
This equipment is designed and constructed to meet the rigorous demands of the marine environ-
ment. However, no machine can perform its intended function unless operated and maintained
properly. Please carefully read and follow the recommended procedures for operation and main-
tenance.
We would appreciate hearing from you, the end user, about whether we are achieving our purpos-
es. Thank you for considering and purchasing FURUNO equipment.
Features
The GP-25 and GP-27 provide a totally integrated GPS receiver and color video plotter. The built-
in GPS receiver provides highly accurate position, course and speed information. The compact
display unit and antenna unit permit installation where space is limited.
The main features are
• Bright 5-inch (GP-25) or 7-inch (GP-27) color LCD with brilliance control.
• Excellent viewing angles, even when wearing sunglasses.
• Internal GPS receiver provides highly accurate position information.
• Large internal memory stores 30,000 track points, 30,000 points, 200 routes (50 waypoints/
route).
• SD card slot accepts SD and SDHC cards for external storage of data and settings. It is recom-
mended that you use the SD and SDHC cards tested for use in this equipment.
• Full range of alarms: Arrival, Anchor, Speed, Depth, etc.
• Accepts NMEA0183 input.
• Internal GPS antenna available.
• C-Map MAX charts available.
Open Source Acknowledgement
This product makes use of the open source software licensed under GPL,
LGPL and others.
Customer can get the source or object code of the software, copy, modify and
distribute the software that is licensed under GPL and LGPL. To obtain the
source code, refer to our web site
(https://www.furuno.co.jp/cgi/cnt_oss_e01.cgi).
This product uses the software module that was developed by the
Independent JPEG Group.

ix
SYSTEM CONFIGURATION
The environmental category of each unit is as follows:
The display unit GP-25 and GP-27 have a built-in GPS antenna.
GP-25
GP-27
Unit Environmental category
Display unit GP-25/GP-27 Protected from the weather
Antenna unit GPA-017 (option) Exposed to the weather, or protected from the weather in case of
internal antenna
Antenna Unit
GPA-017
(option)
Display Unit
GP-25
External Equipment
12-24 VDC
Antenna Unit
GPA-017
(option)
Display Unit
GP-27
External Equipment
12-24 VDC

x
EQUIPMENT LISTS
Standard supply
Optional supply
Name Type Code No. Qty Remarks
Display Unit GP-25 - 1
GP-27 -
Cable Assy. MJ-A7SPF0005A-020C 000-177-297-10 1 Installation materials
Self-tapping Screw 5x20 SUS304 000-162-608-10 4
Fuse FGMB 125V 2A PBF 000-157-479-10 1 Spare part
SD Card TZ797355*A* - 1 Contains chart data
Name Type Code No. Remarks
Antenna Unit GPA-017 -
Mast Mounting Kit CP20-01111 004-365-780 For mounting the antenna unit
Right Angle Mounting Base No.13-QA330 001-111-910-10

1-1
1. OPERATIONAL OVERVIEW
1.1 Controls
The GP-25 and GP-27 are operated by the touch control.
The chart plotter is mainly operated with
When you operate a key, a single beep sounds to tell you correct operation. For wrong
operation, two beeps sound. If you do not need the key beep, you can deactivate it
from [Home].
• [Home] menus, where you select options
• [Menu]
• Pop-up menus, where you select options
Control Description
Power key Press to adjust LCD brilliance.
Long-press to turn the power on or off.
[Center] key Tap to move the own ship to the center of the screen.
[Point] key Tap to put a point.
Long tap to put an MOB (ManOverBoard) mark at the own ship posi-
tion.
[Menu] key Tap to show [Menu].
[Home] key Tap to show [Home].
SD card slot: Card drive for SD card (chart card and memory card).
Mini USB connector: For maintenance and servicing.
Force Shutdown button: Forcibly shuts off the power. Should the screen freeze press
this button to turn the power off.
[Menu] key
[Home] key
[Point] key
[Center] key
Power key
Cover:
- SD card slot
- Mini USB connector
- Force Shutdown button
Pictured: GP-25

1. OPERATIONAL OVERVIEW
1-2
Touch control description
The basic operations are in the tables that follow.
SD cards
The SD cards store ship’s tracks, routes and points. The unit accepts
SD and SDHC (Secure Digital High Capacity) type cards and the max-
imum capacity is 32 GB.
To set a card in the slot, insert the card as shown in the illustra-
tion. If the card does not go in easily, do not use force. Push the
card until the card is in position.
To remove a card, Tap [Eject SD] from [Menu].
Remove the card (with your fingers) after the message "You can eject SD card safely."
appears.
Care and handling of SD cards
• Handle the cards carefully; rough handling can damage the card and destroy its
contents.
• Make sure the cover is closed at all times. Insert the card fully or remove the
card; the cover cannot be closed if the card is inserted partially.
• Remove a card with only your fingers. Do not use metal instruments (like tweezers)
to remove the card.
• Do not remove a card during the reading of the card or writing to the card, to prevent
damage to the card and loss of the data stored on the card.
• If the cover gets wet, DO NOT open the cover. Remove the water with a dry cloth
completely and then open the cover.
• Stop the vessel before reading or writing data to an SD card.
Operation with a finger Function
Tap • Move the map and display the cursor.
• Select a menu item.
• Select an object or position to display
the related pop-up menu.
• Confirm the operation.
Long tap • Long tap the [Point] key to put an MOB
(ManOverBoard) mark.
• Move the selected point.
• Display the pop-up menu for some list
item.
Tap!
Hold!

1. OPERATIONAL OVERVIEW
1-3
Tested SD cards
The SD cards tested for use in this equipment are listed in the table below.
Maker, Type Size
2 GB 4 GB 8 GB 16 GB 32 GB
ADTEC
AD-SDH (SD) [AD-SDH2G] Y
BUFFALO
RSDC-S (SD) [RSDC-S2G] Y
RSDC-G Hi-Performance (SD)
[RSDC-G2G] Y
Hagiwara System
T series (SD) [PSDB0487A] Y
M series Super High Speed (SD)
[PSDB0486A] Y
I-O DATA
I-O DATA (SD) [SD-2G] Y
I-O DATA Super High Speed (SD) [SDP-2G] Y
Kingston
Kingston (SD) [SD/2GBFE] Y
Kingston (SDHC) CLASS 4 [SD4/32GB] Y
Panasonic
Panasonic PRO HIGH SPEED (SD)
[RP-SDK02GJ1A] Y
Panasonic HIGH SPEED (SD) CLASS 2
[RP-SDR02GJ1A] Y
Panasonic HIGH SPEED (SDHC) CLASS 4
[RP-SDM04GK1K] Y
Panasonic HIGH SPEED (SDHC) CLASS 4
[RP-SDM08GK1K] Y
Panasonic HIGH SPEED (SDHC) CLASS 4
[RP-SDM16GK1K] Y
Panasonic PRO HIGH SPEED (SDHC)
CLASS 6 [RP-SDV04GK1K] Y
Panasonic PRO HIGH SPEED (SDHC)
CLASS 6 [RP-SDV08GK1K] Y
pqi
pqi (SD) [QSDS-2G] Y

1. OPERATIONAL OVERVIEW
1-4
San Disk
SanDisk (SD) [SDSDB-2048-J60] Y
SanDisk (SDHC) [SDSDBR-4096-J85] Y
SanDisk Ultra II (SDHC) CLASS 4
[SDSDRH-8192-903] Y
SanDisk Ultra II (SD) [SDSDH-2048-903] Y
SanDisk Ultra II (SDHC)
[SDSDRH-4096-903] Y
SanDisk Extreme III (SDHC)
[SDSDRX3-4096-903] Y
SanDisk Extreme (SDHC)
[SDSDX3-032GJ31A] Y
TOSHIBA
(SD) CLASS 4 [SD-B002GT4] Y
Maker, Type Size
2 GB 4 GB 8 GB 16 GB 32 GB

1. OPERATIONAL OVERVIEW
1-5
1.2 How to Turn the Power On or Off
Long-press the Power key to turn the power ON. To turn the power OFF, long-press
the same key until the screen goes dark. The display shows the number of seconds
remaining until the power is turned off.
When you turn on the power, a beep sounds and the following sequence occurs.
1. The test display appears.
2. If some data is missing or corrupted, a message states the missing component.
Contact your dealer for details.
3. The unit shows the "WARNINGS - LIMITATIONS ON USE" screen. Read the in-
formation then tap the display to start operation.
4. If a C-MAP chart card is inserted, chart information is checked to see if it is up-to-
date. If the chart is not up-to-date, the message "The chart data is out-of date, and
may be unsafe for navigation, which could place you and others at risk..." appears.
If this message appears contact your dealer to get up-to-date charts.
5. If it is the first time that the system is powered ON, [Installation Menu] appears.
See section 12.4 to set the settings below.
• Language
• Units of Measure (Distance, Speed, Depth, Temperature)
• Time Difference
• GPS Antenna
1.3 How to Adjust the Display Brilliance
You can adjust the display brilliance as follows:
1. Press the Power key to show the [Backlight
Brilliance] window.
2. Do the following to adjust the display brilliance.
• Press the Power key.
• Tap the or key.
3. Tap outside the [Backlight Brilliance] window to close the window.

1. OPERATIONAL OVERVIEW
1-6
1.4 Plotter Display
The plotter provides a small world map. The plotter receives position information from
the internal GPS receiver. Your position is marked on the screen with the own ship
icon. Waypoints and routes you have entered are shown on the display.
The plotter display also
• Plots the track of your vessel.
• Measures distances and bearings.
• Marks man overboard (MOB) position.
• Controls alarm functions.
• Follows routes.
• Puts points.
Item Description Reference
Compass Find a direction.
GPS icon Shows GPS status. page AP-6
Alarm icon Appears when an alarm condition(s) is met. page AP-6
Point Displayed where you have entered a point. chapter 3
Cursor Displayed where you tapped. section 1.6
Cursor position box Shown when the cursor is present. section 1.6
Own ship icon Shows the own ship's position. section 1.7
Track Your boat's track. chapter 2
COG line Shows the own ship direction.
MOB mark Shows man overboard position. section 1.12
MOB box Shows bearing and distance to MOB mark. section 1.12
Range scale Tap to change the range scale. section 1.8
Range scale
Cursor
COG line Navigation
data box
L/L grid
Track
Alarm icon
Cursor
position
box
MOB mark
[Home] key
[Menu] key
[Point] key
[Center] key
Own ship
icon
Point
Compass
MOB box
(Bearing and distance
to MOB position)
GPS icon

1. OPERATIONAL OVERVIEW
1-7
1.5 How to Tap an Object
The plotter display shows lots of objects - own ship icon, points, buoys and lighthous-
es.
Tap an object that you want to process to show the related pop-up menu.
1.5.1 Pop-up menus
The pop-up menus let you quickly access the commands asso-
ciated with the selected object. Tap the own ship icon, cursor or
a point symbol to show the corresponding pop-up menu. The
figure at right shows the pop-up menu for a point. Tap the menu
item to select a function.
1.5.2 Object information
You can find information about objects such as buoys and lighthouses with the pop-
up menu.
1. Tap an object to put the cursor on the object.
2. Tap the cursor which is put on an object to show the pop-up menu.
3. Tap [Information] and tap the object name (e.g. LIGHTHOUSE) to show the [Ob-
ject Information] window.
4. Tap [More] to show detailed information.
[Home] key Tap to display [Home]. section 1.9
[Menu] key Tap to display [Menu]. section 1.10
[Point] key Tap to enter a point. section 3.2
[Center] key Tap to move the display to the own ship at
the center of the display.
section 1.7.1
Navigation data
Box
Shows various navigation data. section 1.13
Item Description Reference

1. OPERATIONAL OVERVIEW
1-8
1.5.3 Tide information
The equipment has worldwide tide height and tidal current information, recorded by
tidal recording stations.
Tide height information
The tidal station symbol appears at the locations of tidal stations.
To display tide information, do as follows:
1. Tap the tidal symbol to put the cursor on the symbol and show the pop-up menu.
2. Tap [Information] and tap [TIDE HEIGHT...] to show the [Object Information] win-
dow.
3. Tap [More] to show detailed information.
4. Tap [Exit] to close.
• The information is mostly accurate under moderate weather conditions. However,
storms and weather fronts can influence forecasted tide times and heights.
This manual suits for next models
1
Table of contents
Other Furuno Plotter manuals

Furuno
Furuno GP-3100 Mark-2 User manual

Furuno
Furuno GP-1810 User manual

Furuno
Furuno GP-280 User manual

Furuno
Furuno Auto Plotter ARP15 User manual

Furuno
Furuno GP-3500 Manual

Furuno
Furuno RP-25 User manual

Furuno
Furuno GP-1871F User manual

Furuno
Furuno GP-1600F User manual

Furuno
Furuno RP-340 User manual

Furuno
Furuno GP-1670 User manual

Furuno
Furuno GP-3500 Manual

Furuno
Furuno GP-1850DF User manual

Furuno
Furuno RP-250 User manual

Furuno
Furuno Auto Plotter ARP15 User manual

Furuno
Furuno GPS Plotter GP1600 User manual

Furuno
Furuno GP-1871F User manual

Furuno
Furuno 1932 MK2 User manual

Furuno
Furuno RP-17 User manual

Furuno
Furuno GP-3500 User manual

Furuno
Furuno GP-1810F Manual