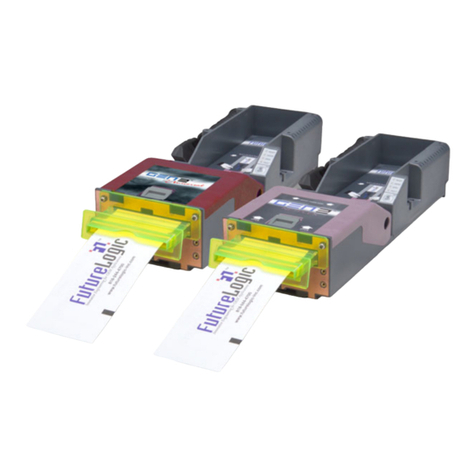
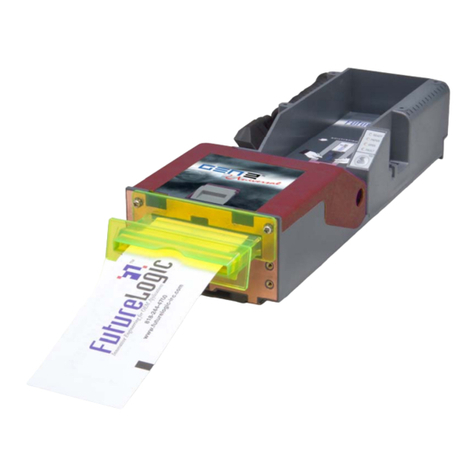
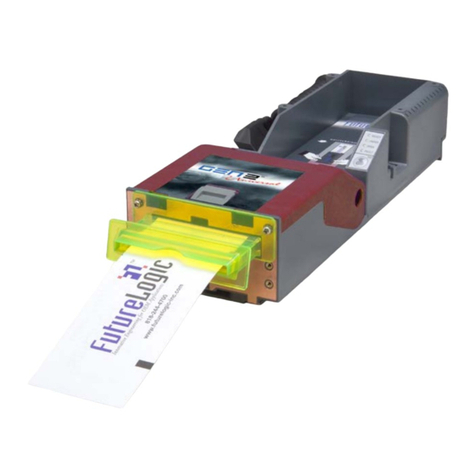
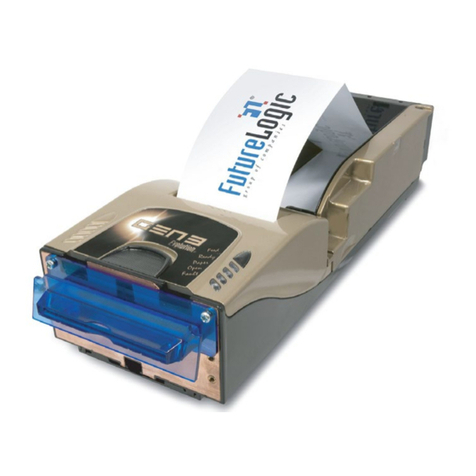
FutureLogic PSA-66-001N User manual

PSA-66-001N
PSA
-
66
-
ST
Operators and Technicians
Manual
O
PERATORS AND
T
ECHNICIANS
M
ANUAL
PSA-66-ST
RS232 Interface
PSA-66-001N
Netplex Interface
INDUSTRIAL, DIRECT THERMAL
GAMING / LOTTERY MACHINE VOUCHER PRINTER

UM-STO-C Revision C 2
Operators and Technicians
Manual
PSA-66-001N
PSA
-
66
-
ST
IMPORTANT NOTES REGARDING THIS MANUAL
•These specifications are subject to
change without notice and may not
completely and correctly document the
operation of this product.
Copyright © 2003 Futurelogic, Inc.
!

UM-STO-C Revision C 3
Operators and Technicians
Manual
PSA-66-001N
PSA
-
66
-
ST
1
PRODUCT OVERVIEW ............................................................................................................................... 6
1.1
PSA-66-ST AND PSA-66-001N HIGHLIGHTS............................................................................................ 6
2
OPERATOR INTERFACE ........................................................................................................................... 7
2.1
OPERATOR CONTROLS AND INDICATORS ................................................................................................... 7
2.2
PRINTER SENSOR FUNCTIONS .................................................................................................................... 8
2.3
PAPER LOADING ........................................................................................................................................ 8
2.4
BEZEL OPERATION................................................................................................................................... 10
2.5
KEYPAD LED OPERATION AND PRINTER STATUS CONDITIONS ............................................................... 10
2.6
PAPER FEED OPERATION ......................................................................................................................... 11
2.7
CUT KEY FUNCTIONS .............................................................................................................................. 11
2.8
SELF TEST ............................................................................................................................................... 11
2.9
CLEARING A PAPER JAM .......................................................................................................................... 12
3
SERVICING THE PRINTER...................................................................................................................... 14
3.1
REMOVING THE INNER MODULE .............................................................................................................. 14
4
PORTS........................................................................................................................................................... 18
4.1
INTRODUCTION ........................................................................................................................................ 18
4.2
PSA-66-001N NETPLEX PRINTER............................................................................................................ 19
4.3
PSA-66-ST RS232 PRINTER ................................................................................................................... 22
5
SENSOR OPERATION ............................................................................................................................... 26
5.1
PAPER OUT SENSOR ................................................................................................................................ 26
5.2
PAPER LOW SENSOR ................................................................................................................................ 26
5.3
PAPER PRESENT SENSOR ......................................................................................................................... 26
5.4
PAPER JAM SENSING................................................................................................................................ 26
6
APPENDIX A – GENERAL SPECIFICATIONS...................................................................................... 27
7
APPENDIX B – PAPER............................................................................................................................... 29
8
APPENDIX C – PRINTER PART NUMBERS ......................................................................................... 30
9
APPENDIX D – SPARE PARTS................................................................................................................. 31
10
APPENDIX E – BEZELS......................................................................................................................... 36
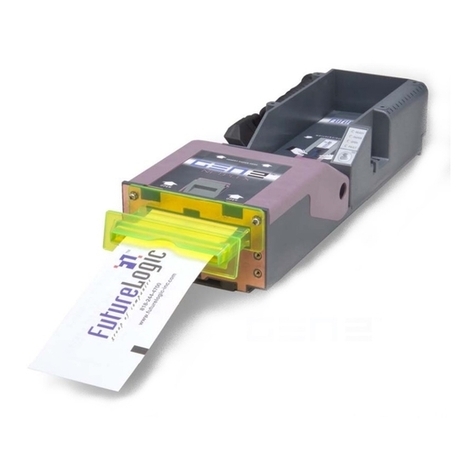
T
ABLE OF
C
ONTENTS

UM-STO-C Revision C 4
Operators and Technicians
Manual
PSA-66-001N
PSA
-
66
-
ST
TABLE 2-1
BEZEL DISPLAY STATUS .................................................................................................................. 10
TABLE 2-2
KEYPAD LEDS STATUS REPORTING ................................................................................................ 10
TABLE 4-1 FRONT BEZEL PORT PINS ................................................................................................................. 19
TABLE 4-2 FRONT BEZEL PORT PINS ................................................................................................................. 20
TABLE 4-3 NETPLEX PRINTER CABLE PIN OUT .................................................................................................. 21
TABLE 4-4 FRONT BEZEL PORT PINS ................................................................................................................. 22
TABLE 4-5 RS232 PRINTER BASE PORT PIN OUT............................................................................................... 23
TABLE 4-7 RS232 CABLE PORT PIN OUT........................................................................................................... 24
TABLE 4-8
PSA-66-ST RS232 10 POSITION DIP SWITCH SETTINGS .................................................................. 25
TABLE 6-1
GENERAL SPECIFICATIONS ............................................................................................................... 27
TABLE 8-1
PRINTER ORDER P/N’S.................................................................................................................... 30
TABLE 9-1
SPARES P/N'S................................................................................................................................... 31
List of Tables

UM-STO-C Revision C 5
Operators and Technicians
Manual
PSA-66-001N
PSA
-
66
-
ST
FIGURE 2-1
OPERATOR CONTROLS ....................................................................................................................... 7
FIGURE 2-2
SAMPLE CONFIGURATION TICKET.................................................................................................... 12
FIGURE 4-1 PSA-66-001N FRONT BEZEL PORT.................................................................................................. 19
FIGURE 4-2 PSA-66-001N BASE PRINTER PORT................................................................................................. 20
FIGURE 4-3 PSA-66-001N CABLE CONNECTOR PIN OUT ................................................................................... 21
FIGURE 4-4 PSA-66-ST FRONT BEZEL PORT...................................................................................................... 22
FIGURE 4-5 PSA-66-ST BASE PRINTER PORT..................................................................................................... 23
FIGURE 4-7 PSA-66-ST RS232 UNIT RS232 CABLE PIN OUT ............................................................................ 24
FIGURE 4-8 PSA-66-ST RS232 DIP SWITCHES BOTTOM VIEW........................................................................... 25
FIGURE 7-1
TICKET DIMENSIONAL SPECIFICATION .............................................................................................. 29
List of Figures

UM-STO-C Revision C 6
Operators and Technicians
Manual
PSA-66-001N
PSA
-
66
-
ST
1 PRODUCT OVERVIEW
1.1 PSA-66-ST and PSA-66-001N Highlights
The PSA-66-ST refers to both the PSA-66-ST and PSA-66-001N versions and is an advanced thermal
printer capable of creating high quality complicated output with a minimum of development and effort on
the part of the user. The printer module supports both serial and a Netplex current loop interface to
allow it to operate in any standard slot machine on the market.
PSA-66-ST FEATURES
•MAY BE MOUNTED ON AN ANGLE OR HORIZONTALLY
•SIMPLE PAPER LOADING no loose parts
•VARIABLE PAPER CAPACITY VIA PAPER TRAYS 200, 400, 600 & 1000 ticket
trays
•PROMOTIONAL PRINTING CAPABILITIES
•PAGE MODE PRINTING WITH TCL PRINTER LANGUAGE
•LINE PRINTER CAPABILITY
•HIGH QUALITY LASER LIKE SAN SERIF FONTS IN MULTIPLE SIZES
•ADVANCED GRAPHICS PRINTING
•WINDOWS CONNECTIVITY
•3 INCH PER SECOND PRINT SPEED
•2K INPUT BUFFER
•WIDE TEMPERATURE RANGE OPERATION
•STANDARD AND CUSTOMIZED SERIAL INTERFACES AVAILABLE RS232
Netplex

UM-STO-C Revision C 7
Operators and Technicians
Manual
PSA-66-001N
PSA
-
66
-
ST
2 OPERATOR INTERFACE
2.1 Operator Controls and Indicators
The printer is equipped with 2 status indicators and 2 operator controls to allow the operator to know the
status of the printer at all times. The status indicators are:
•The front bezel light
•The STATUS and ERROR LEDs on the keypad
The operator controls for the printer are:
•The FEED key
•The platen release lever
Figure 2-1 below illustrates the location of these controls and displays. The purpose of this section is to
detail the operation of the printer around these displays and controls.
Figure 2-1 Operator Controls
Platen r
elease
Error! light
Status light
Paper advance
Paper insertion slot
INDEX MARK SIDE UP

UM-STO-C Revision C 8
Operators and Technicians
Manual
PSA-66-001N
PSA
-
66
-
ST
2.2 Printer Sensor Functions
There are 6 primary sensor functions on the PSA-66-ST printer:
•Paper out
•Paper level low
•Paper taken
•Paper jam
•Printer platen engaged
•Printer opened
These sensors work in conjunction with the game firmware to provide reliable trouble-free operation. Any
error conditions as a result of these sensors will be indicated by the front bezel light and keypad LEDs.
2.3 Paper Loading
Generally, the only service required for printer is to load new paper stacks. This section provides a step
by step description of how to load paper to the unit. The automatic paper loading feature of this system
simplifies this process to essentially two steps; putting the paper stack into the printer paper tray, and
presenting paper to the paper feed slot in the printer. The platen release lever, the paper advance button
and the cutter operate button are merely provided as supports for this process, and usually are not
required to load paper.

UM-STO-C Revision C 9
Operators and Technicians
Manual
PSA-66-001N
PSA
-
66
-
ST
Follow these steps to load paper:
Pull open the printer drawer until the paper tray is completely accessible. Place the
paper stack in the printer as indicated by the band around the stack and the label in the
bottom of the paper tray.
Insert paper into the paper loading slot; the printer will automatically pull through a form
or two, leaving it registered at the top of a form. Remove the excess tickets from the
printer.
1 –
insert paper stack
2 –
insert paper here

UM-STO-C Revision C 10
Operators and Technicians
Manual
PSA-66-001N
PSA
-
66
-
ST
2.4 Bezel Operation
The front bezel display allows the operator to determine the state of the printer on the casino floor, at a
distance, without disturbing the game. The table below lists the various conditions which the bezel
indicates.
Table 2-1 Bezel Display Status
Bezel Display Status
Solid On Printer Idle and Ready
Slow Blink Paper low or Printer Error
Fast Blink Ticket Printing and/or Ticket in chute
Off Printer power off
2.5 Keypad LED Operation and Printer Status Conditions
The keypad LEDs provide a more detailed reporting of system status. Table 2-2 below lists the status of
the keypad LEDs in a variety of status which are defined following.
Table 2-2 Keypad LEDs Status Reporting
CONDITION STATUS_LED
ERR_LED
Unit in Powered Off 0FF 0FF
Unit Ready ON OFF
Unit Flushed ON ON
Paper out OFF ON
Head Up OFF ON
Temperature Error OFF MED BLINK
Voltage Error OFF SLOW BLINK
Print Head Error ON FAST BLINK
Missing Black Index Mark ON FAST BLINK
Paper Jam ON FAST BLINK
Although there are a variety of error conditions which can occur, most printer errors are a result of the
printer running out of paper or the operator raising the head up lever. This section lists the possible error
which can occur, and how the condition is remedied.
PAPER OUT:This condition results when the printer detects that paper is not present. The printer scans
for a paper out condition at all times. Remedy the condition by loading a new paper stack.
HEAD UP:This condition results from lowering the head release lever. To remedy the error, it is
necessary to raise the blue lever on the side of the unit.

UM-STO-C Revision C 11
Operators and Technicians
Manual
PSA-66-001N
PSA
-
66
-
ST
TEMPERATURE ERROR:. This condition results when the printer is in an over temperature condition. If the
printer is operating in an environment where the ambient temperature is roughly room temperature, this
error would most likely be the result of a hardware problem. The printer will automatically resume
operation after the detected head temperature reaches legal operation limits.
VOLTAGE ERROR:If the printer detects a power supply voltage (+24VDC to +25VDC) outside of legal
limits, then a voltage error occurs. This error could be the result of a poor cable connection. The printer
will automatically resume operation after the power supply is detected within legal limits.
PRINT HEAD ERROR:This type of error occurs when the printer senses an internal error due to
connectivity or interfacing problem with the thermal print head. This can be a result of a cable problem
between the main controller board and the printer engine. The printer will remain in this error state until
the power is cycled or the unit is reset. If the problem persists, the printer will require service.
MISSING BLACK INDEX MARK:If the paper type selected is indexed paper, and while feeding paper or
printing a black mark is not seen within approximately 10” of paper, then this type of error will occur. The
purpose of this error is to alert the user to the presence of the wrong kind of paper in the printer, or that
the paper was inserted in the wrong direction (so the black mark index is rotated 180 degrees. The
condition is cleared by raising of the head release lever (presumably to change the paper).
PAPER JAM:This error indicates that the printer detected an error in the paper path for presenting the
ticket to the customer. To clear this condition, open the printer head and inspect for a jammed ticket.
2.6 Paper Feed Operation
The printer has been designed to run with black mark indexed paper. Paper feeding is accomplished by
use of the feed button. Each long press (~1 second) of the feed key will result in paper being advanced to
the top of the next form.
2.7 Cut Key Functions
The CUT key performs no function in the PSA-66-ST printer and should be ignored.
2.8 Self Test
If the FEED key is held depressed during power up or reset, a self test will be triggered which will result in
the proper printing of a configuration ticket if the test passes successfully. The test ticket is illustrated in
Figure 2-2 and it contains important information about how the unit is configured.

UM-STO-C Revision C 12
Operators and Technicians
Manual
PSA-66-001N
PSA
-
66
-
ST
Figure 2-2 Sample Configuration Ticket
2.9 Clearing a Paper Jam
The printer has been designed to operate reliably with a minimum of paper jamming. Should it be
necessary to clear a paper jam however, follow the simple instructions below. After the jam is cleared,
perform these operations in reverse.
When clearing a paper jam:
DO:
•Insure that all paper paths from the entry point at the back of the paper well, through the printer and
cutter and the presentation chute are clear of paper or obstructions
•Use the platen release lever located on the side of the unit
•Use the rotary screw at the top of the printer
Model: PSA-66-ST
Firmware: 2.4.0.0.0
COMMUNICATION
Interface: serial
Baud Rate: 19200
Data Bits: 8
Parity: NONE
Handshaking:
HARDWARE
PRINT CONTROL
Darkness Control: +00%
Black Bar Index: Disabled
Print On Demand: Disabled
Auto Sleep Timer: Off
SYSTEM RESOURCES
FLASH -Used: 000000
-Free: 024064
LIBRARY INVENTORY
Templates:
Print Regions:
Graphics:
Fonts: 3(0), 7(0), 8(0), 5(0)
Model number and software version
System communications setup

UM-STO-C Revision C 13
Operators and Technicians
Manual
PSA-66-001N
PSA
-
66
-
ST
DO NOT:
•Ever allow a screw driver or other probing object to come into contact with the printer; this can cause
permanent damage
Undo the mechanism fastening screw at the top of the printer plate at the front of the
printer:
Swivel the printer open. The paper path will be exposed, and any jammed paper can
be removed:
2 –
swivel the head open
3 –
paper can be cleared from
chute under the printer engine
1 –
undo the fastening screw

UM-STO-C Revision C 14
Operators and Technicians
Manual
PSA-66-001N
PSA
-
66
-
ST
3 SERVICING THE PRINTER
Should the printer require service outside of the game, the sliding module which includes the majority of
electronics may be easily removed and replaced. This chapter covers the sliding module removal
operation.
3.1 Removing the Inner Module
The sliding module of the PSA-66-ST may be removed from its stationary module by following the simple
steps given below. To re-install the sliding module, repeat the steps in reverse order.
Turn off the power.
1 –
turn off the power
!
The printer is
not
hot-connectable and
any attempt to do so can permanently
damage the printer!
OFF

UM-STO-C Revision C 15
Operators and Technicians
Manual
PSA-66-001N
PSA
-
66
-
ST
Slide the unit open until it locks in the open position.
If you can access the ribbon cable which attaches the sliding module to the stationary
module, go to the next step. If you cannot access the ribbon cable due to paper tray
being in the way, grab the back of the paper tray by the back fin and rock it forward,
pulling it out of the unit.
2 –
slide the unit open until it locks

UM-STO-C Revision C 16
Operators and Technicians
Manual
PSA-66-001N
PSA
-
66
-
ST
3 –
release the finger latches
to eject the ribbon cable
Be sure to note that the black end of the ribbon cable connects to the rear
daughter board (Gray end of cable connects to main controller.
Release the ribbon cable by spreading the finger latches at the rear of the unit:
!

UM-STO-C Revision C 17
Operators and Technicians
Manual
PSA-66-001N
PSA
-
66
-
ST
Press in the release lever under the front of the sliding module to release the sliding
printer module. The will release the locking mechanism and the unit may now be pulled
completely out of the stationary module.
Remove the printer from the machine.
4 –
push inward on the locking bar at the front of the unit to unlock the sliding module
5 –
slide the drawer module
completely out of the stationary
module
Gray connector end
of cable hooks to
main controller board
Black connector end
of cable hooks to
rear daughter board

UM-STO-C Revision C 18
Operators and Technicians
Manual
PSA-66-001N
PSA
-
66
-
ST
4 PORTS
4.1 Introduction
This section details the connector pin outs on the PSA-66-ST printer. There are actually two versions of
the PSA-66-ST printer by part number are:
PSA-66-001N Netplex Printer
And
PSA-66-ST RS232 Printer
This section is divided into two sub-sections, one for each version of the printer.

UM-STO-C Revision C 19
Operators and Technicians
Manual
PSA-66-001N
PSA
-
66
-
ST
4.2 PSA-66-001N Netplex Printer
Table 4-1 Front Bezel Port Pins
PIN
FUNCTION
1 Modulated +24VDC
2 No connect
3 GND
Figure 4-1 PSA-66-001N Front Bezel Port
PSA-66-001N
Netplex Version
This table below lists information on the bezel
port. The bezel port is for driving a printer front
action alert light built into the front bezel.
Bezel Port
Connector: Molex 39-01-4032
Mate: Molex 39-01-4030
1
2
3

UM-STO-C Revision C 20
Operators and Technicians
Manual
PSA-66-001N
PSA
-
66
-
ST
Table 4-2 Front Bezel Port Pins
Figure 4-2 PSA-66-001N Base Printer Port
PIN
FUNCTION
1 MRESET
2 Netplex TX
3 +13V
4 Netplex RX
5 GND
6 +24VDC
7 GND
8 +24VDC
9 Modulated +24VDC
10 GND
PSA-66-001N
Netplex Version
Base Port
1
5
6
10
Connector: Molex 39-30-1100
Mate:
Molex 39
-
01
-
2100
This manual suits for next models
1
Table of contents
Other FutureLogic Printer manuals

FutureLogic
FutureLogic GEN2 PSA-66-ST2 User manual

FutureLogic
FutureLogic PSA-66-ST2NU User manual

FutureLogic
FutureLogic PSA-66-ST2RU User manual

FutureLogic
FutureLogic PSA-66-ST2 User manual

FutureLogic
FutureLogic GEN2 User manual

FutureLogic
FutureLogic GEN3 Evolution User manual

FutureLogic
FutureLogic GEN2 User manual