MAN_BRW 199199.1300_Vers. 03.2013_BRW 148205
Brütsch / Rüegger Werkzeuge AG • Heinrich Stutz-Strasse 20 • Postfach • 8902 Urdorf • Tel. +41 44 736 63 63 • Fax +41 44 736 63 00 • www.brw.ch • sales@brw.ch
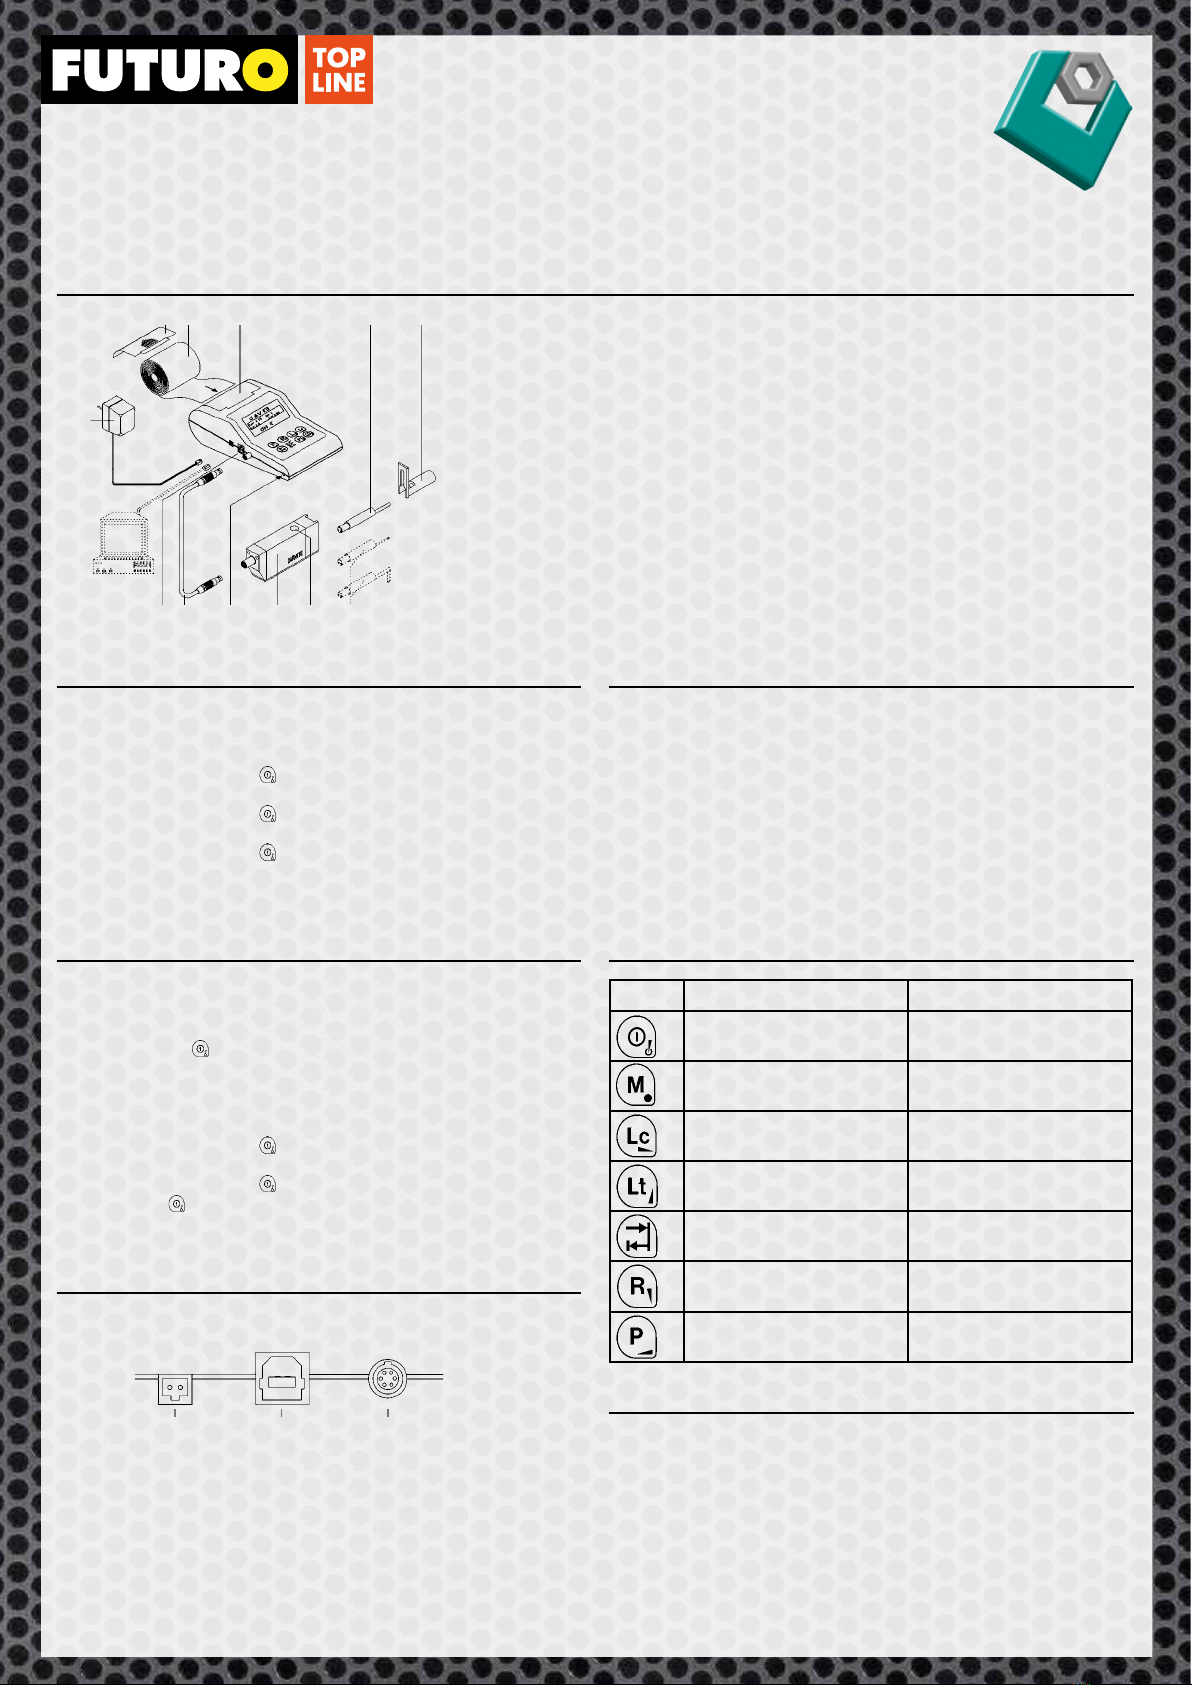
Diseño del aparato
Medición
El punto de medición de la pieza de trabajo debe limpiarse bien para evitar
la suciedad del pulsador. En caso de que la rugosidad se mida manualmente,
la unidad de avance se coloca en la pieza de trabajo y se mantiene quieta.
La lámpara de indicación verde del aparato debe estar iluminada, esta indica
que el aparato y el pulsador se hallan en estado listo para la medición. Tras
pulsar la tecla de inicio o el mando a distancia en el avance, el proceso de
medición se inicia automáticamente.
Una medición en curso puede interrumpirse pulsando una tecla cualquiera.
El pulsador se mantiene parado y tras un breve tiempo regresa a la posición
de partida.
Teclado
Pulsadores
La zapata de apoyo (6) se quita con la llave con macho hexagonal o con la
tuerca moleteada (tipo VHF) incluidas en el suministro.
De este modo, el pulsador de medición (5, 12) se encaja en la guía de la uni-
dad de avance de forma que el punto mire hacia el centro del prisma.
En caso de realizarse mediciones manualmente, la zapata de apoyo vuelve a
fijarse en la unidad de avance.
Advertencia: El pulsador de medición no debe encajarse en ningún caso
ejerciendo fuerza. Solo puede agarrarse en el diámetro más grande posible
con mucho cuidado!
Conexiones
En el lateral del aparato de medición hay tres conexiones. Estas conexiones
sirven para la alimentación de energía eléctrica, la conexión de la cabeza de
medición y para una conexión USB a un PC.
Contraste
1. Pulse una tecla a voluntad, transcurridos un par de segundos el
aparato estará listo para el servicio
2. Pulse la tecla ‚M’, en la pantalla aparece el menú
3. Pulse la tecla ‚R’ cuatro veces para la opción de calibrado
4. Pulse una vez la tecla
5. Pulse una vez la tecla ’R‘ para acceder a la opción Referencia
¡Para el contraste se ajusta automáticamente el cutoff de 0,8 mm!
6. Pulse la tecla ‚Lt’ o ‚R’, en caso de que no utilice el patrón de
medida original
7. Pulse una vez la tecla
8. Pulse una vez la tecla ’R‘ para acceder a la opción cal Ra/Lt
9. Pulse una vez la tecla y vuelva a confirmar el valor indicado con
10. El proceso de calibrado (4 mediciones) dura aprox. 1 minuto
11. Pulse la tecla ‚M’ hasta acceder al modo de medición
Ajuste de idioma
11. Pulse una tecla a voluntad, transcurridos un par de segundos el
aparato estará listo para el servicio
2. Pulse la tecla ‚M’, en la pantalla aparece el menú
3. Pulse la tecla ‚R’ dos veces para la opción de configuración
4. Pulse una vez la tecla
5. Pulse la tecla ‚R’ cuatro veces para la opción de sistema
6. Pulse una vez la tecla
7. Pulse una vez la tecla ’R‘
8. Pulse varias veces la tecla y aparecerán de forma consecutiva
los siguientes idiomas
9. En el idioma deseado, pulse una vez la tecla ‚Lt’
10. Pulse la tecla ‚M’ hasta acceder al modo de medición
1 aparato de red 7 interfaz USB
2 cubierta de la sección de papel 8 cable de conexión
3 papel de impresora 9 reset del aparato
4 sección de papel 10 unidad de avance VH (VHF)
5 pulsador estándar 11 mando a distancia (arranque/conexión)
6 zapata de apoyo 12 pulsador adicional (opcional)
Adaptador
de red
USB avance
Tecla Modo de medición Función de menú
Conectar/desconectar el aparato Confirmación del ajuste de
menú seleccionado
Activar/desactivar el menú Activar/desactivar el menú
Selección del cutoff con trayec-
to de pulsación estándar
Cursor hacia la derecha
Selección del trayecto de
pulsación
Selección de menú de la opción
de menú anterior
Inicio de la medición Retorno
tras una parada de emergencia
Consulta de los valores de
medición
Selección de menú de la opción
de menú siguiente
Impresión de los valores de
medición, perfil y Rmr
Cursor hacia la izquierda
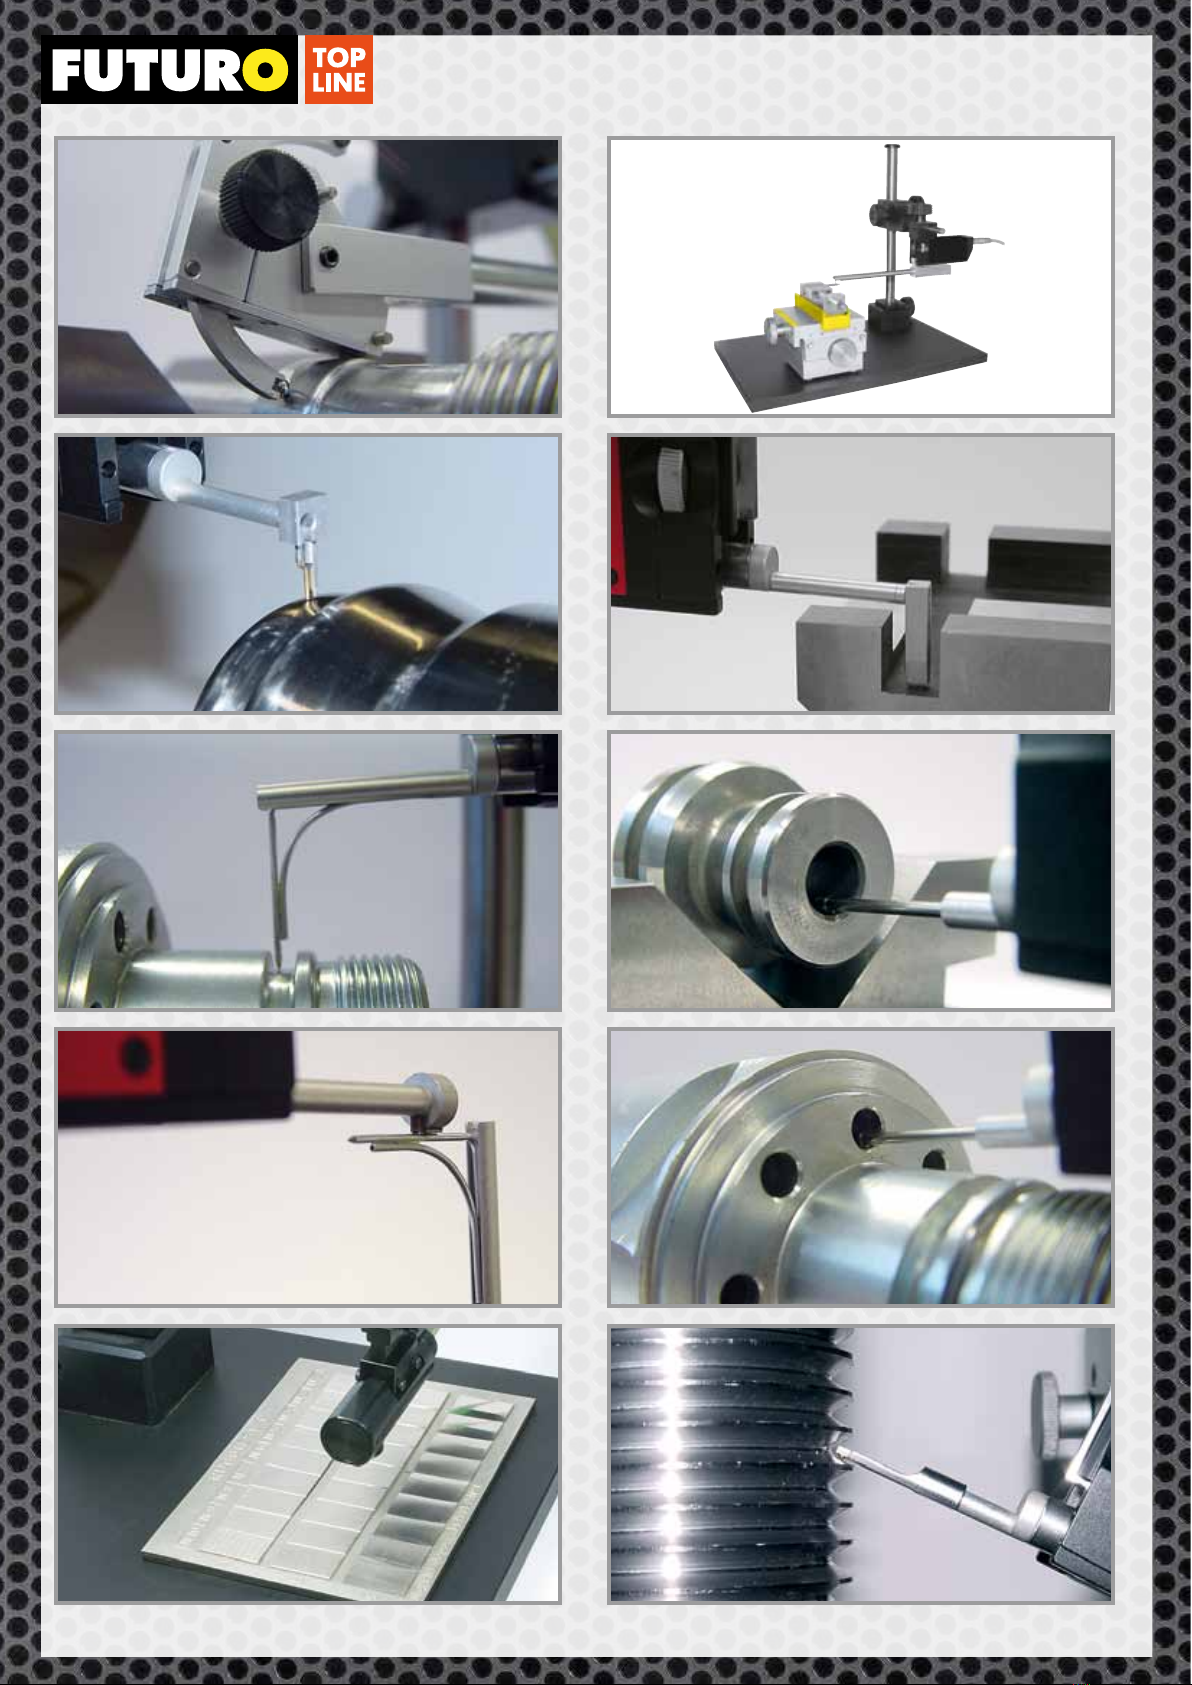
FUTURO SURFACE
Las instrucciones de servicio completas se hallan en el CD adjunto como archivo PDF.
1
2
7
3
8
4
9
5
10 11
6
12