manuals.online logo
Brands
  1. Home
  2. •
  3. Brands
  4. •
  5. Gaggenau
  6. •
  7. Cooktop
  8. •
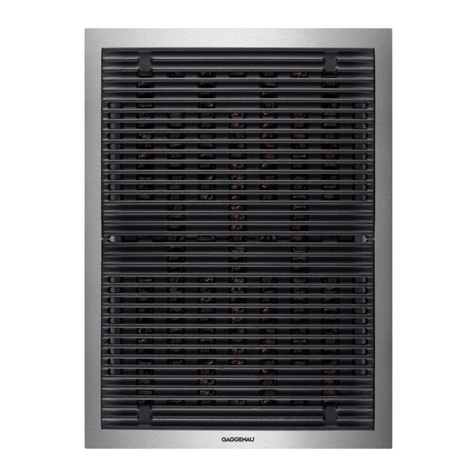
  9. Gaggenau Vario 400 Series User guide

Gaggenau Vario 400 Series User guide

Other manuals for Vario 400 Series

6

Other Gaggenau Cooktop manuals

Gaggenau KG 291 CA User manual

Gaggenau

Gaggenau KG 291 CA User manual

Gaggenau VI424 User manual

Gaggenau

Gaggenau VI424 User manual

Gaggenau VG 295 AU User manual

Gaggenau

Gaggenau VG 295 AU User manual

Gaggenau VG 491 211 CA User manual

Gaggenau

Gaggenau VG 491 211 CA User manual

Gaggenau CE 273 612 User manual

Gaggenau

Gaggenau CE 273 612 User manual

Gaggenau KG 291 CA Specification sheet

Gaggenau

Gaggenau KG 291 CA Specification sheet

Gaggenau VI 492 613 User manual

Gaggenau

Gaggenau VI 492 613 User manual

Gaggenau GE273 User manual

Gaggenau

Gaggenau GE273 User manual

Gaggenau VG 442 User manual

Gaggenau

Gaggenau VG 442 User manual

Gaggenau VE 230 User manual

Gaggenau

Gaggenau VE 230 User manual

Gaggenau VC 230 Product guide

Gaggenau

Gaggenau VC 230 Product guide

Gaggenau CX49261 Series User manual

Gaggenau

Gaggenau CX49261 Series User manual

Gaggenau VG 424 User manual

Gaggenau

Gaggenau VG 424 User manual

Gaggenau VI 263 620 User manual

Gaggenau

Gaggenau VI 263 620 User manual

Gaggenau CI 282 601 User manual

Gaggenau

Gaggenau CI 282 601 User manual

Gaggenau CI 491602 User manual

Gaggenau

Gaggenau CI 491602 User manual

Gaggenau VG 295 CA User manual

Gaggenau

Gaggenau VG 295 CA User manual

Gaggenau CG 280210 CA User manual

Gaggenau

Gaggenau CG 280210 CA User manual

Gaggenau CX492610 User manual

Gaggenau

Gaggenau CX492610 User manual

Gaggenau CE 273 User manual

Gaggenau

Gaggenau CE 273 User manual

Gaggenau CX 492 611 User manual

Gaggenau

Gaggenau CX 492 611 User manual

Gaggenau VG 231 HK User manual

Gaggenau

Gaggenau VG 231 HK User manual

Gaggenau CX48261 Series User manual

Gaggenau

Gaggenau CX48261 Series User manual

Gaggenau Vario 400 Series User manual

Gaggenau

Gaggenau Vario 400 Series User manual

Popular Cooktop manuals by other brands

Fisher & Paykel CE302CBX2 manual

Fisher & Paykel

Fisher & Paykel CE302CBX2 manual

Whirlpool GJC3634RB00 parts list

Whirlpool

Whirlpool GJC3634RB00 parts list

Whirlpool ACH7324/BLV Use, care and installation guide

Whirlpool

Whirlpool ACH7324/BLV Use, care and installation guide

Frigidaire Professional FPDF4085KF Important safety instructions

Frigidaire

Frigidaire Professional FPDF4085KF Important safety instructions

Bonnet OPTIMUM 700 Technical instructions

Bonnet

Bonnet OPTIMUM 700 Technical instructions

Jenn-Air JGCP430 installation instructions

Jenn-Air

Jenn-Air JGCP430 installation instructions

Bompani BO374AA/E User instructions

Bompani

Bompani BO374AA/E User instructions

Kleenmaid cooking GCTK9011 Instructions for use and warranty details

Kleenmaid

Kleenmaid cooking GCTK9011 Instructions for use and warranty details

Waldorf RN8603E-B Technical data sheet

Waldorf

Waldorf RN8603E-B Technical data sheet

Whirlpool SMP658CNEIXL quick guide

Whirlpool

Whirlpool SMP658CNEIXL quick guide

Electrolux E36IC80ISS - 36" Induction Cooktop Wiring diagram

Electrolux

Electrolux E36IC80ISS - 36" Induction Cooktop Wiring diagram

Wolf CI243C/B Use and care guide

Wolf

Wolf CI243C/B Use and care guide

Fulgor Milano F5PGK305S1 installation instructions

Fulgor Milano

Fulgor Milano F5PGK305S1 installation instructions

Wells WV-2HFG owner's manual

Wells

Wells WV-2HFG owner's manual

Samsung NA36N9755 installation manual

Samsung

Samsung NA36N9755 installation manual

Miele KM 404 operating instructions

Miele

Miele KM 404 operating instructions

Lacor 69562 Instructions for use and maintenance

Lacor

Lacor 69562 Instructions for use and maintenance

Keating Of Chicago MG-2 manual

Keating Of Chicago

Keating Of Chicago MG-2 manual

manuals.online logo
manuals.online logoBrands
  • About & Mission
  • Contact us
  • Privacy Policy
  • Terms and Conditions

Copyright 2025 Manuals.Online. All Rights Reserved.

Numbers indicated
inside parenthesis ( ) = mm
Cut-out dimensions for Vario 400 series combinations. Surface-mount installation.
The drawings listed below show the cut-out dimensions for Vario 400 series appliance combinations for a surface mounting.
While taking into consideration the previous page and the drawings specified below, the installer can define the suitable cut-out
dimensions. The combinations listed here are only sample combinations.
The connection strip VA 420 010 must be provided for surface mounting combinations.
Sample combinations without VL 414 ventilation element:
Without cover
With cover
(360±2)
(492±2)
(515±2)
(520)
(535)
(14)
(14)
(5)
(15)
(380)
14 ³⁄₁₆" ±¹⁄₁₆"
14 ¹⁵⁄₁₆" 19� ⅜" ±¹⁄₁₆" 20� ½"
⁹⁄₁₆"
⁹⁄₁₆"
20� ¼" ±¹⁄₁₆" 21� ¹⁄₁₆"
³⁄₁₆"
⁹⁄₁₆"
14 ¹⁵⁄₁₆" (380)
⅛" (3)
14 ¹⁵⁄₁₆" (380)
⅛" (3)
14 ¹⁵⁄₁₆" (380)
45 ⅛" (1146)
- ⁶⁄₈" -
(20)
44 ⁵⁄₁₆" ±¹⁄₁₆" (1126±2)
Appliance
Connection strip VA 420
Appliance
Connection strip VA 420
Appliance
Overhang
Cutout
(1126±2)
(380)
(380)
(380)
(3)
(3)
44 ⁵⁄₁₆" ±¹⁄₁₆"
14 ¹⁵⁄₁₆"
⅛" ⅛"
14 ¹⁵⁄₁₆" 14 ¹⁵⁄₁₆"
(1167±2)
(380)
14 ¹⁵⁄₁₆"
(804)
31 ⅝"
(3)
⅛"
45 ¹⁵⁄₁₆" ±¹⁄₁₆"
14 ¹⁵⁄₁₆" (380)
⅛" (3)
31 ⅝" (804)
48 ¾" (1187)
- ⁶⁄₈" -
(20)
45 ⁵⁄₁₆" ±¹⁄₁₆" (1167±2)
Appliance
Connection strip VA 420
Appliance
Overhang
Cutout
Appliance
Connection strip VA 420
Appliance (36"cooktop)
Overhang
Cutout
(1271±2)
50 ¹⁄₁₆" ±¹⁄₁₆"
(380)
14 ¹⁵⁄₁₆"
(908)
35 ¾"
14 ¹⁵⁄₁₆" (380)
⅛" (3)
35 ¾" (908)
50 ¹³⁄₁₆" ±¹⁄₁₆" (1291)
- ⁶⁄₈" -
(20)
50 ¹⁄₁₆" ±¹⁄₁₆" (1271±2)
(3)
⅛"
www.gaggenau.com/us
Revised: 31 March 2020
Numbers indicated
inside parenthesis ( ) = mm
Cut-out dimensions for Vario 400 series combinations. Flush installation.
The drawings listed below show the cut-out dimensions for Vario 400 series appliance combinations for a flush mounting.
While taking into consideration the previous page and the drawings specified below, the installer can define the suitable cut-out
dimensions. The combinations listed here are only sample combinations.
The connection strip VA 420 000 must be provided for flush mounted combinations.
If installing with the VA 440 appliance cover or VA 450 filler strip, take into account the additional space required for the depth. Further-
more, you must ensure that there is an asymmetrical alignment in the cut-out depth.
Sample combinations without VL 414 ventilation element:
Without cover
With cover
(492±2)
(526±2)
(515±2)
(541±2)
(520)
(535)
(17)
(8)
(18)
(386±2)
15 ¹³⁄₁₆" ±¹⁄₁₆"
¹¹⁄₁₆"
(17)
¹¹⁄₁₆"
(360±2)
14 ³⁄₁₆" ±¹⁄₁₆"
(380)
14 ¹⁵⁄₁₆"
19 ⅜" ±¹⁄₁₆" 20 ½" 20 ¹¹⁄₁₆" 20 ¼" 21 ¹¹⁄₁₆"21 ⁵⁄₁₆"
⁵⁄₁₆"
¹¹⁄₁₆"
Appliance
Connection strip VA 420
Appliance
Connection strip VA 420
Appliance
Overhang
Cutout
Overhang
Silicone joint
Cutout with groove
(1152±2)
(380)
14 ¹⁵⁄₁₆"
(380)
14 ¹⁵⁄₁₆"
(380)
14 ¹⁵⁄₁₆"
(3)
⅛"
(3)
⅛"
(1126±2)
44 ⁵⁄₁₆" ±¹⁄₁₆"
45 ⅜" ±¹⁄₁₆"
14 ¹⁵⁄₁₆" (380)
⅛" (3
)
14
¹⁵⁄₁₆" (380
)
⅛" (3
)
14
¹⁵⁄₁₆" (380
)
45
¹⁄₁₆" (1146
)
- ⁶⁄₈"
-
(20
)
44
⁵⁄₁₆" ±¹⁄₁₆" (1126±2
)
+ ⁶⁄₈" + (20
)
+ ¼" + (6
)
45 ⅜"
±¹⁄₁₆"
(1152
±2
)
(380)
14 ¹⁵⁄₁₆"
(3)
⅛"
(804)
31 ⅝"
(1193±2)
47" ±¹⁄₁₆"
(1167±2)
45 ¹⁵⁄₁₆" ±¹⁄₁₆"
Appliance
Connection strip VA 420
Appliance
Overhang
Cutout
Overhang
Silicone joint
Cutout with groove
14 ¹⁵⁄₁₆" (380)
⅛" (3
)
31 ⅝" (804
)
46
¾" (1187
)
- ⁶⁄₈"
-
(20
)
45 ¹⁵⁄₁₆" ±¹⁄₁₆" (1167±2
)
+ ⁶⁄₈"
+
(20
)
+ ¼" +(6
)
47" ±¹⁄₁₆" (1193±2
)
Appliance
Connection strip VA 420
Appliance (36"cooktop)
Overhang
Cutout
Overhang
Silicone joint
Cutout with groove
(1297±2)
51 ¹⁄₁₆" ±¹⁄₁₆"
(1271±2)
50 ¹⁄₁₆" ±¹⁄₁₆"
(3)
⅛"
(380)
14 ¹⁵⁄₁₆"
(908)
35 ¾"
14 ¹⁵⁄₁₆" (380)
⅛" (3)
35
¾" (908)
50
¹³⁄₁₆" (1291)
- ⁶⁄₈"
-
(20)
50
¹⁄₁₆" ±¹⁄₁₆" (1271±2)
+ ⁶⁄₈"
+
(20)
+ ¼" +(6)
51 ¹⁄₁₆" ±¹⁄₁₆" (1297±2)
www.gaggenau.com/us
Revised: 31 March 2020
Numbers indicated
inside parenthesis ( ) = mm
Cut-out dimensions for Vario 400 series combinations. Calculating tool for the cut-out width.
Calculation of the width of the cut-out for a surface mounting
Example using a combination of VI 414, VI 422, VP 414 and 2 VL 414.
Example Your combination
Total width of all appliances in inches (mm) (3x 14 ¹⁵⁄₁₆" (380)) + (2x 4 ¹⁵⁄₁₆" (110)) 53 ⁹⁄₁₆" (1,360) ..................................................
+ Number of connection strips x ⅛" (3) 4x ⅛" (3) + ½" (12) ..................................................
– Lateral appliance overhang (⅜" (10) / side) ⁶⁄₈" (20) – ⁶⁄₈" (20) – ⁶⁄₈" (20)
(A) Total cut-out width (in inches (mm)) 53 ¼"±¹⁄₁₆" (1,352± 2) ............................... ±¹⁄₁₆" (±2)
Cut-out depth based on the installation situation with or without appliance cover/󾺾ller strip.
Calculation of the width of the cut-out for a flush mounting
Example using a combination of VI 414, VI 422, VP 414 and 2 VL 414.
Example Your combination
Total width of all appliances in inches (mm) (3x 14 ¹⁵⁄₁₆" (380)) + (2x 4 ¹⁵⁄₁₆" (110)) 53 ⁹⁄₁₆" (1,360) ....................................................
+ Number of connection strips x ⅛" (3) 4x ⅛" (3) + ½" (12) ....................................................
– Lateral appliance overhang (⅜" (10) / side) ⁶⁄₈" (20) – ⁶⁄₈" (20) – ⁶⁄₈" (20)
(A) Total cut-out width (in inches (mm)) 53 ¼"±¹⁄₁₆" (1,352± 2) ................................. ±¹⁄₁₆" (±2)
+ Lateral appliance overhang (⅜" (10) / side) ⁶⁄₈" (20) + ⁶⁄₈" (20) – ⁶⁄₈" (20)
+ Silicone joint (⅛" (3) circumference) 2x ⅛" (3) + ¼" (6) + ¼" (6)
(B) Total width with groove in inches (mm) 54 ¼"±¹⁄₁₆" (1,378 ± 2) ................................. ±¹⁄₁₆" (±2)
Cut-out depth based on the installation situation with or without appliance cover/󾺾ller strip.
AA
AAAAAAAAAAAAAAAAAAAAAAAAAAAAAА
AA
(380)
14 ¹⁵⁄₁₆"
(380)
14 ¹⁵⁄₁₆"
(380)
14 ¹⁵⁄₁₆"
(3)
⅛"
(3)
⅛"
(110)
4 ⁵⁄₁₆"
(3)
⅛"
(3)
⅛"
(110)
4 ⁵⁄₁₆"
A
B
A
B
A
B
A
B
A
B
A
B
A
B
A
B
A
B
A
B
A
B
A
B
A
B
A
B
A
B
A
B
A
B
A
B
A
B
A
B
A
B
A
B
A
B
A
B
A
B
A
B
A
B
A
B
A
B
A
B
A
B
А
В
A
B
A
B
(380)
14 ¹⁵⁄₁₆"
(380)
14 ¹⁵⁄₁₆"
(380)
14 ¹⁵⁄₁₆"
(3)
⅛"
(3)
⅛"
(3)
⅛"
(110)
4 ⁵⁄₁₆"
(3)
⅛"
(3)
⅛"
(3)
⅛"
(110)
4 ⁵⁄₁₆"
www.gaggenau.com/us
Revised: 31 March 2020
Numbers indicated
inside parenthesis ( ) = mm
Installation with appliance cover for Vario 400 series
If installing with the VA 440 appliance cover, take into account the additional space required for the depth.
Furthermore, you must ensure that there is an asymmetrical alignment in the cut-out depth.
min. 1"
Installation with appliance cover/adjustment strip;
surface-mount installation
(55)
(515±2)
(5)
(15)
(550)
21 ⅝ "
2 ³⁄₁₆"
³⁄₁₆"
⁹⁄₁₆"
(25)20 ¼" ±¹⁄₁₆"
21 ¼" ±¹⁄₁₆"
20 ¼" ±¹⁄₁₆"
Installation with appliance cover/adjustment strip;
flush installation
(3.5-0.5)
(3±1)
(546)
20 ½"
(55)
2 ³⁄₁₆"
⅛" ±¹⁄₃₂"
(3±1)
⅛" ±¹⁄₁₆"
min. 1"
(25)
(8)
⁵⁄₁₆"
(18)
¹¹⁄₁₆"
(515±2)
(541±2)
⅛"
www.gaggenau.com/us
Revised: 31 March 2020