+49 (0) 3491/6181-0
www.loet-shop.de
Bräunlich GmbH
Am Heideberg 26
D-06886 Lutherstadt Wittenberg
Select 3 points
for previous
submenu or exit
menu.
Is a soldering tip inserted?
Is the soldering tip inserted
correctly?
Check soldering tip
and insert correctly!
Is the soldering tip inserted
correctly?
Check soldering tip
and insert correctly!
The manufacturer / distributor
Bräunlich GmbH
Am Heideberg 26
06886 Lutherstadt Wittenberg
hereby declares that the following product
Product name: GALLUNOPTIMAL Soldering Iron
Trade name: GALLUNOPTIMAL SPRINT80
Model name: GOSPRINT80+
complies with the provisions of the Low Voltage
Directive 2014/35/EU - including its amendments in
force at the time of the declaration.
The following harmonized standards have been applied:
"DIRECTIVE OF THE EUROPEAN PARLIAMENT AND OF THE
COUNCIL on the harmonization of the laws of the Member
States relating to electromagnetic compatibility".
The following national or international standards (or
parts/clauses thereof) and specifications have been applied:
EN 60335-1:2012 + A11:2014 + A13:2017 + A1:2019 +
A2:2019 + A14:2019
EN 60335-2-45:2002 + A1:2008 + A2:2012
EN 62233:2008
Location: Lutherstadt Wittenberg
Date: 30.8.2022
_______________________________
(Signature)
Tobias Bräunlich, CEO
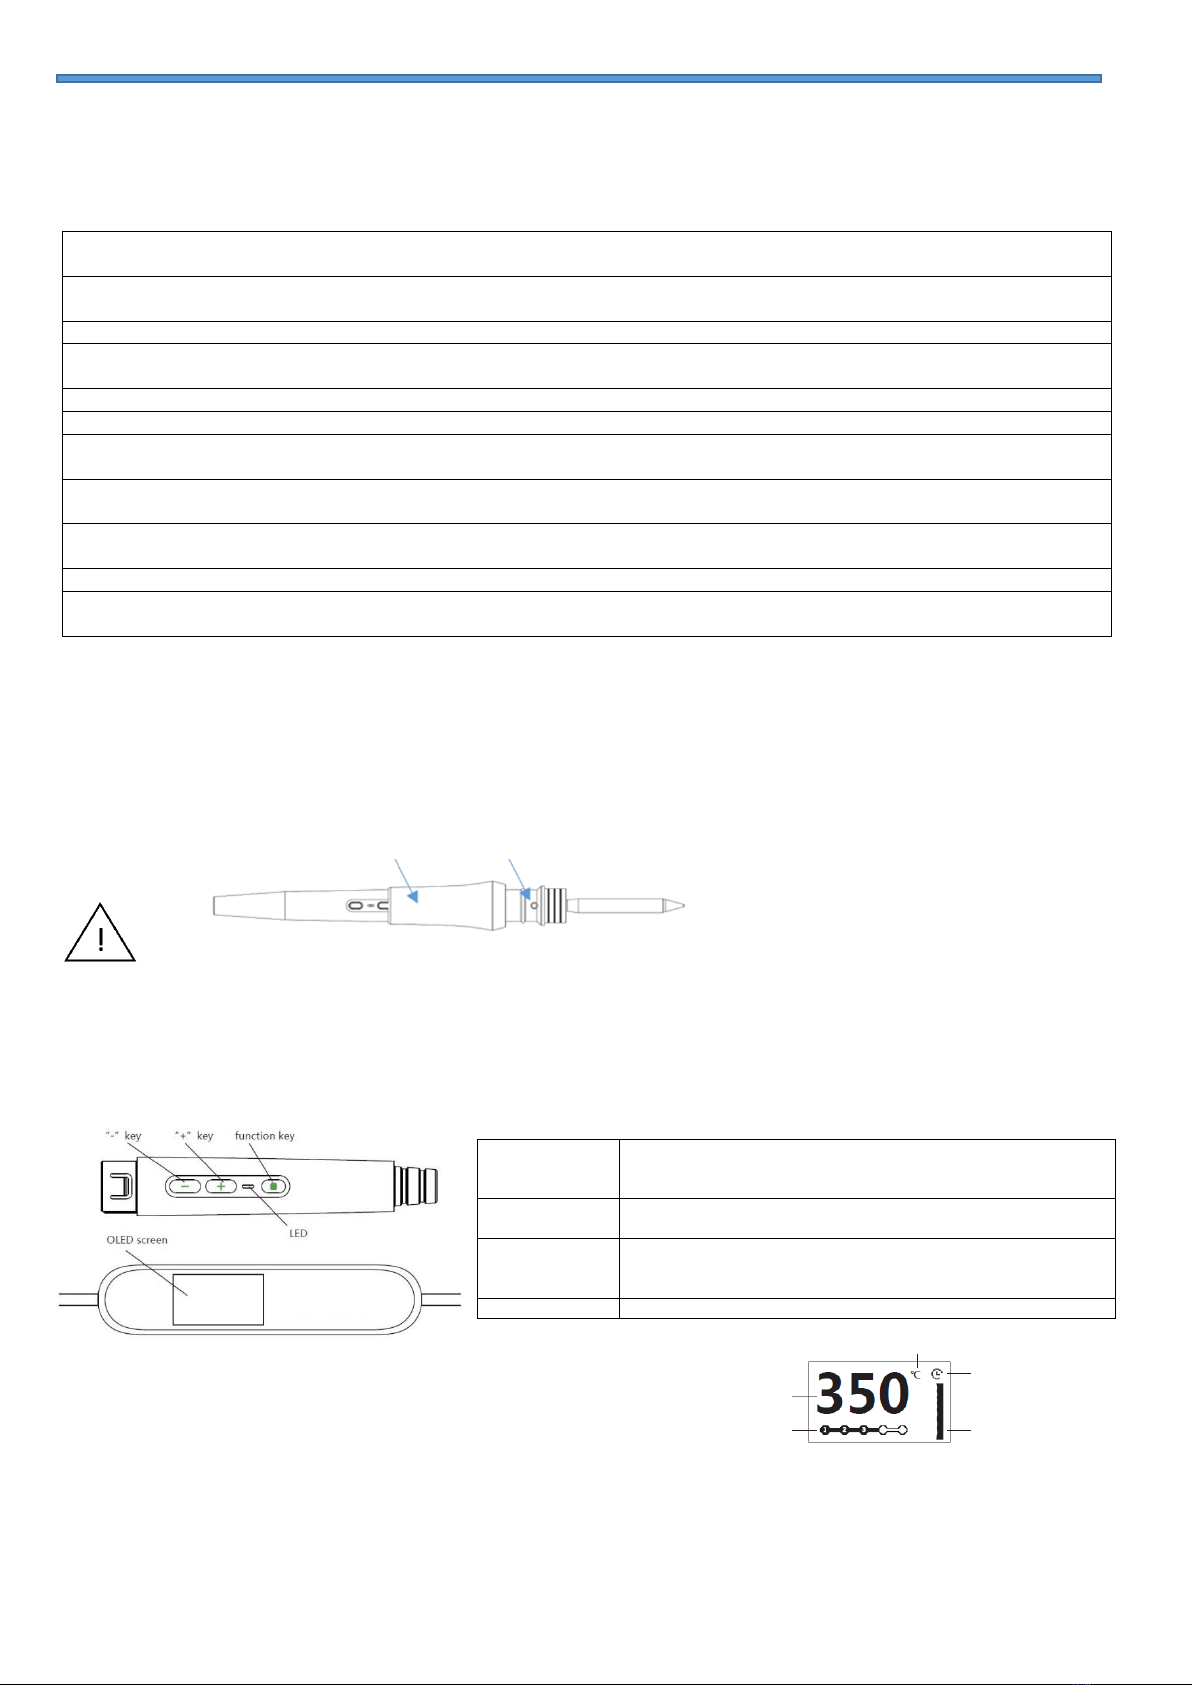
Open Menu: Press and hold the function key, then select the desired option with +/-.
The currently selected
menu is framed
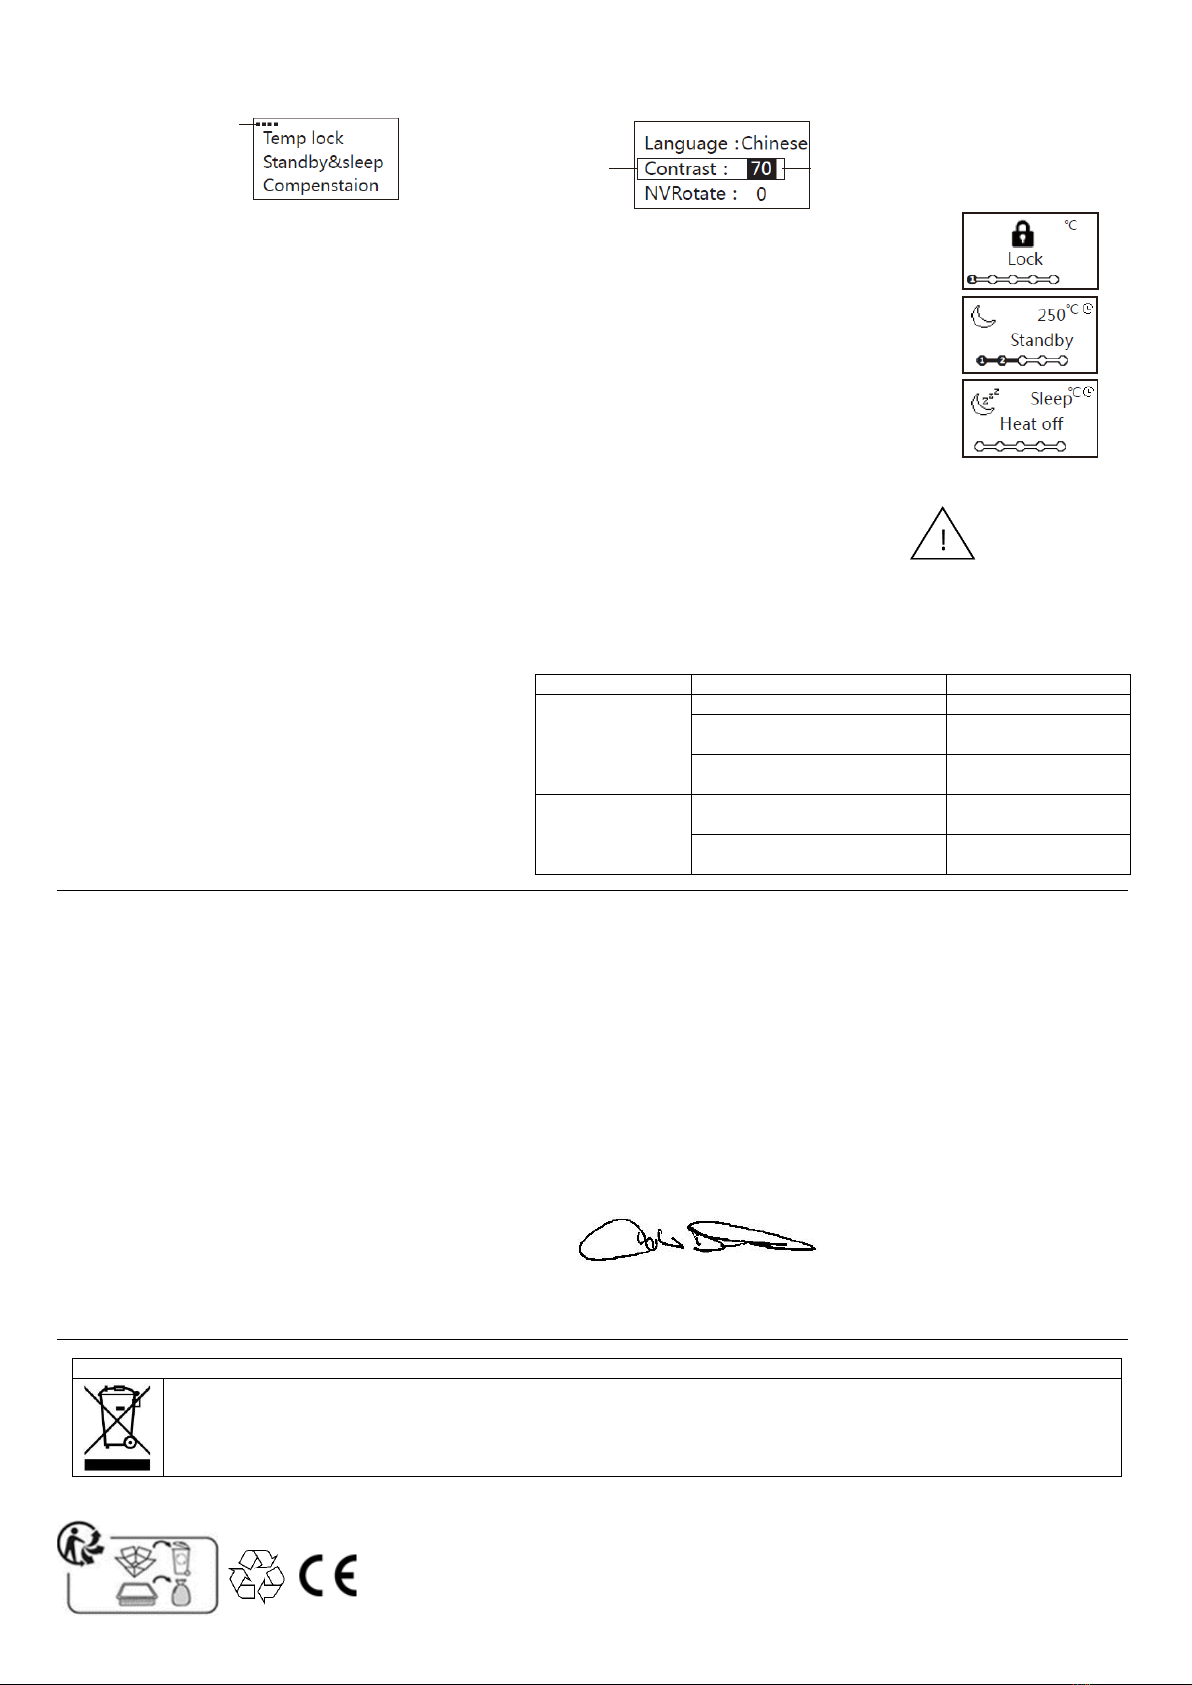
Temperature lock
When this function is activated, no set temperature can be changed.
Standby and Sleep (idle mode)
Set the standby temperature in menu standby temp.
Set the standbay time in menu standby time (0-60min.)
Set the idle time in menu sleep time (0-60min.)
The functions are inactive when set to 0.
In the idle mode, the display illumination is switched off. Pressing any key ends this state.
Temperature Compensation
Example: Set 350°C and wait 2 minutes to obtain a stable value. Measure the temperature at the soldering tip and enter
the difference between ACTUAL and TARGET temperature as a value.
Calibration (Calibrate soldering tip temperature exactly)
WARNING: Changes affect the temperature control!
NOTE: Clean the soldering tip and wet it with solder. An oxidized soldering tip can otherwise cause temperature
measurement errors. Use a suitable temperature measuring device!
Select YES in the calibration menu, then please allow T1 to stabilize and then measure the soldering tip temperature. Then enter
this measured value with the keys +/- and confirm with the function key. Then repeat this procedure with T2.
Interface (Language / Contrast / Rotate display)
Language / DE or EN
Contrast adjustable from 1 to 100
NVRotate rotates the display 180°
System (°C/°F/factory setting)
Unit °C or °F
FactorySet. YES reset to default
EU Declaration of Conformity according to Low
Voltage Directive 2014/35/EU (No. 01-20)
Example contrast: Select
menu item with +/-, mark
with the function key and
change the number with +/-.
Correct disposal of this product
The crossed-out wheeled garbage can indicates that this product must not be disposed of with other waste in the
household waste throughout the EU. To avoid harm to the environment or damage to health, recycle the product
responsibly to promote the sustainable reuse of material resources. For an environmentally sound disposal of your
old device, please use the return and collection systems. For more information, please contact your city or local
authority. Or contact the dealer from whom you purchased the product.