manuals.online logo
Brands
  1. Home
  2. •
  3. Brands
  4. •
  5. Gama Sonic
  6. •
  7. Lantern
  8. •
  9. Gama Sonic 114B033 User manual

Gama Sonic 114B033 User manual

US patents
# 7172307, 9458970
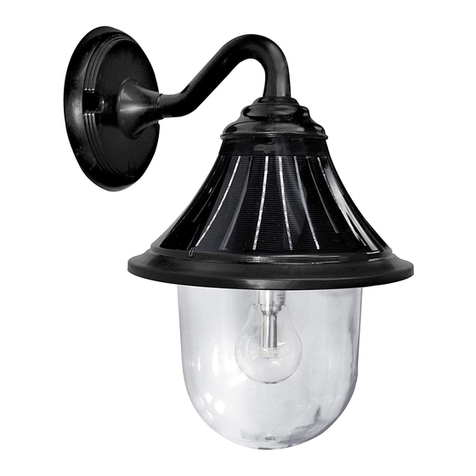
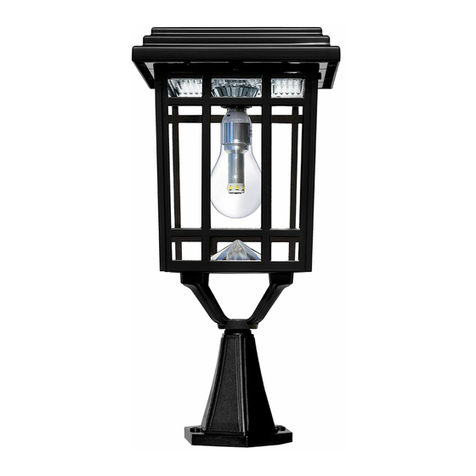
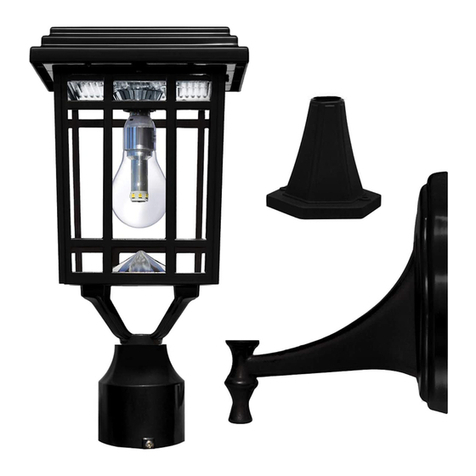
PRAIRIE BULB
SOLAR LAMP
Part # 114B033, 114B333, 114B50833
Instruction Manual
3MOUNTING OPTIONS
Thank you for your purchase! GAMA SONIC® solar charged lights are brighter and last
all night with a typical solar charge. Unique design, superior light output and numerous
installation options confirm the outstanding value of our product. GAMA SONIC® has been
recognized as a worldwide leader in the lighting industry for over 20 years.
Please read the instruction manual carefully to obtain the best results from your purchase.
Visit our website or download the latest version of your instruction manual:
www.gamasonic.com or www.gamasonic.com/user-guides
Technical Assistance / Warranty Claims / Replacement Parts
Toll-Free number: +1-800-835-4113 (only within the US) or www.gamasonic.com
Gama Sonic’s patented Bulb technology
gives your solar lamp the look and feel
of a traditional incandescent lamp. This
helps to distribute light further than
traditional solar lamps.
Gama Sonic’s Bulb Technology What’s In The Box
For optimum light duration throughout
the night, it is very important to mount
your solar lamp in a spot where it
will receive the maximum amount of
direct sunlight throughout
the day.
NOTE: For best results,
the solar light must
be charged in the
“High or Low”
position for at least
2 days of full direct
sunlight.
Solar Lamp Location
page 2
AB
C D E
BULB SCREWS &
ANCHORS
3” Pole/Fitter Mount
NOTE: If you are replacing an existing gas/electric
post light, you must consult a certified technician
to properly disconnect and secure the gas/electric
connection.
1. Attach the 3” fitter (C) to the fixture
(B) using the bolt and secure from
inside the fitter (C) using the lock
washer and nut.
2. Place the fitter (C) on top of the 3”
post and secure using the 3 screws
provided.
NOTE: Be sure to not overtighten the set
screws.
Pier Mount
1. Using the pier base (D) as a template,
mark and drill two holes no larger
than the provided anchors.
2. Place the anchors in the holes and
secure the pier base (D) with the
provided screws.
3. Attach the fixture (B) to the pier base
(D) using the bolt and twist the fixture
(B) clockwise until secure.
NOTE: There are specific types of screws for
specific surfaces. If unsure of the appropriate
type of screw to use on your surface, please
consult a professional.
Wall Mount
NOTE: For best results, position your solar
lamp so it is facing south.
1. Using the wall mount (E) as a
template, mark and drill two holes no
larger than the provided anchors.
2. Place the anchors in the holes and
secure to wall mount (E) with
the provided screws.
3. Attach the fixture (B) to
the wall mount (E) using
the bolt and twist the
fixture (B) clockwise
until secure.
1. Remove the top (A) from the fixture (B) by removing the two
screws under the top (A).
2. Install the GS Solar LED Bulb by twisting clockwise.
3. Switch the lamp to the ON position.
4. Replace the top (A) on the fixture (B) and secure with the
screws removed earlier.
5. Your lamp will turn on automatically at dusk.
NOTE: If there is a film covering the solar panel, make sure to remove this by
peeling it off.
Assembly Instructions Operation Instructions
Replacement Batteries and Bulbs are available at
www.gamasonic.com or via our Toll Free number: +1-800-835-4113
Your Lamp can use the following bulbs:
A50WW10W – included bulb with Warm White LEDs (2700K)
A50BW10W – bulb with Bright White LEDs (6000K)
F30WW05W –Flame bulb with simulated flame LEDs
T45WW10W – Edison LED Bulb with Warm White LEDs (2700k)
Your lamp uses the following battery:
GS36V08
Replacement Parts
page 3
Replacing the battery
page 4
Maintenance
Batteries are available for purchase at www.gamasonic.com
Troubleshooting
Clean the solar panels regularly with a damp towel to guarantee optimum performance. Do not use any type of
solvent for cleaning and be careful not to put too much pressure on the solar panels while cleaning.
WARNING: Do not dispose of Li-Ion batteries in the regular trash, municipal waste stream or by re as batteries may
leak or explode. Do not open, short circuit, or mutilate batteries as injury may occur. Preserve our environment by
recycling Li-Ion batteries or disposing of them in accordance with local, State, and federal regulations. Do not mix old
and new batteries.
If your solar light does not come on as expected despite observance of all the instructions, please try the
following steps:
1. Make sure that the solar lamp is not being aected by any other light source.
2. Ensure the solar lamp is not positioned in the shade during the day.
3. Check that the batteries are installed correctly.
NOTE: The performance of the solar lamp will vary with the time of year. It will last longer when it has had a full
day in the sun rather than a day in overcast weather.
WARNING: Please keep out of reach of children. Do not dispose of the Li-Ion battery in the regular trash,
municipal waste stream or by fire as batteries may leak or explode. Do not open, short circuit, or mutilate
batteries as injury may occur. Preserve our environment by recycling Li-Ion batteries or disposing of them in
accordance with local, State and federal regulations. Do not mix old and new batteries.
WINTERTIME TIPS: For optimal performance, be sure to remove any snow or debris accumulation from solar
panel(s). A solar panel free of debris will charge the batteries much more eciently.
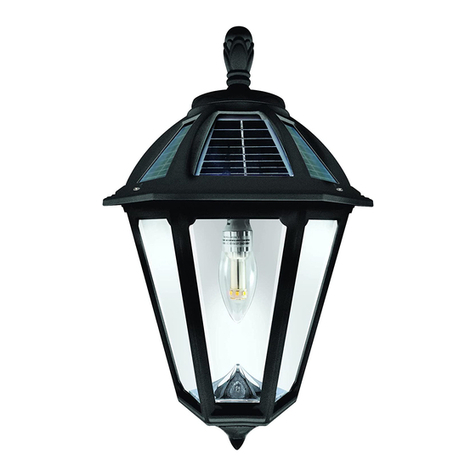
1. Remove the top (A) from the lamp by removing the two screws.
2. Switch the lamp to the OFF position and remove the bulb.
3. Remove the battery compartment cover that is held in with a screw.
4. Remove and unclip the old battery.
5. Make sure the new battery is a high quality Ni-MH 3.6V/800mAh battery (Item GS36V08)
6. Clip the battery in and place the battery in the compartment.
7. Reinstall the battery compartment cover and screw.
8. Reinstall the bulb and switch the lamp to the ON position.
9. Reinstall the top (A) to the lamp and secure with the two screws removed earlier.

This manual suits for next models

2

Other Gama Sonic Lantern manuals

Gama Sonic GS-97ATS User manual

Gama Sonic

Gama Sonic GS-97ATS User manual

Gama Sonic 102i60012 User manual

Gama Sonic

Gama Sonic 102i60012 User manual

Gama Sonic BAYTOWN II User manual

Gama Sonic

Gama Sonic BAYTOWN II User manual

Gama Sonic GS-97B-S User manual

Gama Sonic

Gama Sonic GS-97B-S User manual

Gama Sonic GS-5 User manual

Gama Sonic

Gama Sonic GS-5 User manual

Gama Sonic GS-106P User manual

Gama Sonic

Gama Sonic GS-106P User manual

Gama Sonic 105BP250040 User manual

Gama Sonic

Gama Sonic 105BP250040 User manual

Gama Sonic BAYTOWN GS-106FPW User manual

Gama Sonic

Gama Sonic BAYTOWN GS-106FPW User manual

Gama Sonic 132i90012 User manual

Gama Sonic

Gama Sonic 132i90012 User manual

Gama Sonic BAYTOWN 106B50233 User manual

Gama Sonic

Gama Sonic BAYTOWN 106B50233 User manual

Gama Sonic IMPERIAL III GS-97K Series User manual

Gama Sonic

Gama Sonic IMPERIAL III GS-97K Series User manual

Gama Sonic 14B50063 User manual

Gama Sonic

Gama Sonic 14B50063 User manual

Gama Sonic DL-713LS User manual

Gama Sonic

Gama Sonic DL-713LS User manual

Gama Sonic DLG2-713LS User manual

Gama Sonic

Gama Sonic DLG2-713LS User manual

Gama Sonic BAYTOWN II 105BSG01 User manual

Gama Sonic

Gama Sonic BAYTOWN II 105BSG01 User manual

Gama Sonic ORION 123010 User manual

Gama Sonic

Gama Sonic ORION 123010 User manual

Gama Sonic 117i90080 User manual

Gama Sonic

Gama Sonic 117i90080 User manual

Gama Sonic GS-94FPW User manual

Gama Sonic

Gama Sonic GS-94FPW User manual

Gama Sonic GS-94B-S User manual

Gama Sonic

Gama Sonic GS-94B-S User manual

Gama Sonic GS-94C-D User manual

Gama Sonic

Gama Sonic GS-94C-D User manual

Gama Sonic DL-71 3LS User manual

Gama Sonic

Gama Sonic DL-71 3LS User manual

Gama Sonic GS-179 User manual

Gama Sonic

Gama Sonic GS-179 User manual

Gama Sonic GS-105FPW User manual

Gama Sonic

Gama Sonic GS-105FPW User manual

Gama Sonic 94B001 User manual

Gama Sonic

Gama Sonic 94B001 User manual

Popular Lantern manuals by other brands

HOLOPHANE Mongoose LED Installation and maintenance manual

HOLOPHANE

HOLOPHANE Mongoose LED Installation and maintenance manual

Saxby Lighting AVIT WALL instruction manual

Saxby Lighting

Saxby Lighting AVIT WALL instruction manual

Snow Peak ES-080 instruction manual

Snow Peak

Snow Peak ES-080 instruction manual

Anslut 422-310 operating instructions

Anslut

Anslut 422-310 operating instructions

BEGA 77 148 Instructions for use

BEGA

BEGA 77 148 Instructions for use

Perel CSOLMF user manual

Perel

Perel CSOLMF user manual

WE-EF ETC320-FS LED Installation and maintenance instructions

WE-EF

WE-EF ETC320-FS LED Installation and maintenance instructions

Nave 52124 manual

Nave

Nave 52124 manual

Patriot Lighting SOLAR SHED LIGHT user manual

Patriot Lighting

Patriot Lighting SOLAR SHED LIGHT user manual

EASY LED SALOA L15 installation guide

EASY LED

EASY LED SALOA L15 installation guide

Lights LC003639 Installation instructions & owner's manual

Lights

Lights LC003639 Installation instructions & owner's manual

Intelight ORION LED Installation and maintenance instructions

Intelight

Intelight ORION LED Installation and maintenance instructions

Flash Technology OL2A user manual

Flash Technology

Flash Technology OL2A user manual

esotec Float 25 operating instructions

esotec

esotec Float 25 operating instructions

Philips Stylid Evo Compact ST770B manual

Philips

Philips Stylid Evo Compact ST770B manual

Fumagalli SILOE quick guide

Fumagalli

Fumagalli SILOE quick guide

Carmanah M850 instructions

Carmanah

Carmanah M850 instructions

Portfolio Outdoor LWS20325J1 manual

Portfolio Outdoor

Portfolio Outdoor LWS20325J1 manual

manuals.online logo
manuals.online logoBrands
  • About & Mission
  • Contact us
  • Privacy Policy
  • Terms and Conditions

Copyright 2025 Manuals.Online. All Rights Reserved.