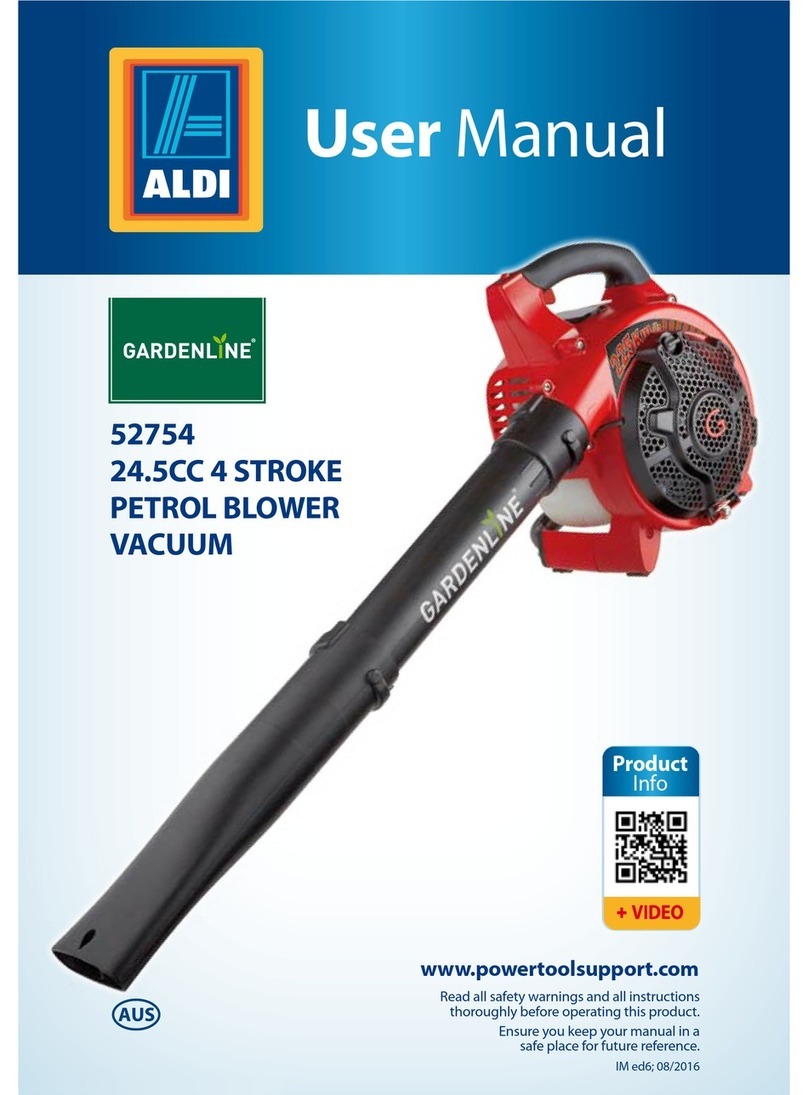
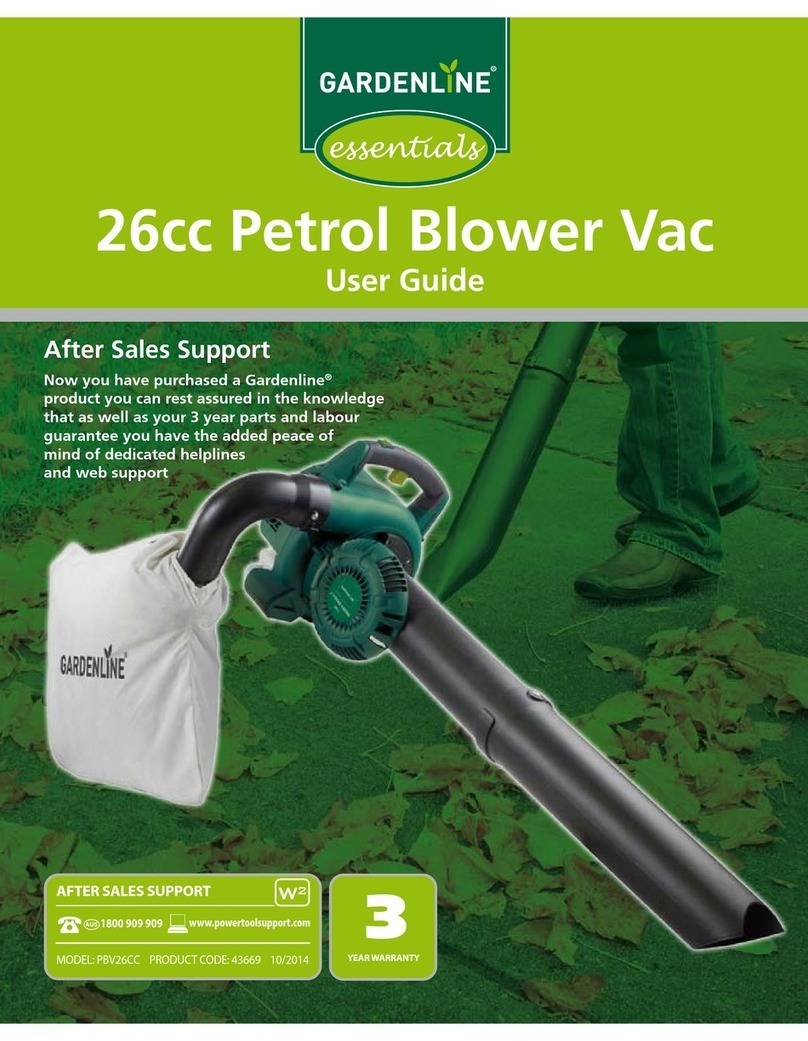
Gardenline 52754 User manual

User Manual
Product
Info
https://help.tools/
Read all safety warnings and all instructions
thoroughly before operating this product.
Ensure you keep your manual in a
safe place for future reference.
IM ed 4; 08/2018
52754
24.5CC 4 STROKE
PETROL BLOWER
VACUUM

Contents
QR codes take you where you want to go
quicky and easily
Whether you require product information, spare parts or accessories,
details on warranties or aftersales service, or if you want to watch
a product demonstration video, our QR codes will take you there in
no time at all.
What is a QR code?
A QR-code (QR=Quick Response) is a type of matrix that can be read
with a smartphone camera and that contains a link to a website or
contact details, for example.
Advantage: You are not required to manually enter a website address
or contact details.
How it works
To scan the QR code, all you need is a smartphone with QR codes reader
software and an Internet connection*. This type of software can be
downloaded for free from your smartphone’s app store.
Try it out now
Just scan the QR code with your smartphone and
nd out more about the Aldi product you have
purchased*.
* Depending on your tarif you may be charged for the connection.
Pack contents /parts 2
Description of Symbols 3
General safety warnings 4
Additional Safety rules for Petrol Blower Vacuums 9
Parts List 12
Assembly 14
Preparation of the Blower Vacuum prior to use 14
Setting up for use as a Blower 14
Attaching the Blower Tube 14
Setting up for use as a Vacuum 15
Fitting the Vacuum Tube to the Blower Vacuum Housing 16
Fitting the Bag tube into the Collection bag 16
Preparation 18
Adding and Checking the oil 18
Fuelling 20
Operation 21
Choke control / Starting the Blower 21
Stopping the Blower 22
Blowing 23
Use of the Petrol Blower 23
Operating as a Vacuum 24
Clearing a blocked Impeller/Mulcher 25
Use of the Petrol Blower Vacuum 25
Emptying the Collection Bag 26
Maintenance 26
Checking the Spark Plug 26
Air Filter 27
Servicing 28
Storage and maintenance after use 28
Troubleshooting 29
Power loss or sudden stopping of the engine 29
Poor or reduced performance 29
Starting a ooded engine 29
Product Disposal 30
Vibration 30
Warranty 31
Environmental protection 31
What your 3 year warranty means 31
Service Support 34
Accessories and After Sales Parts 34
Technical Specications 33
Product
Info

24.5cc 4 Stroke Petrol Blower Vacuum
AFTER SALES SUPPORT
MODEL: №. EBV245A • 08/2018 • 52754 (toll free)
4
Pack contents / parts
Congratulations on the purchase of your Gardenline® 24.5cc 4 Stroke Petrol
Blower Vacuum. When you open your packaging, rst remove all items and
check there are no parts damaged or missing. If you nd anything wrong,
do not operate the product until the parts have been replaced or the fault
has been rectied. Failure to do so could result in serious personal injury.
Intended use of the 24.5cc 4 Stroke Petrol Blower Vacuum
NOTE: This product is for private domestic DIY use only.
It is not suitable for commercial, industrial or trade use.
This Blower Vacuum has been designed for moving leaves and other small
garden debris by using either the blowing function to move or disperse, or the
vacuum function for collection in the bag.
IMPORTANT INFORMATION.
NOTE: This is a 24.5cc 4 Stroke Petrol Blower Vacuum.
The motor MUST be lled with 70ml of SAE 10W-30 BEFORE starting.
Fresh unleaded fuel must be used in this unit.
Do NOT use Ethanol based fuels. Do NOT mix oil with fuel.
NOTE: First time users or inexperienced operators pay particular attention to the
operation of the Blower Vacuum, including details of starting and stopping and
correct use of the Blower Vacuum on pages 21-22, as well as the
maintenance instructions on pages 26-28.
Contents of carton
2 3
Description of symbols
The rating plate on your product may show symbols. These represent important
information about the product or instructions on its use.
Conforms to relevant standards
for electromagnetic compliance.
Warning.
Explosive material.
Extremely hot surface. Do not touch a hot muer, gear box or cylinder,
you may get burned. These parts get extremely hot from operation and
remain hot for a short time after the unit is turned o.
Wear hearing protection. Wear eye protection. Wear breathing protection.
Risk of hand and feet injuries
Risk of hair entanglement
Risk of clothing entanglement
Read these instructions for use carefully.
Keep spectators away. Beware of objects being ung out.
Do not put in water or expose to rain.
Use at a distance of at least 15m from other people.
Before carrying out any maintenance operation stop the engine,
disconnect the spark plug and refer to your manual.
Noise label rating 98db(A) (taken at 7.5 metres)
You must wear ear protection at all times.
98
dB(A)
1 x Blower Vacuum
1 x Upper blow tube
(+assembly screw) (not tted)
1 x Blow tube nozzle
(+ assembly screw + 2 washers)
(not tted)
1 x Bag tube
(+assembly screw) (not tted)
1 x Upper vacuum tube
(+ assembly screw) (not tted)
1 x Vacuum tube nozzle
(+ assembly screw) (not tted)
1 x Spark plug spanner /
combination screwdriver
1 x Collection bag with shoulder strap
1 x Instruction Manual
1 x Warranty Card & details
1 x Quick Start Guide

General safety warnings
Safety instructions
WARNING Read and understand all instructions. Failure to follow
all instructions listed below may result in electric shock, re and/or
serious injury. The term“power tool”in all of the warnings below refers
to your mains-operated (corded) power tool, garden power tool,
battery-operated (cordless) power tool or your petrol operated
garden tool.
Save these instructions
Work area
• Ensure the area to be blown /vacuumed is clear and free of debris, rocks,
gravel, garden furniture etc.
• Keep work area clean and well lit. Cluttered and dark areas invite
accidents.
• Do not operate power tools in explosive atmospheres, such as in the
presence of ammable liquids, gases, or dust. Power tools create sparks
which may ignite the dust or fumes.
• Ensure all animals, children and bystanders are at least 20m away while
operating this blower/vacuum. Distractions can cause you to lose
control.
Personal safety
• Stay alert, watch what you are doing and use common sense when
operating a power tool. Do not use a power tool while you are tired
or under the inuence of drugs, alcohol, or medication. A moment of
inattention while operating power tools may result in serious
personal injury.
• Use safety equipment. Always wear eye protection. Safety equipment
such as a dust mask, non-skid safety shoes, hard hat, or hearing
protection used for appropriate conditions will reduce personal injuries.
• Remove any adjusting key or wrench before turning the tool on.
A wrench or a key that is left attached to a rotating part of the power
tool may result in personal injury.
• Do not overreach. Keep proper footing and balance at all times.
This enables better control of the power tool in unexpected situations.
• Dress properly. Do not wear loose clothing or jewellery. Keep your hair,
clothing and gloves away from moving parts. Loose clothes, jewellery or
long hair can be caught in moving parts.
• If devices are provided for the connection of dust extraction and
collection facilities ensure that these are connected and properly used.
Use of these devices can reduce dust-related hazards.
Power tool use and care
• Do not force the power tool. Use the correct power tool for your
application. The correct power tool will do the job better and safer at
the rate for which it was designed.
• Do not use the power tool if the switch does not turn it on and o.
Any power tool that cannot be controlled with the switch is dangerous
and must be repaired.
• Turn tool o completely before making any adjustments, changing
accessories, or storing power tools. Such preventive safety measures
reduce the risk of starting the power tool accidentally.
• Store idle power tools out of the reach of children and do not allow
persons unfamiliar with the power tool or these instructions to operate
the power tool. Power tools are dangerous in the hands of untrained
users.
• Maintain power tools. Check for misalignment or binding of moving
parts, breakage of parts and any other condition that may aect the
power tool’s operation. If damaged, have the power tool repaired before
use. Many accidents are caused by poorly maintained power tools.
• Keep cutting tools sharp and clean. Properly maintained cutting tools
with sharp cutting edges are less likely to bind and are easier to control.
• Use the power tool, accessories and tool bits etc., in accordance with
these instructions and in the manner intended for the particular type
of power tool, taking into account the working conditions and the work
to be performed. Use of the power tool for operations dierent from
intended could result in a hazardous situation.
4 5

General safety warnings
Safety rules for Petrol Blower Vacuums
Training
• Read the instructions carefully. Get familiar with the controls and proper
use of the equipment.
• Non-skilled persons and rst time users should read and understand the
full instruction manual before proceeding with use of the product or
recommended maintenance tasks.
• Only use the blower vacuum for the purpose for which it was designed,
i.e. blowing or vacuuming garden debris. Any other use can be
hazardous, causing damage to the machine.
• Never allow children or people unfamiliar with these instructions to
use the blower vacuum. Local regulations may restrict the age of the
operator.
• Never use the blower vacuum:
– When people, especially children, or pets are nearby.
– If the operator has taken medicine or substances that can aect his
ability to react and concentrate.
• Remember that the operator or user is responsible for accidents or
hazards occurring to other people or their property.
• Do not use unit around people with long hair.
• Dress appropriately. Do not operate with loose clothing or jewellery.
Ensure there is a gap between the air intake and the operator.
Preparation
• While blowing or vacuuming, always wear sturdy non skid footwear and
long trousers.
Do not operate the equipment with bare feet or open sandals.
WARNING: DANGER!
Engine fuel is highly ammable:
– Store fuel in containers specically designed for this purpose.
– Refuel using a funnel and outdoors only.
Do not smoke while refuelling or whenever handling the fuel.
– Add fuel before starting the engine. Never remove the cap of the fuel
tank or add fuel while the engine is running or when the engine is hot.
– If fuel is spilled, do not attempt to start the engine but move the
machine away from the area of spillage and avoid creating any source
of ignition until the fuel has evaporated and the vapour dispersed.
– Replace all fuel tanks and containers caps securely.
- Add 4 stroke oil to the oil reservoir. Do not use 2 stroke oil.
Do not mix fuel and oil.
• Substitute faulty silencers.
• Before use, always inspect the machine and check that the screws are
not worn or damaged.
• It is advisable to wear suitable eye protection (safety glasses) ear
protection, and sturdy gloves when operating the blower vacuum.
Maintenance and storage
• Keep all nuts, bolts and screws tight to be sure the equipment is in safe
working condition. Regular maintenance is essential for safety and
performance.
• Never store the equipment with fuel in the tank inside a building where
vapour may reach a ame or a spark or a source of extreme heat i.e. a
water heater.
• Allow the engine to cool before storing in an enclosed space.
• To reduce the re hazard, keep the engine, exhaust silencer, battery
compartment (if applicable) and fuel storage area free of grass, leaves, or
excessive grease.
• If the fuel or oil tank has to be drained, this should be done outdoors and
when the engine is cool.
• For reasons of safety, do not use the equipment with worn or
damaged parts.
Parts are to be replaced and not repaired. Parts that are not of the same
quality can damage the equipment and be dangerous for your safety.
• Fuel goes o fairly quickly. If you nd your blower vacuum does not start,
rst change the fuel in the tank with newly purchased fuel.
6 7

AFTER SALES SUPPORT
(toll free)
24.5cc 4 Stroke Petrol Blower Vacuum
MODEL: №. EBV245A • 08/2018 • 52754
11
Service
• Have your power tool serviced by a qualied repair personnel using only
identical replacement parts (recoil starter, spark plug, collection bag,
tubes, blades / impellor). This will ensure that the safety of the power
tool is maintained.
Operation safety instructions
WARNING. Stop the engine and unplug the spark plug before any
repairs or maintenance operations.
• Check that all nuts, bolts and screws are well tightened before every use.
• Do not run the engine in an enclosed and/or poorly ventilated area. The
gas of the engine contains carbon monoxide, which is dangerous to
your health.
• Work only when there is sucient light.
• Do not use the blower when it is raining or when the grass is wet.
• Do not use the blower near open windows due to possible
debris entering.
• Caution must be taken while blowing and vacuuming on slopes.
• Turn o the engine if you must leave the blower vacuum unattended.
• Never change the rated speed of the engine in any way.
• Stop the engine and remove the spark plug cover in these cases:
– Before any maintenance, repairing or checking operations.
– If you leave the blower vacuum unattended.
– If the blower vibrates in an abnormal way, take the blower vacuum to an
authorised service centre.
– Check the bolts and nuts regularly. Bolts and nuts may vibrate loose
over time.
WARNING.
Fuel is highly ammable.
• Keep fuel in a fuel can specially made for this purpose.
• Fill the fuel tank with a funnel and outside. Do not smoke or use a mobile
phone during this process.
• Fill with both fuel in the fuel tank and 4 stroke oil in the oil reservoir
before starting the engine. Never open the cap of the fuel tank to add
fuel while the engine is running or still hot. Do not mix oil and fuel.
Do not use 2 stroke oil.
• Do not start the engine if there is spilt fuel on the blower vacuum or in
the area surrounding. Take the blower away from the zone where fuel
has been spilt and avoid any contact from a hot source as long as the
spilt fuel is completely evaporated.
• Tighten the fuel tank cap and fuel can cap tightly, and ensure the oil
dipstick is secure in position.
WARNING: This blower vacuum is not suitable for use for children
below the age of 14 years old. Children below the age of 14 years
old should not use, or be in reach of this blower vacuum during its
operation.
• Do not operate in a hazardous location. Such areas include where there
is a risk of explosion of petrol fumes, leaking gas or explosive dust.
• Do not operate in a conned area. Exhaust gases, smoke or fumes could
reach dangerous concentrations.
• Protect your blower vacuum. This blower vacuum is NOT
WEATHERPROOF and should not be exposed to direct sunlight, high
ambient temperature and damp, wet or high humidity conditions.
• Do not smoke while refuelling. This is potentially dangerous as it may
ignite the fuel and cause an explosion.
• Take care not to spill fuel. When refuelling the blower vacuum ensure
that the motor has been switched o. Prevent the spilling of fuel as
this may also ignite with the hot motor. Never refuel whilst the engine
running.
• Be careful where you store the blower vacuum. Store the blower vacuum
in a dry area away from ammable liquids.
• Keep your distance. The blower vacuum emits exhaust fumes. Ensure
bystanders keep a safe distance.
• Fill with both fuel in the fuel tank and 4 stroke oil in the oil reservoir
before starting the engine. Never open the cap of the fuel tank to add
fuel while the engine is running or still hot. Do not mix oil and fuel.
Do not use 2 stroke oil. If not, the engine will overheat and cause
damage to your blower vacuum.
8 9
Additional safety rules for Petrol Blower Vacuums
AFTER SALES SUPPORT
(toll free)
24.5cc 4 Stroke Petrol Blower Vacuum
MODEL: №. EBV245A • 08/2018 • 52754
13
• Never ll fuel tank indoors. Never ll fuel tank when engine is running
or hot.
Do not smoke when lling fuel tank.
• Stop the engine before re-fuelling.
• Stop the engine and disconnect the spark plug wire:
– If the blower vacuum vacuum starts to vibrate abnormally (nd and
remove the cause of the vibration immediately).
• Reduce the throttle before turning o the engine and turn the fuel o
when you have nished blowing or vacuuming.
• The user is responsible for the safety of other people, animals and
objects in the working area. Keep children and domestic animals at a
safe distance while the blower Vacuum is in use.
• Fill the oil reservoir with 4 stroke oil. Do not use 2 stroke oil.
We recommend 4 Stroke SAE 10W/30.
WARNING: This blower vacuum is not suitable for use for children
below the age of 14 years old. Children below the age of 14 years
old should not use, or be in reach of this blower Vacuum during its
operation.
10 11

24.5cc 4 Stroke Petrol Blower Vacuum
AFTER SALES SUPPORT
MODEL: №. EBV245A • 08/2018 • 52754 (toll free)
AFTER SALES SUPPORT
(toll free)
24.5cc 4 Stroke Petrol Blower Vacuum
MODEL: №. EBV245A • 08/2018 • 52754
12 13
Blower Assembly
12 14
15
16
13
20
17
Part List Parts List
Parts List
25
29 30
28
23
18
1. Main handle
2. Throttle trigger
3. ON/OFF switch
4. Throttle lock lever
5. Upper blow tube
6. Blow tube nozzle
7. Bag tube
8. Intake Cover
9. Upper Vacuum tube
10. Collection bag
11. Vacuum Tube nozzle
12. Primer
13. Fuel cap
14. Oil reservoir / dipstick
15. Air lter cover
16. Air lter
17. Choke lever (red)
18. Spark plug cover
19. Spark Plug
20. Recoil starter
21. Motor (internal)
22. Fuel tank
23. Shoulder strap
24. Discharge port
25. Spark Plug Spanner/
combination screwdriver
26. Outlet exhaust
27. Fuel tank bracket / feet
28. Shoulder Strap connection points
29. Intake cover lock screw
30. Impellor
31. Throttle lock
button 4
1028 287
2
2627 14 21 226
18
245
20 13
31
11
9
31
8
27
19
Vaccuum
Assembly

24.5cc 4 Stroke Petrol Blower Vacuum
AFTER SALES SUPPORT
MODEL: №. EBV245A • 08/2018 • 52754 (toll free)
AFTER SALES SUPPORT
(toll free)
24.5cc 4 Stroke Petrol Blower Vacuum
MODEL: №. EBV245A • 08/2018 • 52754
14 15
Preparation of the Blower Vacuum prior to use
The petrol blower vacuum requires some assembly prior to use. This includes
joining of the vacuum tubes, joining of the blower tubes, and depending if
the tool is to be used for blowing or vacuuming, tting of the tube assembly
to the housing and tting the collection bag assembly to the housing.
Setting up for use as a Blower
IMPORTANT. Blower tube installation aects both blower balance and
performance.
WARNING. Danger from rotating impeller!
Stop the engine before installing or removing the blower tubes.
Never perform any maintenance or assembly procedures on this
machine while the engine is running.
Attaching the Blower Tube
1. Place the blower upright on the ground or on a sturdy work surface (Fig A).
2. Push the blower tube nozzle tube (6) over the upper blow tube (5), lining
up both the arrows on the each tube and lining up the protruding locking
pin/s on the end of the upper blow tube (5) with the protruding channel/s
on the blow tube nozzle (6) (Fig B).
NOTE: You may need to loosen the screw from the blow tube nozzle (6) so
the screw sits ush otherwise the tubes will not connect properly due to the
screw impeding the connection. This is a non-removable screw.
3. Rotate the blow tube nozzle (6) clockwise on the upper blow tube (5)
locking it into place. Then using the spark plug spanner / combination
screwdriver (25),screw in the assembly screw until secure.
4. Loosen the screw (with 2 small washers) from the
discharge port (24), using the supplied spark plug
spanner / combination screwdriver (25). Align and
push the assembled blower tube assembly over the
discharge port (24) on the blower outlet lining up
the arrow on the discharge port with arrow on the
tube and then rotate clockwise until it locks in place
and the screw hole can be seen (Fig C).
5. Using the supplied spark plug spanner /
combination screwdriver (25), screw in the
assembly screw + 2 small washers until secure
(Fig D).
Check the intake cover (8). For use of the blower
vacuum as a blower, the vacuum tubes should
not be tted, but the intake cover MUST be
closed and secured (Fig E).
The blower vacuum is now ready for use as a
blower.
NOTE: The vacuum tubes (9/11) and the
collection bag (10) are not required for the
blower operation.
Setting up for use as a Vacuum
Assembly of the Vacuum tubes
1. Align the upper vacuum tube (9) and the
vacuum tube nozzle (11) so that the protruding
pins on the upper vacuum tube (9) align with the
protruding channels on the vacuum tube nozzle
(11).
NOTE: You may need to loosen the screw from
the vacuum tube nozzle (11) so the screw sits
ush otherwise the tubes will not connect
properly due to the screw impeding the
connection.
2. Slide the upper vacuum tube (9) inside the
vacuum tube nozzle (11) until it will enter no
more, then rotate the vacuum tube nozzle (11 in
an anti clockwise direction until securely locked
together (Fig F). This is a non-removable screw.
3. Using the supplied spark plug spanner /
combination screwdriver (25), secure in the
assembly screw and rotate in a clock wise
direction until secure (Fig G).
D.
G.
F.
E. TIGHTEN
TIGHTEN
TIGHTEN
Assembly Assembly
Assembly
LOCK IN PLACE
C.A. B.
LOCK IN PLACE LOCK IN PLACE

24.5cc 4 Stroke Petrol Blower Vacuum
AFTER SALES SUPPORT
MODEL: №. EBV245A • 08/2018 • 52754 (toll free)
AFTER SALES SUPPORT
(toll free)
24.5cc 4 Stroke Petrol Blower Vacuum
MODEL: №. EBV245A • 08/2018 • 52754
16 17
Fitting the Vacuum Tube to the
Blower Vacuum Housing
1. Loosen and remove the intake cover lock screw
(29) on the intake cover (8) by turning in an anti
clockwise direction (Fig H).
2. Open the intake cover (8) and insert the lower
vacuum tube (9) so it ts inside the round
entry of the vacuum housing by aligning the
external pins protruding from the port with the
2 channels on each side of the upper vacuum
tube (9) (Fig I).
3. Push the tube assembly onto the port as far as it
will go, and then rotate the lower vacuum tube
(9) in a clockwise direction until it can be rotated
no further. The tube should now be suciently
locked in place and ready for use.
NOTE: The intake cover lock screw (29) is not re-
applied when the unit is in vacuum mode. Ensure
you keep the lock screw (29) in a safe place for
when required to re-apply when the product is
used in blow mode.
Fitting the bag tube and collection bag.
WARNING: Never operate the vacuum without
collection bag attached.
Serious personal injury could be the result if the
blower vacuum is used without the bag tted.
IMPORTANT: Before using this product as a
vacuum, ensure the correct vacuum tubes are in
position as per the instructions on the previous
page, and the collection bag zip is done up before
tting.
1. Align the arrow on the bag tube (7) with the
arrow on the discharge port (24) and rotate the
bag tube (7) in a clockwise direction as far as it
will go until you can see the screw hole on the
discharge port (24) through the bag tube (7)
(Fig J).
2. Secure the assembly screw using the supplied
spark plug spanner / combination screwdriver
(25) rotating in a clockwise direction until
secure (Fig K).
3. Undo the velcro strip on the collection bag (10)
and place the small opening end of the bag
over the open end of the bag tube (7)
and secure the bag over the bag tube (7) by
re-securing the velcro strip (Fig L).
NOTE: the bag can be rotated on the tube later
to nd the most comfortable position.
4. When you start using the unit as a vacuum,
place the shoulder strap attached to the bag
over your shoulder to balance the collection
bag while lling.
I.
H. LOOSEN
LOCK IN PLACE
Assembly Assembly
J.
K.
L.
TIGHTEN
LOCK IN PLACE

24.5cc 4 Stroke Petrol Blower Vacuum
AFTER SALES SUPPORT
MODEL: №. EBV245A • 08/2018 • 52754 (toll free)
AFTER SALES SUPPORT
(toll free)
24.5cc 4 Stroke Petrol Blower Vacuum
MODEL: №. EBV245A • 08/2018 • 52754
18 19
4. Clean the dipstick portion of any oil residue and
then insert the dipstick fully into the oil reservoir,
however, DO NOT THREAD the dipstick into the
reservoir. Hold the dipstick in place for a few
seconds and then remove (Fig O).
5. Check the oil mark on the dipstick. It should reach
the middle hole on the dipstick. Be careful not to
overll (Fig P).
6. If the oil level is not close to the middle hole,
then add small amounts of oil and repeat steps 3, 4 & 5 until the oil level is
approaching the middle hole on the dipstick.
DO NOT OVERFILL. Do Not EXCEED the upper hole on the dipstick.
7. IMPORTANT: The motor should NEVER be started if the oil level is below
the lowest hole.
Always check the oil level before starting ensuring the blower vacuum is
positioned as per step1 for checking.
8. When the oil level reaches the middle hole, replace the dipstick (14) and
thread in the dipstick in a clockwise direction until the dipstick is rmly in
place. The Sealing O ring on the shoulder of the dipstick should be fully
compressed when the dipstick is rmly hand tightened.
Adding and Checking the oil
IMPORTANT: The motor of this blower vacuum is packed with NO OIL in
the motor. Prior to starting the motor, 4 stroke oil MUST be added to the oil
reservoir (14). Failure to add sucient oil will result in damage to the motor
which is NOT covered under the warranty of the unit.
NOTE: This is a 4 stroke blower vacuum. The motor sump MUST be lled with
60mL of 4 stroke SAE 10W/30 BEFORE starting. Fresh unleaded fuel must be
used in this unit. Do not use ethanol based fuels.
Do NOT mix oil with fuel. Oil must be separately poured into the sump of
the motor as follows, and also the oil level MUST be checked every time the
blower is used.
NEVER attempt to remove the oil dipstick (14) while the motor is running.
ENSURE the motor is not running when the oil level is being checked.
On a new unit, the motor needs to be lled with 60mL of SAE 10W/30
engine oil.
To initially ll with oil or to check the oil level, follow the process below.
1. Sit the blower on its side such that the intake cover is resting on a secure
at surface, or on the ground, and the oil reservoir is easily accessible
(Fig M). Clean the area directly around the oil reservoir (14) (Fig N).
2. Fully remove/unthread the oil dipstick in an anti clockwise direction.
3. On a new unit which has not previously been lled with oil, measure 60mL
of SAE 10W/30 oil
and pour into the oil
reservoir (14), using
a funnel, where the
dipstick was removed.
O.
N.M.
P.
CORRECT
LEVEL
(MIDDLE HOLE)
DO NOT
OVERFILL
(TOP HOLE)
Preparation Preparation
Preparation

24.5cc 4 Stroke Petrol Blower Vacuum
AFTER SALES SUPPORT
MODEL: №. EBV245A • 08/2018 • 52754 (toll free)
AFTER SALES SUPPORT
(toll free)
24.5cc 4 Stroke Petrol Blower Vacuum
MODEL: №. EBV245A • 08/2018 • 52754
20 21
Fuelling
IMPORTANT: Fuel goes o after about 3-4 months. If you nd your unit does
not start, rst change the fuel in the tank with newly purchased fuel.
WARNING: Do not rell fuel tank while engine is running or is hot.
Allow the motor to cool before fueling.
Move at least 15m away from the refuelling site before starting engine.
NOTE. Do not use fuel that contains ethanol. Use fresh unleaded fuel.
Do not smoke when refuelling or operating the product.
• Be careful not to admit dust, dirt, water or other foreign objects into
the fuel.
• Wipe o spilt fuel thoroughly before starting engine.
• Ensure you DO NOT fuel the unit in close proximity to any open ames,
lit cigarettes, or hot objects.
1. Place the blower vacuum on a secure surface,
or on the ground in the upright position, then
unscrew the fuel tank cap (13) and pour fresh
unleaded fuel into the tank with the aid of a
funnel (Fig. Q).
NOTE: The fuel tank capacity is 500mL. When
lling the tank when it is sitting upright on the
ground, approx 420mL will appear to be the
capacity, however, if you tilt the blower upwards
such that the front of the fuel tank (where the fuel cap is) raised, you can
further ll to 500mL.
Be careful not to spill any mixture. If this happens, wipe the spill with a
clean rag.
2. Replace the fuel cap (13) when the fuel tank is lled to 500mL, and while
sitting in the raised position so there is no spillage, taking care NOT to
cross thread the cap on the fuel tank (22). Tighten the cap rmly in a
clockwise direction.
3. When starting the engine ensure it is at least 15m away from the area
where the fuel tank has been lled up in order to avoid any risk of re.
• Always use extreme care when handling fuel! Fuel is highly ammable.
• Never attempt to fuel the product if the fuel system components are
damaged or are leaking.
• Never smoke or light any res near the product or fuels.
Q.
Operation
WARNING: This blower vacuum is not suitable
for use for children below the age of 14 years old.
Children below the age of 14 years old should not
use, or be in reach of this blower vacuum during its
operation.
During operation of the blower it is recommended
to wear eye protection, a dust mask, and full
hearing protection. Ensure you are wearing suitable
clothing, no loose jewellery, and be cautious of
hair entanglement. Long hair should be suitably
protected.
Choke control
If the engine is cold you will need to use the choke
control.
Start position (choke closed)
Run position (choke open)
Starting the Blower Vacuum
1. Press the primer (12) 6 to 10 times or until there
are no air bubbles visible in the fuel discharge
line (Fig R).
NOTE: The primer is located above the recoil
starter (20) (Fig S).
NOTE: This is not necessary if the engine is warm.
2. If the engine is cold, move the choke lever (red)
(17) upwards to the cold start position (choke
closed) (Fig T).
3. Press the“I”symbol on the on/o switch (3) to
turn the ignition ON (Fig U). Then move the
throttle lock lever (4) halfway between the rabbit
and the tortoise by pushing in the throttle trigger
(2) and at the same time moving the throttle lock
lever (4) halfway down towards the rabbit (Fig V).
Press in the throttle lock button (31) to secure the
throttle lock lever (4) and throttle trigger (2) for
starting.
S.
R.
T.
U.
V.
Preparation Operation
Operation
6 X 10 TIMES

24.5cc 4 Stroke Petrol Blower Vacuum
AFTER SALES SUPPORT
MODEL: №. EBV245A • 08/2018 • 52754 (toll free)
AFTER SALES SUPPORT
(toll free)
24.5cc 4 Stroke Petrol Blower Vacuum
MODEL: №. EBV245A • 08/2018 • 52754
22 23
4. Place the blower vacuum on the ground and
hold the blower vacuum handle rmly with your
left hand.
5. Pull the recoil starter (20) until the engine sounds
like it wants to run or starts (Fig W).
6. Slowly move the choke lever (red) (17) halfway
down. If the motor is not running re try to start in
the half way choke position (Fig X).
7. Allow the motor to run for approximately 20 sec
in the half choke position and then slowly move
to the full run position. Release the throttle lock
button (31) to release the throttle trigger (2),
and move the throttle lock lever (4) back to the
tortoise position.
8. Allow the engine to run for 10 seconds to let it
warm up.
9. To increase the engine speed, hold in the throttle
trigger (2), then move the throttle lock lever
towards the rabbit to go faster. To keep in this
position, press in the throttle lock button (31).
To decrease the engine speed, push in the
throttle trigger (2) to release the the throttle lock
button (31), then push the throttle lock lever
(4) back towards the tortoise to reduce speed.
To lock in at the lower speed, again push in the
trigger switch (2), move the throttle lock lever (4)
to the required speed in between the rabbit and
the tortoise, and press in the throttle lock button
(31).
NOTE: If the motor stalls, move the choke lever
(red) (17) back to the full choke position and repeat from point 4 unless
the motor is already warm. If already warm, start in the half or no choke
position.
Stopping the Blower
Before stopping the engine, ensure the trigger switch (2) is not locked by
releasing the throttle lock button (31), and then moving the throttle lock
lever (4) back to the rabbit position, then stop the engine by pressing the
on/o switch (3) on the symbol marked“O”to turn OFF the motor (Fig Y).
W.
X.
Y.
Blowing
Start the blower engine, as previously described. Hold the blower rmly
about 10–20 cm from the ground and move it in a sweeping motion from left
to right, directing the debris to the desired location.
• Use low throttle settings when clearing lightweight materials from around
lawns or shrubbery.
• Use medium to higher throttle settings to move lightweight grass or
leaves from driveways or paths.
• Use full throttle when moving heavy loads such as dirt or snow.
IMPORTANT. Blower noise increases at higher throttle settings.
Always use the lowest throttle setting required to get the job done.
• Never operate the blower unless it is properly assembled and in good
working condition.
• Never operate the blower without a properly functioning muer.
Use of the Petrol Blower
• The petrol blower vacuum can eciently move a wide variety of debris
ranging from grass clippings to gravel. As a general rule try to operate the
blower at the lowest throttle setting necessary to get the job done.
• Prior to use of the blower ensure you have read and understood this
instruction manual.
• Ensure you are wearing suitable clothing, no loose jewellery, and
also safety equipment like safety glasses, ear protection and a mask if
necessary. Be cautious of hair entanglement. Long hair should be suitably
protected.
• Keep a gap between the air intake and clothing and body parts as
blocking the intake will reduce the performance of the blower and may
result in injury.
• Be aware of any local or national restrictions when using this appliance.
This could include, but not restricted to, times of operation, location of
operation, or work place operation.
• It is recommended to use a rake or broom to loosen debris before
blowing/ vacuuming.
Operation Operation

24.5cc 4 Stroke Petrol Blower Vacuum
AFTER SALES SUPPORT
MODEL: №. EBV245A • 08/2018 • 52754 (toll free)
AFTER SALES SUPPORT
(toll free)
24.5cc 4 Stroke Petrol Blower Vacuum
MODEL: №. EBV245A • 08/2018 • 52754
24 25
Operating as a Vacuum
IMPORTANT. Ensure the collection bag (10) is securely tted and the zip is
closed.
The blower vacuum is tted with a safety switch to prevent the operation of
the unit when the intake cover (8) is opened where the vacuum tube is to be
tted.
NEVER attempt to open the intake cover when the unit is operating.
NEVER attempt to use the vacuum without the collection secured to the
housing.
NEVER attempt to operate the vacuum with only the upper vacuum tube
tted.
The lower nozzle tube must always be tted and secured with the supplied
screw.
This appliance is designed to be used as a garden vacuum in dry conditions.
Debris to be collected should be in a dry condition to avoid jamming and
clogging of the inlet tube.
1. Fit the vacuum tubes as previously detailed on page 16.
2. Start engine as previously detailed on page 21.
3. Place the shoulder strap (23) over your head, onto your shoulder, and
adjust it properly.
NOTE: Ensure the collection bag (10) is not in line with the exhaust outlet.
Do not put the blower vacuum on the ground whilst it is operating. Turn
the blower vacuum o before you remove the collection bag (10) strap
from your shoulder.
4. Hold the vacuum, tilting the blower vacuum tube slightly and use a
sweeping action to collect light debris. Small leaves and twigs will ow
into the vacuum bag and be mulched as they
pass through the fan housing, allowing the
vacuum bag to hold more debris (Fig Z).
WARNING: Avoid loose stones, glass and cans.
The blower vacuum is not a garbage collection
unit and will be damaged if this type of debris is
drawn into the vacuum.
Clearing a blocked Impeller/Mulcher
WARNING: Ensure the blower/vacuum on/o switch (3) is in the OFF
position, as indicated by the“O”on the on/o switch (3) (Fig Y),
and that the spark plug cap is removed/disconnected to prevent accidental
starting which may cause serious injury.
WARNING: Never attempt to clear a blockage by placing your hand down
the inlet tube.
1. Switch the on/o switch (3) to the OFF position, as indicated by the“O” on
the on/o switch (3). Wait for the impeller (30) to stop rotating.
2. Remove the spark plug cover (18) to access the spark plug. Remove the
spark plug arrestor cover to disconnect the spark plug to prevent the unit
from starting.
3. Remove the upper vacuum tube (9) and nozzle by rotating the tube in an
anti clockwise direction and then pulling the tube outward.
4. Carefully remove the material blocking the tube or impeller (30). Inspect
the blades to ensure there is no damage. Rotate the impeller blades
by hand to ensure the blockage is completely cleared. Ret the upper
vacuum tube and nozzle tube assemby.
5. If the blockage was not on the vacuum side, remove the collection
bag tube (7) from the blower output by removing the assembly screw,
rotating the bag tube (7) in a clockwise direction, and then pull the bag
tube (7) directly o the blower. Inspect and clear any blockage from the
blower outlet or in the bag tube (7).
After clearing any blockages, replace the bag tube (7) and secure the tube
with the retaining knob.
6. Reconnect the spark plug (19).
7. Empty the collection bag (10).
Use of the Petrol Blower Vacuum
The GARDENLINE® Petrol Blower Vacuum can eciently collect a wide
variety of debris ranging from grass clippings and leaves. Debris should be
collected or vacuumed in a dry condition. As a general rule try to operate
the blower vacuum at the lower throttle setting necessary to get the job
done.
• Prior to use of the blower vacuum ensure you have read and understood
this instruction manual.
• Ensure you are wearing suitable clothing, no loose jewellery, and
also safety equipment like safety glasses, ear protection and a mask if
necessary.
Be cautious of hair entanglement. Long hair should be suitably protected.
Z.
Operation Operation

24.5cc 4 Stroke Petrol Blower Vacuum
AFTER SALES SUPPORT
MODEL: №. EBV245A • 08/2018 • 52754 (toll free)
AFTER SALES SUPPORT
(toll free)
24.5cc 4 Stroke Petrol Blower Vacuum
MODEL: №. EBV245A • 08/2018 • 52754
26 27
WARNING: This blower vacuum is not suitable for use for children below the
age of 14 years old. Children below the age of 14 years old should not use,
or be in reach of this blower vacuum during its operation.
Emptying the Collection Bag
WARNING: Ensure to turn o the blower vacuum before attempting to
empty the collection bag (10). The collection bag (10) must never be opened
with the motor running.
The collection bag (10) should be emptied as soon as a noticeable reduction
in performance of the vacuum is noticed. In general it is suggested to empty
the bag when it becomes 1/2 full so as to keep the overall weight down and
also to maintain max performance.
When emptying the debris bag it is suggested to wear a face mask and eye
protection.
It is not necessary to remove the bag from the vacuum machine. If it is
preferred, remove screw on the vacuum outlet tube (7) and rotate the tube
o the vacuum housing.
With the bag assembly on or o the vacuum, open the zip on the bottom
edge of the bag, and empty the contents from the bag. It is suggested to
give the bag a good shake to dislodge as much dust as possible.
Check the teeth on the zip are not clogged or fouled with debris. Close the
zip fully. Replace the bag assembly on to the vacuum outlet if the bag was
removed.
WARNING: Before performing any maintenance
on this blower, stop the engine and disconnect the
spark plug (19).
Checking the Spark Plug
Check the spark plug every 10 - 15 hours of use.
1. Remove the spark plug cover (18) to gain access
to the spark plug (19) (Fig AA). Remove the black
arrestor cover on the spark plug (19).
2. Use the supplied spark plug spanner (25) to
remove the spark plug (19), by turning it
anti-clockwise (Fig AB).
3. Clean and adjust the spark plug gap to
0.6 - 0.7mm (Fig AC). Replace any damaged
or visibly worn plug with a TORCH CMR6A or
equivalent spark plug.
4. Install the spark plug (19) nger tight in the
cylinder head, then tighten it rmly with the
supplied spark plug spanner / combination
screwdriver (25).
NOTE: If your spark plug becomes worn
replacements are available for purchase from
https://help.tools/, or can be purchased from
most hardware stores or mower type repair
shops. Refer to page 32 for further detail.
Air Filter
The air lter (16) should be checked approximately
every 10 hours of use, or more frequently in dusty
areas.
1. Undo the air lter cover (15), by pushing down on
the clip on the air lter cover (15), and using your
other hand, pull the cover away and down (Fig AD).
NOTE: The air lter cover does not detach from the
unit. It is held in place by the hinges at the bottom
of the air lter cover (15) .
2. Inspect the air lter (16). If the air lter (16) is
distorted or damaged, replace it with a new one.
3. Wash the air lter (16) in detergent and water.
Rinse the air lter (16) thoroughly. Squeeze out
excess water. Allow it to dry completely before
reinstalling.
4. Re-install the air lter (16) and then close the air
lter cover (15) ensuring the clip is fully engaged
and the cover will not open during use. (Fig AE).
NOTE: Replacement air lters are available for
purchase - please refer to page 32 for details.
AA.
AB .
AD.
AE.
AC.
Maintenance Maintenance
Maintenance

24.5cc 4 Stroke Petrol Blower Vacuum
AFTER SALES SUPPORT
MODEL: №. EBV245A • 08/2018 • 52754 (toll free)
AFTER SALES SUPPORT
(toll free)
24.5cc 4 Stroke Petrol Blower Vacuum
MODEL: №. EBV245A • 08/2018 • 52754
28 29
Servicing
• It is recommended once you rst use your petrol blower have it serviced
after 15 hours of use.
• From thereafter, service the petrol blower every 2 years.
Storage and maintenance after use
• When you nish working, clean the blower vacuum completely.
• Inspect the entire blower vacuum and tubes for damage, including loose
or missing components, and repair anything necessary.
• Empty the collection bag (10), and give it a good shake to remove all
debris and dust.
• Store the blower vacuum away from direct sunlight.
• Do not store in a nylon bag as this can encourage the formation of
mould.
• Use a small brush to clean o the outside of the unit and keep the air
vents free from obstructions. Do not use water or a hose to clean the unit.
• It is recommended to drain the fuel from the blower vacuum on the
completion of use, prior to storage or transportation.
• When transporting the blower vacuum it is recommended to
disassemble the product and put it back inside its original packaging
(or the like), to prevent any damage during transit. Ensure the fuel cap is
secured tightly to avoid fuel leakage.
Whenever the machine is not used for a long period of time, proceed
as follows:
• Give the petrol blower vacuum an overall cleaning and a thorough check.
• Empty the fuel tank (22) completely, then clean the carburettor and lines
by running the blower vacuum until it stops from lack of fuel.
• Empty oil from the oil reservoir.
Ensure to add a tag on the blower after the oil has been drained to say
“OIL DRAINED”. Oil must be added before the next use.
• Protect all metal engine parts from corrosion by coating them with oil.
• Remove the spark plug (19), put several drops of oil into the cylinder
through the spark plug hole and then pull the recoil starter 2 to 3 times in
order to distribute the oil evenly. Replace the spark plug and spark
plug cover.
• Clean the air lter (16) as described in the air lter section.
Power loss or sudden stopping of the engine
• Check whether the fuel tank (22) is empty. If there is water in the mixture,
drain and rinse the fuel system with petrol.
• Check the oil level in the oil reservoir (14).
• The air lter (16) is dirty. Clean the air lter (16).
• Check a twig or debris is not binding the impellor.
• The collection bag (10) is full. Empty the collection bag (10).
Poor or reduced performance
With the engine turned o and the spark plug arrestor cover removed:
• Check the contents of the collection bag (10) and empty if it is more than
half full.
• Remove the upper vacuum tube (9) and check the tube is clear.
• With the upper vacuum tube (9) o, check the condition of the impeller (30)
and replace if the impeller (30) is worn.
• Remove the bag tube (7) from the blower and check the tube is are clear of
debris and the discharge port is clear.
Starting a ooded engine
• Disconnect the spark plug lead, and use the supplied spark plug spanner (25)
to remove the spark plug (19) in an anti clockwise direction.
• If the spark plug (19) is fouled or is soaked with fuel, clean or replace the plug
as required.
• Clean excess fuel from the combustion chamber by cranking the engine
several times while the spark plug (19) is removed.
• Install the spark plug (19) and rmly tighten it with the supplied spark plug
spanner (25). Connect the spark plug (19).
• Repeat the starting procedure as if the blower was already warm.
Maintenance Troubleshooting
Troubleshooting

24.5cc 4 Stroke Petrol Blower Vacuum
AFTER SALES SUPPORT
MODEL: №. EBV245A • 08/2018 • 52754 (toll free)
AFTER SALES SUPPORT
(toll free)
24.5cc 4 Stroke Petrol Blower Vacuum
MODEL: №. EBV245A • 08/2018 • 52754
30 31
Your new Gardenline® Blower Vacuum will more than satisfy your expectations. It
has been manufactured under stringent Gardenline® Quality Standards to meet
superior performance criteria.
You will nd your new Blower Vacuum easy and safe to operate, and, with proper
care, it will give you many years of dependable service.
CAUTION. Carefully read through this entire instruction manual before using your
new Gardenline® Blower Vacuum .
Take special care to heed the Cautions and Warnings.
Your Gardenline® Blower Vacuum has many features that will make your job faster
and easier. Safety, performance, and dependability have been given top priority in
the development of this Blower Vacuum , making it easy to maintain and operate.
Environmental protection
Recycle unwanted materials instead of disposing of them as waste.
All tools, hoses and packaging should be sorted, taken to the local
recycling centre and disposed of in an environmentally safe way.
Dispose of used motor oil in a manner that is compatible with the environment.
We suggest you take it in a sealed container to your local service station for
reclamation. Do not throw it in the trash or pour it into the earth.
What your 3 year warranty means
Great care has gone into the manufacture of this product and it should therefore
provide you with years of good service when used properly.
In the event of product failure within its intended use over the course of the rst
3 years after the date of purchase, we will remedy the problem as quickly as possible
once it has been brought to our attention. In the unlikely event of such an
occurrence, or if you require any information about the product please contact us
via our after sales support services, details of which can be found in this manual
and on the product itself. After Sales Support TEL: 1800 909 909
Product Disposal
If disposing of the unit, recycle the unwanted materials instead of disposing of
them as waste.
All tools, hoses and packaging should be sorted, taken to the local recycling
centre and disposed of in an environmentally safe way.
NOTE. Do not discard unwanted fuel with household waste. It must be taken to
an authorised repository site.
Vibration
Vibration white nger may occur in operators using hand held vibrating tools
such as blower Vacuums. Continual vibration can cause both vascular damage
and also nerve damage to the operator.
The following guidelines can reduce the risk:
- Limit the use of vibrating tools.
- Hold vibrating tools as loosely as possible and in varying positions.
- Ensure tools are well maintained and replace worn parts.
- Use tools correctly, and use the right tool for the job (to do the job more
quickly and reduce exposure time).
- Store tools so that they do not have very cold handles when next used.
- Use anti-vibration gloves.
- Take regular breaks of at least 10 minutes every hour away from the tool, for
both vibration and damage to the ears.
Troubleshooting Warranty
Warranty

24.5cc 4 Stroke Petrol Blower Vacuum
AFTER SALES SUPPORT
MODEL: №. EBV245A • 08/2018 • 52754 (toll free)
AFTER SALES SUPPORT
(toll free)
24.5cc 4 Stroke Petrol Blower Vacuum
MODEL: №. EBV245A • 08/2018 • 52754
32 33
Engine Displacment: 24.5cc
Motor: 4 stroke
Max. air velocity: 210 km/h
Max. air volume: 0.16 m3/s
Idling Engine Speed: 3000min-1( +/- 15%)
Full Engine Speed: 7000min-1 ( +/- 15%)
Fuel tank capacity: 500mL
Fuel type: Unleaded petrol
Oil Tank Capacity: 60mL
Oil Type: 4 Stroke (SAE 10W/30)
Collection bag: 40 Litre
Mulching function: Reduces large piles of garden waste to
small manageable piles of mulch.
Spark Plug: Torch CMR6A
Equivalent Spark Plug: NGK CMR6A
Noise label rating: 98dB(A)
Weight in Vacuum mode (no fuel): 6.2kg
Weight in blower mode (no fuel): 5.1kg
A-weighted sound pressure level: 72.6dB(A)
A-weighted sound power level: 97.6dB(A)
Vibration: 3.0m/s2
Uncertainty (K): 1.5m/s2
Product Dimensions: 98cm x 27cm x 37cm
(Set up for Blower function) +/- tolerances (L x W x H)
Set up for Vacuum function 118cm x 27cm x 37cm
(without collection bag) +/- tolerances (L x W x H)
This product complies with: EN15503 :2009
EN15503/A1:2013
PPP 53351A:2012
EN ISO 14982:2009
Service Support
If you have any issues with the operation of your product, please take it with a
copy of your receipt to one of our National Service Agents for repair. A listing
of our Service Agents is included with your product, however, you can also nd
our most updated listing by visiting https://help.tools/ Alternatively call us on
our Customer Support line, 1800 909 909, for advice or support.
Accessories and After Sales Parts
Should you nd the following accessories are worn or past their user life,
replacements can be purchased online via our website
https://help.tools/ or by calling our customer service hotline on: 1800 909 909
If you have any queries regarding these accessories,
please call us on our Customer Support line,
1800 909 909.
1. Collection bag
(52754-BGT3)
2. Spark Plug
(Torch GB/T7825)
3. Recoil Starter
(52754-BGT3)
4. Air Filter
(52754-AF3)
Technical Specications

24.5cc 4 Stroke Petrol Blower Vacuum
AFTER SALES SUPPORT
MODEL: №. EBV245A • 08/2018 • 52754 (toll free)
34
MODEL: EBV245A • 08/2018 • 52754
1800 909 909 (toll free)
e-mail: help@powertoolsupport.com
ALDI guarantees that our exclusive brand products are developed to
our stringent quality specications. If you are not entirely satised with this
product, please return it to your nearest ALDI store, within 60 days from
the date of purchase, for a full refund or replacement, or take advantage of
our after sales support by calling the supplier’s Customer Service Hotline.
Made in China
Gardenline® is a registered trademark of ALDI Stores
DISTRIBUTED BY:
ALDI STORES
1 SARGENTS ROAD
MINCHINBURY NSW 2770
www.aldi.com.au
Other manuals for 52754
1
Table of contents
Other Gardenline Blower manuals

Gardenline
Gardenline PBV26CC User manual

Gardenline
Gardenline 36357 User manual

Gardenline
Gardenline GLLS 3002 UK User manual

Gardenline
Gardenline 52754 User manual

Gardenline
Gardenline GLBV-2500 User manual

Gardenline
Gardenline 60099 User manual

Gardenline
Gardenline GLLS 3000/3 User manual

Gardenline
Gardenline GLBV 2501 User manual