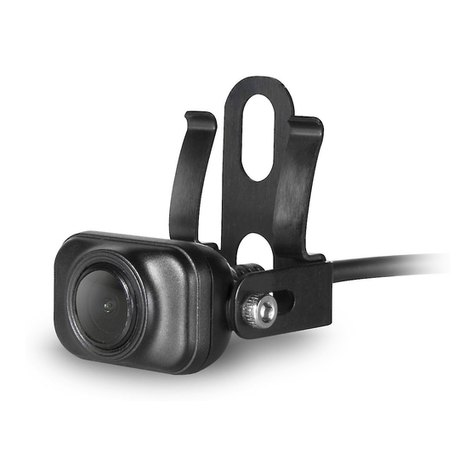
Garmin BC 20 User manual

July
2013
BCTM
20
Wireless
Backup
Camera
Installation
Instructions
190-01600-90_08
Printed
in
Ta
i
wan

All
rights
reserved.
Under
the
copyright
laws,
this
manual
may
not
be
copied,
in
whole
or
in
part,
without
the
written
consent
of
Garmin.
Garmin
reserves
the
right
to
change
or
improve
its
products
and
to
make
changes
in
the
content
of
this
manual
without
obligation
to
notify
any
person
or
organization
of
such
changes
or
improvements.
Go
to
www.garmin.com
for
current
updates
and
supplemental
information
concerning
the
use
of
this
product.
Garmin®
and
the
Garmin
logo
are
trademarks
of
Garmin
Ltd.
or
its
subsidiaries,
registered
in
the
USA
and
other
countries.
BC™
is
a
trademark
of
Garmin
Ltd.
or
its
subsidiaries.
These
trademarks
may
not
be
used
without
the
express
permission
of
Garmin.

Wireless
Backup
Camera
Installation
Instructions
See
the
Important
Safety
and
Product
Information
guide
in
the
GPS
device
P~?~~~~
~?~
~?~P~?~~~~~~r.~i~Q~~
-
~9
?!~~E
..
~~P?~~
-
~~
i
_
~!?r.~~~i
_
?
.
~
.
·
.
..
Garmin®
strongly
recommends
having
an
experienced
installer
with
the
proper
knowledge
of
electrical
systems
install
the
device.
Incorrectly
wiring
the
power
cable
can
result
in
damage
to
the
vehicle
or
the
battery
and
can
cause
bodily
injury.
When
connecting
the
power
cable,
do
not
remove
the
in-line
fuse
holder.
To
prevent
the
possibility
of
injury
or
product
damage
caused
by
fire
or
overheating,
the
appropriate
fuse
must
be
in
place
as
indicated
in
the
product
specifications.
In
addition,
connecting
the
power
cable
without
the
appropriate
fuse
in
place
will
void
the
product warranty.
-
Always
wear
safety
goggles,
ear
protection,
and
a
dust
mask
when
drilling,
cutting,
or
sanding.
NOTICE
When
drilling
or
cutting,
always
check
what
is
on
the
opposite
side
of
the
surface.
These
installation
instructions
do
not
apply
to
a
specific
vehicle
type,
and
are
meant
as
a
guide
when
installing
this
product
on
your
vehicle.
For
questions
specific
to
your
vehicle,
you
should
contact
the
vehicle
manufacturer.
Wireless
Backup
Camera
Installation
Instructions
Item
Description
CD
Wireless
camera
PND
mount
The
PND
device
must
be
powered
through
this
mount
to
communicate
with
the
camera.
(~
)
Transmitter
(;l)
I
Camera
Tools
Needed
•
Drill
and
0.36
in.
(9.09
mm,
or
size
T)
drill
bit
•
#2
Phillips
screwdriver
•
Screws,
bolts,
or
cable
ties
(to
secure
the
transmitter)
•
Solderless
wire-splice
connector
or
solder
and
heat-shrink
tubing
•
RV
sealant
(optional)
Camera
Mounting
Considerations
When
selecting
a
location
to
mount
the
camera,
observe
these
considerations.
•
You
should
test
a
mounting
location
before
you
permanently
mount
the
camera.

•
Installing
the
camera
higher
on
the
back
of
the
vehicle
provides
a
better
viewing
angle.
•
The
included
bracket
can
be
clipped
onto
a
license
plate
or
other
similar
surface,
or
it
can
be
fastened
to
the
back
of
the
vehicle
using
the
included
self-tapping,
panhead
screws.
Transmitter
Location
and
Wiring
Considerations
When
selecting
a
location
to
install
the
wireless
transmitter,
observe
these
considerations.
•
You
should
test
a
proposed
installation
location
before
you
permanently
install
the
transmitter.
•
Although
the
transmitter
can
reliably
transmit
the
video
signal
over
approximately
45ft.
(13.5
m),
the
location
of
the
transmitter
can
affect
this
range.
2
o
The
closer
you
install
the
transmitter
to
the
wireless
camera
PND
mount,
the
more
reliable
the
signal.
The
transmitter
provides
the
best
signal
when
either
flat
surface
is
pointing
toward
the
wireless
camera
PND
mount.
o
Dense
metal
or
appliances
in
the
path
of
the
transmitter
greatly
reduce
the
transmission
distance.
o
The
fewer
solid
objects
that
exist
between
the
path
of
the
transmitter
and
the
device,
the
more
reliable
the
signal.
•
If
the
distance
between
the
camera
and
the
transmitter
exceeds
the
length
of
the
included
cable,
additional
extension
cables
can
be
used.
A
50
ft.
(15
m)
extension
cable
can
be
purchased,
and
more
than
one
extension
cable
can
be
installed.
See
your
Garmin
dealer
or
go
to
www.garmin.com
for
more
information.
•
The
fuse
holder
located
near
the
transmitter
is
not
waterproof.
Installing
the
fuse
holder
in
a
location
that
is
exposed
to
the
elements
is
not
recommended.
•
The
connector
between
the
camera
and
the
transmitter
is
not
waterproof.
If
you
make
this
connection
in
a
location
exposed
to
the
elements,
you
must
make
sure
that
the
connection
is
~aterproof.
Testing
the
Camera
and
Transmitter
Location
1
Temporarily
secure
the
camera
in
the
preferred
mounting
location.
2
Temporarily
place
the
transmitter
in
the
preferred
installation
location,
and
connect
it
to
power
and
to
the
camera.
TIP:
If
you
do
not
want
to
splice
into
the
wiring
of
your
vehicle
for
this
test,
you
can
connect
the
transmitter
and
camera
to
a
12
Vdc
battery
.
3
Test
the
transmitter
for
correct
operation
by
applying
power
to
the
PND
device
using
the
wireless
camera
PND
mount.
If
you
do
not
see
video
on
the
device
at
the
preferred
installation
location,
move
the
transmitter
to
another
location
and
test
it
again.
4
Repeat
steps
2-3
until
the
transmitter
operates
correctly.
5
Test
the
camera
view
by
observing
the
video
on
the
device.
6
If
the
camera
does
not
provide
the
optimal
view
for
your
vehicle,
move
it
to
another
location
and
test
it
again.
7
Repeat
steps
5-6
until
the
camera
mounting
location
provides
the
optimal
view
for
your
vehicle.
Wireless
Backup
Camera
Installation
Instructions

TIP:
Make
note
of
which
direction
is
up
when
you
are
testing
the
camera
view
to
ensure
correct
permanent
installation.
Mounting
the
Camera
Before
you
permanently
mount
the
camera,
you
should
test
the
mounting
location
for
the
optimal
view
for
your
vehicle
(page
2).
If
you
have
already
connected
the
camera
to
the
bracket,
you
must
first
disassemble
it.
1
Place
the
bracket
in
the
mounting
location.
2
Select
an
option:
•
If
you
are
mounting
the
bracket
directly
on
the
surface
of
your
vehicle,
mark
the
locations
of
the
two
holes
on
the
bracket
Wireless
Backup
Camera
Installation
Instructions
•
If
you
are
installing
the
bracket
on
a
license
plate,
remove
one
of
the
license
plate
screws
and
clip
the
bracket
in
place
so
the
hole
on
the
bracket
lines
up
with
the
hole
on
the
license
plate.
3
Secure
the
bracket
to
the
vehicle
using
either
the
included
self-tapping
screws
(4)
or
the
license-plate
screw
you
removed
in
step
2
4
Place
the
camera
in
the
bracket,
and
determine
the
best
place
for
the
camera
cable
to
enter
the
vehicle.
5
Using
an
appropriate
drill
bit,
drill
a
hole
for
the
camera
cable
to
enter
the
vehicle.
6
Feed
the
camera
cable
through
the
hole
and
route
it
to
the
transmitter
location.
15m
(50
ft.)
extension
cables
can
be
purchased
separately,
if
needed.
7
Secure
the
camera
in
the
bracket
using
the
included
hex
bolts
8
Adjust
the
angle
of
the
camera
and
tighten
the
hex
bolts
using
the
included
hex
key.
9
Apply
RV
sealant
around
the
cable
where
it
enters
the
vehicle
(optional).
Installing
the
Transmitter
Before
you
permanently
install
the
transmitter,
you
must
test
the
installation
location
for
correct
operation
(page
2).
1
Secure
the
transmitter
to
the
installation
location
using
hardware
appropriate
for
the
location,
such
as
screws,
bolts,
or
cable
ties.
The
fuse
holder
located
near
the
transmitter
is
not
waterproof.
Installing
the
fuse
holder
in
a
location
that
is
exposed
to
the
elements
is
not
recommended.
2
Connect
the
camera
and
transmitter
cables.
The
connector
between
the
camera
and
the
transmitter
is
not
waterproof.
If
you
make
this
connection
in
a
location
exposed
to
the
elements,
you
must
make
sure
that
the
connection
is
waterproof.
3

3
Connect
the
power
cable
from
the
transmitter
to
a
12-24
VDC
power
source,
preferably
a
reverse
lamp
using
a
solderless
wire-splice
connector
(not
included).
NOTE:
Connecting
the
transmitter
to
an
always-on
12-24
VDC
source
(such
as
a
running
lamp)
instead
of
a
reverse
lamp
requires
you
to
manually
switch
power
to
the
transmitter.
The
transmitter
may
drain
your
vehicle
battery
if
it
is
left
on.
4
If
you
did
not
use
a
solderless
wire-splice
connector,
solder
and
heat-shrink
the
electrical
connections
to
protect
them
from
the
elements.
Using
the
Camera
The
camera
shows
video
on
the
device
in
different
ways,
depending
on
how
you
connected
the
power
to
the
transmitter.
1
Select
an
option
to
show
video:
4
•
If
you
connected
the
transmitter
to
a
reverse
lamp
(recommended),
place
the
vehicle
into
reverse.
The
device
automatically
shows
video
from
the
backup
camera.
•
If
you
connected
the
transmitter
to
a
running
lamp
or
other
steady
12
VDC
source,
select
the
camera
icon
on
the
device
to
show
video
from
the
backup
camera.
2
Select
an
option
to
resume
normal
device
operation:
•
If
you
connected
the
transmitter
to
a
reverse
lamp
(recommended),
take
the
vehicle
out
of
reverse.
The
device
automatically
resumes
normal
operation.
•
If
you
connected
the
transmitter
to
a
running
lamp
or
other
steady
12
VDC
source,
select
the
camera
icon
on
the
device
to
resume
normal
operation.
Pairing
the
Transm
itter
and
Device
Mount
The
transmitter
and
wireless
camera
PND
mount
come
paired
from
the
factory.
If
the
transmitter
and
the
PND
mount
are
properly
installed
and
you
are
not
receiving
video,
you
can
try
to
re-pair
the
transmitter
and
the
PND
mount.
1
Verify
there
is
no
power
to
the
transmitter
by
placing
the
vehicle
in
park
or
turning
off
the
applicable
steady
power
source.
2
Turn
on
the
PND
device
connected
to
the
wireless
camera
PND
mount.
3
On
the
wireless
camera
PND
mount,
hold
PAIR
until
Start
Pairing
appears
on
the
PND
device.
If
Start
Pairing
does
not
appear
on
the
PND
device,
make
sure
the
wireless
camera
PND
mount
is
correctly
connected
to
power.
4
Apply
power
to
the
transmitter
by
placing
the
vehicle
in
reverse
or
turning
on
the
applicable
steady
power
source.
After
approximately
five
seconds,
Pairing
OK
appears
on
the
PND
device.
5
Power
cycle
both
the
wireless
camera
PND
mount
and
the
transmitter
by
turning
them
both
off
and
then
back
on
again.
6
If
the
transmitter
and
wireless
camera
PND
device
mount
do
not
pair
successfully,
repeat
steps
1-4.
Wire
l
ess
Backup
Camera
Installation
Instructions

Specifications
Camera
sensor
Camera
resolution
---
---
----
--
----
--
-
--
·
·-----
--
--
---
------+
Camera
angle
(vertical)
Camera
angle
(horizontal)
Camera
and
transmitter
input
voltage
1/3.7-type
CMOS
640
X
480
115°
Fuse
500
mA,
fast-blow
--------··
----
---------------
--
----
---------
----------
---
---
--
---
-----------
·········
··
··--
----
--
------------------
--
----
-
--------------
-
-----------
---
----
--
----
--------------
----
--
--·
···
-
···-
-
·-
------------
--
-----
-·
··---
--------
-----.
----------------
-
Camera
and
transmitter
current
usage
150
mA
@
12
VDC
Camera
and
transmitter
waterproof
rating
IEC
60529
IPX7
Camera
temperature
range
-40°
to
185°F
(-40°
to
85°C)
---------------------------------------------------------
-------------------
----------
-------------------------------------------------
--
-
-----
-
--
-
---------
-
----------
------------
--
-----
------
-
--------
---
----
-
Transmitter
and
PND
mount
temperature
range
-4
o
to
158°F
(-20°
to
70°C)
Wireless
transmission
type
Wireless
transmission
distance
-
--
-
--
-
---
----
-
-----
--
--
·-
Radio
Frequency
Exposure
2.4
GHz
ISM
radio
band
45ft.
(13.5
m)
This
device
is
a
mobile
transmitter
and
receiver
that
uses
its
antenna
to
send
and
receive
low
levels
of
radio
frequency
(RF)
energy
for
voice
and
data
communications.
The
device
emits
RF
energy
below
the
published
limits
when
OP.erating
in
its
maximum
output
power
mode
and
when
used
with
Garmin
authorized
accessories.
To
comply
with
FCC
RF
exposure
compliance
requirements,
the
device
should
be
used
in
a
compatible
mount
or
as
mounted
per
the
installation
instructions
only.
The
device
should
not
be
used
in
other
configurations.
This
device
must
not
be
co-located
or
operated
in
conjunction
with
any
other
transmitter
or
antenna.
Instructions
d'installation
de
Ia
camera
de
recul
sans
fil
Instructions
d'installation
de
Ia
camera
de
recul
sans
fil
Consultez
le
guide
Informations
importantes
sur
le
produit
et
Ia
securite
inclus
dans
l'emballage
du
GPS
pour
prendre
connaissance
des
avertissements
et
autres
informations
sur
le
produit.
Garmin
vous
recommande
fortement
de
faire
installer
l'appareil
par
un
technicien
experimente,
disposant
des
connaissances
appropriees
en
matiere
de
circuits
electriques.
Le
raccordement
incorrect
du
cable
d'alimentation
peut
endommager
le
vehicule
ou
Ia
batterie
et
entralner
des
blessures
corporelles.
Lorsque
vous
connectez
le
cable
d'alimentation,
ne
retirez
pas
le
porte-fusible
en
ligne.
Pour
eviter
de
vous
blesser
ou
d'endommager
votre
produit
en
exposant
Ia
batterie
au
feu
ou
a
une
chaleur
extreme,
le
fusible
approprie
doit
etre
place
comme
indique
dans
les
caracteristiques
techniques
du
produit.
De
plus,
Ia
connexion
du
cable
d'alimentation
en
I'
absence
du
fusible
approprie
annulerait
Ia
garantie
du
produit.
&,
AlTENTIQN
Portez
toujours
des
lunettes
de
protection,
un
equipement
antibruit
et
un
masque
anti-poussiere
lorsque
vous
percez,
coupez
ou
poncez.
Lorsque
vous
percez
ou
coupez,
commencez
toujours
par
verifier
Ia
nature
de
Ia
face
opposee
de
!'element.
Ces
instructions
d'installation
sont
universelles
et
se
proposent
d'accompagner
!'installation
du
produit
sur
votre
vehicule,
quel
que
soit
son
modele.
Pour
toutes
questions
sur
votre
vehicule,
veuillez
contacter
votre
concessionnaire.
5

~+49
6
42?646
c----------,
(tnPf'!f';'
4J1
')
4f:.4'
..
-..JO-..~...
. L
,)
+44
2380
662
915
Garmin
Inc.
·1200
East
151
st
Street
Kansas
66062.
US/\
Garm!n
Ud.
House.
Hounsdmvn
Park
S040
9LR
UK
~
0808
238
0000
~
+44
870
850
1242
=
+45
4810
5050
U +
'~Q
0''
')b···
69069°
-....::,
~L
•)
"
::!
•
3512.14
447 460
©
2013
Ltd.
or
m
1-866-429-9296
c::t::.:J
·3:
r:g 9
0Q?7
9750
L:J'::j
+,
v'-·
~
Ow•.JI ,
....
o
=
0800-
02:3
3937
035-
539
3727
I ult I+
34
93
275
44
97
=
+43
(0)
820
220 230
U .
3r'·1·
r;c
0(\
33
no
"'t"
; j ,);:)
0,_!
'
Vv
.+4781569555
=>
I+
46
7744
s2o2o
CE

•
GAR
MIN®
&eAWliON
To
comply
with
RSS
102
RF
exposure
compliance
requirements,
a
separation
distance
of
at
least
7.9
in.
(20
em)
must
be
maintained
between
the
transmitter
of
this
device
and
all
persons.
Radio
Frequency
Radiation
Exposure
•
This
transmitter
must
not
be
co-located
or
operating
in
conjunction
with
any
other
antenna
or
transmitter.
•
This
transmitter
complies
with
FCC
RF
radiation
exposure
limits
set
forth
for
an
uncontrolled
environment.
The
transmitter
should
be
installed
and
operated
with
a
minimum
distance
of
7.9
in.
(20
em)
between
the
radiator
and
your
body.
~ATIENTION
Pour
etre
conforme
aux
exigences
d'exposition
aux
radiofrequences
definies
par
Ia
norme
RSS
102,
une
distance
d'au
mains
20
em
(7,9
pouces)
doit
etre
conservee
entre
l'emetteur
de
cet
appareil
et
toute
personne.
Exposition
aux
rayonnements
a
frequence
radioelectrique
•
Cet
emetteur
ne
doit
pas
etre
place
ou
utilise
en
conjonction
avec
d'autres
antennes
ou
emetteurs.
•
Cet
emetteur
est
conforme
a
Ia
reglementation
FCC
relative
aux
limites
d'exposition
aux
rayonnements
a
frequence
radioelectrique
applicables
en
environnement
non
controle.
Lars
de
!'installation
et
de
!'utilisation
de
cet
emetteur,
une
distance
de
separation
minimale
de
20
em
(7,9
pouces)
doit
etre
conservee
entre
le
radiateur
et
votre
corps.
August
2013
190-01600-91
...
0A
Printed
in
Taiwan

Important Safety and Product Information.............................................................2
Informations importantes relatives au produit et a
Ia
securite ...............................6
lnformazioni importanti sulla sicurezza e sui prodotto.........................................10
Wichtige Sicherheits- und Produktinformationen.................................................14
Informacion importante sabre el producto y tu seguridad ...................................17
lnformac;oes lmportantes de Seguran9a e do Produto........................................
21
Belangrijke veiligheids- en productinformatie......................................................25
Vigtige produkt- og sikkerhedsinformationer.......................................................28
Tarkeita turvallisuus- ja tuotetietoja.....................................................................32
Viktig sikkerhets- og produktinformasjon.............................................................35
Viktig sakerhets- och produktinformation ............................................................38
Wazne informacje dotyczq_ce bezpieczeristwa i produktu ...................................
41

Important
Safety
and
Product
Information
Failure
to
avoid
the
following
potentially
hazardous
situations
could
result
in
an
accident
or
collision
resulting
in
death
or
serious
injury.
Installation
and
Operation
Warnings
•
When
installing
the
device
in
a
vehicle,
place
the
device
securely
so
it
does
not
obstruct
the
driver's
view
of
the
road
<D
or
interfere
with
vehicle
operating
controls,
such
as
the
steering
wheel,
foot
pedals,
or
transmission
levers
.
Do
not
place
unsecured
on
the
vehicle
dashboard®.
Do
not
place
the
device
in
front
of
or
above
any
airbag
®.
•
The
windshield
mount
may
not
stay
attached
to
the
windshield
in
all
circumstances.
Do
not
place
the
mount
where
it
will
become
a
distraction
if
the
mount
should
become
detached
.
Keep
your
wi
ndshield
clean
to
help
ensure
that
the
mount
stays
on
the
windshield.
•
Always
use
your
best
judgement
,
and
operate
the
vehicle
in
a
safe
manner.
Do
not
become
distracted
by
the
device
while
driving,
and
always
be
fully
aware
of
all
driving
conditions.
Minimize
the
amount
of
time
spent
viewing
the
device
screen
while
driving
and
use
voice
prompts
when
possible.
•
Do
not
input
destinations,
change
settings,
or
access
any
functions
requiring
prolonged
use
of
the
device
controls
while
driving.
Pull
over
in
a
safe
and
legal
manner
before
attempting
such
operations.
2
•
When
navigating,
carefully
compare
information
displayed
on
the
device
to
all
available
navigation
sources
,
including
road
signs
,
road
closures
,
road
conditions
,
traffic
congestion,
weather
conditions
,
and
other
factors
that
may
affect
safety
while
driving.
For
safety,
always
resolve
any
discrepancies
before
continuing
navigation
,
and
defer
to
posted
road
signs
and
road
conditions.
•
The
device
is
designed
to
provide
route
suggestions.
It
is
not
a
replacement
for
driver
attentiveness
and
good
judgement.
Do
not
follow
route
suggestions
if
they
suggest
an
unsafe
or
illegal
maneuver
or
would
place
the
vehicle
in
an
unsafe
situation.
Battery
Warnings
If
these
guidelines
are
not
followed
,
the
internal
lithium-ion
battery
may
experience
a
shortened
life
span
or
may
present
a
risk
of
damage
to
the
GPS
device
,
fire,
chemical
burn,
electrolyte
leak
,
and/or
injury
.
•
Do
not
leave
the
device
exposed
to
a
heat
source
or
in
a
high-
temperature
location,
such
as
in
the
sun
in
an
unattended
vehicle.
To
prevent
damage
,
remove
the
device
from
the
vehicle
or
store
it
out
of
direct
sunlight,
such
as
in
the
glove
box.
•
Do
not
puncture
or
incinerate
the
device
or
battery.
•
When
storing
the
device
for
an
extended
time,
store
within
the
following
temperature
range:
from
32
°F
to
7rF
(from
ooc
to
25°C).
•
Do
not
operate
the
device
outside
of
the
following
temperature
range:
from
-4°F
to
131°F
(from
-20oc
to
55°C).
•
Contact
your
local
waste
disposal
department
to
dispose
of
the
device/battery
in
accordance
with
applicable
local
laws
and
regulations.
Additional
User-Replaceable
Battery
Warnings:
•
Do
not
use
a
sharp
object
to
remove
the
battery.
•
Keep
the
battery
away
from
children.
•
Do
not
disassemble,
puncture
,
or
damage
the
battery.

•
If
using
an
external
battery
charger
,
only
use
the
Garmin
accessory
approved
for
your
product.
•
Only
replace
the
battery
with
the
correct
replacement
battery.
Using
another
battery
presents
a
risk
of
fire
or
explosion.
To
purchase
a
replacement
battery,
see
your
Garmin
dealer
or
the
Garmin
Web
site.
Additional
Non-User-Replaceable
Battery
Warning:
•
Do
not
remove
or
attempt
to
remove
the
non-user-replaceable
battery.
....
........
...
...................
....
...
......
.
.............
.
.....
. .......................
..
............
...
..
···············
················
··
···
···
······
··
··
···
Magnet
Warning
Both
the
device
and
its
mount
may
contain
magnets.
Under
certain
circumstances,
magnets
may
cause
interference
with
some
internal
medical
devices,
including
pacemakers
and
insulin
pumps.
Devices
and
mounts
that
contain
magnets
should
be
kept
away
from
such
medical
devices.
·
NOTIGI
Magnet
Notice
Both
the
device
and
its
mount
may
contain
magnets.
Under
certain
circumstances,
magnets
may
cause
damage
to
some
electronic
devices,
including
hard
drives
in
laptop
computers.
Use
caution
when
devices
and
mounts
that
contain
magnets
are
near
electronic
devices.
Speed
Limit
Notice
The
speed
limit
feature
is
for
information
only
and
does
not
replace
the
driver's
responsibility
to
abide
by
all
posted
speed
limit
signs
and
to
use
safe
driving
judgment
at
all
times
.
Garmin
will
not
be
responsible
for
any
traffic
fines
or
citations
that
you
may
receive
for
fa
il
ing
to
follow
all
applicable
traffic
laws
and
signs.
Windshield
Mounting
Legal
Restrictions
Before
using
the
suctio
n
cup
mount
on
yo
ur
windsh
ield,ch
ec
kt
he
state
and
local
laws
and
ordinances
where
you
dr
i
ve.
Some
state
laws
prohibit
drivers
from
using
suction
mounts
on
the
ir
wi
n
dsh
i
elds
while
operating
motor
vehicles.
Other
state
laws
allow
the
su
ctio
n
mount
to
be
located
only
in
specific
locations
on
the
wi
ndsh
i
eld.
M
any
other
states
have
enacted
restrictions
agains
t
plac
i
ng
objec
ts
on
th
e
windshield
in
locat
i
ons
th
at
obstr
u
ct
the
drive
r'
svi
sio
n.
IT
IS
THE
USER'S
RESPONSIBILITY
TO
MOUNT
THE
GARMIN
DEVICE
IN
COMPLIANCE
WITH
ALL
APPLICABLE
LAWS
AND
ORDINANCES.
Where
r
equired
,ot
her
Garmin
das
h
boa
rd
or
fri
ct
i
on
m
ount
op
ti
ons
should
be
used.
Always
mount
yo
ur
Garm
in
device
in
a
locat
i
on
that
does
not
obstruct
the
driver's
view
of
the
road.
Garmin
does
not
assume
any
responsibility
for
any
fines
,
penal
t
ies
,
or
damages
tha
t
may
be
incurred
as
a
result
of
any
state
or
l
oca
l
law
or
ord
in
ance
relating
to
the
use
of
your
Gar
m
in
device
.
Map
Data
Information
Garmin
uses
a
combinat
i
on
of
governme
n
ta
landpr
ivate
da
ta
so
ur
ces
.
Virtually
all
data
so
u
rces
conta
in
so
mei
naccu
rate
or
in
comp
lete
da
ta.
In
some
count
ri
es
,
complete
and
accurate
map
i
nformat
i
on
is
e
ith
er
not
available
or
is
prohibitively
expens
i
ve.
Declaration
of
Conformity
Hereby
,
Garmin
,
declares
that
t
his
product
is
in
comp
l
iance
wi
th
the
essential
requirements
and
other
relevant
pr
ovis
i
ons
of Di
rect
i
ve
1999/5/EC
.
To
view
the
f
ull
Declaration
of
Co
nf
ormi
t
y,
go
to
www
.garmin.com/compliance.
CE
Mark
If
the
CE
Alert
mark
is
present
on
you
r
de
vi
ce
,this
de
vi
ce
uses
frequency
bands
that
are
not
harmonised
throughout
the
EU
,and/
or
3

the
intended
use
of
the
device
is
subject
to
restrictions
made
by
one
or
more
Member
States.
FCC
Compliance
This
device
complies
with
part
15
of
the
FCC
Rules.
Operation
is
subject
to
the
following
two
conditions:
(1)
this
device
may
not
cause
harmful
interference,
and
(2)
this
device
must
accept
any
interference
received,
including
interference
that
may
cause
undesired
operation.
This
equipment
has
been
tested
and
found
to
comply
with
the
limits
for
a
Class
B
digital
device,
pursuant
to
part
15
of
the
FCC
rules.
These
limits
are
designed
to
provide
reasonable
protection
against
harmful
interference
in
a
residential
installation.
This
equipment
generates,
uses,
and
can
radiate
radio
frequency
energy
and
may
cause
harmful
interference
to
radio
communications
if
not
installed
and
used
in
accordance
with
the
instructions.
However,
there
is
no
guarantee
that
interference
will
not
occur
in
a
particular
installation.
If
this
equipment
does
cause
harmful
interference
to
radio
or
television
reception,
which
can
be
determined
by
turning
the
equipment
off
and
on,
the
user
is
encouraged
to
try
to
correct
the
interference
by
one
of
the
following
measures:
•
Reorient
or
relocate
the
receiving
antenna.
•
Increase
the
separation
between
the
equipment
and
the
receiver.
•
Connect
the
equipment
into
an
outlet
that
is
on
a
different
circuit
from
the
GPS
unit.
•
Consult
the
dealer
or
an
experienced
radio/TV
technician
for
help.
This
product
does
not
contain
any
user-serviceable
parts.
Repairs
should
only
be
made
by
an
authorized
Garmin
service
center.
Unauthorized
repairs
or
modifications
could
result
in
permanent
damage
to
the
equipment,
and
void
your
warranty
and
your
authority
to
operate
this
device
under
Part
15
regulations.
4
Industry
Canada
Compliance
Category
I
radiocommunication
devices
comply
with
Industry
Canada
Standard
RSS-210.
Category
II
radiocommunication
devices
comply
with
Industry
Canada
Standard
RSS-310.
This
device
complies
with
Industry
Canada
license-exempt
RSS
standard(s).
Operation
is
subject
to
the
following
two
conditions:
(1)
this
device
may
not
cause
interference,
and
(2)
this
device
must
accept
any
interference,
including
interference
that
may
cause
undesired
operation
of
the
device.
Limited
Warranty
Garmin's
non-aviation
products
are
warranted
to
be
free
from
defects
in
materials
or
workmanship
for
one
year
from
the
date
of
purchase.
Within
this
period,
Garmin
will,
at
its
sole
option,
repair
or
replace
any
components
that
fail
in
normal
use.
Such
repairs
or
replacement
will
be
made
at
no
charge
to
the
customer
for
parts
or
labor,
provided
that
the
customer
shall
be
responsible
for
any
transportation
cost.
This
warranty
does
not
apply
to:
(i)
cosmetic
damage,
such
as
scratches,
nicks
and
dents;
(ii)
consumable
parts,
such
as
batteries,
unless
product
damage
has
occurred
due
to
a
defect
in
materials
or
workmanship;
(iii)
damage
caused
by
accident,
abuse,
misuse,
water,
flood,
fire,
or
other
acts
of
nature
or
external
causes;
(iv)
damage
caused
by
service
performed
by
anyone
who
is
not
an
authorized
service
provider
of
Garmin;
(v)
damage
to
a
product
that
has
been
modified
or
altered
without
the
written
permission
of
Garmin;
or
(vi)
damage
to
a
product
that
has
been
connected
to
power
and/or
data
cables
that
are
not
supplied
by
Garmin.
In
addition,
Garmin
reserves
the
right
to
refuse
warranty
claims
against
products
or
services
that
are
obtained
and/
or
used
in
contravention
of
the
laws
of
any
country.
This
product
is
intended
to
be
used
only
as
a
travel
aid
and
must
not
be
used
for
any
purpose
requiring
precise
measurement
of
direction,
distance,
location
or
topography.
Garmin
makes
no
warranty
as
to
the
accuracy
or
completeness
of
map
data
in
this
product.

THE
WARRANTIES
AND
REMEDIES
CONTAINED
HEREIN
ARE
EXCLUSIVE
AND
IN
LIEU
OF
ALL
OTHER
WARRANTIES
EXPRESS,
IMPLIED,
OR
STATUTORY,
INCLUDING
ANY
LIABILITY
ARISING
UNDER
ANY
WARRANTY
OF
MERCHANTABILITY
OR
FITNESS
FOR
A
PARTICULAR
PURPOSE,
STATUTORY
OR
OTHERWISE.
THIS
WARRANTY
GIVES
YOU
SPECIFIC
LEGAL
RIGHTS,
WHICH
MAY
VARY
FROM
STATE
TO
STATE.
IN
NO
EVENT
SHALL
GARMIN
BE
LIABLE
FOR
ANY
INCIDENTAL,
SPECIAL,
INDIRECT
OR
CONSEQUENTIAL
DAMAGES,
INCLUDING,
WITHOUT
LIMITATION,
DAMAGES
FOR
ANY
TRAFFIC
FINES
OR
CITATIONS,
WHETHER
RESULTING
FROM
THE
USE,
MISUSE
OR
INABILITY
TO
USE
THE
PRODUCT
OR
FROM
DEFECTS
IN
THE
PRODUCT.
SOME
STATES
DO
NOT
ALLOW
THE
EXCLUSION
OF
INCIDENTAL
OR
CONSEQUENTIAL
DAMAGES,
SO
THE
ABOVE
LIMITATIONS
MAY
NOT
APPLY
TO
YOU
.
Garmin
retains
the
exclusive
right
to
repair
or
replace
(with
a
new
or
newly-overhauled
replacement
product)
the
device
or
software
or
offer
a
full
refund
of
the
purchase
price
at
its
sole
discretion.
SUCH
REMEDY
SHALL
BE
YOUR
SOLE
AND
EXCLUSIVE
REMEDY
FOR
ANY
BREACH
OF
WARRANTY
.
To
obtain
warranty
service,
contact
your
local
Garmin
authorized
dealer
or
call
Garmin
Product
Support
for
shipping
instructions
and
an
RMA
tracking
number
.
Securely
pack
the
device
and
a
copy
of
the
original
sales
receipt,
which
is
required
as
the
proof
of
purchase
for
warranty
repairs.
Write
the
tracking
number
clearly
on
the
outside
of
the
package.
Send
the
device,
freight
charges
prepaid,
to
any
Garmin
warranty
service
station.
Online
Auction
Purchases:
Products
purchased
through
online
auctions
are
not
eligible
for
warranty
coverage.
Online
auction
confirmations
are
not
accepted
for
warranty
verification.
To
obtain
warranty
service,
an
original
or
copy
of
the
sales
receipt
from
the
original
retailer
is
required.
Garmin
will
not
replace
missing
components
from
any
package
purchased
through
an
online
auction.
International
Purchases:
A
separate
warranty
may
be
provided
by
international
distributors
for
devices
purchased
outside
the
United
States
depending
on
the
country.
If
applicable,
this
warranty
is
provided
by
the
local
in-country
distributor
and
this
distributor
provides
local
service
for
your
device.
Distributor
warranties
are
only
valid
in
the
area
of
intended
distribution.
Devices
purchased
in
the
United
States
or
Canada
must
be
returned
to
the
Garmin
service
center
in
the
United
Kingdom,
the
United
States,
Canada,
or
Taiwan
for
service.
Australian
Purchases:
Our
goods
come
with
guarantees
that
cannot
be
excluded
under
the
Australian
Consumer
Law.
You
are
entitled
to
a
replacement
or
refund
for
a
major
failure
and
for
compensation
for
any
other
reasonably
foreseeable
loss
or
damage.
You
are
also
entitled
to
have
the
goods
repaired
or
replaced
if
the
goods
fail
to
be
of
acceptable
quality
and
the
failure
does
not
amount
to
a
major
failure.
The
benefits
under
our
Limited
Warranty
are
in
addition
to
other
rights
and
remedies
under
applicable
law
in
relation
to
the
products.
Garmin
Australasia,
Unit
19,
167
Prospect
Highway,
Seven
Hills,
NSW,
Australia,
2147,
Phone:
1800
822
235.
Product
Environmental
Programs
Information
about
Garmin's
product
recycling
program
and
WEEE,
RoHS,
REACH,
and
other
compliance
programs
can
be
found
at
www.garmin.com/aboutGarmin/environment.
5

©
2011-2013
Garmin
Ltd.
or
its
subsidiaries
Garmin
International,
Inc.
1200
East
151
st
Street
Olathe,
Kansas
66062,
USA
April2013
Garmin
(Europe)
Ltd.
Liberty
House,
Hounsdown
Business
Park
Southampton,
Hampshire,
5040
9LR
UK
190-00720-71
OF
www.garm1n.com
CE
Garmin
Corporation
No.
68,
Zangshu
2nd
Road,
Xizhi
Dist.
New
Taipei
City,
221,
Taiwan
(R.O.C.)
Printed
in
Taiwan
Other manuals for BC 20
3
Table of contents
Other Garmin Automobile Accessories manuals
Popular Automobile Accessories manuals by other brands

ULTIMATE SPEED
ULTIMATE SPEED 279746 Assembly and Safety Advice

SSV Works
SSV Works DF-F65 manual

ULTIMATE SPEED
ULTIMATE SPEED CARBON Assembly and Safety Advice

Witter
Witter F174 Fitting instructions

WeatherTech
WeatherTech No-Drill installation instructions

TAUBENREUTHER
TAUBENREUTHER 1-336050 Installation instruction
