Garmin CATALYST User manual
GARMIN CATALYST™
Driving Performance Optimizer
Owner’s Manual

© 2022 Garmin Ltd. or its subsidiaries
All rights reserved. Under the copyright laws, this manual may not be copied, in whole or in part, without the written consent of Garmin. Garmin reserves the right to change or
improve its products and to make changes in the content of this manual without obligation to notify any person or organization of such changes or improvements. Go to
www.garmin.com for current updates and supplemental information concerning the use of this product.
Garmin® and the Garmin logo are trademarks of Garmin Ltd. or its subsidiaries, registered in the USA and other countries. Garmin Catalyst™, Garmin Connect™, and Garmin
Express™ are trademarks of Garmin Ltd. or its subsidiaries. These trademarks may not be used without the express permission of Garmin.
Apple® and Mac® are trademarks of Apple Inc, registered in the U.S. and other countries. The Bluetooth® word mark and logos are owned by the Bluetooth SIG, Inc., and any use of
such name by Garmin is under license. microSD® is a trademark of SD-3C. Wi‑Fi® is a registered trademark of Wi-Fi Alliance. Windows® is a registered trademark of Microsoft
Corporation in the United States and other countries.

Table of Contents
Getting Started.................................1
Installation....................................... 1
Installing the Magnetic Mount in Your
Vehicle..................................................... 1
Connecting the Mount to Vehicle
Power.......................................................2
Bare Wire USB Cable........................... 2
Camera Mounting Considerations.........2
Installing the Polarizing Filter on the
Camera.................................................... 3
Removing the Polarizing Filter from
the Camera.......................................... 3
Installing the Remote Cam on Your
Windshield............................................... 4
Connecting the Camera Cable............... 6
Connecting the Device to the Magnetic
Mount...................................................... 7
Installing the Screw-Down Ball Mount on
the Dashboard.........................................8
Device Overview...............................9
Using the Touchscreen........................ 10
Home Screen........................................ 10
Status Bar Icons................................ 11
Synchronizing Session Data with
Garmin Connect................................ 11
Viewing Track Information............... 11
Viewing the Weather Forecast......... 11
Starting a Drive Session................. 12
Pausing a Drive Session....................... 12
Drive Session Audio Settings............... 13
Audible Prompt and Coaching
Settings..............................................13
Race Timer............................................ 14
Adding a Track...................................... 14
Adding a Track Configuration.............. 15
Adding a Driver Profile..........................15
Editing a Driver Profile...................... 15
Changing the Units of Measure....... 15
Adding or Editing a Car Profile.............15
Selecting a Car or Driver Profile........... 15
Reviewing Drive Sessions...............16
Session Summary................................. 16
Viewing a Session Video.................. 16
Saving a Session Video.................... 17
Comparing Sessions.........................17
Deleting Sessions............................. 17
Viewing Opportunities.......................... 17
Opportunities.....................................18
Adding Opportunity Information to the
Race Coach....................................... 18
Reviewing Laps..................................... 19
Laps................................................... 19
Viewing Lap Speed Data...................19
Viewing Acceleration and
Deceleration Data............................. 19
Comparing Laps................................20
Settings......................................... 20
Connecting to a Wireless Network...... 20
Enabling Bluetooth Wireless
Technology............................................20
Pairing a Wireless Headset or Car
Stereo................................................ 20
Display Settings.................................... 20
Sound and Notification Settings.......... 20
Adjusting Sound and Notification
Volume.............................................. 21
Setting the Text Language................... 21
Date and Time Settings........................ 21
Device Settings..................................... 21
Resetting Data and Settings................ 21
Device Information......................... 21
Viewing E-label Regulatory and
Compliance Information...................... 21
Specifications....................................... 22
Charging the Device............................. 22
Device Maintenance....................... 22
Garmin Support Center.........................22
Updating Software Using a Wi‑Fi
Network................................................. 22
Updating Software with Garmin
Express™............................................... 23
Installing Garmin Express................ 24
Updating the Camera Software........... 24
Device Care........................................... 24
Cleaning the Outer Casing................24
Table of Contents i

Cleaning the Touchscreen............... 24
Cleaning the Camera Lens............... 24
Avoiding Theft................................... 25
Restarting the Device........................... 25
Removing the Device, Mount, and
Suction Cup........................................... 25
Removing the Mount from the Suction
Cup..................................................... 25
Removing the Suction Cup from the
Windshield......................................... 25
Removing the Adhesive Camera
Mount.................................................... 25
Troubleshooting.............................25
The suction cup will not stay on my
windshield............................................. 25
The mount does not hold my device in
place while I drive................................. 25
My device is not acquiring satellite
signals................................................... 25
The device does not charge in my
vehicle................................................... 26
My battery does not stay charged for
very long................................................ 26
My camera feels warm while it is
operating............................................... 26
My video recordings are blurry............ 26
Appendix........................................26
Data Management................................ 26
Memory Cards...................................26
Replacing the Memory Card............. 27
Formatting the Memory Card........... 27
Deleting Videos from the Memory
Card................................................... 27
Connecting the Device to Your
Computer........................................... 28
Transferring Data From Your
Computer........................................... 28
Disconnecting the USB Cable.......... 28
Purchasing Accessories...................... 28
Index..............................................29
ii Table of Contents

Getting Started
WARNING
See the Important Safety and Product Information guide in the product box for product warnings and other
important information.
This device is only intended for recreational use in a circuit environment. Never use this device on public
roadways. Failure to follow this warning may result in an accident causing property damage, serious personal
injury, or death. You are responsible for using this device in a safe and prudent manner.
The first time you turn on your device, it guides you through the initial setup steps with on-screen prompts. You
should complete these steps before using the device for the first time.
1Turn on the device, and follow the on-screen instructions.
2Update your device software (Updating Software Using a Wi‑Fi Network, page 22).
Installation
Installing the Magnetic Mount in Your Vehicle
WARNING
This product contains a lithium-ion battery. To prevent the possibility of personal injury or product damage
caused by battery exposure to extreme heat, store the device out of direct sunlight.
Both the device and its mount contain magnets. Under certain circumstances, magnets may cause interference
with some internal medical devices and electronic devices, including pacemakers, insulin pumps, or hard drives
in laptop computers. Keep the device away from medical devices and electronic devices.
1Clean and dry your windshield and the suction cup with a lint-free cloth.
2Press the suction cup to the windshield, and flip the lever .
3Connect the ball of the suction cup mount and the ball of the powered magnetic mount to the double-
socket arms .
4Connect the double-ball link to both double-socket arms.
5Tighten the knobs on both double-socket arms slightly.
6If necessary, rotate the powered magnetic mount so the Garmin® logo faces right-side up, and adjust the
mount for better viewing and operation.
7Tighten the knobs to secure the mount.
Getting Started 1

Connecting the Mount to Vehicle Power
1Plug the mini-USB end of the power cable into the mini-USB port on the powered mount.
2Plug the power cable into the included vehicle power adapter .
3Plug the vehicle power adapter into the power outlet in your vehicle.
4If necessary, turn on the vehicle ignition switch to provide power to the power outlet in your vehicle.
Bare Wire USB Cable
WARNING
Garmin strongly recommends having an experienced installer with the proper knowledge of electrical systems
install the device. Incorrectly wiring the power cable can result in damage to the vehicle or the battery and can
cause bodily injury.
The device includes a bare wire power adapter for use in vehicles that are not equipped with a CLA power
outlet. You can also use this cable in applications where a hardwired permanent power source is preferred. The
device must be mounted in a suitable and secure location in your vehicle, based on available power sources
and safe cable routing.
Device mini-USB connector
10 to 30 Vdc system input power (red)
System ground (black)
Camera Mounting Considerations
The first time you turn on your device, it provides information to help you mount the camera. The camera
affixes to the windshield using the included adhesive mount. The adhesive mount is difficult to remove after it
is installed. You should carefully consider the mounting location before you install the mount.
• Do not mount the camera in a location that interferes with the driver's view of the road.
• You should choose a mounting location that provides the camera a clear view of the road ahead.
• You should choose a mounting location that is as high as possible on the center of the windshield.
• You should verify the area of the windshield in front of the camera is cleared by the windshield wipers.
• You should avoid placing the camera behind a tinted area of the windshield.
2 Installation

Installing the Polarizing Filter on the Camera
The camera comes with a polarizing filter pre-installed over the lens to help reduce glare from your windshield.
If you remove the polarizing filter, you can re-install it.
NOTICE
Do not rotate the lens cover while it is installed on the camera.
1Position the filter so the line on the outer rim is facing up.
2Place the filter firmly onto the camera lens.
3Verify the line on the outer rim of the filter is facing up and the Garmin logo is right side up.
Removing the Polarizing Filter from the Camera
1Firmly grip the camera in one hand and the polarizing filter in the other hand.
2Pull the filter away from the camera.
Installation 3
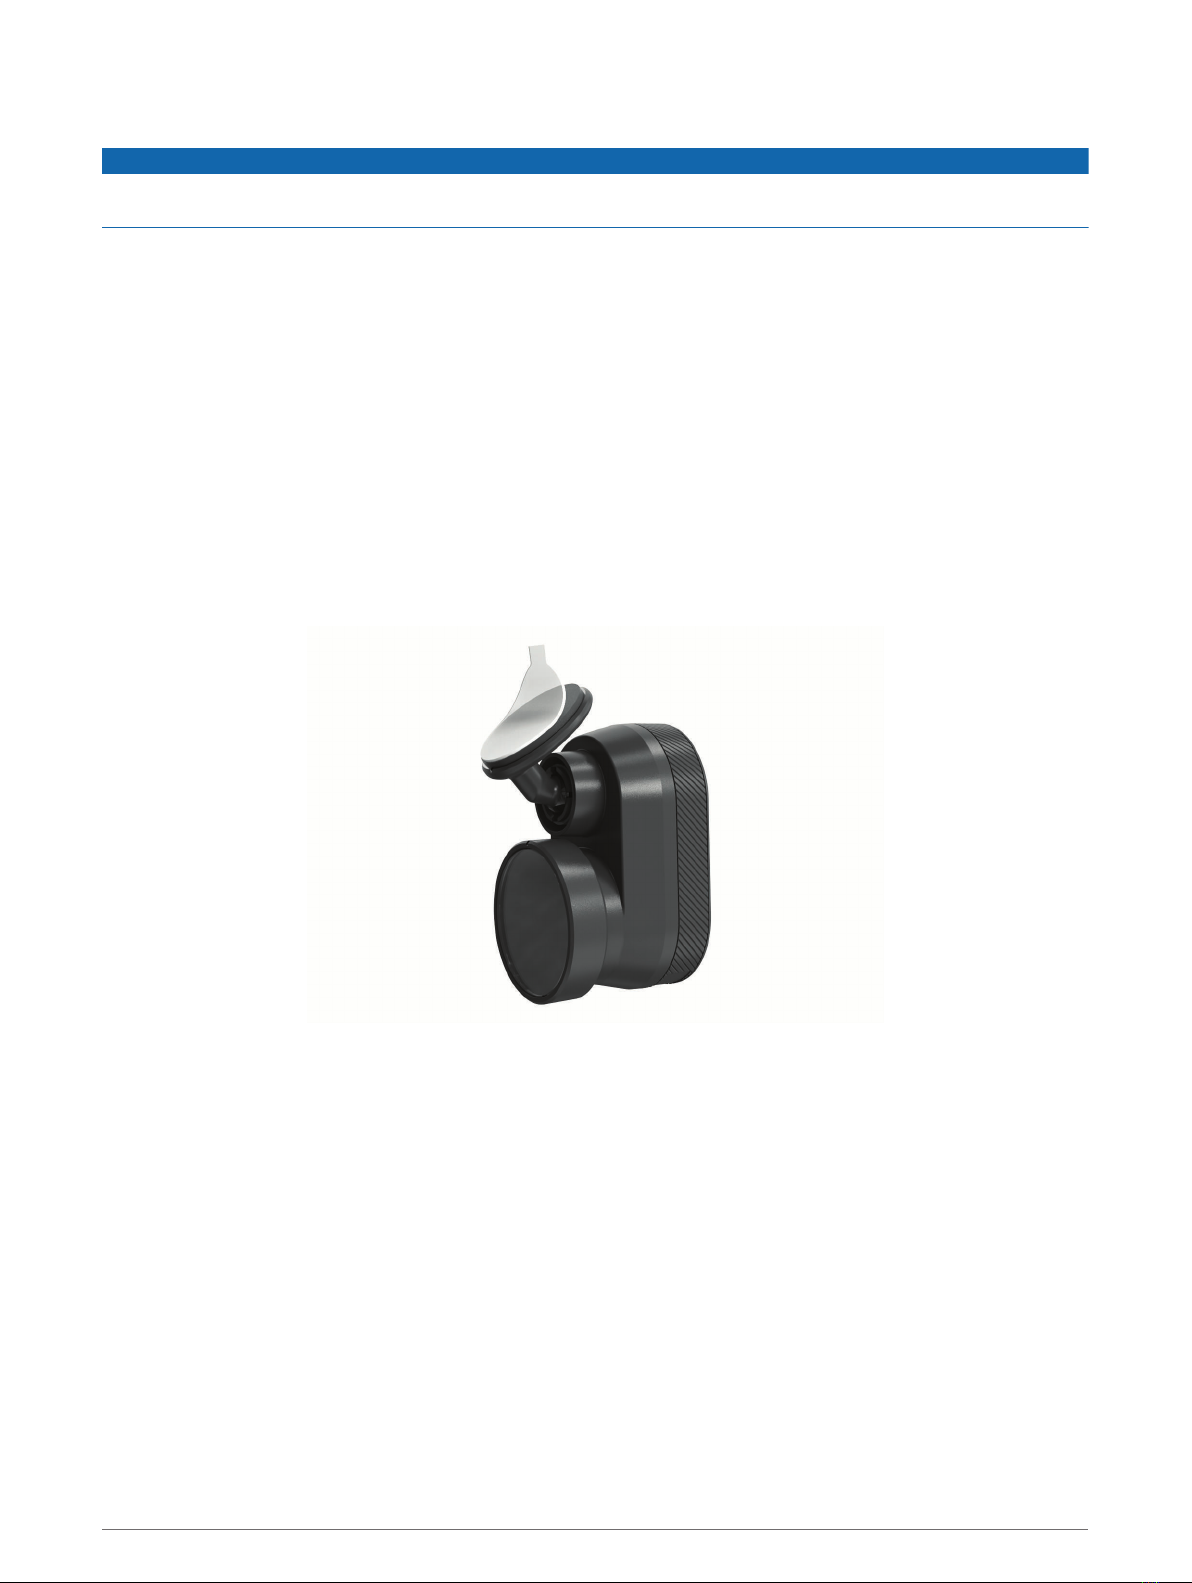
Installing the Remote Cam on Your Windshield
NOTICE
The adhesive mount is intended for a long-term installation and can be difficult to remove. You should carefully
consider the mounting location before you install the mount.
Before you can install the adhesive mount onto your windshield, you should review the windshield mounting
considerations (Camera Mounting Considerations, page 2).
For the best results, the ambient temperature should be from 21° to 38°C (from 70° to 100°F) while installing
the camera on your windshield. The adhesive may not bond correctly if the temperature is outside this range. If
you need to install the camera at lower temperatures, you must clear all snow, ice, and moisture from the
windshield and warm the windshield using the vehicle defroster before installing the camera.
The camera attaches to the windshield using the included adhesive mount.
1Clean the inside of the windshield using water or alcohol, and a lint-free cloth.
The windshield must be free of dust, wax, oils, or coatings.
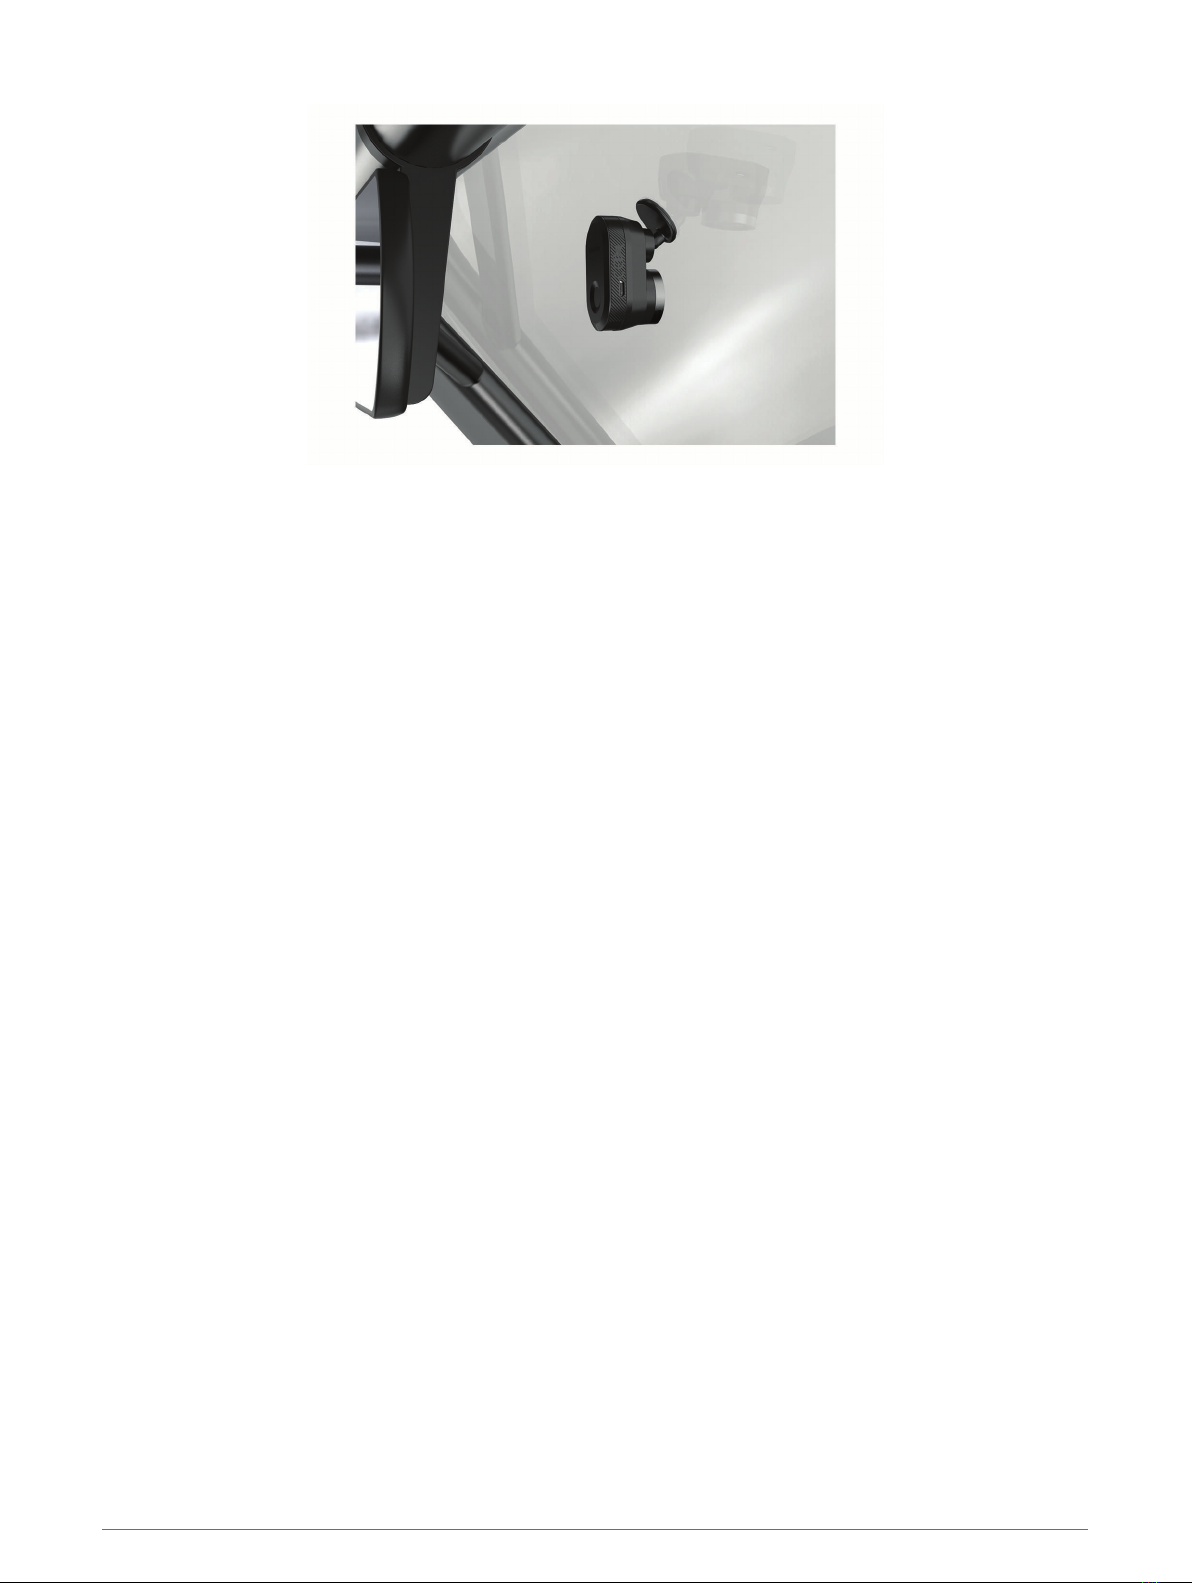
2Hold the camera in the desired mounting location on the windshield, and verify the camera has a clear,
unimpeded view.
TIP: For best results, you should mount the camera as high as possible in the center of the windshield.
3After you have selected a mounting location with a clear view, remove the protective film from the mount
adhesive.
4Position the mount over the mounting location.
TIP: The adhesive is extremely sticky. Avoid touching the adhesive to the windshield until the mount is
properly positioned.
5Press the mount firmly onto the windshield, and maintain pressure for 30 seconds.
This helps to ensure the mount adhesive has proper contact with the windshield.
4 Installation
Installation 5

Connecting the Camera Cable
1Plug the camera cable into the micro-USB port on the camera.
2Route the camera cable around your windshield so it does not obstruct your view of the track.
The cable is designed to be routed out of sight. To hide the cable, route it behind the vehicle trim along the
windshield, doorframe, or dash.
3If necessary, use the included adhesive cable clips to secure the camera cable to the frame of your vehicle.
4Connect the camera cable to the USB port on the magnetic mount.
6 Installation

Connecting the Device to the Magnetic Mount
The magnetic mount supplies power to the Garmin Catalyst™ device. Before you use your device on battery
power, you should charge it.
Place the back of the device onto the magnetic mount.
Installation 7

Installing the Screw-Down Ball Mount on the Dashboard
Before you can attach the screw-down ball mount to your dashboard, you must select a suitable location on the
dashboard and purchase the appropriate hardware for your mounting surface.
WARNING
It is your responsibility to ensure the mounting location complies with all applicable laws and ordinances, and
does not block your view of the road during the safe operation of your vehicle.
NOTICE
Avoid wires, gauges, air bags, air bag covers, HVAC, and other items when drilling pilot holes and attaching the
mount to the vehicle. Garmin is not responsible for any damages or consequences arising from the installation.
NOTICE
Garmin recommends professional installation of the screw-down ball mount.
The device includes an optional 4-hole AMPS pattern mount that you can secure to the dash board in place of
the suction cup. This can be useful if you are unable to mount the device to a windshield.
1Place the mount on the selected location.
2Using the mount as a template, mark the four screw locations .
3If necessary for your mounting surface, drill pilot holes.
NOTE: Do not drill through the mount.
4Securely fasten the mount to the surface using M4 or #8 screws suitable for your mounting surface.
8 Installation
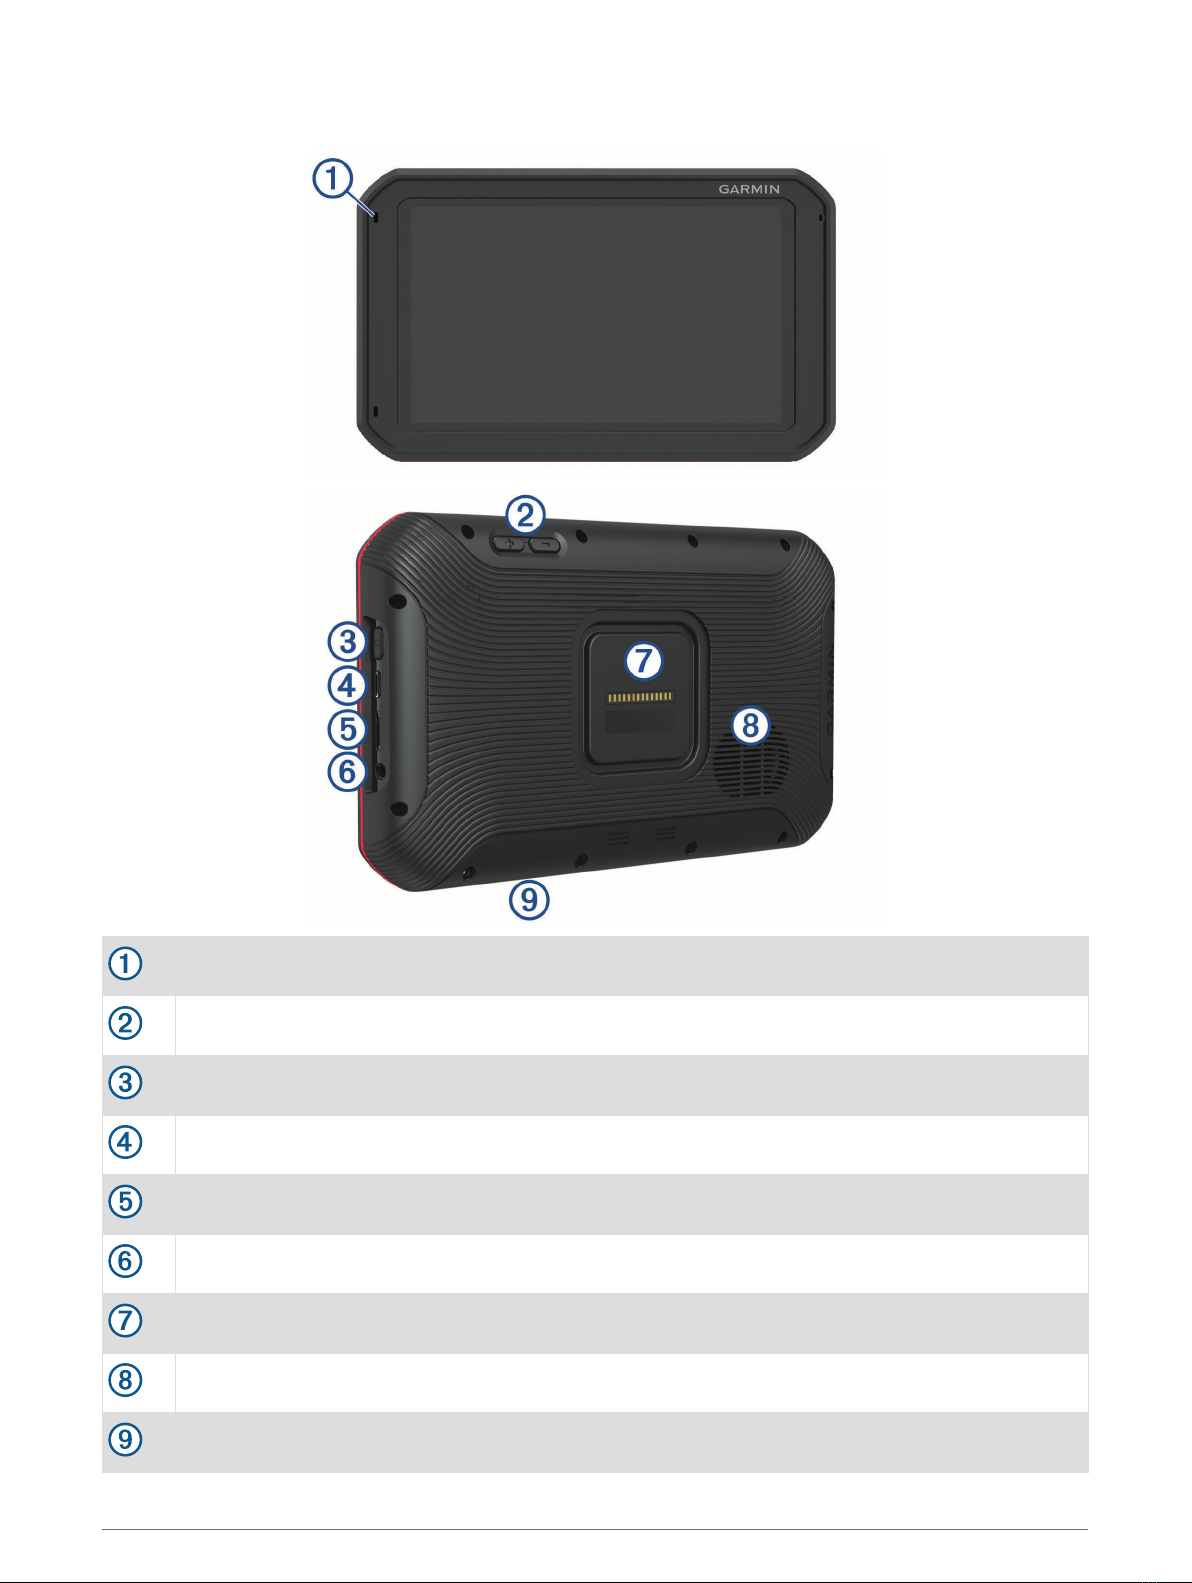
Device Overview
Microphone
Volume control
Power button
Micro USB power and data port
Auxiliary memory card slot (for additional memory)
3.5 mm audio jack
Magnetic mount interface with 14-pin connector
Speaker
Memory card slot with pre-installed microSD® card (under cover)
Device Overview 9

Using the Touchscreen
• Tap the screen to select an item.
• Drag or swipe your finger across the screen to pan or scroll.
• Pinch two fingers together to zoom out.
• Spread two fingers apart to zoom in.
Home Screen
Status bar Select an icon to view more information.
Race profile Select to configure your driver or car profile.
Settings Select to change the device settings.
DRIVE Select to start a drive session.
REVIEW Select to review the details of your recent drive sessions.
SYNC Select to synchronize data with your Garmin Connect™ account.
Weather information Displays the weather conditions at the closest track.
TRACKS Select to view information about any track on the device.
10 Device Overview
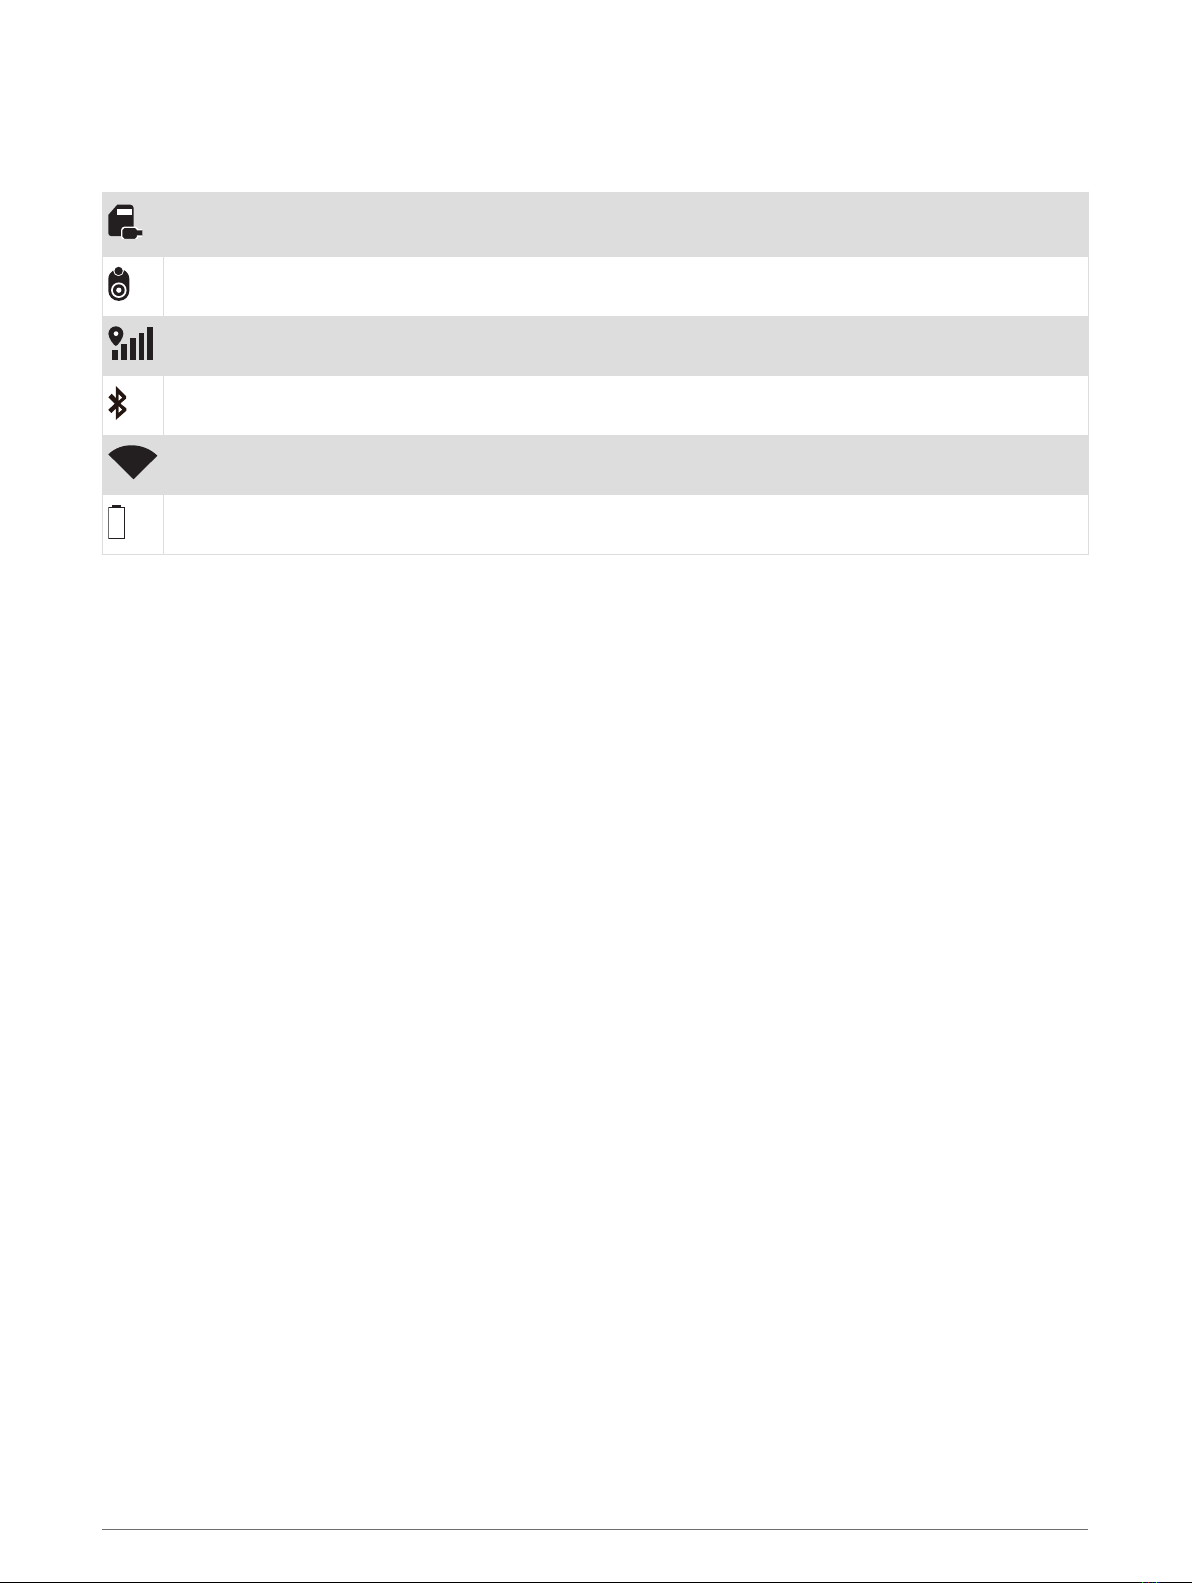
Status Bar Icons
The status bar is located at the top of the main menu. The status bar icons display information about features
on the device. You can select some icons to change settings or view additional information.
Camera storage. The timer shows the estimated recording time remaining on the memory card. Select
to clear space on the memory card.
Camera status. Select to align the camera.
GPS signal status. Select to view location accuracy and acquired satellite information.
Bluetooth® technology status. Select to view the Bluetooth settings.
Wi-fi signal strength. Select to change the wi-fi settings.
Battery charge level.
Synchronizing Session Data with Garmin Connect
Before your Garmin Catalyst device can sync session data with your Garmin Connect account, you must have a
Garmin Connect account and a Wi‑Fi® connection.
Your Garmin Catalyst device automatically syncs session data with your Garmin Connect account. This allows
you to view drive session and performance data on your computer or mobile device.
NOTE: The device does not sync video footage.
1If the device does not automatically sync session data, select SYNC.
2Select an option:
• If the device prompts you to sign in to Garmin Connect, select Sign In or Create a New Account.
• If the device prompts you to connect to Wi‑Fi, select CONNECT.
3Follow the on-screen instructions.
Multi-Factor Authentication
The multi-factor authentication feature uses a second factor to verify your identity when you log in to your
Garmin Connect account, such as your phone or e-mail.
NOTE: You must enable multi-factor authentication in your Garmin Connect account to use this feature.
Viewing Track Information
You can view information and statistics about all race tracks that are available in the device memory.
1From the home screen, select TRACKS.
2Select the search bar.
3Enter all or part of a track name.
Suggested track names appear below the search bar.
4Select a track.
Viewing the Weather Forecast
Before you can use this feature, you must connect your device to the internet and sign in to your Garmin
Connect account.
1From the home screen, select the weather bar.
The device displays the current weather conditions and an hourly forecast for your current location.
2Select a tab to view additional weather forecast data.
Device Overview 11

Starting a Drive Session
Before you can start a drive session, your device must acquire satellite signals. You can select in the status
bar to check the current signal strength and accuracy.
1From the home screen, select DRIVE.
2Select a track.
3Select an option:
• To change your driver profile, select .
• To change your vehicle profile, select .
• To configure audio features, select .
• To change your track conditions, select or .
• To configure lap timer settings, select .
• To enable or disable audio recording, select .
4Select CHECK ALIGNMENT, and follow the on-screen instructions to adjust your camera alignment.
5Select START.
6Start driving.
The timer starts automatically when you cross the starting line.
Pausing a Drive Session
You can pause a drive session that is already in progress. When you pause a drive session, the device stops
recording audio and video and stops recording some race data. This is useful if your vehicle breaks down on
the track, or if you make a long pit stop.
When you come to a stop, the device automatically prompts you to pause the drive session.
1Stop the vehicle.
2From the race timer, select an option:
• When the device prompts you, select PAUSE.
• If the device does not prompt you, select STOP > PAUSE.
The session automatically resumes when you begin driving again.
12 Starting a Drive Session

Drive Session Audio Settings
Before you start a race, you can select CHECK AUDIO to adjust audio settings for the drive session.
RECORD CAMERA AUDIO: Enables or disables camera audio recording for drive session videos.
AUDIBLE PROMPTS: Sets the level of audio coaching feedback and audible prompts you receive during a drive
session (Audible Prompt and Coaching Settings, page 13).
AUDIO OUTPUT: Sets the audio output device.
VOLUME: Sets the volume level for audio prompts. You can move the slider left or right to adjust the volume.
TEST AUDIO: Plays a sample audio clip to test the function and volume of your audio configuration.
Audible Prompt and Coaching Settings
WARNING
The Advanced Race Coach feature is intended for use by experienced high-speed drivers only. Use of the
feature by an inexperienced driver could result in an accident involving property damage, personal injury, or
death. Any use of or reliance on suggestions provided by the advanced race coach is at your own risk.
You can set the amount of audible coaching feedback you receive during a drive session. Before you start a
drive session, select CHECK AUDIO > AUDIBLE PROMPTS.
ADVANCED RACE COACH: Sets the device to automatically give advanced coaching feedback as you drive,
such as braking and turning advice.
RACE COACH: Sets the device to give you basic coaching feedback based on your performance. You can add
additional prompts to your race coach feedback after you review your drive session (Adding Opportunity
Information to the Race Coach, page 18).
LAP TIMES ONLY: Sets the device to provide audio prompts that contain only lap time information.
OFF: Disables audio prompts.
Starting a Drive Session 13

Race Timer
As you drive, the device keeps track of your progress and gives you audible coaching tips. The race timer keeps
track of your lap number and shows your best lap times.
LAST LAP Displays the last lap time during the current session.
BEST LAP Displays the best lap time for the current session.
DELTA
Displays the time difference between the current lap and the best lap during the current
session.
END Select to end the current session.
LAP Displays the current lap number.
TOTAL TIME Displays the total lap time.
Adding a Track
You can add a track that is not already loaded on your device. The device uses your GPS location and your
vehicle's movements to create a map of the track.
1Select DRIVE > ADD A TRACK.
2Follow the on-screen instructions to enter track details and information about your drive session.
3Select START.
4Start driving.
Once you exit the pit area and enter the track, you must drive in a straight line for at least 0.5 seconds at a
minimum of 55 mph (90 km/h), and complete one full lap.
5Select END after you have completed the drive session.
6Select or to position the starting line on the map.
7Select SAVE.
14 Starting a Drive Session

Adding a Track Configuration
You can add additional configurations for tracks that are stored on your device.
1Select DRIVE.
2Select a track.
3Select ADD A TRACK CONFIGURATION.
4Follow the on-screen instructions to enter track details and information about your drive session.
5Select START.
6Start driving.
7Select END after you have completed the drive session.
8Select or to position the starting line on the map.
9Select SAVE.
Adding a Driver Profile
1From the home screen, select the race profile icon (Home Screen, page 10).
2Select DRIVER.
3Select ADD A PROFILE.
4Follow the on-screen instructions.
Editing a Driver Profile
You can edit a driver profile to adjust preferences and change units of measure.
1From the home screen, select the race profile icon (Home Screen, page 10).
2Select DRIVER.
3Select .
4Select a field to edit its contents.
Changing the Units of Measure
You can customize the units of measure displayed on the device.
1From the home screen, select the race profile icon (Home Screen, page 10).
2Select DRIVER > > UNITS.
3Select a unit of measure.
Adding or Editing a Car Profile
1From the home screen, select the race profile icon (Home Screen, page 10).
2Select CAR.
3Select an option:
• To add a car profile, select ADD A CAR.
• To edit a car profile, select .
4Select a field to enter information about the make, model, and year of your vehicle.
5Select DONE.
Selecting a Car or Driver Profile
1From the home screen, select the race profile icon (Home Screen, page 10).
2Select an option:
• To change the driver profile, select DRIVER.
• To change the car profile, select CAR.
3Select a car or driver.
Starting a Drive Session 15
Reviewing Drive Sessions
WARNING
Do not review any drive sessions while driving. Failure to pay attention to your surroundings and road
conditions can result in serious personal injury or death.
The device records detailed information about each drive session. You can view the results of each drive
session individually or compare data with another session. The device prompts you to review each drive
session automatically at the end of each session.
1From the home screen, select REVIEW.
2Select a track.
3Follow the on-screen prompts to select a drive session.
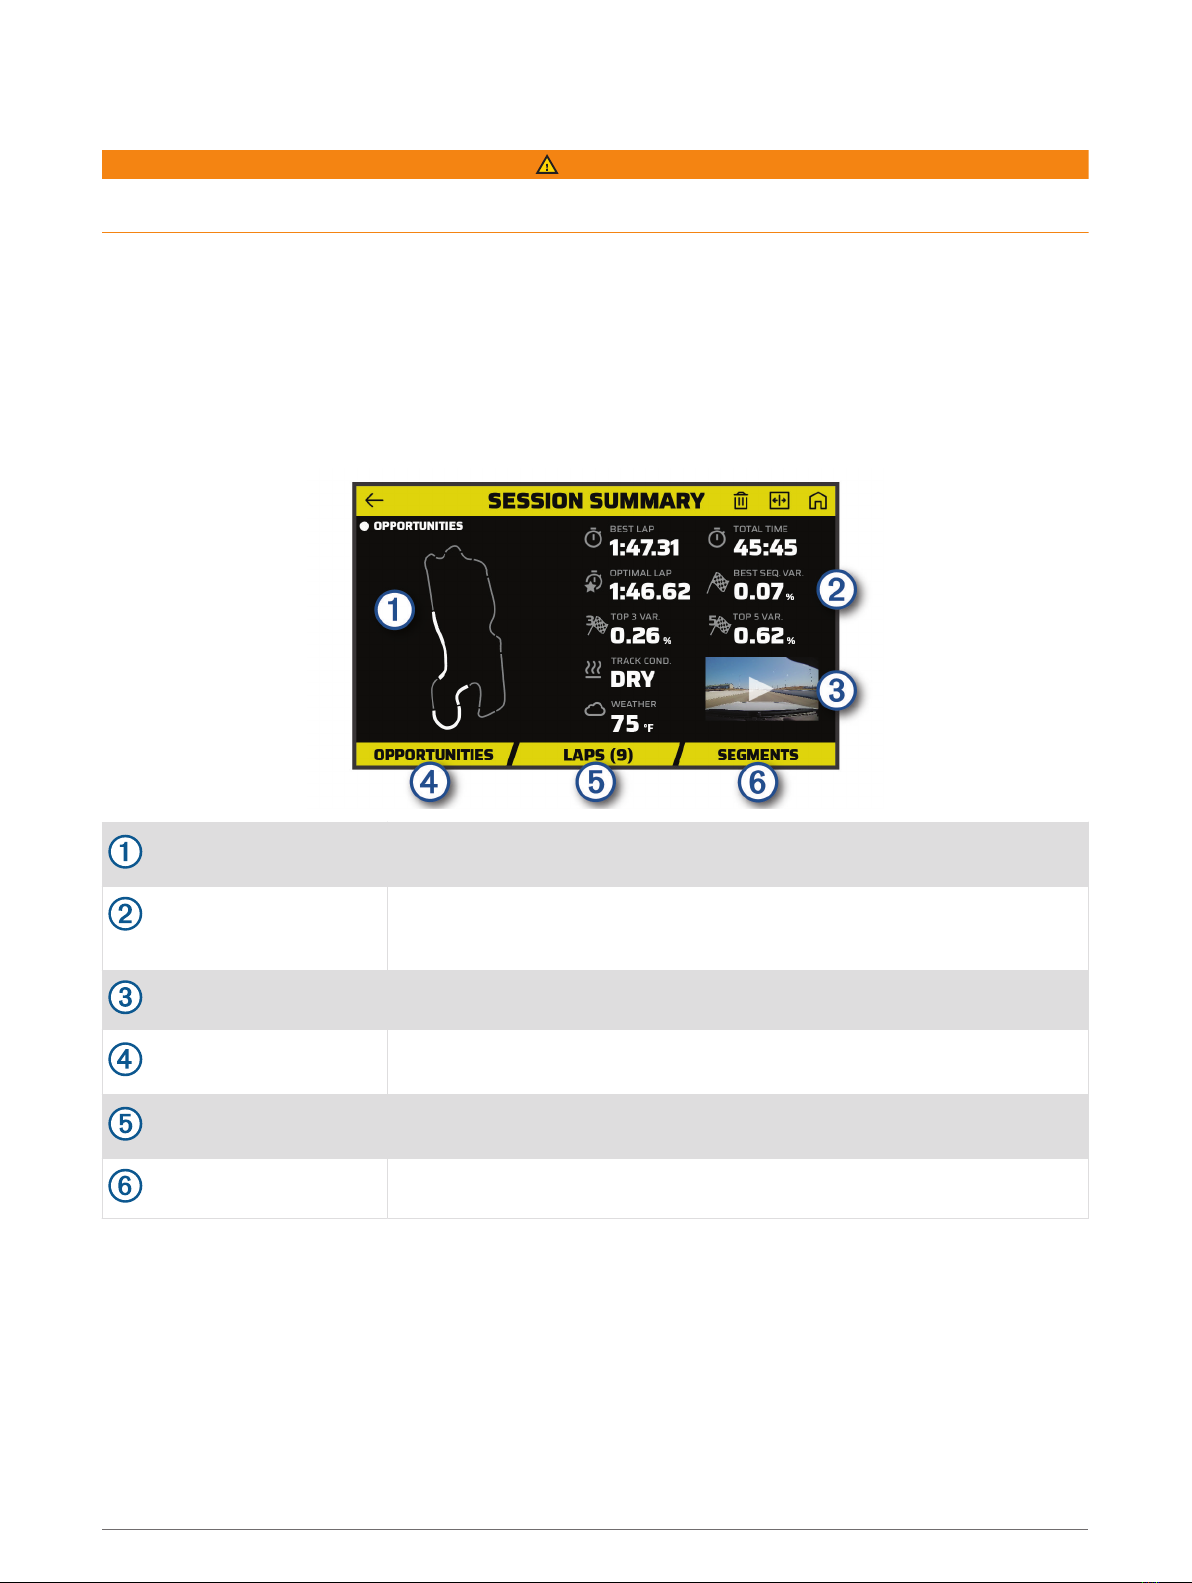
Session Summary
Track map
Displays a map of the track. You can select a highlighted segment to view
opportunities for that segment.
Session summary statis
tics
Displays a summary of track conditions and performance metrics for the
selected session.
Session video thumbnail Select to view a video of the entire session.
OPPORTUNITIES
Select to view all opportunities for improvement for the selected session
(Opportunities, page 18).
LAPS
Select to view detailed information about each lap (Reviewing Laps,
page 19).
SEGMENTS Select to view detailed information about each track segment.
Viewing a Session Video
While you drive, the device records video of your drive session. You can view the recorded footage for each
session. This can be useful to help you visualize your performance data.
From the session summary screen, select the video thumbnail (Session Summary, page 16).
16 Reviewing Drive Sessions
Other manuals for CATALYST
1
Table of contents
Other Garmin Automobile Accessories manuals


