Gasmate GSB300 User manual

3050-07/10
Important: Retain these instructions for future use.
Deluxe Spit Roaster
GSB300
• Stainless steel body
• Robust design with wheels for
easy moving
• Includes 240V rotisserie motor
rated at 70kg, one piece stainless
steel shaft, two prongs, neck brace,
front leg brace, rear leg brace and
rotisserie baskets
Gasmate®is a registered trademark of: Sitro Group Australia Pty Ltd www.gasmate.com.au
Aber – Hamilton, N.Z. www.gasmate.co.nz
FEATURES
• Electronic ignition for easy lighting
• Complete with hose & regulator
• Use with LPG
• For outdoor use only
• AGA certified

2
CONTENTS
Section Page
General Information 2-4
Operating & Lighting Procedure 5-8
Care & Maintenance 9-10
Parts List & Hardware List 11-12
Assembly Instructions 13-19
Safe Appliance Locations 20
GENERAL INFORMATION
Gas Installation Codes
• Spit roaster must be used in accordance with
New Zealand Standard 5261 “Gas Installations”.
• Spit roaster for use with bottled gas are
labelled ‘LPG’.
• Spit roaster for use with natural gas are
labelled ‘natural gas’ and must be installed
by an authorised person. Check the gas type
sticker attached to the spit roaster.
Clearances
Minimum Clearances from combustible materials
must be:
Rear - 600mm Sides - 600mm Above - 600mm
Hose & Regulator Safety
The regulator and hose assembly supplied with the
spit roaster are suitable for LPG only. A gas
regulator adjusted to have an outlet pressure of
2.75kPA is supplied for connection to the LPG
cylinder. The gas regulator and hose assembly
supplied with the spit roaster must be used.
Replacement gas regulators and hose assemblies
must be those specified by the spit roaster
manufacturer.
When connecting the hose and regulator assembly
to the gas cylinder, take care to avoid unnecessary
twisting of the flexible hose.
After the assembly has been secured, turn on the
gas and check for leaks by brushing a soap and
water solution over all connections.
If you are unable to correct the leak by tightening
the connections, turn off the gas and contact the
supplier immediately.
Always ensure the spit roaster is kept away from
flammable materials and the gas cylinder clear of
any heat source.
When changing over from an empty gas cylinder
to a full one make sure this procedure is carried
out in a flame free atmosphere.
Specifications
Spit roaster specifications can be found on the
data label attached to the spit roaster body.
Hose connection thread at gas inlet is 1/4” BSPT.

3
Gas Cylinder Use & Safety
This is a low pressure spit roaster and must only
be used with the hose and regulator supplied.
Your spit roaster is designed for use with 9Kg
LPG cylinders.
The gas cylinder should be filled by a reputable
gas supplier and visually inspected and re-
qualified at each filling.
Always keep cylinder in an upright position.
Always close the cylinder valve when the spit
roaster is not in use.
Do not subject gas cylinder to excessive heat.
Never Store your Gas Cylinder Indoors.
If you store your spit roaster indoors, ALWAYS
disconnect the gas cylinder first and store the
cylinder safely outside.
Cylinders must be stored outdoors in a well
ventilated area out of reach of children, and must
not be stored in a building, garage or any other
enclosed area.
Location of your Spit roaster
DO NOT use your spit roaster in garages, porches,
sheds, breezeways, or other enclosed areas. Your
spit roaster is to be used OUTDOORS. The spit
roaster is not intended to be installed in or on
recreational vehicles and/or boats and should not
be placed under any surface that will burn. Do not
obstruct the flow of combustion and ventilation air
around the spit roaster housing.
Tools You Will Need
Standard Phillips-head screw driver (or cordless drill
and bits), Adjustable Spanner and protective mat.
Check Spit roaster for any Damage
Inspect spit roaster parts as you proceed with
assembly. Contact your supplier for assistance
regarding replacement of any damaged or missing
parts. Do not assemble or operate a spit roaster
that appears damaged. Spit roasters for use
with gas cylinders are labelled ‘LPG’.
Check labelling at the gas connection on your spit
roaster.
Protect Children
Keep children away from spit roaster during use
and until spit roaster has cooled after you have
finished.
Do not allow children to operate spit roaster.
Always ensure that no sporting or physical
activities are carried out in close proximity to the
spit roaster during use and while still hot.
FOR YOUR SAFETY
• Do not store or use petrol or other
flammable liquids in the vicinity of this or
any other appliance.
• Do not store empty or full spare gas cylinders
under or near this or any other appliance.
• Keep the gas hose away from hot surfaces
and protect from dripping grease. Avoid
unnecessary twisting of hose. Visually
inspect the hose prior to each use for cracks,
excessive wear or other damage. Replace
the hose if necessary.
• Never test for gas leaks with a lit match or
open flame. Never light spit roaster with hood
closed or before checking to ensure the burner
tubes are fully seated over gas valve orifices.
• Never lean over cooking surface when lighting.
• Never alter or modify the regulator or gas
supply assembly.
• This spit roaster must not be used indoors.
• Ensure the spit roaster is set up on a level
and stable surface.
• Do not move the spit roaster while in use or
when hot. Remove the fat cup before moving.

4
WARNINGS
• Failure to comply with these instructions could
result in a fire or explosion which could cause
serious bodily injury, death or property
damage.
• Accessible parts may be very hot.
• Keep young children away.
• Any modifications to this spit roaster may be
dangerous.
• Do not move this spit roaster during use.
• Turn off gas supply at the cylinder after use.
• Read instructions before using the spit
roaster.
• Parts sealed by the manufacturer or their
agent must not be manipulated by the user.
• This spit roaster is only to be used and stored
outdoors.
• Never operate this spit roaster without a
regulator.
• Do not test for gas leaks with an open flame.
• If this information is not followed exactly, a
fire causing death or serious injury may occur.
• Do not store a spare gas cylinder under or
near this spit roaster. Never fill the cylinder
beyond 85% full. This spit roaster is only to
be used and stored outdoors.
• If you smell gas
1. Shut off gas to the spit roaster at its
source, if possible.
2. Extinguish any open flame.
3. Open hood.
4. If odour continues, immediately call
your gas supplier or fire department.
• Do not connect your spit roaster to a gas
cylinder exceeding the 9kg capacity.
• Never connect an unregulated gas cylinder to
your spit roaster.
• Read carefully before assembling and
operating your spit roaster.
GSB300 Length Width Height
Hooded 2050mm 655mm 1060mm
Nominal Hourly Gas Consumption - GSB300 series Spit Roaster
Overall Spit roaster Dimensions
Gas Type Number of
Burners Injector Size
Gas
consumption
per burner
Total Gas
Consumption
Gas
Pressure
LPG 21.20mm 18.4 MJ/h 36.8 MJ/h 2.75 kPa

5
GENERAL ASSEMBLY
Assembly will require 2 people due to the Spit
Roaster size.
Connecting & Disconnecting
to Gas Source
Familiarise yourself with the general information and
safety guidelines located at the front of this manual.
Check
1. Gas cylinder is filled. A sloshing sound will be
heard when shaken.
2. The burner control is in the ‘OFF’ position
Connecting
1. Ensure cylinder valve is in its full off position.
2. Check for any damage to either the cylinder
connection or the hose. NEVER attempt to use
damaged equipment.
3. When connecting the hose to the cylinder tighten
the nut to a positive stop by hand or spanner.
4. Open cylinder valve fully. If a leak can be heard
at either end of the hose turn cylinder off and
tighten joint. Wait 5 minutes before re-testing
and use a soapy water solution to check the
joint. If bubbles appear the connection will need
to be re-tightened.
Disconnecting
1. Ensure the burner control is in the
‘OFF’ position.
2. Ensure gas cylinder is in the full off position.
3. Detach the hose from cylinder.
LIGHTING PROCEDURE
Burner Operation
& Ignition System Check
1. With cylinder valve in OFF position press the
electronic igniter button. Check for sparking to
the burners.
2. Lift hood, remove the 4 stainless steel trays,
leave hood open until both burners are fully lit.
3. If spark is not evident at the burner ignition
point, check that the ignition lead is firmly
attached to the control and sparker tip.
4. With sparking established, turn cylinder valve
ON. Push and turn a control knob on either side
of the ignitor to HIGH and press the ignitor
button.
5. If burner fails to light after several attempts
turn off the gas supply at cylinder and inspect
for any obstructions to the gas flow.
6. Both burners will need to be lit following steps
1-5.
If re–ignition is necessary while the gas spit
roaster is still hot, you must wait for a minimum of
5 minutes before commencing to re–ignite
(this allows accumulated gas fumes to clear).
After Use
Turn the gas cylinder valve off and wait for the
flame to go out. Then turn the appliance control
valve off.
IMPORTANT
• Remove all packing and transit protection
before assembly.
•CAUTION: Ensure no packing material is
left in spit roaster before lighting. Remove
all plastic protection, usually blue film before
assembly and use.
• Before connecting and disconnecting spit
roaster to gas source, make sure burner
controls are in ‘OFF’ position.
•CAUTION: When the spit roaster is not in use,
the gas must be turned off at the cylinder.
• Check that the seals between the appliance
and the gas cylinder are in place and in good
condition before connecting the gas cylinder.
• Do not use this appliance if it has damaged or
worn seals.
• The appliance control knob must be in the ‘OFF’
position before opening the cylinder valve.
• If for some reason, ignitor fails to produce a
spark at the electrode, spit roaster can be lit
by a long spit roaster match. With hood open
use a lighted match from top. Push and turn a
control knob to HIGH. Light the other burner
in the same way.
• Check performance of burner prior to installing
spit roaster rack.
• Do not smoke when attempting to
ignite spit roaster.
• Never use volcanic rock, heat beads
or other material.
• Always use protective gloves when handling
hot components.

6
Problem Possible Reason Solution
Burner will
not ignite
Valve on cylinder is closed Open valve on cylinder
Control knob is closed Turn knob to high when lighting
Electronic igniter is faulty Use a long spit roaster match.
Food is not cooking
or is taking too long
Burner has gone out Check that the gas bottle is not
empty and re-ignite the burner
Control knob is set to low Turn control knob to medium or high.
Note: Check food regulary and turn
control knob down to stop food
burning.
NOTE: If the appliance cannot be adjusted to perform correctly it should not be used until serviced
or repaired.
BURNER OPERATION & IGNITION SYSTEM CHECK
OPERATING PROCEDURE
Burn-off
Before cooking for the first time, operate the spit
roaster for about 15 minutes with the hood closed
and the gas turned on ‘HIGH’. This will “heat
clean” the internal parts and dissipate odour from
the finish.
Preheating
It is necessary to preheat the spit roaster for at
least 5 minutes before cooking certain foods,
depending on the type of food and the cooking
temperature. Food that requires a low cooking
temperature, needs only a period of 2-3 minutes
preheating.
FOR YOUR SAFETY
• The hood must be in the open position
for lighting.
• Do not smoke at any time when attempting
to ignite the spit roaster burners.
• Do not leave the spit roaster unattended
when alight.

7
IMPORTANT SAFEGUARDS
• The power supply must be supplied through
a residual current device (RCD) having a
tripping current not exceeding 30mA.
• Only connect this rotisserie to a socket-
outlet having an earthing contact.
• DO NOT use the rotisserie during inclement
weather, rain or damp conditions.
• Unplug and remove rotisserie when not
in use.
• Never store rotisserie on spit roaster,
always remove.
• DO NOT operate the rotisserie with a
damaged cord or plug, or if rotisserie
malfunctions, or has been damaged
in any manner.
• To protect against electrical shock, DO NOT
immerse cord, plug or motor in water or
expose to rain.
• Avoid contact of the electrical cord with hot
spit roaster surfaces and grease.
• Never operate this rotisserie when you are
tired, drinking alcohol, taking drugs or if
taking medication that causes drowsiness.
• This rotisserie is not intended for use by
persons (including children) with reduced
physical, sensory or mental capabilities,
or lack of experience and knowledge,
unless they have been given supervision or
instruction concerning use of the rotisserie
by a person responsible for their safety.
• Children must be supervised to ensure that
they do not play with the rotisserie.
• Pets and animals must be kept away
from the work area so as to avoid
tripping dangers.
When using electrical appliances, basic
safety precautions should always be
followed, including the following:
• Never modify this rotisserie as damage
and injury may occur, and this will void
your warranty.
• Read and understand all instructions.
• DO NOT touch hot surfaces. Use handles or knobs.
• The use of accessory attachments not
recommended by the appliance manufacturer
may cause injuries.
• Extreme caution must be used when moving an
appliance containing hot oil or other hot liquids.
• DO NOT use this appliance for anything other
than intended use.
• Only connect this rotisserie to 240V AC power.
• DO NOT place on or near a hot gas or electric
burner, or in a heated spit roaster.
• Check for damaged parts before operating
this rotisserie.
• Do not touch any hot components.
• Ensure work area is clear of clutter and possible
trip dangers.
• Never wear loose clothing which could get
caught in moving parts.
• Long hair should be contained so it can not get
caught in moving parts.
• Never yank or pull the power cord to disconnect
it from the mains supply socket-outlet.
• Never carry the rotisserie by its power cord.
• Keep power cord away from heat, oil, solvents
and sharp edges.
• Check power cord for signs of damage before
each use. If damaged do not use.
• Power cord must only be replaced by an
authorised service facility.
• To clean rotisserie only use a damp soft cloth,
never use liquid or solvents of any type.
• Ensure rotisserie is disconnected when not in
use and before servicing, making adjustments or
when changing and accessories.
• Ensure rotisserie is turned off before connecting
to the mains power supply.
• Only use an extension cord intended and marked
“outdoor” use.
• Only use a ‘3’ core (earth pin) extension cord
with this rotisserie.
• DO NOT clean the spit motor while it is on or
plugged into the mains power supply.
• Always switch ‘OFF’ and un-plug before cleaning.
• DO NOT spray water or any liquid into the
spit motor.
• Repairs should only be carried out by qualified
personse using original spare parts. Failure to do so
may result in considerable danger to the operator.
Deluxe Spit Roaster GSB300
Deluxe Spit Motor GRT7
Voltage 240V AC~50 Hz
Input Wattage 25W
Maximum Load 70kg
ELECTRIC MOTOR AND
SUPPLY CORD

8
• Ensure the ‘outdoor’ extension cord is not placed
accross walkways so that it is not a trip hazard.
• Do not use in damp or wet conditions.
• Always ensure that the power cord is fully extended
and NOT in contact with any part of the spit.
• Never use the motor if any part of it is damaged.
• Do not attempt to modify the motor, power cord
or power plug in any way.
• This product is fitted with a sealed electrical
connection plug that is compatible to the mains
supply for New Zealand and meets the
requirements of international standards. It must
be connected to a supply voltage that is equal to
that stated on the rating label. If the mains
connection plug or power cord becomes
damaged it must be replaced with a complete
assembly that is identical to the original, and this
must be replaced by an authorised service
centre. Always follow the New Zealand
requirements for connection to the mains supply.
If in doubt always consult a qualified electrician.
CARE & MAINTENANCE
Care & Maintenance
As with all appliances, proper care and
maintenance will keep them in top operating
condition and prolong their life. Your new gas
spit roaster is no exception. By following these
cleaning procedures on a timely basis, your spit
roaster will be kept clean and working properly
with minimum effort.
Cleaning
“Burning off” the spit roaster after every use
(for approx 15 minutes) will keep excessive food
residue to a minimum.
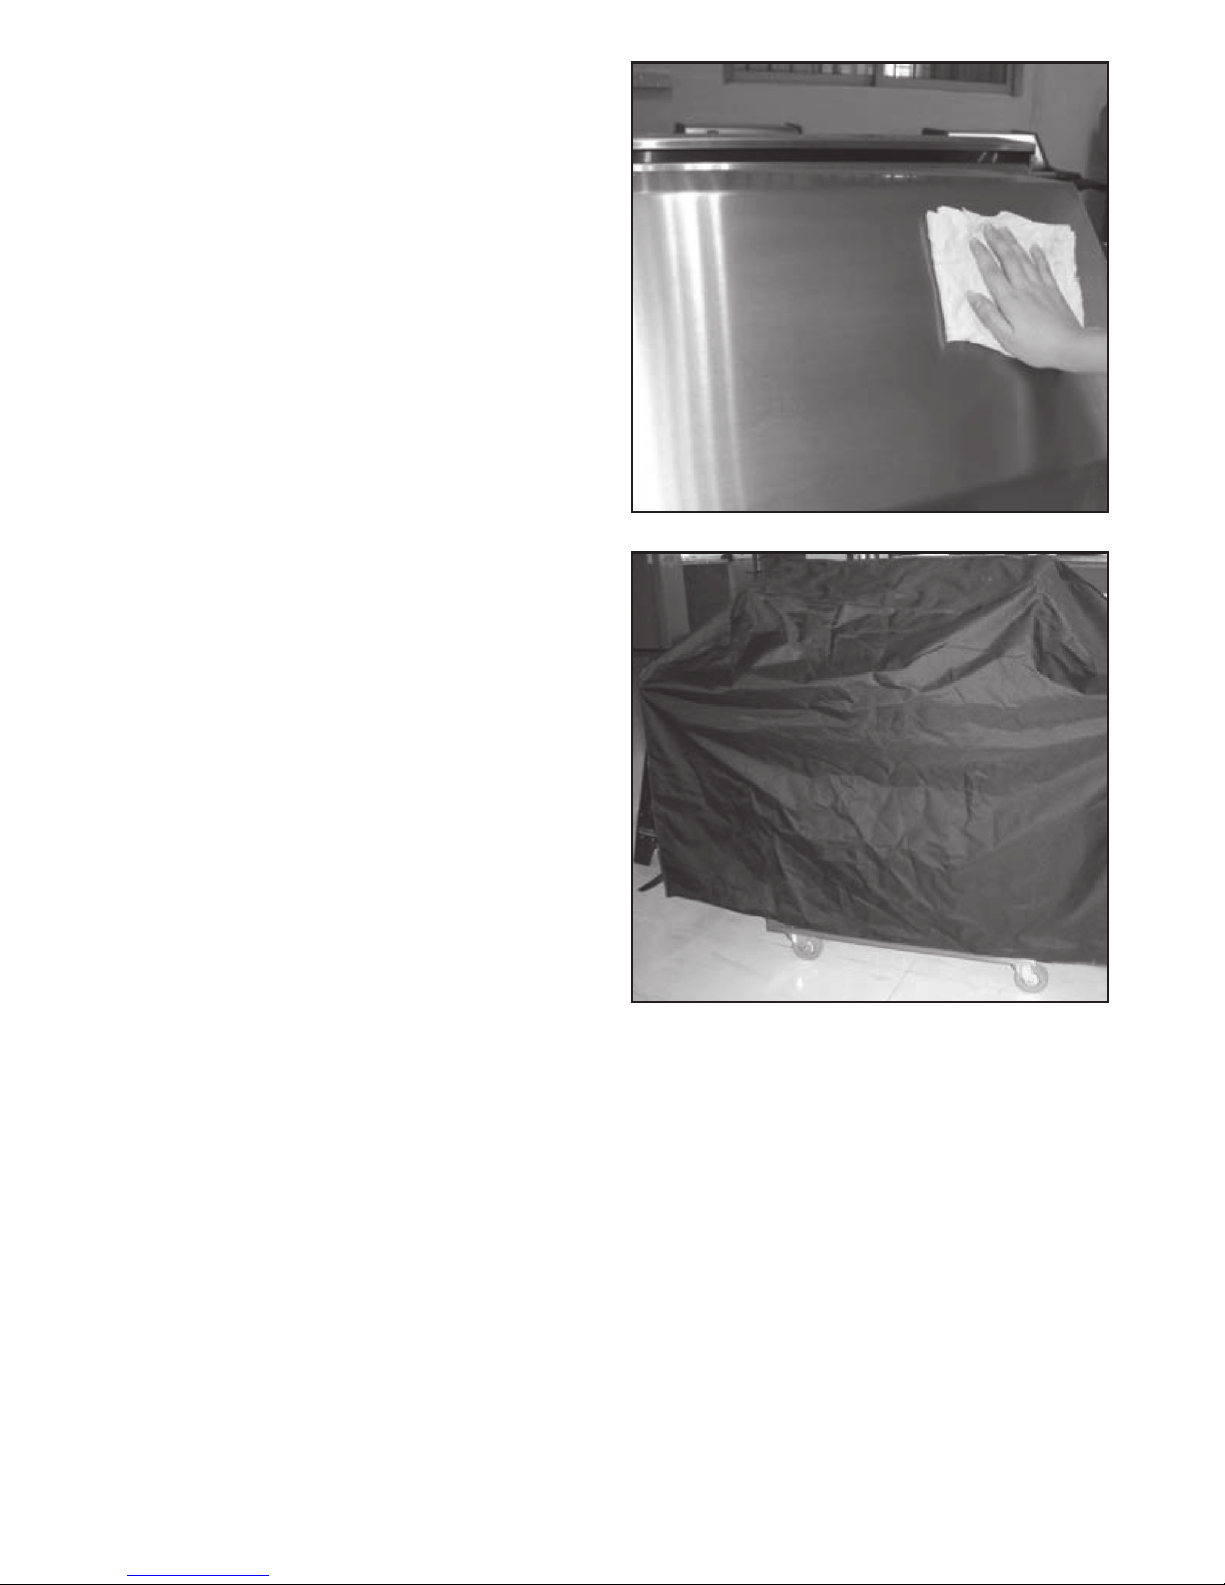
Outside Surface
Use mild detergent or baking soda and hot water
solution. Non-abrasive scouring powder can be
used on stubborn stains, then rinse with water.
If the inside surface of the spit roaster hood has
the appearance of pealing paint, baked on grease
build-up has turned to carbon and is flaking off.
Clean thoroughly with strong hot soapy water
solution. Rinse with water and allow to completely
dry. NEVER USE OVEN CLEANER.
Interior of spit roaster bottom
Remove residue using brush, scraper and/
or cleaning pad then wash with a soapy water
solution. Rinse with water and alow to dry.
Cleaning the burner assembly.
Turn the gas ‘OFF’ at the control knob and
disconnect the cylinder.
Clean the burner with a soft brush or blow clean
with compressed air and wipe with a cloth.
Clean any clogged ports with a pipe cleaner or stiff
wire (such as an opened paper clip).
Flash-Back
Spiders and small insects occasionally spin
webs or make nests in the burner tubes during
warehousing and transit.
These webs can lead to a gas flow obstruction
which could result in a fire in and around the
burner tubes. Cleaning with a soft brush
before use and at least every six months is
recommended.
This type of fire is known as ‘FLASH-BACK’ and
can cause serious damage to your spit roaster and
create an unsafe operating condition for the user.
Although an obstructed burner tube is not the only
cause of ‘FLASH-BACK’ it is the most common
cause and frequent inspection and cleaning of the
burner tubes is necessary.
If fire occurs in and around the burner, immediately
turn off gas at its source and turn the burner control
to ‘OFF’, wait until the spit roaster has cooled, then
clean the burner tubes and burner ports.
Cleaning the Fat Tray
To avoid fat or grease dripping from the spit
roaster remove and empty the fat tray after each
use. A small amount of water can be placed in the
fat cup before use to help with fat removal. Wait
until the fat tray is cool to touch before disposing
of contents.
The fat tray should be washed periodically
in a mild detergent and warm water solution.
Service
If the appliance cannot be adjusted to perform
correctly it should not be used until serviced or
repaired. Contact 0800 161 161 for service
information.
IMPORTANT
• Beware of spiders and wasps. Burner tube
should be inspected and cleaned periodically.
• To avoid any flare-ups, it is recommended
that the fat tray be checked and emptied
regularly. Contents of the fat tray may be
very hot during cooking. If emptied during
extended cooking extreme caution should
be taken and direct contact by hand should
be avoided at all times. Allow to cool
completely before disposing of the contents.
• This appliance must only be serviced by an
authorised person.

9
How to maintain your deluxe spit roaster
1. Wipe over the outside stainless steel surface
with a light water repellent oil, wipe the inside
with a vegetable oil or similar edible oil.
2. If stored outside, fit a rainproof cover over the
spit roaster when it is not in use.

10
EXPLODED DIAGRAM

11
Ref Description
Type&Qty
Ref Description
Type&Qty
KYQ-6320 KYQ-6320
1 Hood assembly 1 38 Flat pad 8
2 Hood handle 1 39 Wheel support-back right 1
3 Hood hinge axis 2 40 Wheel-6” no brake 4
4 Hood restrict piece 2 41 Whee axis 1
5 Dish 4 42 Wheel support-back left 1
6 Roasting Basket 5 43 Hood support 2
7 R Pin 12 44 Roller 4
8 Roasting Basket Support 2 45 Roller bolt 4
9 Manually locking screw 2 46 Rotisserie shaft restrict piece-front 1
10 Rotisserie shaft 1 47 Rotisserie shaft restrict piece-back 1
11 Meat prong 2 48A Rotisserie shaft support pipe-Bottom 2
12 Triangle support 2 48B Rotisserie shaft support pipe-Top 2
13 Squareness meat prong 2 49 Rotisserie shaft support-front 1
14 Squareness meat prong support 2 50 Rotisserie shaft support-back 1
15 Burner-main 2 51 Rotisserie shaft restrict piece-support 2
16 Burner flame tamer 2 52 M10 screw 2
17 Electronic wire set 2 53 M10 Butterfly nut 2
18 Burner nozzle 2 54 Roller fixed-front 1
19 Shield board 2 55 Roller fixed-back 1
20 Thermocouple support 2 56 Thermocouple 2
21 Body inner anelleft/right 2 57 Tracheal 2
22 Body inner panel-support 2 58 Gas valve 1
23 Body panel-right side 1 59 Control panel-left side 1
24 Body panel-left side 1 60 Control panel-right side 1
25 Body inner panel-front 1 61 Control panel 1
26 Body inner panel-back 1 62 Control knob 2
27 Body support 2 63 Control knob seat 2
28 Body panel-front 1 64 Electronic igniter-2 port 1
29 Body panel-back 1 65 Motor heat shield panel 1
30 Body inner panel-bottom 1 66 Motor Joints pin 1
31 Body panel-bottom 1 67 Motor Joints 1
32 Body frame 1 68 Motor pin 1
33 Square plug(25*25) 4 69 Motor 1
34 Wheel support-front left 1 70 Motor support 1

12
ASSEMBLY
Step 1
Before assembly, turn the spit roaster over, NOTE:
put some soft cushions or protective mat or similar
on the floor to protect the spit roaster body and hood.
Attach the locking castor wheels using 8x M8x15
hex bolt.
Attach the rear wheel brackets using 8x M8x15
hex bolt.
Insert axle #41 through one bracket and slide
wheels on. Assemble using above diagram.
1

13
Step 2
Before assembling the motor and its support, first
loosen and remove the four pre-assembly M5 x
8 screws on the base of the motor Ref #69, then
put the motor on its support Ref #70, install and
tighten the same M5 x 8 screws.
Attach ref #69 + #70 to the spit body using M6 x
12 screws.
2

14
Step 3
To install uprights ref#49 and #50 use the M6 x
35 screws with washers and nuts.
To install motor heat shield ref#65 use the M5 X
10 screws.
Install the rollers ref#44 using shoulder screws
ref#55.
3

15
Step 4
Use the above diagram to install the roasting
clamps, prongs and leg supports.
NOTE: You can only use either the clamps, prongs
etc or the roasting baskets, see step 5.
4

16
Step 5
Use the above diagram to install the roasting
baskets.
Slide both rack supports ref #8 onto the rotisserie
shaft ref #10.
Push each of the racks ref #6 into the holes in the
supports ref #8. Secure with the ‘R’ clip ref #7.
When all 4 racks are fitted tighten the 2 supports
to the shaft using the screws.
NOTE: You can only use either the roasting
baskets or the roasting clamps, prongs and leg
supports, see step 4.
5

17
6
7
Step 6
To cook vegetables or small amounts of meat you
can also use the supplied trays.
If using the trays with the roasting baskets or the
pig clamps only use a maximum of 2 trays evenly
spaced along the cooking length.
Step 7
To fit the fat tray slide the tray ref#5 into the
grooves under the spit roaster on the same end as
the motor. Push in until fully located.
NOTE: If emptying or fitting fat tray during
cooking extreme caution should be taken and
direct contact by hand should be avoided at all
times.
Fat Tray slides in here
Fat tray slides in here
at bottom or spit roaster
Ref#5

18
IMPORTANT POINTS
PLEASE NOTE Upon receipt, your spit roaster will
be covered in a thin layer of oil which is used in
the manufacturing process, this needs removing
prior to first use with either hot soapy water or a
remover such as white spirit. If you don’t remove
this prior to getting the spit roaster hot on the
first occasion, the burnt oil will tarnish the metal,
especially on the inside.
Avoid rubbing the printed ‘HOT’ areas on the spit
roaster with thinners or similar agents as they
may damage the printing.
Due to the heating and cooling of the spit
roaster and vibrations caused by the spit
rotations, some of the screws may become
loose during transit or use. PLEASE tighten
the screws periodically in particular the 4
screws on the motor MUST be checked every
time you cook as these are mounted upside
down they are particularly vulnerable to
becoming slack and a motor falling off could
be a disaster half way through the cooking
process.
Familiarise yourself with the spit to motor
connector and be careful not to lose the U
shaped pin, you will find two holes on the motor
bracket where this pin can be stored when not
in use.
8
Step 8
Battery Insert
Take out the ignition button, inserting 1 pc of AA
battery.

19
ROTISSERIE COOKING
Rotisserie cooking produces foods that are moist,
flavourful and attractive, as the turning food self
bastes. Although the rotisserie is best for larger
pieces of meat or poultry, nearly anything can be
used if prepared properly.
Balancing the Food
The item that requires the most attention in
rotisserie cooking is balancing the food. The
rotisserie must turn evenly otherwise the
stopping and starting action will cause the food to
cook unevenly and possibly burn the heavier side.
The easiest foods to balance are those of uniform
shape and texture. To test if the food is balanced
correctly when secured, place the ends of the
rotisserie skewer loosely in the palms of your
hands. If there is no tendency to roll, give the
spit a quarter turn. If it’s still stable give it a final
quarter turn. It should rest without turning in
each of these positions. It can then be attached
to the spit roaster.
Poultry
When using poultry, truss the birds tightly so that
wings and drumsticks are close to the body of the
bird. The cavity of the bird maybe stuffed prior to
this if you wish. Pull the neck skin down and using
a small skewer fix to the back of the bird. Push
the rotisserie skewer through lengthwise, catching
the bird in the fork of the wishbone. Centre the
bird and tighten with the holding forks. Test the
balance as described above.
Large Carcass
The maximum carcass weight allowed is 70Kg.
Ensure that the carcass is held firmly using both
sets of prongs and the leg braces (wire or twine
can be used to secure the legs). A separate “U”
clamp can be used for the spine or neck.
Rolled Meat
A rolled piece of meat only requires the rotisserie
skewer to be inserted through the centre of the
length of meat then secured and balanced.
Unboned Meat
For meats which are unboned it is best to secure
the rotisserie skewer diagonally through the meaty
sections.
When to Use Foil
If protuding bones or wings brown too quickly
cover with pieces of foil.
COOKING TIMES
This will vary according to the type and weight of
food you are cooking. Insert a meat thermometer
into the centre of the meat (avoiding bone) which
will provide a temperature guide for you.
The cooking times on a rotisserie will be
approximately the same as for spit roaster cooking.
The Rotisserie shaft must be horizontal during use.
This can be achieved by loosening the wing screw and
sliding either the motor or shaft brackets up or down.
When cooking with the shaft in a low position ensure
that the counter weight is clear to rotate fully.
BRIEF COOKING GUIDELINES
The spit roaster with both burners running on full
will use around 1kg of gas per hour. Monitor the
meat closely at all times, the following is a rough
guide only and assumes you are cooking a pig of
around 70kg in weight. Ideally allow the meat to
get to room temperature prior to cooking.
Place in the spit roaster with both burners on full
for the first 30-40mins to ‘sear’ the meat, that’s
sealing the outer skin. The meat skin should go
crisp and darken, don’t let it go black! Next, turn
down to either: one burner on almost full and the
other off or both to low for the next approx 4.5 to
5 hours, the slower you cook the meat, the more
succulent will be the result.
Once cooked, (use a temperature probe to be
certain) lift the pig up to the carving position
placing cut meat into one of the 4 trays below.
Keep one burner on low to keep the 4 trays hot.
NOTE: You can also cook a couple of joints on
the trays as well as the spit. This is ideal if some
parties want a choice of beef or lamb or if you are
catering for a lot of people.
Included roasting rotisserie
cradle for smaller joints
of meat, chickens, jacket
potatoes etc

20
SAFE APPLIANCE LOCATIONS
This appliance shall only be used in an above
ground open-air situation with natural ventilation,
without stagnant areas, where gas leakage and
products of combustion are rapidly dispersed by
wind and natural convection.
Any enclosure in which the appliance is used
shall comply with the following:
An enclosure with walls on all sides, but at least
one permanent opening at ground level and no
overhead cover (see Example 1).
Within a partial enclosure that includes an
overhead cover and no more than two walls
(see Example 2 & 3).
Within a partial enclosure that includes an
overhead cover and more than two walls, the
following will apply:
at least 25% of the total wall area is completely
open, and at least 30% of the remaining wall area
is open and unrestricted (see Example 4 & 5). In
the case of balconies, at least 20% of the total wall
area shall be and remain open and unrestricted.
Gasmate®is a registered trademark of: Sitro Group Australia Pty Ltd www.sitro.com.au
Aber, Hamilton, N.Z. www.gasmate.co.nz
Table of contents
Other Gasmate Kitchen Appliance manuals

Gasmate
Gasmate PORTOFINO PO3104-12 User manual

Gasmate
Gasmate Specialist Deluxe II BQ8322 User manual

Gasmate
Gasmate PORTOFINO PO3106-16 User manual

Gasmate
Gasmate PC1070 User manual

Gasmate
Gasmate BQ1011P User manual

Gasmate
Gasmate GM160-016 User manual

Gasmate
Gasmate GSB001 User manual

Gasmate
Gasmate GM160-014 User manual

Gasmate
Gasmate GRT2 User manual

Gasmate
Gasmate P0104 User manual