Gaumard S401.100 User manual

The S401.100 Advanced Multipurpose Venous Training System is an interactive educational
system developed to assist a certified instructor. It is not a substitute for a comprehensive
understanding of the subject matter and not intended for clinical decision making.
S401.100
ADVANCED MULTIPURPOSE VENOUS
TRAINING ARM
USER GUIDE

TABLE OF CONTENTS
1. INTRODUCTION 5
1.1 SPECIFICATIONS 5
1.2 CARE AND MAINTENANCE 5
2. OVERVIEW 7
2.1 FEATURES 7
3. INITIAL SETUP 8
3.1 UNBOXING 8
3.2 PACKAGE CONTENTS 8
3.3 DEVICE SIZE RECOMMENDATIONS 9
3.4 BLOOD DISPENSING BAG & STAND ASSEMBLY 9
4. WORKING WITH THE SIMULATOR 11
4.1 FILLING THE VENOUS SYSTEM 11
4.2 SIMULATING VENOUS PRESSURE 12
4.3 SIMULATING COLLAPSED VEINS 13
4.4 INJECTION IN THE DORSUM OF THE HAND 13
4.5 IV INFUSIONS 14
4.6 BLOOD COLLECTION 15
4.7 FLUSHING THE VENOUS SYSTEM 16
4.8 SUBCUTANEOUS & INTRAMUSCULAR INJECTION SITES 18
4.9 CHANGING THE INJECTION SITES 19
4.10 TB SCREENING SITES 20
5. ROUTINE MAINTENANCE 21
5.1 REPLACING THE ARM SKIN 21
5.2 REVEINING THE ARM 22
S401.100 ADVANCED MULTIPURPOSE TRAINING ARM | USER GUIDE
Table of Contents | iii

6. APPENDIX 31
6.1 REPLACEMENT PARTS LIST 31
6.2 EXCLUSIVE ONE-YEAR LIMITED WARRANTY 32
6.3 CONTACT TECHNICAL SUPPORT 33
6.4 GENERAL INFORMATION 33
S401.100 ADVANCED MULTIPURPOSE TRAINING ARM | USER GUIDE
iv | Table of Contents

S401.100 ADVANCED MULTIPURPOSE TRAINING ARM | USER GUIDE
Introduction | 5
1. INTRODUCTION
1.1 SPECIFICATIONS
Weight: 12 lbs
Length: 19 inches
The S401.100 Advanced Venous Training Arms accurately represent an adult arm and hand,
complete with the Cephalic, Basilic, Antecubital, Radial, and Ulnar veins. The simulators
also feature subcutaneous injection sites on the volar side of the forearm and the lateral
side of the upper arm, as well as an intramuscular injection site in the deltoid area.
1.2 CARE AND MAINTENANCE
General
• Do not wrap this or any other Gaumard product in newsprint.
• Marks made with ballpoint pens, ink or marker cannot be removed.
• Replacement parts are available from Gaumard or from your distributor.
• Do not use povidone iodine or Betadine type antiseptic solutions
as these may permanently stain the simulator.
CAUTION: Damage caused by misuse is not covered by your warranty. It is
critical to understand and comply with the following guidelines.
Cautions
• Use the venous training arm with the same precautions used with a real patient.
• Have providers wash their hands prior to use to prevent dirt and oils from clinging to the material.
• Do not palpate using fingernails as this may tear the skin; palpate using the pads of the fingers.
• Vein tubing contains latex, which may cause allergic reactions. Users allergic or sensitive to latex should
avoid contact. Discontinue use of this product and seek medical attention if an allergic reaction occurs.
Operating Temperatures
• Operating temperature: 50°- 95° F (10°- 35° C).
• Humidity: 5% - 95% (non-condensing).

S401.100 ADVANCED MULTIPURPOSE TRAINING ARM | USER GUIDE
6 | Introduction
Storage
• Store the venous training arm in a cool, dry place.
• Humidity: 40% - 60% (non-condensing).
• Do not stack or store heavy materials on top of the bag. Please store and ship it in the bag provided.
Cleaning
• The venous training arm is water proof. It should be cleaned with a
cloth dampened with diluted liquid dishwashing soap.
• Do not clean with harsh abrasives.
• Dry thoroughly after every cleaning.
• After drying, application of baby powder can return the arm to its lifelike feel.
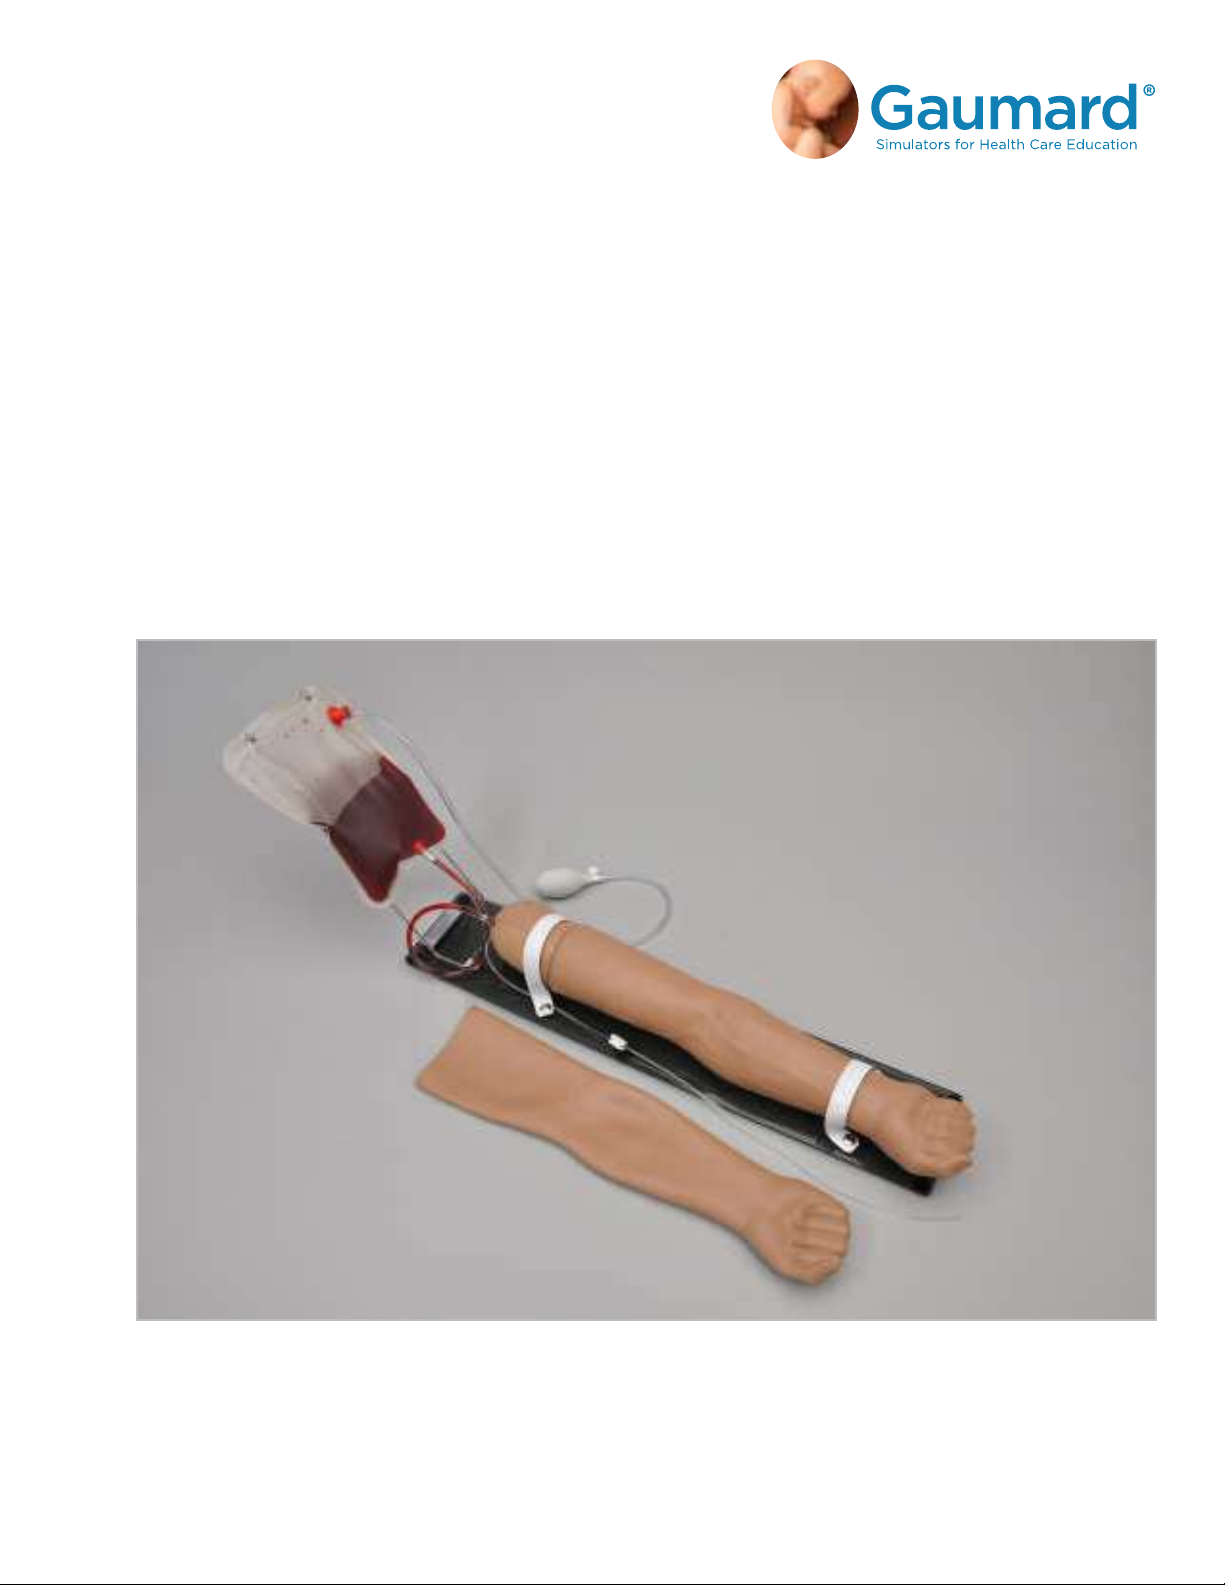
IV Arm
• Only use Gaumard’s simulated blood provided in the standard package. Any other simulated blood
containing sugar or any additive may cause blockage and/or interruption of the veins in the IV arm.
• The use of needles larger than 22 to 23 gauge will reduce the lifetime of the arm skin and veins.
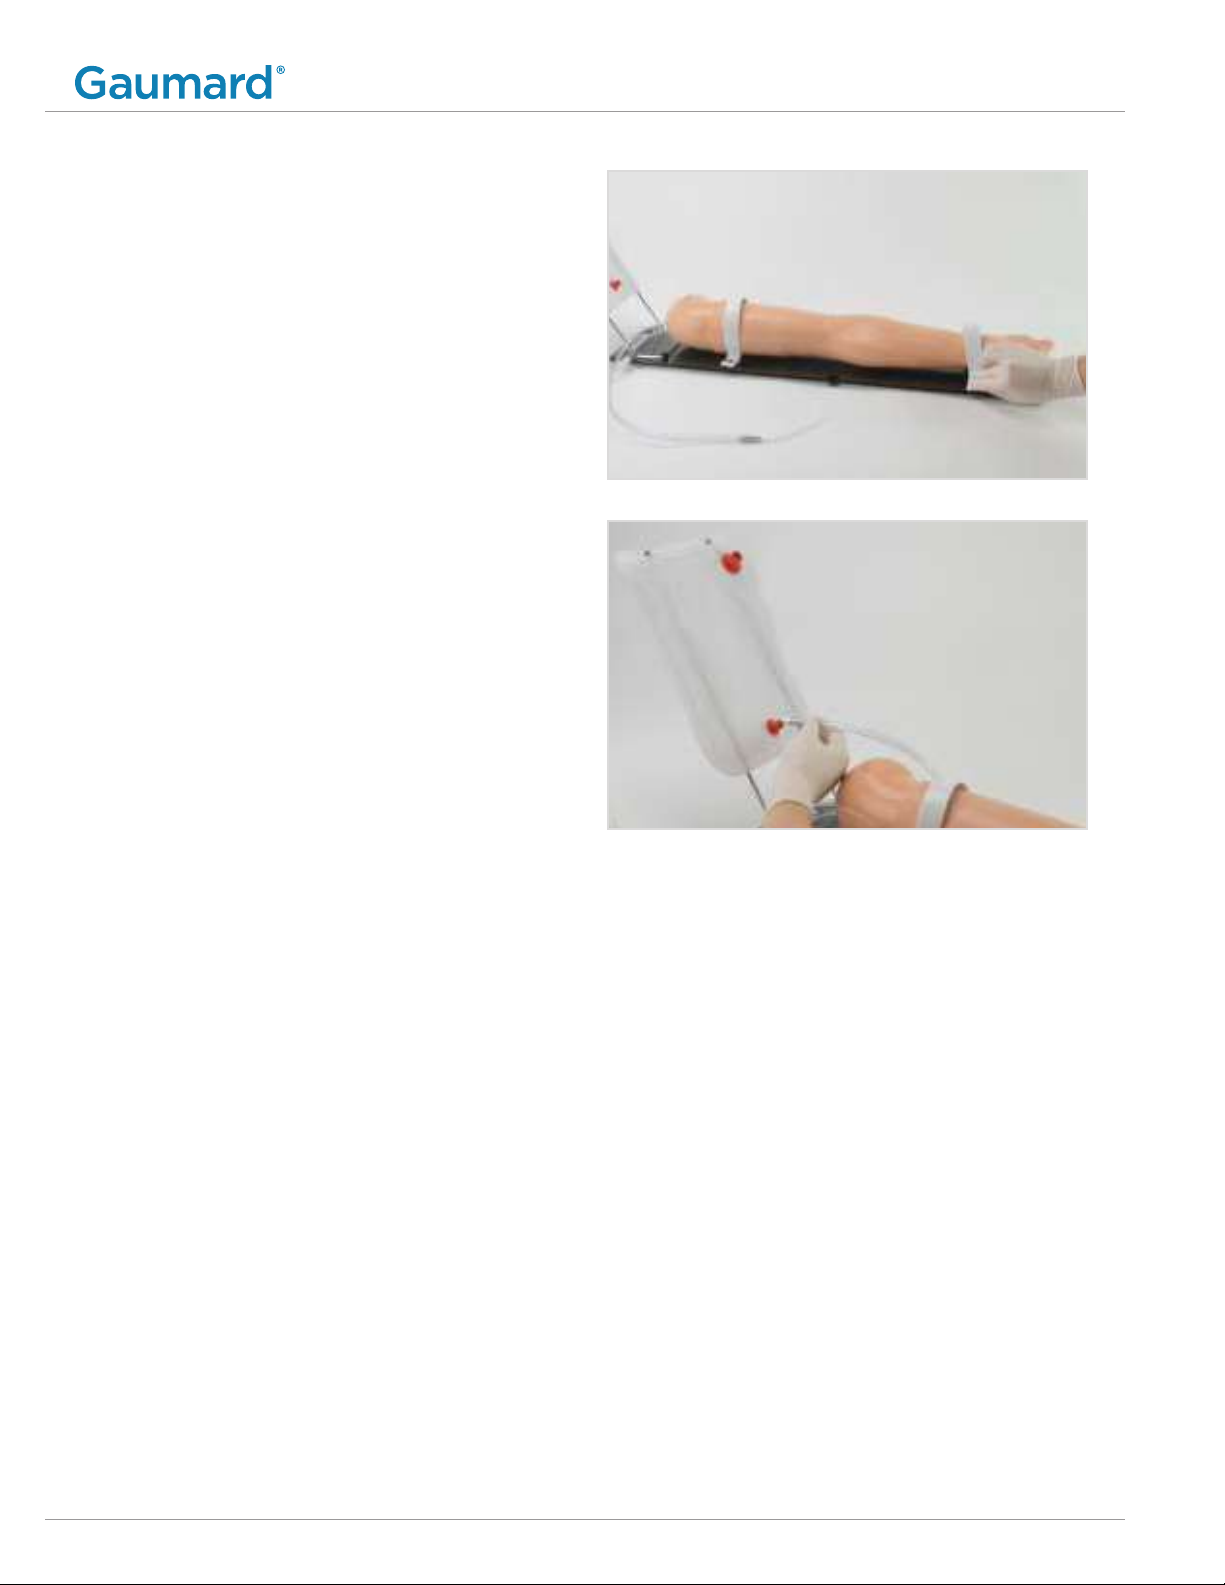
• Always purge with clean water, then drain the vein reservoirs at the end of each simulation
session. Doing so will retard the formation of mold and prevent clogging of the system.
• The skin of the training arm can be cleaned with a mild detergent, or soap and water. After drying the
arm, lightly dust it with talcum powder. This will keep the training arm supple and easy to use.
• We recommend flushing veins with a 70:30 mix of clean water to isopropyl
alcohol (IPA) after each use to prolong the life of the vasculature.
• For more information regarding the replacement of veins and other consumable items
please contact technical support. Contact information is provided in section 6.3.
WARNING: Vein tubing contains latex which may cause allergic reactions. Users allergic or sensitive to latex
should avoid contact. Stop using the product and seek medical attention if an allergic reaction occurs.

S401.100 ADVANCED MULTIPURPOSE TRAINING ARM | USER GUIDE
Overview | 7
2. OVERVIEW
2.1 FEATURES
• Simulated cephalic, basilic, antecubital, radial, and ulnar veins
• Subcutaneous injection areas on the volar side of the forearm and the lateral side of the upper arm
• Prominent venous network
• Intramuscular injection site in deltoid area
• Veins in the dorsum of the hand
• Resealing veins and outer skin
• Realistic "pop" as needle enters vein
• Squeeze bulb to increase or decrease venous pressure
• Blood collection exercises with simulated blood
• Administration of medication by intravenous bolus
• Simulation of clenched fist and tourniquet position
• Simulation of collapsed veins
• TB test sites

S401.100 ADVANCED MULTIPURPOSE TRAINING ARM | USER GUIDE
8 | Initial Setup
3. INITIAL SETUP
3.1 UNBOXING
• Lift the arm from the box and remove the bag it is shipped in.
• Rest the arm on a bed or clean, flat surface.
3.2 PACKAGE CONTENTS
1. Multipurpose Venous Training Arm
2. Smoked Lucite Base with Stand
3. Simulated Blood Concentrate
4.Intradermal Sites
5. Manual Squeeze Bulb
6.Dispensing Blood Bag
7. Funnel
8. Replacement Arm Skin
9. Rubber Stopper
10. Mineral Oil Lubricant
11. Talcum Powder
12. Soft Carrying Bag

3.3 DEVICE SIZE RECOMMENDATIONS
Procedure Device Size
Needle stick 22 G or smaller
Infusion of large amounts of fluid 19 G / 14-18 G cannula
General infusion 21 G / 20 G cannula
Subcutaneous injection 25-27 G
Intradermal injection 26 G
Intramuscular injection 20-23 G
3.4 BLOOD DISPENSING BAG & STAND ASSEMBLY
1. Lift the hinged metal stand into
position on the Lucite base.
2. Place the blood bag on the stand.
S401.100 ADVANCED MULTIPURPOSE TRAINING ARM | USER GUIDE
Initial Setup | 9

3. Place the arm on the base and secure
it with the straps provided by gently
pressing down on the snaps.
4.Insert the venous tube to the dispensing
bag port at the bottom of the bag.
S401.100 ADVANCED MULTIPURPOSE TRAINING ARM | USER GUIDE
10 | Initial Setup

1. Using the funnel, fill the blood dispensing bag
with water or the simulated blood provided.
The dispensing bag holds up to 1.5 Liters.
NOTE: Follow the instructions on the blood
concentrate to make up to 1 gallon.
2. Place the drainage tube in a container.
3. Be sure the drainage tube is unclamped to
allow the fluid to flow into the venous system.
NOTE: Place the drainage hose in a collection
container. If fluid does not flow all the way
through the drainage hose, position the
drain tubing lower than the IV arm.
4.Clamp the tube closed when there are no air
bubbles left in the venous system and attach
the black rubber stopper to the upper port.
4. WORKING WITH THE SIMULATOR
4.1 FILLING THE VENOUS SYSTEM
S401.100 ADVANCED MULTIPURPOSE TRAINING ARM | USER GUIDE
Working with the Simulator | 11

S401.100 ADVANCED MULTIPURPOSE TRAINING ARM | USER GUIDE
12 | Working with the Simulator
4.2 SIMULATING VENOUS PRESSURE
To simulate bulging veins from a tourniquet placement, follow the steps below:
2. Apply the desired pressure to the
veins via the squeeze bulb.
3. Practice the desired procedure.
1. Attach the squeeze bulb to the dispensing
bag at the squeeze bulb port.

S401.100 ADVANCED MULTIPURPOSE TRAINING ARM | USER GUIDE
Working with the Simulator | 13
4.4 INJECTION IN THE DORSUM OF THE HAND
• Three veins are located in the dorsum
of the hand to allow injections.
• Follow section "4.1 Filling the Venous System"
to setup the arm for dorsal injections.
4.3 SIMULATING COLLAPSED VEINS
1. To access the dorsum of the hand, lift
the straps that hold the arm in place.
To relieve venous pressure or simulate
collapsed veins, release the air pressure by
loosening the squeeze bulb's valve.

S401.100 ADVANCED MULTIPURPOSE TRAINING ARM | USER GUIDE
14 | Working with the Simulator
2. Rotate the arm to a prone position.
3. Press the straps back in place.
4.5 IV INFUSIONS
Unclamp the drainage tube to ensure the
veins do not overflow when practicing
injections, IV therapy or IV infusions.

S401.100 ADVANCED MULTIPURPOSE TRAINING ARM | USER GUIDE
Working with the Simulator | 15
4.6 BLOOD COLLECTION
1. Ensure the drain tube is clamped. To
simulate a tourniquet, follow the steps in
section 4.2 "Simulating Venous Pressure."
2. Attach the black rubber stopper.
3. Perform the blood collection exercise.

S401.100 ADVANCED MULTIPURPOSE TRAINING ARM | USER GUIDE
16 | Working with the Simulator
4.7 FLUSHING THE VENOUS SYSTEM
Clean and dry the vasculature at the end of the simulation session to prevent mold or clogs.
1. Unclamp the drainage tube and place
the end of the hose in a container.
2. Replace the black rubber stopper
with the squeeze bulb.
3. Squeeze the bulb to push the remaining
fluid out of the venous system.

S401.100 ADVANCED MULTIPURPOSE TRAINING ARM | USER GUIDE
Working with the Simulator | 17
4.When the blood dispensing bag is
empty, refill the bag with a solution of
70:30 water to isopropyl alcohol.
5. Attach the squeeze bulb to the port
to purge the venous system. Continue
to push air through it to dry.

S401.100 ADVANCED MULTIPURPOSE TRAINING ARM | USER GUIDE
18 | Working with the Simulator
4.8 SUBCUTANEOUS & INTRAMUSCULAR INJECTION SITES
• The arm contains 2 subcutaneous injection sites
• The intramuscular site is located
on the deltoid of the arm.
CAUTION: Avoid the use of iodine or
Betadine-type solutions as these may
permanently stain the arm skin.
Intramuscular injection site
First subcutaneous injection site
Second subcutaneous injection site

S401.100 ADVANCED MULTIPURPOSE TRAINING ARM | USER GUIDE
Working with the Simulator | 19
4.9 CHANGING THE INJECTION SITES
The injection sites are removable and replaceable.
1. To remove the subcutaneous sites,
carefully roll down the skin.
2. Lift out the used injection site and
replace it with the new one.
3. Use the provided lubrication to assist
in rolling the skin back in place.
NOTE: To purchase new subcutaneous
and intramuscular sites, refer to
section 6.1 for the part number.

S401.100 ADVANCED MULTIPURPOSE TRAINING ARM | USER GUIDE
20 | Working with the Simulator
4.10 TB SCREENING SITES
Forearm
Upper Arm
• There are 2 TB sites on the arm that
may be utilized for TB screening.
• Perform the TB tests in the
sites highlighted below.

S401.100 ADVANCED MULTIPURPOSE TRAINING ARM | USER GUIDE
Routine Maintenance | 21
5. ROUTINE MAINTENANCE
5.1 REPLACING THE ARM SKIN
1. Starting at the top of the arm, gently
slide the skin o the arm.
2. To install the new arm skin, roll the
skin onto to the clenched fist and
slide it into place over the arm.
NOTE: Place the subcutaneous
pads in their designated slots while
sliding the arm skin back on.
3. Use the lubricant provided to
ease the skin into place.
Table of contents
Popular Educational Equipment manuals by other brands

Horizon Educational
Horizon Educational FCJJ-44 Assembly guide

BJ Live
BJ Live SHX Bubble Tube installation guide

Reality Works
Reality Works Muscular Figure Tabletop Size Model quick start guide

fischertechnik
fischertechnik CLASS SET Electrical Control Assembly instruction

timio
timio TM01 user manual

PASCO
PASCO ME-6957 Product guide

LEXIBOOK
LEXIBOOK JC598i5 Series instruction manual

National Library Service
National Library Service DS1 Service manual

Nasco Healthcare
Nasco Healthcare TERi LF04302EX instruction manual

Digi Sport Instruments
Digi Sport Instruments MADT1 EDU manual

Tobii Dynavox
Tobii Dynavox EM-12 Mounting instructions

pitsco
pitsco AP Launcher user guide