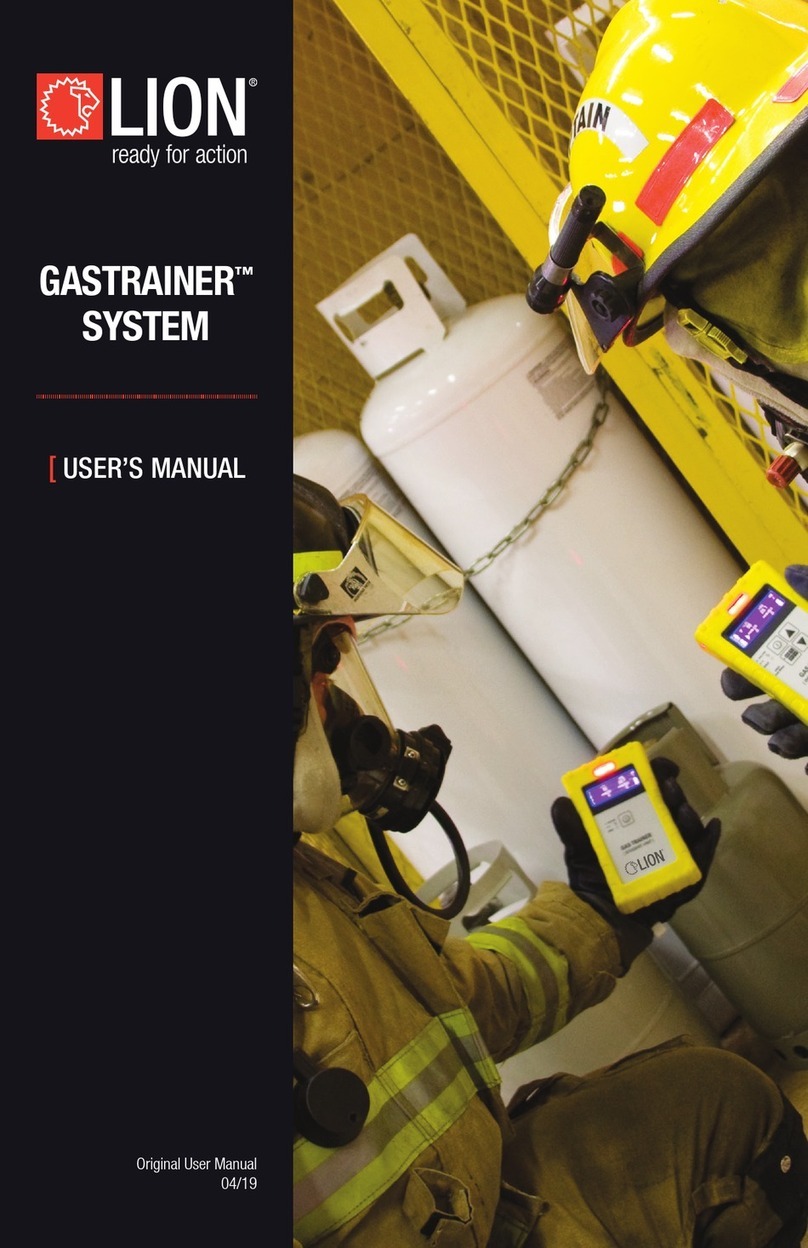
LION R.A.C.E. STATION User manual

R.A.C.E.
STATION™
[ USER’S MANUAL
Original User Manual
03/20

WARNING
Improper installation, adjustment, alteration,
service or maintenance can cause injury or property damage.
Read the setup, operation and maintenance instructions thoroughly
before installing or servicing this equipment.
Failure to follow these instructions could result in
property damage, personal injury, or death.
NOTE
Read and follow all instructions within the user manuals of any
other optional equipment or accessories used in conjunction with
the R.A.C.E. Station™.

WWW.LIONPROTECTS.COM
1. HOW THE R.A.C.E. STATION™WORKS............................................................................... 2
2. FOR YOUR SAFETY............................................................................................................ 3
3. R.A.C.E. STATION™PARTS AND ACCESSORIES ................................................................. 4
4. R.A.C.E. STATION™SPECIFICATIONS ................................................................................ 5
5. PRODUCT INFORMATION .................................................................................................. 6
6. OPTIONAL ACCESSORIES ................................................................................................. 7
7. LION SERVICE PLANS ....................................................................................................... 8
8. OPERATING INSTRUCTIONS.............................................................................................. 8
9. SHUTDOWN/PUT AWAY PROCEDURE .............................................................................. 18
10. MAINTENANCE INSTRUCTIONS ...................................................................................... 18
11. WARRANTY INFORMATION ............................................................................................. 19
12. CONTACT INFORMATION................................................................................................. 21
SAVE THESE INSTRUCTIONS FOR FUTURE REFERENCE
TABLE OF CONTENTS

R.A.C.E. STATION™
2
WWW.LIONPROTECTS.COM
1. HOW THE R.A.C.E. STATION™WORKS
Congratulations on the purchase of your new R.A.C.E. Station™.
This state-of-the-art training tool uses a pull station, annunciator and
extinguisher sensor to facilitate complete “R.A.C.E.-to-P.A.S.S.” training in
conjunction with the LION BullsEye™Digital Fire Extinguisher Training System.
Features include a phone for trainees to dial their appropriate emergency phone
number, as well as a smoke alarm to facilitate training on the use, placement,
and maintenance of smoke alarms.
The R.A.C.E. Station™provides maximum value when used in conjunction with
the BullsEye™. The R.A.C.E. Station™automatically communicates wirelessly
with the BullsEye™and tracks how long it takes trainees to perform certain tasks
like triggering the pull station and in what order. Custom scenarios can easily be
created to help enforce key training objectives, such as calling for help before
attempting to extinguish the re.
The R.A.C.E. Station™can be optionally equipped with an electric cutoff prop which
can be used in conjunction with the BullsEye™or with the ATTACK™Digital Fire
Training System. Teach trainees how to respond to electrical res, identifying the
risk, and cutting power, prior to engaging the re.
The R.A.C.E. Station™can also be used as a standalone training tool. The
R.A.C.E. Station™is portable and can be set up in strategic locations so that
your trainees must locate pull stations and extinguishers as they would in a
real emergency. Additional props can be added to the system to further expand
your training scenarios

3
WWW.LIONPROTECTS.COM
1. Always use in accordance with all
applicable local, state, and national codes.
Contact your local re department or
authority having jurisdiction for details on
re extinguisher training.
2. Do not use this appliance without reading the
entire User’s Manual.
3. Do NOT drop the R.A.C.E. Station™.
4. Do NOT alter or modify this appliance in any
manner. The R.A.C.E. Station™will not operate
as designed or intended if modied.
5. Do NOT use in an explosive atmosphere.
6. When using this appliance, exercise the
same precautions you would with any
electrical device.
7. If you are unsure of anything in these
instructions, STOP and contact your
distributor or LION for assistance.
8. This product should not be used with any
power source other than what has been
provided. Use of other power sources is
dangerous and will void the warranty.
9. Death, serious injury, or damage to
property may occur if the above is not
followed exactly.
2. FOR YOUR SAFETY WARNING
DISCLAIMER
Purchaser assumes all risk in the assembly and operation of this unit.
Failure to follow this manual’s WARNINGS and instructions can result in severe personal
injury, death, or property damage. LION is not responsible for any damage, death, or injury
that may arise or result from improper or misuse of the R.A.C.E. Station™.
R.A.C.E. STATION™
4
WWW.LIONPROTECTS.COM
3.
R.A.C.E. STATION PARTS AND ACCESSORIES
PARTS LIST
To order replacement parts, contact your distributor or LION for assistance.

5
WWW.LIONPROTECTS.COM
4. R.A.C.E. STATION™SPECIFICATIONS
PHYSICAL SPECIFICATIONS
Kit Case Dimensions 44.3” x 25” x 16.5”
(112.40 cm x 63.5 cm x 41.91 cm)
Kit Case Weight 104 lbs. (47.3 kg) OR 120 lbs. (54.5 kg)
with added optional ECO
Kit Case Transport Features Pull handles with corner wheels
Tripod Base Dimension 36” (91.44 cm) dia. max. spread
Tripod Height Adjustment 45”-76” (114.30-193.04 cm)
Tripod Weight 5 lbs. (2.3 kg)
Prop Box Weight 6-6.5 lbs. (2.7–3.0 kg)
Standalone Prop
Case Dimensions
45.1” x 16.0” x 13.0”
(114.55 cm x 40.72 cm x 32.94 cm)
Standalone Prop
Case Weight
31 lbs. (14.1 kg)
Standalone Prop Case
Transport Features
Pull handles with corner wheels
ELECTRICAL
Input Power 5 VDC, 0.75A
Battery Life 8 hr. minimum at full charge
(battery life varies by prop)
Strobe Brightness 15/75cd
Horn Volume 89-96 dBA at 3 ft. (91.44 cm)
Residential Alarm Volume 83 dBA at 3 ft. (91.44 cm)

EUROPEAN STYLE CALL
POINT, ELECTRIC CUTOFF,
AND ANNUNCIATOR
ALSO AVAILABLE
R.A.C.E. STATION™
6
WWW.LIONPROTECTS.COM
5. PRODUCT INFORMATION
AR.A.C.E. STATION™BOXES
The R.A.C.E. Station™consists of a series of training props, each mounted on
their own prop box.
BTRIPODS TO HOLD THE R.A.C.E. STATION™PROP BOXES
Each R.A.C.E. Station™Prop Box includes its own tripod. The tripods are quick
to set up, height adjustable, and provide a stable platform for training.
CNETWORK BRIDGE ADAPTER
The R.A.C.E. Station™utilizes a central network hub known as a Network
Bridge Adapter to wirelessly connect the props and manage their
communication during simulations.
DINTERACTIVE EMERGENCY PHONE
Designed to look and feel like a modern smartphone, the included Interactive
Emergency Phone will add even more realism to the training scenario.
A
B
D
C
1. Strobe Annunciator/Residential
2. Single Action Pull (or Push) Station
3. Extinguisher Bracket/Sensor
4. Electric Cutoff Switch
Product availability and
design may differ based
on market location.

7
WWW.LIONPROTECTS.COM
EWIRELESS QI CHARGER (NOT SHOWN)
The Interactive Emergency Phone features wireless charging capability. Set the
phone on this stand and it will begin charging.
FMULTIPORT USB 12VDC POWER SUPPLY(S) (NOT SHOWN)
Included with each R.A.C.E. Station™are two Multiport USB power supplies.
• (QTY 1) 6-port capable of powering or charging all props simultaneously.
• (QTY 1) 2-port for powering the Network Bridge Adapter and/or Wireless
Charger during use.
GUSB-C CABLE(S) (NOT SHOWN)
• USER MANUAL
• LIMITED ONE-YEAR WARRANTY
See Section 11 for more details on the warranty.
6. OPTIONAL ACCESSORIES
ASG1000™SMOKE GENERATOR
The SG1000™Smoke Generator interacts wirelessly with the BullsEye™Digital
Fire Extinguisher Training System to add an appropriate amount of smoke to
your training evolutions.
A

R.A.C.E. STATION™
8
WWW.LIONPROTECTS.COM
7. LION SERVICE PLANS
Need Assistance? Please see contact information on page 21.
8. OPERATING INSTRUCTIONS
8.1 SYSTEM SETUP AND INSPECTION
Unpack all parts, removing any packaging materials. Check for visible signs
of damage that may have occurred during transport and contact your distributor
or LION immediately to report any concerns.
8.1.1 SETTING UP THE R.A.C.E. STATION™
1. Do NOT use the R.A.C.E. Station
™
without reading the entire User’s Manual rst.
2. Review training location and plan where the Network Bridge and Stationary props
will be setup.
1. If you are using the system with a digital panel, ensure the Network Bridge
Adapter is placed within 10 meters of the panel.
2. Your rst prop should be within 150 meters of the Network Bridge Adapter.
3. Each additional prop should be within 150 meters of another prop or the
Network Bridge.
Refer to the Distance Chart located in section 8.4.
Ranges listed above are based on an open-air environment. If your training is
indoors where there are walls or other obstructions, you may need to consider
shortening the distance between props.
FIGURE 1: NETWORK BRIDGE ADAPTER
STATUS INDICATORS

9
WWW.LIONPROTECTS.COM
3. Setup the LION Network Bridge Adapter as provided with your R.A.C.E. Station
™
.
1. To setup this prop, simply plug the Network Bridge Adapter into power with
the provided USB charger and USB C cable. It should quickly turn on, and
the Link/Status indicator should illuminate solid green.
2. There are four additional status indicators on the Network Bridge which
indicate the status of each relevant R.A.C.E. Station
™
Prop type once they
are connected to the network, see gure 1.
4. For each stationary prop that will be used for training, rst setup an
accompanied tripod.
1. Unfold the tripod and adjust the legs as wide as you are able and
adjust the height to meet the needs of your training scenario.
2. Make sure that the tripod is placed on an even surface and in
a safe location.
FIGURE 2: PLACING PROP BOX
ONTO TRIPOD
>
continues
FIGURE 4: EXTINGUISHER
ATTACHED
FIGURE 3: PROP BOX IN PLACE
5. Place the prop onto its associated tripod by simply
sliding it over the top while holding both handles on
the side, see gures 2-4.
1. If using a prop with an accompanied wall-stop,
be sure to attach it to the back of the prop and
verify that it is making good contact with the
wall in its resting position. Now the prop can
safely be pushed without worry that it might
tip over during training.
2. If setting up the extinguisher prop, you can
now attach the extinguisher to the hook.
Wall-stop

R.A.C.E. STATION™
10
WWW.LIONPROTECTS.COM
6. To power on the prop, simply hold the power button until all four vertical indicators
illuminate, and then release the power button. At this point, the prop should be
ready for training.
1. The status indicators will now indicate the level of charge of the internal
batteries. Make sure that the prop has been charged to a sufcient level
for your training, see gure 6.
2. The Link Status indicator may briey indicate with a solid red, but after a
short time (1-3 seconds), it should change to green to indicate that it is
within range of the network bridge, see gure 5.
i. If this indicator does not change to green within 5-10 seconds,
refer to section 8.5 for troubleshooting instructions.
7. Repeat steps 2-4 until all stationary props are deployed.
8. If you are using the Interactive Emergency Phone prop during this scenario,
this can now be setup with its wireless charging stand.
1. If you are using the wireless charging stand, simply plug it into the
provided USB power adapter in the intended location for your training and
place the training phone onto the stand. It should quickly power up to
indicate it is ready and charging, see gure 7.
2. If you are not using the wireless charging stand, simply hold the power
button on the side until the screen turns on.
3. Once the phone is powered on, there will be a Bluetooth symbol in the
notication bar to indicate the device is properly connected to the network.
FIGURE 5: POWERING ON PROP FIGURE 7: INTERACTIVE
EMERGENCY PHONE ON
WIRELESS CHARGING STAND
FIGURE 6: PROP CONNECTED
AND INDICATING FULL POWER
Power
Volume

11
WWW.LIONPROTECTS.COM
8.1.2 RUNNING TRAINING EVOLUTIONS WITH YOUR
R.A.C.E.STATION™2.0
1. Before training, observe that all props are connected and in their correct initial state.
i. Observe that every prop has a green link status indicator.
ii. Observe that the bridge has each of the prop status indicators
illuminated, for every prop being used in training.
2. After evolution is complete, be mindful to return each prop to its initial state so that
another training evolution can begin.
i. For the call point prop, this means resetting the switch position.
Your call point will feature either a key to reset the switch directly,
or a thumbscrew to provide access to the inside of the case
where the switch can be returned to its normal (open) position,
see gures 8-9.
ii. For the ECO prop, the switch simply needs to be returned to its
normal (closed) position.
iii. For the extinguisher stand, the Digital Extinguisher must be
placed carefully back on the hook and reset by pressing the button
on the side, see gure 10.
iv. Place the training phone prop back on the wireless charging stand.
>
continues
FIGURE 8: RESETTING THE PULL
STYLE CALL POINT
FIGURE 9: RESETTING THE PUSH
STYLE CALL POINT
FIGURE 10: RESETTING THE
EXTINGUISHER
Reset
button

R.A.C.E. STATION™
12
WWW.LIONPROTECTS.COM
8.1.3 USING ELECTRICAL CUTOFF WITH A BULLSEYE™DIGITAL FIRE
EXTINGUISHER TRAINING SYSTEM OR ATTACK™DIGITAL FIRE
TRAINING SYSTEM
1. Setup your BullsEye
™
Digital Fire Extinguisher Training System or ATTACK
™
Digital Fire
Training System as instructed in the provided User Manual
2. Setup your Electrical Cutoff prop and your LION Network Bridge adapter according
to the operating instructions in section 8.1.1, with special care to ensure that the
Network Bridge is within 10 meters of the ATTACK
™
or
BullsEye™
Panel.
3. Start a training evolution of an electrical re on the
BullsEye™
or ATTACK
™
. You will
notice the arcing sounds of the electricity during the evolution. The re will be very
difcult or impossible to extinguish in this state.
4. Simulate an electrical disconnect using your Electrical Cutoff prop and observe
that the arcing sounds diminish, indicating that the primary fuel source for the re
has been removed. At this stage, the evolution can be completed as normal for a
combustible materials re, and the re can be extinguished.
8.1.4 USING THE R.A.C.E. STATION™WITH A BULLSEYE™DIGITIAL FIRE
EXTINGUISHER TRAINING SYSTEM
1. Follow the setup instructions as detailed in starting in section 8.1.1 and be sure to
setup the LION Network Bride Adapter as detailed.
2. Setup your BullsEye
™
as instructed in the BullsEye
™
user manual.
3. The system should now automatically connect to and integrate with the
BullsEye™
.
This will add new training features to your BullsEye
™
training interface, as detailed in
the BullsEye
™
Extinguisher Training System user manual.

13
WWW.LIONPROTECTS.COM
8.2 CHARGING YOUR BATTERY POWERED R.A.C.E. STATION™PROPS
To charge your R.A.C.E. Station™props, simply plug them into the provided power
supply with the provided USB C cables. The stationary props will indicate that
they are charging by blinking each battery indicator in an escalating pattern,
see gure 11.
To charge your Interactive Emergency Phone prop, either plug it into the provided
power supply with a provided USB C cable or charge it on the provided wireless
charger. When plugged in, the screen will briey turn on and the battery indicator
will show a lightning symbol to indicate it is charging.
8.3 ADJUSTING THE R.A.C.E. STATION™SETTINGS
8.3.1 CHANGING THE SOUND MODE OF THE ANNUNCIATOR PROP
The R.A.C.E. Station™will use either the Industrial Annunciator or a Residential
Smoke Alarm to alert the trainee. By default, when the Annunciator prop powers
up, it will be congured to use the Annunciator.
If the trainer wants to use a residential alarm instead, they simply need to change
the setting by double-pressing the power button. When the power button is double
pressed, it will switch between those two modes and alert the user that the mode
was switched by generating a small chirp from the selected sounder.
FIGURE 11: PROP BOXES
CHARGING IN THE CASE
>
continues

R.A.C.E. STATION™
14
WWW.LIONPROTECTS.COM
8.3.2 CHANGING THE EMERGENCY MESSAGE ON THE TRAINING
PHONE PROP
The training phone prop will always have a default emergency message that
can be used, but a new message can be recorded directly on the phone and
selected instead.
To record a new message, power on the phone and navigate to the settings
menu by pressing the button, and press the dropdown menu associated
with the “Message” button. Here, you can select the default emergency message,
the custom audio message, or record a new custom audio message.
See gures 12-13.
To record a new message, select the “New” option, and begin speaking your new
message into the microphone when indicated. The maximum message length
is 30 seconds. When your recording is complete, press the “Finish“ button to end
the message. See gure 14.
Tip: The microphone is located at the bottom face of the training phone prop.
Speak clearly into this location for best quality.
Once the message is recorded, you can play it back if desired and save it by
pressing the button.
8.3.3 ADJUSTING THE TRAINING PHONE PROP VOLUME
The volume of the message and ringer can be adjusted by pressing either the
volume up/down buttons on the side of the page, or adjusting the volume slider
in the menu
8.3.4 ADJUSTING THE TRAINING PHONE SCREEN BRIGHTNESS
The brightness of the screen can be changed with the slider in the menu.
FIGURE 12: SETTINGS SCREEN FIGURE 14: RECORDING A
NEW MESSAGE
FIGURE 13: MESSAGE DROPDOWN

15
WWW.LIONPROTECTS.COM
8.3.5 CHANGING THE LANGUAGE/LOCALE OF THE TRAINING PHONE PROP
The language/locale of the training phone prop can be changed in the dropdown
menu associated with the “Language” setting in the menu, see gure 15.
8.3.6 CHANGING THE EMERGENCY PHONE NUMBER OF THE TRAINING
PHONE PROP
Change the emergency phone number in the menu with the “Emergency #”
button. When the dialer opens, simply enter the new number and conrm the
choice to change the number.
8.3.7 SETTING THE ANNUNCIATOR VOLUME AND STROBE BRIGHTNESS
The annunciator volume and strobe brightness can be changed if desired.
These settings are changed using a dial and slider inside the annunciator. The
annunciator is set to the lowest setting by default and is also dampened to further
reduce the volume
, see gure 16
.
1. Loosen the Phillips screw on the face of the annunciator at the bottom center. The
screw is captive and will not come out of the unit even though it is loose.
2. Carefully pull the annunciator face out and up, away from the prop.
3. The volume and annunciator patterns are changed by rotating the dial labeled
“Audio Select”.
4. The strobe brightness is set using the slider on the bottom back of the annunciator.
The setting is shown in a small window on the front of the annunciator below the
strobe. Use only the 15 or 15/75 settings with the R.A.C.E. Station
™
. The strobe
is not listed for the operating voltage when set to any other candela setting, see
gure17.
>
continues
FIGURE 15: CHANGING THE
LANGUAGE
FIGURE 17FIGURE 16

R.A.C.E. STATION™
16
WWW.LIONPROTECTS.COM
8.4 SETTING OPTIMAL DISTANCE BETWEEN PROPS
Having the props setup and within operating range will help alleviate most of the
errors listed in the troubleshooting section. Use the chart below along with the
details outlined in section 8.1.1, step 2 to optimize setup.
150 m
150 m
150 m 150 m 150 m
150 m
10 m

17
WWW.LIONPROTECTS.COM
8.5 TROUBLESHOOTING
8.5.1 ALL PROP LINK INDICATORS ARE SOLID RED
This means that your network bridge adapter is not powered on, not in range, or it
is malfunctioning. Make sure that it is powered on, its link indicator is solid green,
and it is within range of the other props.
If bringing props in range of the network bridge does not resolve the issue, try
resetting the network bridge by unplugging it for ve seconds and plugging
it back in.
8.5.2 ONE PROP LINK INDICATOR IS SOLID RED OR SWITCHING
BETWEEN RED AND GREEN
This means that this prop is out of range or nearly out of range. Simply move it
closer to another prop which is in range until the light is solid green consistently.
If the link remains red even when within a reasonable range, try powering down the
prop and powering it back on.
8.5.3 ONE PROP IS STEADILY BLINKING RED
This means that the prop has been unpaired from your network which can
sometimes happen after a software update or when receiving a new prop with
factory settings. If this happens, simply plug it into the Network Bridge Adapter until
the light turns solid green. This should take between 5 and 15 seconds.

R.A.C.E. STATION™
18
WWW.LIONPROTECTS.COM
9. SHUTDOWN/PUT AWAY PROCEDURE
1. Power down each device. For the battery powered stationary props, simply hold the
power button until the indicator lights ash. At this point, the power button can be
released, and all lights should be off indicating that it is safely powered down.
2. Power down the Training Phone prop by holding the power button until the screen
turns off. To be sure it is powered off, you can press the power button once with a
short press to make sure the screen does not come back on.
3. Power down the Network adapter by simply unplugging it.
4. Place all equipment back into the transport case, see gure 18.
a. Put each tripod and props back into the case. The tripods should be neatly
stacked into the internal plastic box, and each prop must be placed into a
cutout that will t it.
b. Neatly bundle all wires and place all accessory equipment light chargers,
power supplies, and wires into the provided box. Place this box in the
provided cutout in the case
c. Secure each piece of equipment with the provided Velcro®straps.
10. MAINTENANCE INSTRUCTIONS
GENERAL MAINTENANCE
Store the R.A.C.E. Station™and accessories in a cool, dry area when not in use.
The residential re alarm does use a standard battery, which will beep when it is
close to its lifespan and needs to be replaced.
FIGURE 18: R.A.C.E. STATION™IN
TRANSPORT CASE
Table of contents
Other LION Educational Equipment manuals