Gazer CM50-100 User manual

www.gazer.com
GAZER CAR MULTIMEDIA SYSTEMS
USER MANUAL


User manual ..................................................................................................................................................................4-32
Руководство пользователя.................................................................................................................................... 33-61
Посібник користувача ............................................................................................................................................ 62-90
ENG
RU
UA

4
ENG
Content
1. Gazer multimedia system package contents ...........................................................................................................................................6
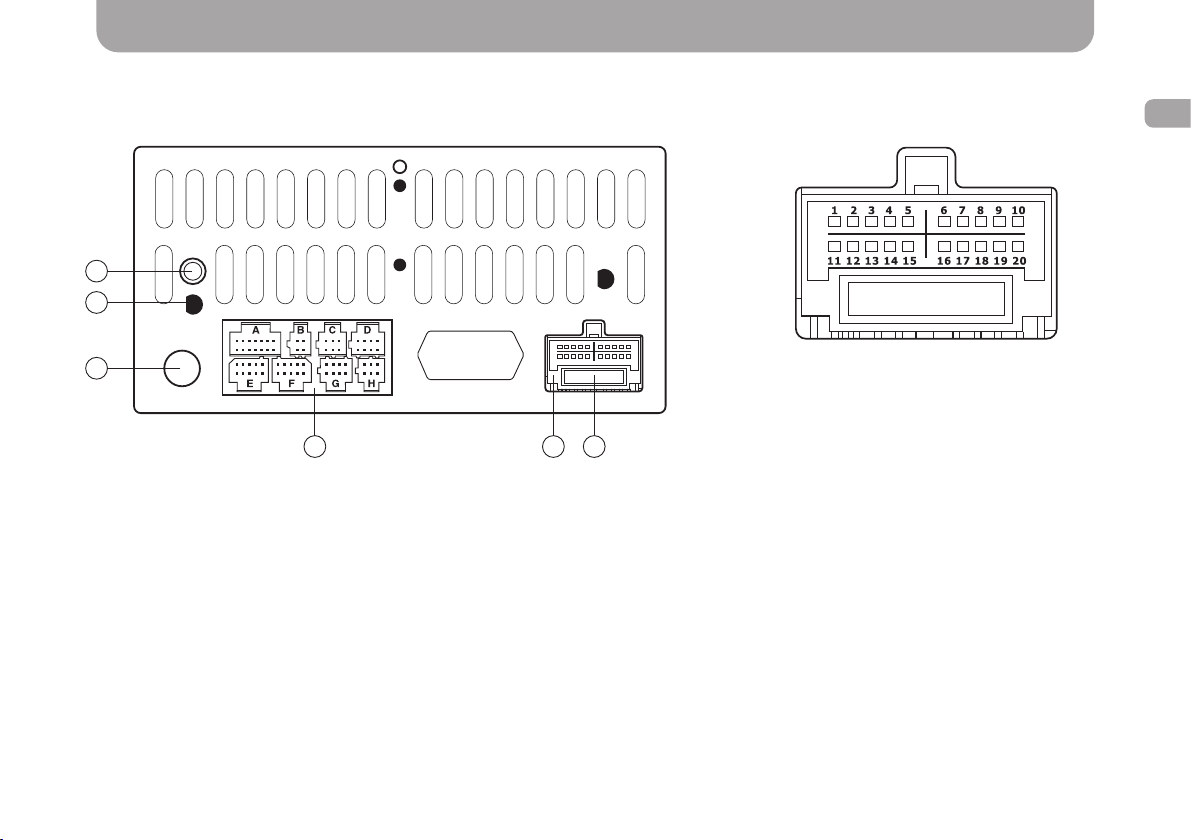
2. Installation diagram ......................................................................................................................................................................................7
3. Installation tips ...............................................................................................................................................................................................8
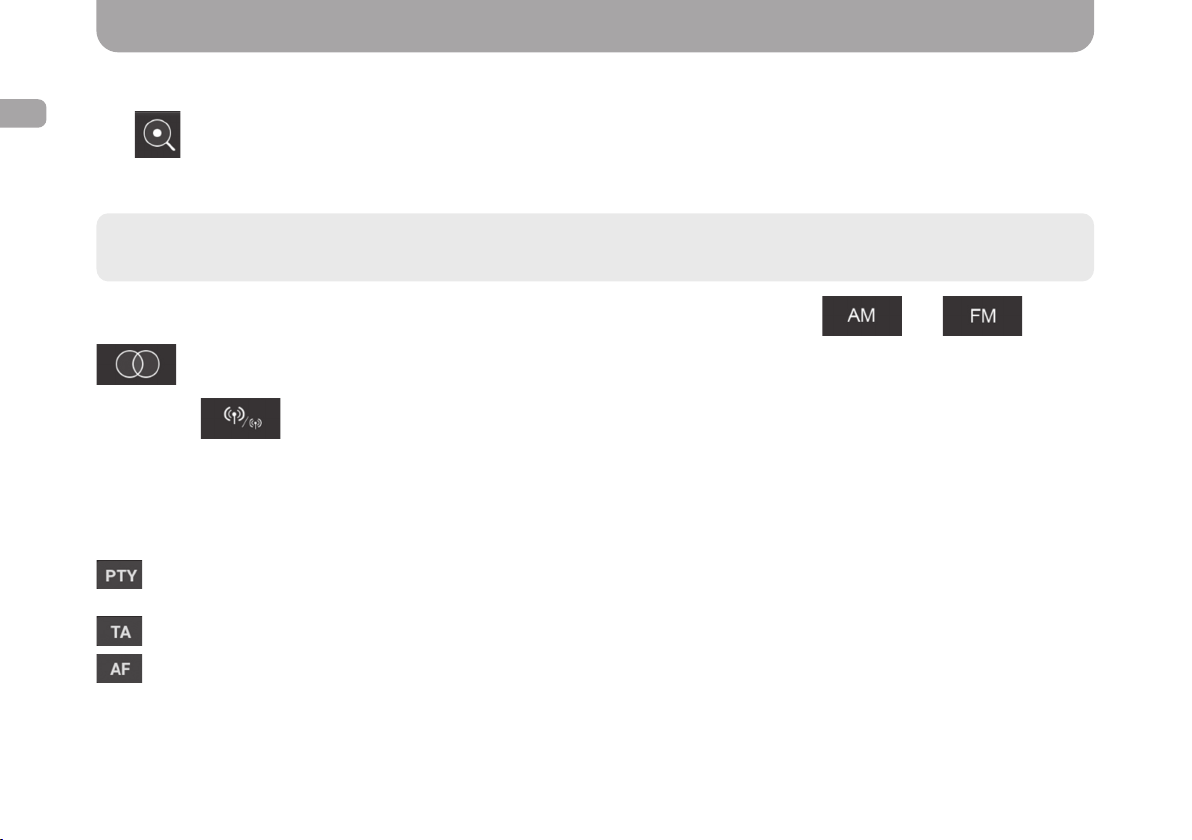
4. Radio App..........................................................................................................................................................................................................9
5. Music App ....................................................................................................................................................................................................... 11
6. Video App ....................................................................................................................................................................................................... 12
7. Bluetooth App................................................................................................................................................................................................ 13
8. A2DP App ....................................................................................................................................................................................................... 19
9. AirPlay and MirrorLink functions .............................................................................................................................................................. 20
• AirPlay ........................................................................................................................................................................................................ 20
• MirrorLink USB .......................................................................................................................................................................................... 22
• MirrorLink Wi-Fi ......................................................................................................................................................................................... 23
10. Installing apps from Google Play ........................................................................................................................................................... 24
11. Conguring GPS navigation voice prompts ......................................................................................................................................... 24
12. Conguring equalizer ................................................................................................................................................................................ 25
13. Front panel buttons .................................................................................................................................................................................. 27
14. Conguring steering wheel controls ...................................................................................................................................................... 27
15. Additional settings .................................................................................................................................................................................... 29
16. Rear view camera settings ..................................................................................................................................................................... 29
17. Front view camera settings ..................................................................................................................................................................... 30
18. Changing boot logo ................................................................................................................................................................................... 30
19. Front panel backlight customization .................................................................................................................................................... 31
20. Problems and troubleshooting ............................................................................................................................................................... 32

5
ENG
We congratulate you on purchasing Gazer multimedia system!
Please, read this guide carefully before using your Gazer multimedia system and storeit safely
for future reference.
Gazer multimedia systems are designed for standard installation in a specic car model or model range. All Gazer multimedia
systems support Plug&Play mounting and connection. Operation via control bus and CAN bus data transfer are also supported.
When connected to CAN bus via a special module, the system is managed by the car’s onboard computer (turning on/o,
climate control status, steering wheel buttons, car speed data, door opening sensors status, and other functions supported
by CAN bus of a specic car). The user can program the steering wheel control buttons on one’s own.
Gazer multimedia system

6
ENG
Gazer multimedia system package contents
* Depends on the model
** Depends on the region
Power cable
GPS antenna
Adapter bracket*
USB cable
CAN unit*
Adapter shaft for
installation*
Audio/Video In cable
Remote control*
Memory card with licensed
Navitel software**
User manual
Audio/Video Out cable
Velcro band*

7
ENG
Installation diagram
Connection diagram
For Gazer CM50-100 model
1. GPS antenna jack
2. Wi-Fi antenna
3. FM antenna jack
4. Peripheral equipment connection interfaces:
A. Audio/Video Out
B. USB
C. Camera in, AUX, Audio/Video in
D. Not usable
E. Not usable
F. Not usable
G. Not usable
H. Not usable
5. Power cable socket
6. Fuse (15A)
GPS
1
2
3
4 5 6
Power cable socket
1. Black – GND
2. Purple+Black
–
Rear Right -
3. Gray+Black – Front Right -
4. Green – Rear Left +
5. White – Front Left +
6. Brown – Brake
7. Orange – Amplier
8. White – SWC
9. Black – SWC GND
10. White+Red – Illumination
11. Yellow – B+ 12V
12. Purple – Rear Right +
13. Gray – Front Right +
14. Green+Black – Rear Left -
15. White+Black – Front Left -
16. Red – ACC
17. Pink – Reverse
18. Blue – Antenna Control
19. Brown+Black – CAN +
20. Blue+White – CAN -

8
ENG
Installation tips
• For Gazer multimedia system installation, one must check that all plugs and jacksare connectedin accordance with the
connection diagram.
• Make sure that the yellow “BATT+” wire of the power cable is connected to the plus terminal of the car battery while the
red “ACC” wire is connected to the auxiliary equipment bus (+12V voltage is supplied when the ignition key is turned to
АСС position).
• Prior to installing the system, one must consider where to place the remote elements such as GPS antennas and USB
ports.
•Lay all cables under the trim.
• Connect the stock USB and AUX connectors to the multimedia system (depending on the car model).
• If your multimedia system has a built-in DVD drive, unscrew two safety screws located in the center of the top panel.
• Prior to using the device, insert a memory card in the “SD card” slot.
• To use all Gazer multimedia system features, one must connect it to the Internet.
Caution! Incorrect power connection may cause the multimedia system to malfunction or fail.
Caution! Remove the memory card only when the device is switched o.

9
ENG
Radio App
To launch Radio app, tap on the corresponding icon in the installed apps list.
Use and buttons to initialize automatic search for available radio stations.
For manual tuning of the radio receiver, use the slider on the frequency range scale.
To enable manual tuning, hold down or buttons for 2 sec. After that, you can ne-tune the receiver to the
required frequency.

10
ENG
Radio App
To make the radio station accessible from a memory button, hold down the required button for 2 sec.
Use button to make the receiver search and memorize all the available radio stations automatically. During the
scanning process, the radio receiver will detect all the available radio stations and assign them consecutively to memory
buttons in FM1, FM2, FM3 or AM1, AM2 groups depending on the frequency range.
To switch between FM1, FM2, FM3 or AM1, AM2 memory button groups, use on-screen and .
button enables or disables Stereo mode.
By pressing button, one can switch between “local/long-distance” reception modes. “Local mode” is used for
receiving strong radio signals, while “long-distance mode” is used for weak radio signals reception.
By default, the multimedia system operates in the long-distance reception mode. When the local reception mode is enabled,
“LOC” indicator appears on the display. Press the button again to disable this mode.
When listening to radio in the background, one can switch between stations using the mini-player built into the widget on
the home screen.
button is designed for searching radio stations by genre. Once this button is pressed, a drop-down list is displayed
where one can select the genre of the required radio station.
button is designed for searching radio stations broadcasting live trac information.
button enables automatic retuning of the radio receiver (e.g., in case of poor reception on the current frequency) to
a dierent frequency where the current program is also broadcast.
Note. Keep in mind that the multimedia system has 6 memory buttons in each group, which allows memorizing a total of
18 radio stations for FM frequency range and 12 radio stations for AM frequency range.

11
ENG
Music App
To launch Music app, tap on the corresponding icon in the installed apps list.
Press to pause audio playback and to resume it.
To skip to the next or previous audio track, use and buttons.
To fast forward/rewind the recording, move the slider on the audio track progress bar.
To fast switch between audio equalizer presets, press the button in the bottom left corner. The current equalizer preset is
indicated on the button.
To select a media source for playback, press button or pull the main screen to the right.
To view the current playlist, pull the main screen to the left.

12
ENG
Buttons located in the top right corner are used for switching information display and audio playback modes.
When audio tracks are played back in the background, one can switch between stations using the mini-player built into the
widget on the home screen.
Music App
To launch Video app, tap on a corresponding icon in the installed apps list.
Press , to pause video playback, use button to start playing a video le, and tap to stop video
playback completely.
Video App

13
ENG
Video App
To skip to the next or previous video clip, use and buttons.
To navigate to a certain scene in the video clip, move the slider on the video playback progress bar either back or forward.
To select a media source for playback, press button or pull the main screen to the right.
To view the current playlist, pull the main screen to the left.
When button is pressed, the video image will be stretched to t the screen margins.
Set playback order using the second button on the left (located on the lower panel). Once pressed, the button changes
depending on the selected order.
To quickly increase/decrease the brightness, swipe up or down in the left half of the screen.
To quickly increase/decrease the volume, swipe up or down in the right half of the screen.
Bluetooth app allows making and receiving hands-free calls.
To connect a mobile phone to the multimedia system, follow the instructions below:
•Enable bluetooth in the mobile phone.
• Find the multimedia system in the list of available bluetooth devices. Pair your phone with the multimedia system and
enter the password (“0000” by default).
If mobile phone pairing is successful, its name will appear in the Search tab of Bluetooth app. All other tabs in the app will
also become active.
To disconnect the device, use button.
Bluetooth App

14
ENG
To navigate to the dialer tab, hit button.
Bluetooth App
To remove mobile device from the list of paired devices, press button.

15
ENG
button is used to enable/disable hands-free mode during a telephone call.
To navigate to the contacts tab, hit button.
Bluetooth App

16
ENG
Use the search bar to search in the contacts list. One can also press button for quick alphabetic navigation.
Bluetooth App
To dial the selected number, use button.
Press button for manual synchronization of contact data saved on your mobile phone.

17
ENG
To access the call log, press button.
To access bluetooth settings, press button.
Bluetooth App

18
ENG
Bluetooth App
One can use this tab to change the bluetooth name of the device, connection password, and congure the auto-answer
settings for incoming calls as well as enable automatic pairing whenever a previously paired device is detected.

19
ENG
A2DP App
A2DP App is designed for listening music from the mobile phone via bluetooth.
To use the app, connect your mobile phone to the multimedia system via bluetooth, as described in the “Bluetooth” section
of this guide (p. 13).
The app can be launched by tapping on the corresponding icon in the installed apps list.
Switch audio tracks by pressing and buttons.
To start or pause playback, press button.
During audio playback, one can see the name of the track and the artist.

20
ENG
AirPlay and MirrorLink functions
AirPlay
AirPlay function is designed for mirroring the screen and playing back audio les from iOS-running devices on the multimedia
system display.
To use AirPlay function, the multimedia system and the mobile device must be connected to the same Wi-Fi network. One
can connect the devices into a single network in a number of ways:
1. By connecting both devices (a mobile device and a multimedia system) to the same Wi-Fi network (home network,
public network, mobile 3G network, etc.).
2. By creating a Wi-Fi network on a mobile device and connecting the multimedia system to it.
3. By creating a Wi-Fi network on a multimedia system and connecting the mobile device to it.
To setup a Wi-Fi network on an iOS mobile device, do as follows:
• Open “Settings” – “Personal Hotspot”.
• Activate a personal hotspot.
To setup a Wi-Fi network on a multimedia system, do as follows:
• Open “Settings” – “More” – “Tethering & portable hotspot”.
• Enable the “Portable Wi-Fi hotspot” optio.
Once both the devices (the multimedia system and the iOS mobile device) are connected within a single Wi-Fi network, one
can proceed to enabling AirPlay function.
Note. This menu also allows changing the access password to the newly created network.
Note. Use the “Set up Wi-Fi hotspot” item of this menu to change the access password and the name of the newly
created network.
Table of contents
Languages:
Other Gazer Car Video System manuals