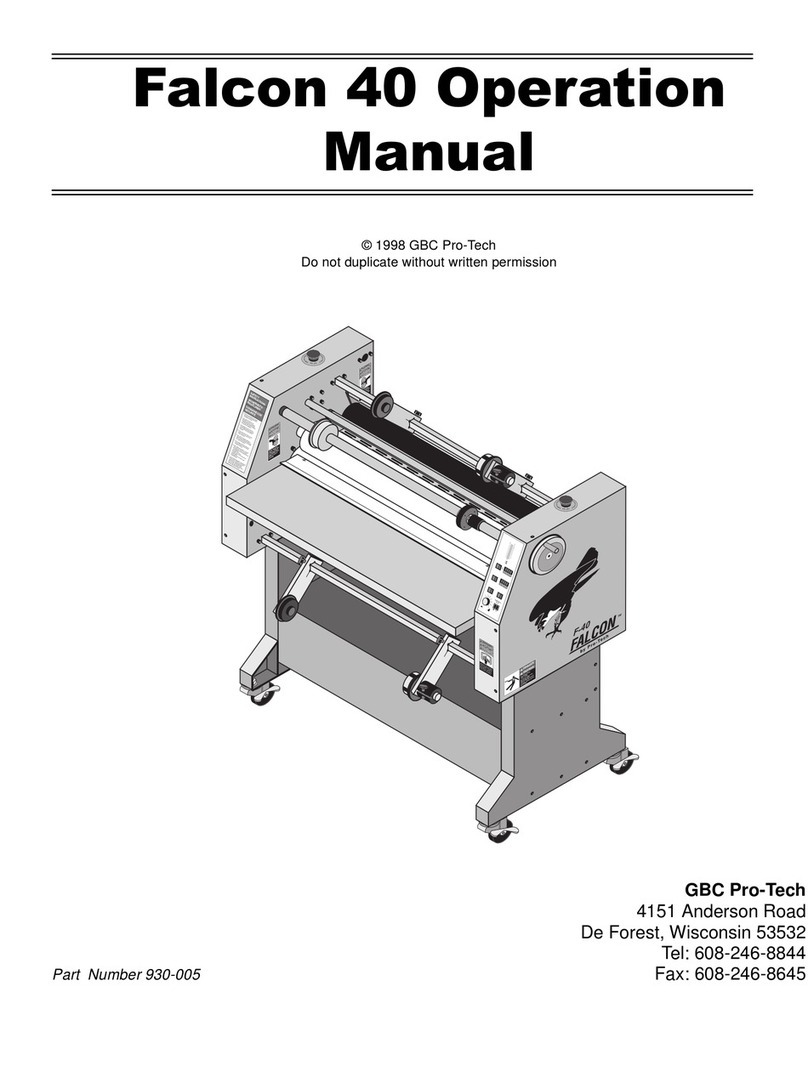
GBC ORCA-I User manual

25&$,2SHUDWLRQ
0DQXDO
© 1997 GBC Pro-Tech
NOT
AUS
E
M
E
R
G
E
N
CY
ST
OP
ARR
E
T
D'
U
R
G
E
N
C
E
©1994HCS,Inc.800-748-0241 ReorderNo.7002-PT
SAFETY
INSTRUCTIONS
SICHERHEITS-
RICHTLINIEN
CONSIGNES DE
SÉCURITÉ
1.Read and understand the Operation
Manualand all safety labels before
operatingthis machine.
2.Only a trained person is to be
permittedto operate this machine.
Trainingshouldinclude instruction
inoperation under normal conditions
andemergency situations.
3.This machine is to be serviced only
bytrained and authorized personnel.
Followlockoutprocedures before
servicing.
4.Never reach into the machine for any
reasonunless the machine is at a
COMPLETESTOP.
5.Never leave the machine stopped in
sucha manner that another worker can
startthe machine while you are working
onor within the machine.
6.Never change or defeat the function of
electricalinterlocks or other machine
“shutdown”switches.
7.Before starting this machine, check that:
-All persons are clear of the machine.
-No maintenance work is being performed
on the machine.
-All guards are in place.
-All parent rolls are well chuckedin the
unwind stands.
-Themachine is free of paper scraps,
wraps and jams.
8.There is a potential hazard of entanglement
inthis machine caused by items such as
longhair,loose clothing and jewelry.
Makesure your clothing and hair fit
closelyto yourbody and that all jewelry,
ringsand watches are removed.
©1994HCS,Inc.800-748-0241 Reorder No.1033-PT
Crushand burn
hazard. Stay clear
ofmoving rollers.
Stopmachine and
raiseroll before
cleaning.
WARNING
ACHTUNG
MISEEN GARDE
©1994HCS,Inc.800-748-0241 ReorderNo.1033R-PT
Crushand burn
hazard. Stay clear
ofmoving rollers.
Stopmachine and
raiseroll before
cleaning.
WARNING
ACHTUNG
MISEEN GARDE
1/2
NOT
AUS
E
M
E
R
G
E
N
CY
ST
OP
ARR
E
T
D'
U
R
G
E
N
C
E
STOP
AUTO
SPEED
0
3
6912
15
18
FWD
REV
POWER
FAN
1
O
1
OHEAT
ROLL
PRESSURE ADJ
B
O
T
T
O
M
MOTOR CONTROLS
PRO-TECHEngineering Madison,WI 608-246-8844
LAMINATORROLL CONTROLS
T
O
P
20
100
40
80
™
Tobe serviced only
bytrained and
authorized personnel.
Lockoutpower before
servicing.
HAZARDOUS
VOLTAG E.
DANGER
GEFAHR
©1994HazardCommunication Systems, Inc. 800-748-0241 ReorderNo.5025-PT
GBC Pro-Tech
4151 Anderson Road
De Forest, Wisconsin 53532
Tel: 608-246-8844
Part Number 930-404 Fax: 608-246-8645
EDNord - Istedgade 37A - 9000 Aalborg - telefon 96333500

ORCA-I Operation Manual
ii GBC Pro-Tech 1997 October
The information in this publication is provided for reference and is believed to be
accurate and complete. GBC Pro-Tech is not liable for errors in this publication or for
incidental or consequential damage in connection with the furnishing or use of the
information in this publication, including, but not limited to, and implied warranty of
fitness or merchantability for any particular use.
GBC Pro-Tech reserves the right to make changes to this publication and to the
products described in it without notice. All specifications and information concerning
products are subject to change without notice.
Reference in this publication to information or products protected by copyright or
patent does not convey any license under the rights of GBC Pro-Tech or others. GBC
Pro-Tech assumes no liability arising from infringements of patents or any other rights
of third parties.
This Manual is Copyrighted © 1997 by GBC Pro-Tech. All rights reserved. The
information contained in this manual is proprietary and may not be reproduced, stored,
transmitted, or transferred, in whole or in part, in any form without the prior and
express written permission of GBC Pro-Tech.
EDNord - Istedgade 37A - 9000 Aalborg - telefon 96333500

ORCA-I Operation Manual
GBC Pro-Tech 1997 October iii
7DEOH RI &RQWHQWV
6HFWLRQ 6DIHW\
Caution/Warning Label Locations.......................................................................................1-5
6HFWLRQ ,QVWDOODWLRQ
Preinstallation Checklist......................................................................................................2-1
Unpacking............................................................................................................................2-4
Setup...................................................................................................................................2-5
Startup.................................................................................................................................2-6
6HFWLRQ 2SHUDWLRQ
Safety ..................................................................................................................................3-1
Operator Controls................................................................................................................3-3
Front Control Panel..........................................................................................................3-3
Rear Control Panel...........................................................................................................3-4
Setup...................................................................................................................................3-5
Laminator Roll Pressure...................................................................................................3-5
Loading the Film..................................................................................................................3-5
Positioning the Film.............................................................................................................3-5
Heating................................................................................................................................3-6
Paper Tips...........................................................................................................................3-6
Laminating 51" - 55" Materials.............................................................................................3-6
Process Control Charts .......................................................................................................3-7
Mounting Only .....................................................................................................................3-7
Setup................................................................................................................................3-7
Procedure.........................................................................................................................3-7
Mounting/Laminating...........................................................................................................3-7
Setup................................................................................................................................3-7
Procedure.........................................................................................................................3-7
Encapsulation......................................................................................................................3-8
Setup................................................................................................................................3-8
Procedure.........................................................................................................................3-8
Two-Pass Mount and Laminate (Hot and Cold)...................................................................3-8
EDNord - Istedgade 37A - 9000 Aalborg - telefon 96333500

ORCA-I Operation Manual
iv GBC Pro-Tech 1997 October
Setup................................................................................................................................3-8
Procedure, Pass 1............................................................................................................3-8
Procedure, Pass 2............................................................................................................3-8
PROCESS CONTROL CHART ...........................................................................................3-9
PROCESS CONTROL CHART 3-1...................................................................................3-11
PROCESS CONTROL CHART 3-2...................................................................................3-13
PROCESS CONTROL CHART 3-3...................................................................................3-15
PROCESS CONTROL CHART 3-4...................................................................................3-17
PROCESS CONTROL CHART 3-5...................................................................................3-19
PROCESS CONTROL CHART 3-6...................................................................................3-21
PROCESS CONTROL CHART 3-7...................................................................................3-23
6HFWLRQ 0DLQWHQDQFH DQG 7URXEOHVKRRWLQJ
Cleaning ..............................................................................................................................4-1
Adjusting the Nip .................................................................................................................4-3
Chain Tensioning ................................................................................................................4-4
Adjusting the Air Cylinder Rate............................................................................................4-5
Lubrication...........................................................................................................................4-7
Contacting Technical Support.............................................................................................4-8
Output Troubleshooting Guide............................................................................................4-9
6HFWLRQ :DUUDQW\
Limited Warranty.................................................................................................................5-1
Exclusions to the Warranty ..............................................................................................5-1
6HFWLRQ 7HFKQLFDO ,QIRUPDWLRQ
Specifications ......................................................................................................................6-1
6HFWLRQ ,QGH[
EDNord - Istedgade 37A - 9000 Aalborg - telefon 96333500

ORCA-I Operation Manual Safety and Warranty Information
GBC Pro-Tech 1997 October 1-1
6HFWLRQ
6DIHW\
DO NOT ATTEMPT TO OPERATE YOUR
ORCA-I LAMINATOR UNTIL YOU HAVE
READ THIS SECTION CAREFULLY!
Your safety, as well as the safety of others, is
important to GBC Pro-Tech. This section contains
important safety information.
The following symbols are used throughout this
manual to indicate warnings and cautions.
DANGER
Indicates an imminently hazardous situation
which, if not avoided, will result in death or
serious injury.
WARNING
Indicates a potentially hazardous situation
which, if not avoided, could result in death or
serious injury.
CAUTION
Indicates a potentially hazardous situation
which, if not avoided, could result in minor or
moderate injury, or alerts against unsafe
practices, or alerts against actions which could
damage the product.
The ORCA-I Laminator has been designed with
safety as a primary consideration. However, you
must become thoroughly familiar with the controls,
proper operation, proper service procedures, and
safety features of the laminator before using or
servicing the unit.
GBC Pro-Tech laminators are powerful machines
that are designed to mount, laminate and encapsulate.
The forces required to accomplish these tasks can
vary from negligible to very large.
The air-cylinder system used to provide downward
pressure on the top roll is capable of producing
forces greater than 1000 pounds (454kg). This force
is applied to any object presented in the opening
(called the nip) between the two rolls.
Use care in lowering the top laminating roll and know
how to react quickly in an emergency. The laminator
roll UP-DOWN switch is located on the instrument
panel labeled Laminator Roll Controls on the upper
right-hand side of the machine. This switch controls
the up and down motion of the top laminator roll.
Before turning this switch to the DOWN position,
ensure that nothing is in the nip area.
In addition, the laminating rolls of the ORCA-I can
reach temperatures of over 200°F (100°C). At these
temperatures there is a danger of a severe burn if the
rolls are touched during set-up, operation or
servicing.
An important feature of the laminator is the
photoelectric eye system that stops the machine when
objects move into the nip area. Once the blocking
object is removed and the light beam reestablished,
the rolls resume turning. However, this system is
overridden if you use the footswitch
WARNING
Use extreme caution when operating the
laminator with the footswitch. The
photoelectric eye system is overridden and
your fingers can get caught in the nip. You can
be crushed or burned.
The ORCA-I Laminator has a steel cabinet that is
bolted closed to isolate the electrical and drive system
components for the safety of the operator. Only a
qualified service technician should open these
cabinets.
EDNord - Istedgade 37A - 9000 Aalborg - telefon 96333500

Safety and Warranty Information ORCA-I Operation Manual
GBC Pro-Tech 1997 October
1-2
The laminator is equipped with two emergency stop
buttons located on the top of either side of the
laminator. Either of these, if engaged, stops the
laminator and raises both the main roll and pull roll.
To continue operation both emergency stop buttons
must be in the up position and turn the main roll UP-
DOWN switch to the UP position to reset the
laminator. The laminator roll UP-DOWN switch is
located on the instrument panel labeled Laminator
Roll Controls on the upper right-hand side of the
machine. This switch controls the up and down
motion of the top laminator roll. Before turning this
switch to the DOWN position, ensure that nothing is
in the nip area.
NOT
AUS
E
M
E
R
G
E
N
CY
ST
OP
ARR
E
T
D'
U
R
G
E
N
C
E
NOT
AUS
E
M
E
R
G
E
N
CY
ST
OP
ARR
E
T
D'
U
R
G
E
N
C
E
Twist and pull up
both buttons to
resume operation
Push either
button to stop the
laminator
1
/
4
tu
r
n
Figure 1-1:
Using the Emergency Stop Buttons
In addition, the ORCA-I is equipped with two
Emergency Stop Kick Cables located at the lower
front and back of the laminator. Either of these, if
stepped on or kicked, stops the laminator and raises
the rolls. To continue operation, turn the main roll
UP-DOWN switch to the UP position to reset the
laminator. Before turning this switch to the DOWN
position, ensure that nothing is in the nip area.
NOT
AUS
E
M
E
R
G
E
N
CY
ST
OP
ARR
E
T
D'
U
R
G
E
N
C
E
©1994HCS,Inc.800-748-0241ReorderNo.6001-PT
CarefullyreadOperator's
Manualbeforehandling
thismachine. Observe
instructionsandsafety
ruleswhenoperating.
WARNING
ACHTUNG
MISEENGARDE
POWER
NOT
AUS
E
M
E
R
G
E
N
CY
ST
OP
ARR
E
T
D'
U
R
G
E
N
C
E
©1994HCS,Inc.800-748-0241 Reorder No.7002-PT
SAFETY
INSTRUCTIONS
SICHERHEITS-
RICHTLINIEN
CONSIGNESDE
SÉCURITÉ
1.Readand understand the Operation
Manualandallsafety labels before
operatingthismachine.
2.Onlya trained person is to be
permittedtooperate this machine.
Trainingshouldincludeinstruction
inoperationunder normal conditions
andemergencysituations.
3.Thismachine is to be serviced only
bytrainedandauthorized personnel.
Followlockoutproceduresbefore
servicing.
4.Neverreach into the machine for any
reasonunlessthe machineis at a
COMPLETESTOP.
5.Neverleave the machine stopped in
suchamannerthat another worker can
startthemachine while youare working
onorwithin the machine.
6.Neverchange or defeat the function of
electricalinterlocksorother machine
“shutdown”switches.
7.Beforestarting this machine, check that:
-Allpersonsare clear of the machine.
-Nomaintenance workis being performed
on the machine.
-Allguardsare in place .
-Allparent rollsare well chucked in the
unwind stands.
-Themachineis free of paper scraps,
wraps and jams.
8.Thereis a potential hazard of entanglement
inthismachinecaused by items such as
longhair,looseclothing and jewelry.
Makesureyourclothing and hair fit
closelytoyourbody and that all jewelry,
ringsandwatchesare removed.
©1994HCS,Inc.800-748-0241ReorderNo.1033-PT
Crushand burn
hazard. Stayclear
ofmoving rollers.
Stopmachine and
raiseroll before
cleaning.
WARNING
ACHTUNG
MISEENGARDE
©1994HCS,Inc.800-748-0241ReorderNo.1033R-PT
Crushand burn
hazard. Stayclear
ofmoving rollers.
Stopmachine and
raiseroll before
cleaning.
WARNING
ACHTUNG
MISEENGARDE
1/2
NOT
AUS
E
M
E
R
G
E
N
CY
ST
OP
ARR
E
T
D'
U
R
G
E
N
C
E
STOP
AUTO
SPEED
0
3
6912
15
18
FWD
REV
POWER
FAN
1
O
1
OHEAT
ROLL
PRESSURE ADJ
B
O
T
T
O
M
MOTOR CONTROLS
PRO-TECHEngineeringMadison,WI608-246-8844
LAMINATORROLL CONTROLS
T
O
P
20
100
40
80
Tobe serviced only
bytrained and
authorizedpersonnel.
Lockoutpower before
servicing.
HAZARDOUS
VOLTAGE.
DANGER
GEFAHR
©1994HazardCommunicationSystems,Inc.800-748-0241ReorderNo.5025-PT
©1994HCS,Inc.800-748-0241ReorderNo.1033R-PT
Crushand burn
hazard. Stayclear
ofmoving rollers.
Stopmachine and
raiseroll before
cleaning.
WARNING
ACHTUNG
MISEENGARDE
1/2 1/2
©1994HCS,Inc.800-748-0241ReorderNo.1033-PT
Crushand burn
hazard. Stayclear
ofmoving rollers.
Stopmachine and
raiseroll before
cleaning.
WARNING
ACHTUNG
MISEENGARDE
IHAVE NO IDEA
WHAT'SHERE
STUFF
STUFF
STUFF
STUFF
STUFF
STUFF
1.0
2.0
3.0
4.0
5.0
6.0
1.0
2.0
3.0
4.0
5.0
6.0
IHAVE NO IDEA
WHAT'SHERE
Tobe serviced only
bytrained and
authorizedpersonnel.
Lockoutpower before
servicing.
HAZARDOUS
VOLTAGE.
DANGER
GEFAHR
©1994HazardCommunicationSystems,Inc.800-748-0241ReorderNo.5025-PT
NOT
AUS
E
M
E
R
G
E
N
CY
ST
OP
ARR
E
T
D'
U
R
G
E
N
C
E
PRESSURE
20
100
40
80
PRESSURE
20
100
40
80
STOP
AUTO
STOP
AUTO
ADJ
ADJ
PULLROLL CLUTCH
PULLROLL CONTROLS
Emergency
Stop Kick
Cable
Emergency
Stop Kick
Cable
™
Figure 1-2:
Using the Emergency Stop Kick
Cables
EDNord - Istedgade 37A - 9000 Aalborg - telefon 96333500

ORCA-I Operation Manual Safety and Warranty Information
GBC Pro-Tech 1997 October 1-3
Despite the safety features built into the ORCA-I
Laminator, extreme caution must be used when
operating or servicing the unit. READ THE
FOLLOWING WARNINGS AND CAUTIONS
BEFORE ATTEMPTING TO OPERATE OR
SERVICE THE ORCA-I LAMINATOR.
WARNING
Never place fingers or arms between the rolls
when they are turning or when the rolls are in
the closed position. You can be crushed or
burned.
WARNING
Do not wear ties, loose fitting clothing or
dangling jewelry while operating or servicing
the laminator. These items can get caught in
the nip and choke you or you can be crushed
or burned.
WARNING
Use extreme caution when operating the
laminator with the footswitch. The
photoelectric eye system is overridden and
your fingers can get caught in the nip. You can
be crushed or burned.
WARNING
Always use care in lowering the top laminating
roll. You can be crushed or burned.
WARNING
Do not operate the laminator near water. You
can be severely shocked, electrocuted or cause
a fire.
DANGER
Remove power from the laminator before
servicing. You can be severely shocked,
electrocuted or cause a fire.
WARNING
Do not use liquid or aerosol cleaners on the
laminator. Do not spill liquid of any kind on
the laminator. You can be severely shocked,
electrocuted or cause a fire. Use only a damp
cloth for cleaning.
WARNING
Exercise care when cleaning the rolls with
80% isopropyl alcohol:
•Use only in a well ventilated area.
•Wear rubber gloves.
•Use only on cool rolls.
Cleaning heated rolls can ignite the fumes.
CAUTION
Use only 80% isopropyl alcohol or a rubber
cement eraser to clean the laminating rolls.
Harsh chemicals like toluene, acetone or MEK
destroy the silicone covering of the rolls.
CAUTION
Raise the upper main roll when the laminator
is not in operation. Prolonged contact can
damage the rolls.
EDNord - Istedgade 37A - 9000 Aalborg - telefon 96333500

Safety and Warranty Information ORCA-I Operation Manual
GBC Pro-Tech 1997 October
1-4
CAUTION
Excess pressure can damage the laminating
rolls. Always select the minimum roll pressure
necessary to complete the task.
CAUTION
If silicone adhesive contacts the upper or
lower roll, remove it IMMEDIATELY using
80 % isopropyl alcohol. It can harden within
an hour and ruin the roll.
WARNING
The operating environment must be free of
dust, flammable liquids and vapors. You can
be injured by inhaling chemical vapors. Vapor
build up or stored flammable liquids can cause
a fire. Excessive dust can damage the
laminator.
CAUTION
Do not use a knife or other sharp instrument
during installation or while servicing the
laminator. You can cause irreparable damage
to the rolls.
WARNING
Do not attempt to move the laminator across
anything other than a flat, level surface
without trained and qualified riggers. You can
be crushed or seriously injured.
The ORCA-I Laminator is a large and heavy
piece of equipment. It is necessary to employ
LICENSED RIGGERS ONLY to move the
machine. The laminator is not designed to be
tipped up or sideways in any way. Such action
disturbs the exact alignment of the rolling
parts of the machine and requires extensive
realignment. GBC Pro-Tech’s warranty does
not cover malfunction of the equipment due to
mishandling and/or tipping.
GBC Pro-Tech bears no responsibility for
personal injury or damage due to moving the
laminator improperly.
WARNING
Only a qualified electrician should connect
power to the laminator. You can be severely
shocked, electrocuted or cause a fire if power
is improperly applied.
WARNING
Do not operate the laminator if the power
cord is damaged or frayed. You can be
severely shocked, electrocuted or cause a fire.
Contact a qualified electrician to replace the
cord.
EDNord - Istedgade 37A - 9000 Aalborg - telefon 96333500

ORCA-I Operation Manual Safety and Warranty Information
GBC Pro-Tech 1997 October 1-5
WARNING
Do not allow anything to rest on the power
cord. Do not locate the cord where people can
walk on it. You or others can be severely
shocked, electrocuted or cause a fire.
WARNING
Never insert objects of any kind through any
of the slots on the laminator. You can touch
dangerous voltage points or short out parts.
You can be severely shocked, electrocuted or
cause a fire.
CAUTION
Do not block infrared temperature sensors.
Main rolls could be damaged from
overheating.
ALWAYS USE GOOD SAFETY PRACTICES
WHEN OPERATING OR SERVICING THE
LAMINATOR AND KNOW HOW TO REACT
QUICKLY IN AN EMERGENCY.
&DXWLRQ:DUQLQJ /DEHO /RFDWLRQV
Posted at various locations on your ORCA-I
Laminator are important safety labels. PAY
CAREFUL ATTENTION TO THESE LABELS AT
ALL TIMES! Figure 1-3 shows the location of each
of these labels.
EDNord - Istedgade 37A - 9000 Aalborg - telefon 96333500

Safety ORCA-I Operation Manual
GBC Pro-Tech 1997 October
1-6
©1994 HCS, Inc. 800-748-0241 Reorder No. 1012-PT
Moving parts can
crush and cut.
Do not operate with
door open.
WARNING
ACHTUNG
MISE EN GARDE
©1994 HCS, Inc. 800-748-0241 Reorder No. 1012-PT
Moving parts can
crush and cut.
Do not operate with
door open.
WARNING
ACHTUNG
MISE EN GARDE
NOT
AUS
E
M
E
R
G
E
N
CY
ST
OP
ARR
E
T
D'
U
R
G
E
N
C
E
©1994HCS,Inc.800-748-0241ReorderNo.7002-PT
SAFETY
INSTRUCTIONS
SICHERHEITS-
RICHTLINIEN
CONSIGNES DE
SÉCURITÉ
1.Read and understand the Operation
Manualand all safetylabels before
operatingthis machine.
2.Only a trained person is to be
permittedto operate this machine.
Trainingshouldinclude instruction
inoperation under normal conditions
andemergency situations.
3.This machine is to be serviced only
bytrainedand authoriz ed personnel.
Followlockoutprocedures before
servicing.
4.Never reach into the machine for any
reasonunless the machine is at a
COMPLETESTOP.
5.Never leave the machine stopped in
sucha manner that another workercan
startthe machine while you are working
onor within the machine.
6.Never change or defeat the function of
electricalinterlocksor other machine
“shutdown”switches.
7.Before starting this machine, check that:
-All persons are clearof the machine.
-No maintenance workis being performed
on the machine.
-All guardsare in place .
-All parent rollsare well chucked in the
unwind stands.
-Themachine is free of paper scraps,
wraps and jams.
8.There is a potential hazard of entanglement
inthis machine caused byitems such as
longhair,loose clothing and jewelry.
Makesure yourclothing and hair fit
closelytoyour body and that all jewelry,
ringsand watches are removed.
©1994HCS,Inc.800-748-0241 ReorderNo.1033-PT
Crushand burn
hazard. Stay clear
ofmoving rollers.
Stopmachine and
raiseroll before
cleaning.
WARNING
ACHTUNG
MISEEN GARDE
©1994HCS,Inc.800-748-0241ReorderNo.1033R-PT
Crushand burn
hazard. Stay clear
ofmoving rollers.
Stopmachine and
raiseroll before
cleaning.
WARNING
ACHTUNG
MISEEN GARDE
1/2
©1994 HCS, Inc. 800-748-0241 Reorder No.7002-PT
SAFETY
INSTRUCTIONS
SICHERHEITS-
RICHTLINIEN
CONSIGNES DE
SÉCURITÉ
1. Read and understand the Operation
Manual and all safety labels before
operating this machine.
2. Only a trained person is to be
permitted to operate this machine.
Training should include instruction
in operation under normal conditions
and emergency situations.
3. This machine is to be serviced only
by trained and authorized personnel.
Follow lockout procedures before
servicing.
4. Never reach into the machine for any
reason unless the machine is at a
COMPLETE STOP.
5. Never leave the machine stopped in
such a manner that another worker can
start the machine while you are working
on or within the machine.
6. Never change or defeat the function of
electrical interlocks or other machine
“shutdown” switches.
7. Before starting this machine, check that:
- All persons are clear of the machine.
- No maintenance work is being performed
on the machine.
- All guards are in place.
- All parent rolls are well chucked in the
unwind stands.
-The machine is free of paper scraps,
wraps and jams.
8. There is a potential hazard of entanglement
in this machine caused by items such as
long hair,loose clothing and jewelry.
Make sure your clothing and hair fit
closely to your body and that all jewelry,
rings and watches are removed.
©1994 HCS, Inc. 800-748-0241 Reorder No.1033R-PT
Crush and burn
hazard. Stay clear
of moving rollers.
Stop machine and
raise roll before
cleaning.
WARNING
ACHTUNG
MISE EN GARDE
©1994 HCS, Inc. 800-748-0241 Reorder No.1033R-PT
Crush and burn
hazard. Stay clear
of moving rollers.
Stop machine and
raise roll before
cleaning.
WARNING
ACHTUNG
MISE EN GARDE
©1994 HCS, Inc. 800-748-0241 Reorder No.1033-PT
Crush and burn
hazard. Stay clear
of moving rollers.
Stop machine and
raise roll before
cleaning.
WARNING
ACHTUNG
MISE EN GARDE
©1994 HCS, Inc. 800-748-0241 Reorder No.1033-PT
Crush and burn
hazard. Stay clear
of moving rollers.
Stop machine and
raise roll before
cleaning.
WARNING
ACHTUNG
MISE EN GARDE
©1994 HCS, Inc. 800-748-0241 Reorder No.6001-PT
Carefully read Operator's
Manual before handling
this machine. Observe
instructions and safety
rules when operating.
WARNING
ACHTUNG
MISE EN GARDE
©1994 HCS, Inc. 800-748-0241 Reorder No.6001-PT
Carefully read Operator's
Manual before handling
this machine. Observe
instructions and safety
rules when operating.
WARNING
ACHTUNG
MISE EN GARDE
3/32
1/8
KBICBARRIERTERMINAL BOARD
LINE
FUSE
ACCEL
P/N9884
MAX MIN IR CL
ARM
FUSE
I1
P3 P2P1 I1 F+ F- L1 L2 A+A-
3/32
1/8
Tobe serviced only
bytrained and
authorizedpersonnel.
Lockoutpower before
servicing.
HAZARDOUS
VOLTAGE.
DANGER
GEFAHR
©1994HazardCommunicationSystems,Inc. 800-748-0241 ReorderNo.5025-PT
STOP
AUTO
SPEED
0
3
6912
15
18
FWD
REV
POWER
FAN
1
O
1
OHEAT
ROLL
PRESSURE ADJ
B
O
T
T
O
M
MOTOR CONTROLS
PRO-TECHEngineeringMadison,WI 608-246-8844
LAMINATORROLL CONTROLS
T
O
P
20
100
40
80
NOT
AUS
E
M
E
R
G
E
N
CY
ST
OP
ARR
E
T
D'
U
R
G
E
N
C
E
To be serviced only
by trained and
authorized personnel.
Lockout power before
servicing.
HAZARDOUS
VOLTAGE.
DANGER
GEFAHR
©1994 Hazard Communication Systems, Inc. 800-748-0241 Reorder No. 5025-PT
To be serviced only
by trained and
authorized personnel.
Lockout power before
servicing.
HAZARDOUS
VOLTAGE.
DANGER
GEFAHR
©1994 Hazard Communication Systems, Inc. 800-748-0241 Reorder No. 5025-PT
Figure 1-3:
Locations of Safety Labels
EDNord - Istedgade 37A - 9000 Aalborg - telefon 96333500
ORCA-I Operation Manual Installation
GBC Pro-Tech 1997 October 2-1
6HFWLRQ
,QVWDOODWLRQ
Before an ORCA-I Laminator can be installed there
are a few requirements that must be met. Make
certain that each of the requirements listed in the
following preinstallation checklist are met before
beginning installation.
CAUTION
Failure to follow the preinstallation checklist
can result in damage to the laminator.
3UHLQVWDOODWLRQ &KHFNOLVW
❒Are doorways and hallways wide enough for the
laminator to be moved to the installation site?
❒Is there ample room for the laminator?
A work area must be established that allows for
operation in both the front and the rear of the
machine and provides space for efficient material
flow. Figure 2-1 shows a typical machine area
layout.
❒Is the environment appropriate for the laminator?
The laminator requires a clean, dust and vapor
free environment to operate properly. It must not
be located where there is air blowing directly on
the machine.
WARNING
The operating environment must be free of
dust, flammable liquids and vapors. You can
be injured by inhaling chemical vapors. Vapor
build up or stored flammable liquids can cause
a fire. Excessive dust can damage the
laminator.
CAUTION
Do not locate the laminator where air is
blowing directly on the machine. The air flow
can cool the rolls unevenly and result in poor
quality output.
❒Has a certified electrician been contacted to both
wire the laminator and ensure that an adequate
power supply, having the appropriate capacity,
overcurrent protection, and safety lockouts is
available?
The laminator requires 220 to 240 VAC, 50/60
Hz, 55A, single phase 3 wire. Or, in Europe
only, 3-N phase 230/400 VAC, 50 Hz, 25A per
phase.
USA - For single phase 3 wire, L1, L2, and L3
are tied together with a jumper box or the main
terminal block.
Europe - For 3-N phase, L1, L2, and L3 are each
separate phases. The jumper box must be
removed on the main terminal block.
WARNING
Do not operate the laminator if the power
cord is damaged or frayed. You can be
severely shocked, electrocuted or cause a fire.
Contact a qualified electrician to replace the
cord.
WARNING
Do not allow anything to rest on the power
cord. Do not locate the cord where people can
walk on it. You or others can be severely
shocked, electrocuted or cause a fire.
EDNord - Istedgade 37A - 9000 Aalborg - telefon 96333500

Installation ORCA-I Operation Manual
GBC Pro-Tech 1997 October
2-2
❒Is there an appropriate filtered air supply
available?
The laminator requires filtered air at 2 cubic feet
per minute (cfm), at a pressure of 100 pounds
per square inch (psi) (700 kPa). The air supply
must be clean (free of dirt) and dry. Moisture
causes corrosion and particles block pneumatic
controls. Either problem can cause the laminator
to malfunction.
It is the customer's responsibility to provide
appropriate filters and water traps for the air
hose before the air is routed to the laminator.
GBC Pro-Tech suggests that the best approach to
the air requirement is to provide a dedicated
small compressor for the laminator. A standard
light-duty ½ to ¾ horse power (1kW) electric air
compressor with 2.0 to 2.5 cfm output with a 2.5
gallon (20 liter) storage tank is appropriate.
CAUTION
The air supply to the laminator must be clean
and dry or the machine will be damaged.
EDNord - Istedgade 37A - 9000 Aalborg - telefon 96333500

ORCA-I Operation Manual Installation
GBC Pro-Tech 1997 October 2-3
75" (1.91 m)
3' (~1m)
Wall
4' x 6' (~1.22m x 2m)
Work Table
on Wheels
Table Height
37" - 37-1/2"
(~.94 - .95m)
37"
(.94 m)
8'6-1/2"
(~2.6m)
8'6-1/2"
(~2.6m)
Rear
Front
20'
(~.6m)
4' x 6' (~1.22m x 2m)
Work Table
on Wheels
Table Height
37" - 37-1/2"
(~.94 - .95m)
Electrical
Supply
Air
Supply
13' (~4m)
Figure 2-1:
Laminator Space Requirements
EDNord - Istedgade 37A - 9000 Aalborg - telefon 96333500

Installation ORCA-I Operation Manual
GBC Pro-Tech 1997 October
2-4
8QSDFNLQJ
⇒NOTE
ALL SHIPMENTS ARE EX- WORKS. At our dock
title passes to the buyer Please review your
insurance coverage prior to shipment, as you are
responsible for all subsequent freight charges and
risks. Before signing the Bill of Lading they should
be sure to inspect the crate and/or pallet for signs of
damage or missing items; if applicable, they should
make a note of this on the Bill of Lading.
WARNING
The unpacking process requires at least two
people. You can be severely injured or
crushed.
Tools required:
•Phillips head screwdriver
•7/8" open end wrench or adjustable wrench
To uncrate the laminator:
1. Remove the top of the crate and then the sides in
the order shown in Figure 2-2.
CAUTION
Do not allow the top to fall into the crate. It
can damage the laminator.
Do not put packing screws on the floor. They
can cause problems when trying to roll the
machine into position.
A second person must support the side labeled
5 in Figure 2-2. It can fall and damage the
laminator.
5
4
NOT
AUS
E
M
E
R
G
E
N
CY
ST
OP
ARR
E
T
D'
U
R
G
E
N
C
E
©1994HCS,Inc.800-748-0241ReorderNo.7002-PT
SAFETY
INSTRUCTIONS
SICHERHEITS-
RICHTLINIEN
CONSIGNESDE
SÉCURITÉ
1.ReadandunderstandtheOperation
Manualandallsafetylabelsbefore
operatingthismachine.
2.Onlyatrainedpersonistobe
permittedtooperatethismachine.
Trainingshouldincludeinstruction
inoperationundernormalconditions
andemergencysituations.
3.Thismachineistobeservicedonly
bytrainedandauthorizedpersonnel.
Followlockoutproceduresbefore
servicing.
4.Neverreachintothemachineforany
reasonunlessthemachineisata
COMPLETESTOP.
5.Neverleavethemachinestoppedin
suchamannerthatanotherworkercan
startthemachinewhileyouareworking
onorwithinthemachine.
6.Neverchangeordefeatthefunctionof
electricalinterlocksorothermachine
“shutdown”switches.
7.Beforestartingthismachine,checkthat:
-Allpersonsareclearof themachine.
-Nomaintenanceworkisbeingperformed
onthemachine.
-Allguardsareinplace.
-Allparentrollsare wellchucked in the
unwindstands.
-Themachineisfreeofpaperscraps,
wrapsandjams.
8.Thereisapotentialhazardof entanglement
inthismachinecausedbyitemssuchas
longhair,looseclothingandjewelry.
Makesureyourclothingandhairfit
closelytoyourbodyandthatalljewelry,
ringsandwatchesareremoved.
©1994HCS,Inc.800-748-0241 ReorderNo.1033-PT
Crushandburn
hazard.Stay clear
ofmovingrollers.
Stopmachineand
raiserollbefore
cleaning.
WARNING
ACHTUNG
MISEENGARDE
©1994HCS,Inc.800-748-0241ReorderNo.1033R-PT
Crushandburn
hazard.Stay clear
ofmovingrollers.
Stopmachineand
raiserollbefore
cleaning.
WARNING
ACHTUNG
MISEENGARDE
1/2
NOT
AUS
E
M
E
R
G
E
N
CY
ST
OP
ARR
E
T
D'
U
R
G
E
N
C
E
STOP
AUTO
SPEED
0
3
6912
15
18
FWD
REV
POWER
FAN
1
O
1
OHEAT
ROLL
PRESSUREADJ
B
O
T
T
O
M
MOTOR CONTROLS
PRO-TECHEngineeringMadison,WI608-246-8844
LAMINATORROLLCONTROLS
T
O
P
20
100
40
80
Tobeservicedonly
bytrainedand
authorizedpersonnel.
Lockoutpowerbefore
servicing.
HAZARDOUS
VOLTAGE.
DANGER
GEFAHR
©1994HazardCommunicationSystems,Inc.800-748-0241ReorderNo.5025-PT
2
Install
Screws
1
3
Figure 2-2:
Removing the Crate
2. Carefully unwrap the shrink wrap from around
the laminator.
CAUTION
Do not use a knife or other sharp instrument
during installation or while servicing the
laminator. You can cause irreparable damage
to the rolls.
3. Carefully remove any accessories packed with
the laminator. The accessory pack should
contain:
1 Set, hex wrenches
1 Slitting knife
1 Manual
1 Set, spare fuses
1 Tape measure
1 Roll of masking tape
1 Rubber cement eraser
1 Air line quick-couple connector, female
4 Leveling pads
4. Have the laminator rolled off the skid and placed
on the floor by licensed riggers. The ramps
included with the laminator can be secured to the
edge of the crate bottom using the screws left
over from the crate disassembly (see Figure 2-2).
EDNord - Istedgade 37A - 9000 Aalborg - telefon 96333500

ORCA-I Operation Manual Installation
GBC Pro-Tech 1997 October 2-5
WARNING
Do not attempt to move the laminator across
anything other than a flat, level surface
without trained and qualified riggers. You can
be crushed or seriously injured.
The ORCA-I Laminator is a large and heavy
piece of equipment. It is necessary to employ
LICENSED RIGGERS ONLY to move the
machine. The laminator is not designed to be
tipped up or sideways in any way. Such action
disturbs the exact alignment of the rolling
parts of the machine and requires extensive
realignment. GBC Pro-Tech’s warranty does
not cover malfunction of the equipment due to
mishandling and/or tipping.
GBC Pro-Tech bears no responsibility for
personal injury or damage due to moving the
laminator improperly.
5. Remove any plastic strapping and packing paper
taped to the rolls.
CAUTION
Do not use a knife or other sharp instrument
during installation or while servicing the
laminator. You can cause irreparable damage
to the rolls.
6. Remove all packing materials to a safe distance
from the laminator.
⇒A NOTE ABOUT RECYCLING
The crate components can be reused for shipping
the machine again, or can be disassembled and the
wood and screws recycled. The shrink wrap is not
recyclable, however, so it must be discarded.
⇒NOTE
A word about international shipments: As these are
heavy pieces of equipment, GBC Pro-Tech takes
every precaution to ensure that our laminators are
properly crated to the highest standards.
Before machines leave our loading dock, they are
pre-treated with a VCI protective film to provide
total corrosion protection. This protective film is
wrapped around the machine and completely sealed.
In addition, moisture absorbing silicone desiccite
packs are packed inside the crate and machine
cabinets.
Prior to start up of the machine, you must remove
the desiccite packs from each cabinet and discard.
DO NOT operate the machine with the desiccite
packs inside the cabinets.
6HWXS
Once the ORCA-I Laminator has been unpacked and
moved into final position check each of the following
items.
Tools required:
•1/8" hex wrench
•Adjustable wrench
Setup Procedure
1. Inspect the laminator for any obvious shipping
damage.
2. Remove the drive and control side cabinet covers
with the 1/8" hex wrench by removing the upper
six screws holding each cover in place and then
loosening, but not removing, the lower two
screws and lifting each panel off the lower
screws.
3. Inspect all the bolts and tighten any that were
loosened during shipping.
4. Have a certified electrician wire the laminator
directly to a power source.
5. Set the nip. (See Section 4: Maintenance and
Troubleshooting for the procedure.)
6. Verify that the infrared sensors are not blocked.
EDNord - Istedgade 37A - 9000 Aalborg - telefon 96333500

Installation ORCA-I Operation Manual
GBC Pro-Tech 1997 October
2-6
WARNING
NEVER BLOCK THE INFRARED
SENSORS! The rolls can overheat and cause
a fire or seriously damage the laminator.
7. Verify that the photoelectric eyes are working
properly. (See Section 5: Adjustments for the
procedure.)
8. If the rolls do not go up and down evenly, adjust
the air cylinder rate (See Section 5: Adjustments
for the procedure.)
9. Replace both cabinet covers.
6WDUWXS
The first time the laminator is started and every time
it is serviced you should use the following checklist to
confirm that the unit is operating properly and that all
safety mechanisms are functioning.
Startup Checklist
Start the laminator and go through the following
checklist.
❒Are the emergency stop buttons working?
Push down on one of the emergency stop buttons.
The laminator should stop and both the upper
main roll and upper pull roll should raise, if they
are lowered. Twist the button until it pops up. If
the main roll UP-DOWN switch is in the UP
position, the machine is reset once the emergency
stop button is released. If the switch in the the
DOWN position, it must be set to the UP
position to reset the machine. Always check both
buttons.
WARNING
Never operate the laminator unless both of the
emergency stop buttons are functioning
properly. You can be crushed or burned.
❒Are the emergency stop kick cables working?
With the laminator running, step on or kick the
front emergency stop kick cable. The rolls should
stop turning and raise, if they are lowered. If the
main roll UP-DOWN switch is in the UP
position, the machine is reset once tension is
released from the kick cable. If the switch in the
the DOWN position, it must be set to the UP
position to reset the machine. Repeat the test for
the back emergency stop kick cable.
WARNING
Never operate the laminator unless both of the
emergency stop kick cables are functioning
properly. You can be crushed or burned.
❒Is the photoelectric eye system working?
With the laminator running, place an object
approximately the size of your hand just in front
of the nip to confirm that the photoelectric eye
system is functioning. The rolls should stop.
Move the object away from the nip. The
laminator should resume operation.
WARNING
Never operate the laminator unless the
photoelectric eye system is functioning
properly. You can be crushed or burned.
❒Is the motor functioning?
Test the motor at various speeds ranging from
0-14 fpm (feet per minute). At 0 the rolls should
stop turning.
Run the motor in both forward and reverse.
❒Are the heaters working?
Verify that the top heater controller heats the top
roll and the bottom heater controller heats the
bottom roll.
❒Is the footswitch operating?
Test the footswitch for both forward and reverse
operation. Verify that the footswitch overrides
the photoelectric eye by pressing the footswitch
and pushing an object as large as your hand into
the nip area.
Once you have completed the startup checklist you
can safely run a test sample.
EDNord - Istedgade 37A - 9000 Aalborg - telefon 96333500

ORCA-I Operation Manual Operation
GBC Pro-Tech 1997 October 3-1
6HFWLRQ
2SHUDWLRQ
6DIHW\
GBC Pro-Tech laminators are powerful machines
that are designed to mount, laminate and encapsulate.
The forces required to accomplish these tasks can
vary from negligible to very large.
The air-cylinder system used to provide downward
pressure on the top roll is capable of producing
forces greater than 1000 pounds (454kg). This force
is applied to any object presented in the opening
(called the nip) between the two rolls.
Use care in lowering the top laminating roll and know
how to react quickly in an emergency. The laminator
roll UP-DOWN switch is located on the instrument
panel labeled Laminator Roll Controls on the upper
right-hand side of the machine. This switch controls
the up and down motion of the top laminator roll.
Before turning this switch to the DOWN position,
ensure that nothing is in the nip area.
In addition, the laminating rolls of the ORCA-I can
reach temperatures of over 200°F (100°C). At these
temperatures there is a danger of a severe burn if the
rolls are touched during set-up, operation or
servicing.
An important feature of the laminator is the
photoelectric eye system that stops the machine when
objects move into the nip area. Once the blocking
object is removed and the light beam reestablished,
the rolls resume turning. However, this system is
overridden if you use the footswitch
WARNING
Use extreme caution when operating the
laminator with the footswitch. The
photoelectric eye system is overridden and
your fingers can get caught in the nip. You can
be crushed or burned.
The ORCA-I Laminator has a steel cabinet that is
bolted closed to isolate the electrical and drive system
components for the safety of the operator. Only a
qualified service technician should open these
cabinets.
The laminator is equipped with two emergency stop
buttons located on the top of either side of the
laminator. Either of these, if engaged, stops the
laminator and raises both the main roll and pull roll.
To continue operation both emergency stop buttons
must be in the up position and turn the main roll UP-
DOWN switch to the UP position to reset the
laminator. The laminator roll UP-DOWN switch is
located on the instrument panel labeled Laminator
Roll Controls on the upper right-hand side of the
machine. This switch controls the up and down
motion of the top laminator roll. Before turning this
switch to the DOWN position, ensure that nothing is
in the nip area.
NOT
AUS
E
M
E
R
G
E
N
CY
ST
OP
ARR
E
T
D'
U
R
G
E
N
C
E
NOT
AUS
E
M
E
R
G
E
N
CY
ST
OP
ARR
E
T
D'
U
R
G
E
N
C
E
Twist and pull up
both buttons to
resume operation
Push either
button to stop the
laminator
1
/
4
tu
r
n
Figure 3-1:
Using the Emergency Stop
Buttons
In addition, the ORCA-I is equipped with two
Emergency Stop Kick Cables located at the lower
front and back of the laminator. Either of these, if
stepped on or kicked, stops the laminator and raises
the rolls. To continue operation, turn the main roll
UP-DOWN switch to the UP position to reset the
laminator. Before turning this switch to the DOWN
position, ensure that nothing is in the nip area.
EDNord - Istedgade 37A - 9000 Aalborg - telefon 96333500

Operation ORCA-I Operation Manual
GBC Pro-Tech 1997 October
3-2
NOT
AUS
E
M
E
R
G
E
N
CY
ST
OP
ARR
E
T
D'
U
R
G
E
N
C
E
©1994HCS,Inc.800-748-0241ReorderNo.6001-PT
CarefullyreadOperator's
Manualbeforehandling
thismachine. Observe
instructionsandsafety
ruleswhenoperating.
WARNING
ACHTUNG
MISEENGARDE
POWER
NOT
AUS
E
M
E
R
G
E
N
CY
ST
OP
ARR
E
T
D'
U
R
G
E
N
C
E
©1994HCS,Inc.800-748-0241 Reorder No.7002-PT
SAFETY
INSTRUCTIONS
SICHERHEITS-
RICHTLINIEN
CONSIGNESDE
SÉCURITÉ
1.Readand understand the Operation
Manualandallsafety labels before
operatingthismachine.
2.Onlya trained person is to be
permittedtooperate this machine.
Trainingshouldincludeinstruction
inoperationunder normal conditions
andemergencysituations.
3.Thismachine is to be serviced only
bytrainedandauthorized personnel.
Followlockoutproceduresbefore
servicing.
4.Neverreach into the machine for any
reasonunlessthe machineis at a
COMPLETESTOP.
5.Neverleave the machine stopped in
suchamannerthat another worker can
startthemachine while youare working
onorwithin the machine.
6.Neverchange or defeat the function of
electricalinterlocksorother machine
“shutdown”switches.
7.Beforestarting this machine, check that:
-Allpersonsare clear of the machine.
-Nomaintenance workis being performed
on the machine.
-Allguardsare in place .
-Allparent rollsare well chucked in the
unwind stands.
-Themachineis free of paper scraps,
wraps and jams.
8.Thereis a potential hazard of entanglement
inthismachinecaused by items such as
longhair,looseclothing and jewelry.
Makesureyourclothing and hair fit
closelytoyourbody and that all jewelry,
ringsandwatchesare removed.
©1994HCS,Inc.800-748-0241ReorderNo.1033-PT
Crushand burn
hazard. Stayclear
ofmoving rollers.
Stopmachine and
raiseroll before
cleaning.
WARNING
ACHTUNG
MISEENGARDE
©1994HCS,Inc.800-748-0241ReorderNo.1033R-PT
Crushand burn
hazard. Stayclear
ofmoving rollers.
Stopmachine and
raiseroll before
cleaning.
WARNING
ACHTUNG
MISEENGARDE
1/2
NOT
AUS
E
M
E
R
G
E
N
CY
ST
OP
ARR
E
T
D'
U
R
G
E
N
C
E
STOP
AUTO
SPEED
0
3
6912
15
18
FWD
REV
POWER
FAN
1
O
1
OHEAT
ROLL
PRESSURE ADJ
B
O
T
T
O
M
MOTOR CONTROLS
PRO-TECHEngineeringMadison,WI608-246-8844
LAMINATORROLL CONTROLS
T
O
P
20
100
40
80
Tobe serviced only
bytrained and
authorizedpersonnel.
Lockoutpower before
servicing.
HAZARDOUS
VOLTAGE.
DANGER
GEFAHR
©1994HazardCommunicationSystems,Inc.800-748-0241ReorderNo.5025-PT
©1994HCS,Inc.800-748-0241ReorderNo.1033R-PT
Crushand burn
hazard. Stayclear
ofmoving rollers.
Stopmachine and
raiseroll before
cleaning.
WARNING
ACHTUNG
MISEENGARDE
1/2 1/2
©1994HCS,Inc.800-748-0241ReorderNo.1033-PT
Crushand burn
hazard. Stayclear
ofmoving rollers.
Stopmachine and
raiseroll before
cleaning.
WARNING
ACHTUNG
MISEENGARDE
IHAVE NO IDEA
WHAT'SHERE
STUFF
STUFF
STUFF
STUFF
STUFF
STUFF
1.0
2.0
3.0
4.0
5.0
6.0
1.0
2.0
3.0
4.0
5.0
6.0
IHAVE NO IDEA
WHAT'SHERE
Tobe serviced only
bytrained and
authorizedpersonnel.
Lockoutpower before
servicing.
HAZARDOUS
VOLTAGE.
DANGER
GEFAHR
©1994HazardCommunicationSystems,Inc.800-748-0241ReorderNo.5025-PT
NOT
AUS
E
M
E
R
G
E
N
CY
ST
OP
ARR
E
T
D'
U
R
G
E
N
C
E
PRESSURE
20
100
40
80
PRESSURE
20
100
40
80
STOP
AUTO
STOP
AUTO
ADJ
ADJ
PULLROLL CLUTCH
PULLROLL CONTROLS
Emergency
Stop Kick
Cable
Emergency
Stop Kick
Cable
™
Figure 3-2:
Using the Emergency Stop Kick
Cables
In addition to the safety features built into the
ORCA-I Laminator, extreme caution must be used
when operating or servicing the unit.
EDNord - Istedgade 37A - 9000 Aalborg - telefon 96333500

ORCA-I Operation Manual Operation
GBC Pro-Tech 1997 October 3-3
2SHUDWRU &RQWUROV
The operator controls for the ORCA-I Laminator are
located on the front and rear of the unit, to the right
of the operator position. The names and functions of
these controls are as follows:
)URQW &RQWURO 3DQHO
STOP
AUTO
SPEED
0
3
6912
15
18
FWD
REV
POWER FAN
1
O
1
OHEAT
ROLL
PRESSURE ADJ
B
O
T
T
O
M
MOTOR CONTROLS
PRO-TECH Engineering Madison,WI 608-246-8844
LAMINATOR ROLL CONTROLS
T
O
P
20
100
40
80
Motor REV/FWD
Foot Switch/
Continuous
Run
Upper Heater
Controller
Lower Heater
Controller
Speed Adjust
Upper Heater
ON/OFF
Lower
Heater
ON/OF
Main Roll Air
Pressure Gauge Main Roll Air
Pressure Control
Main Roll
UP/DOWN Switch
Fan Switch
Power
Light
1
2
3
4
56
7
8
9
10
12 11
Figure 3-3:
Front Control Panel
1. SPEED ADJUSTMENT - Adjusts the speed of
the machine from zero to maximum as the control
is turned clockwise.
2. UPPER ROLL HEAT ON/OFF - Turns the
heater controller for the top laminating roll on or
off.
3. LOWER HEAT ON/OFF - Turns the heater
controller in the bottom laminating roll on or off.
4. MAIN ROLL AIR PRESSURE GAUGE -
Displays the air pressure pushing the main
laminating roll down.
5. POWER LIGHT - Indicates when the main
power is being applied to the machine.
6. COOLING FAN ON/OFF - Turns the cooling
fan on or off.
7. MAIN ROLL UP/DOWN - Sets the main roll
to the up (load) or down (operate) position.
8. MAIN ROLL AIR PRESSURE CONTROL -
Varies the air pressure fed to the cylinders that
drive the top laminating roll down.
9. LOWER HEATER CONTROLLER -
Provides a readout of the temperature of the
bottom laminating roll and the set-point for the
desired temperature. The upper heater must be on
for the lower heater to function.
10. UPPER HEATER CONTROLLER - Provides
a readout of the temperature of the upper
laminating roll and the set-point for the desired
temperature.
11. FOOTSWITCH/CONTINUOUS RUN -
Changes control of the machine drive from the
footswitch to continuous run.
12. MOTION CONTROL FORWARD/STOP
REVERSE - Controls the direction of the drive
system - forward, stop, or reverse.
EDNord - Istedgade 37A - 9000 Aalborg - telefon 96333500

Operation ORCA-I Operation Manual
GBC Pro-Tech 1997 October
3-4
5HDU &RQWURO 3DQHO
PRESSURE
20
100
40
80
PRESSURE
20
100
40
80
STOP
AUTO
STOP
AUTO
ADJ
ADJ
PULL ROLL CLUTCH
PULL ROLL CONTROLS
Pull Roll
Clutch Air
Pressure
Adjustment
Pull Roll Air
Pressure
Gauge
Pull Roll Air
Pressure
Adjustment
Motor Control
Switch
Pull Roll
Clutch Air
Pressure
Gauge
Pull Roll
Up/Down
Switch
1
2
3
4
5
6
Figure 3-4:
Rear Control Panel
1. PULL ROLL CLUTCH PRESSURE
DISPLAY - Measures and displays the air
pressure driving the pull roll clutch, which sets
web tension.
2. PULL ROLL UP/DOWN - Sets the pull roll to
the up (load) or down (operate) position.
3. FOOTSWITCH/CONTINUOUS RUN -
Changes control of the machine drive from the
footswitch to continuous run.
4. PULL ROLL PRESSURE ADJUSTMENT-
Varies the air pressure fed to the cylinders that
drive the pull roll down.
5. PULL ROLL PRESSURE GAUGE -
Measures and displays the air pressure pushing
the pull roll down.
6. CLUTCH PRESSURE ADJUSTMENT -
Adjusts the clutch pressure from zero to
maximum as the control is turned clockwise.
EDNord - Istedgade 37A - 9000 Aalborg - telefon 96333500
Other manuals for ORCA-I
1
Table of contents
Other GBC Laminator manuals

GBC
GBC Inspire User manual

GBC
GBC GBC CLA303H User manual

GBC
GBC 2080WFt User manual

GBC
GBC 3500 PRO-SERIES User manual
GBC
GBC HEATSEAL H220 User manual

GBC
GBC OORCA-III User manual

GBC
GBC Glide A2 User manual

GBC
GBC GBC 4064WF Installation instructions

GBC
GBC GBC4250 User manual

GBC
GBC HeatSeal Creative User manual

GBC
GBC PRO 3600 User manual

GBC
GBC DocuSeal 120 User manual
GBC
GBC FUSION 5100L User manual

GBC
GBC Fusion Plus 6000 L User manual

GBC
GBC FALCON 60 C User manual

GBC
GBC FUSION 1000L A4 Instruction Manual

GBC
GBC Pinnacle 27 EZload User manual

GBC
GBC HeatSeal H425 User manual

GBC
GBC H435 User manual

GBC
GBC HeatSeal H535 Turbo User manual