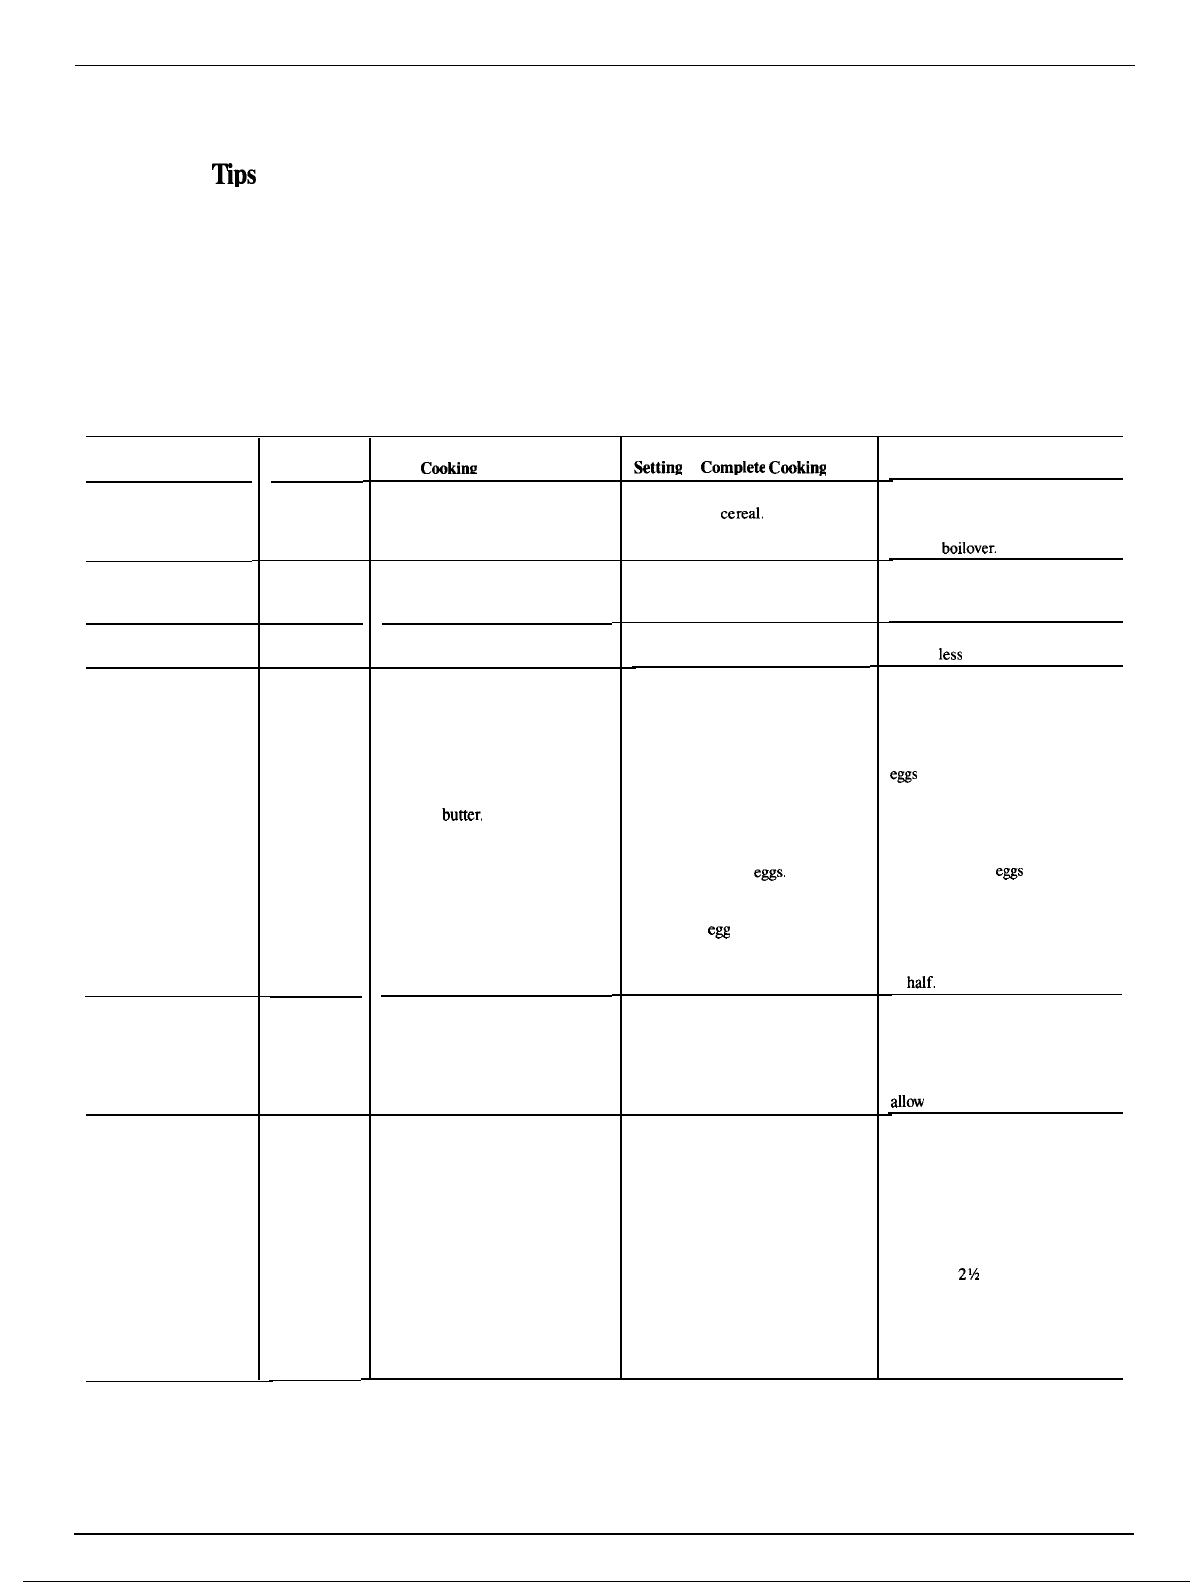
Cooking Guide
Cookware
TIPS
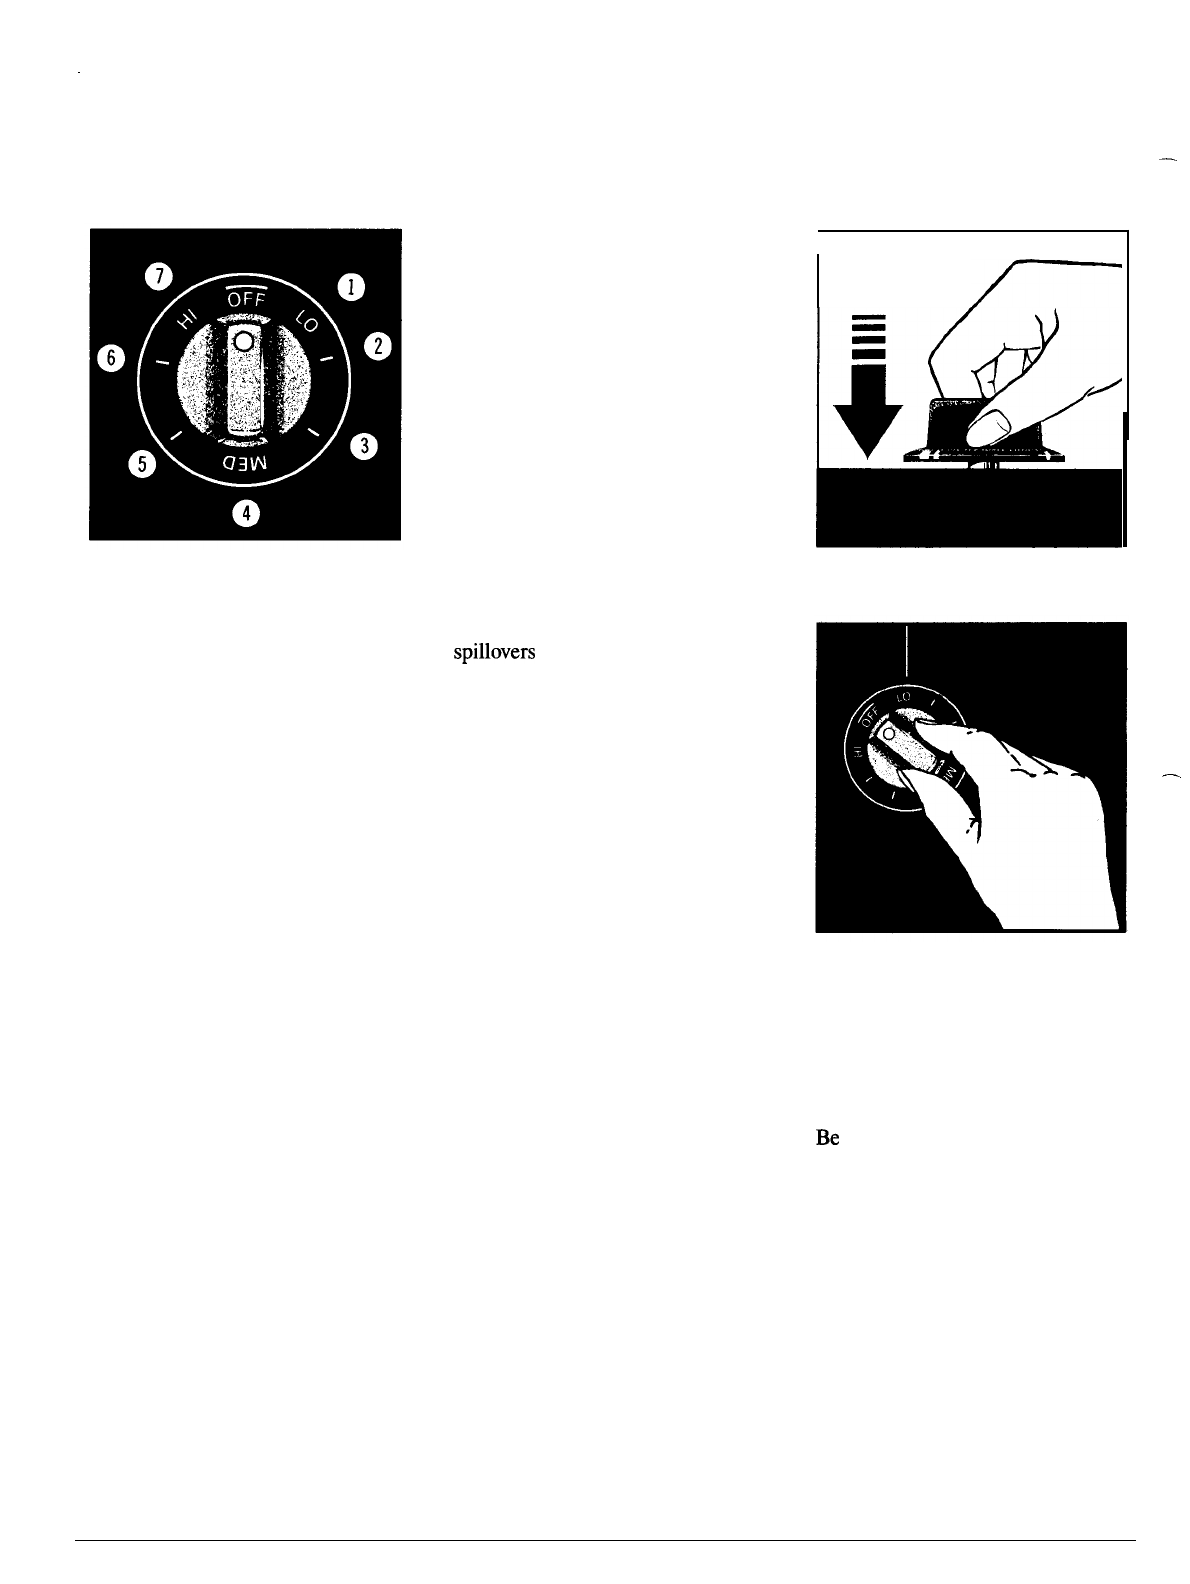
2.
To conserve the most cooking
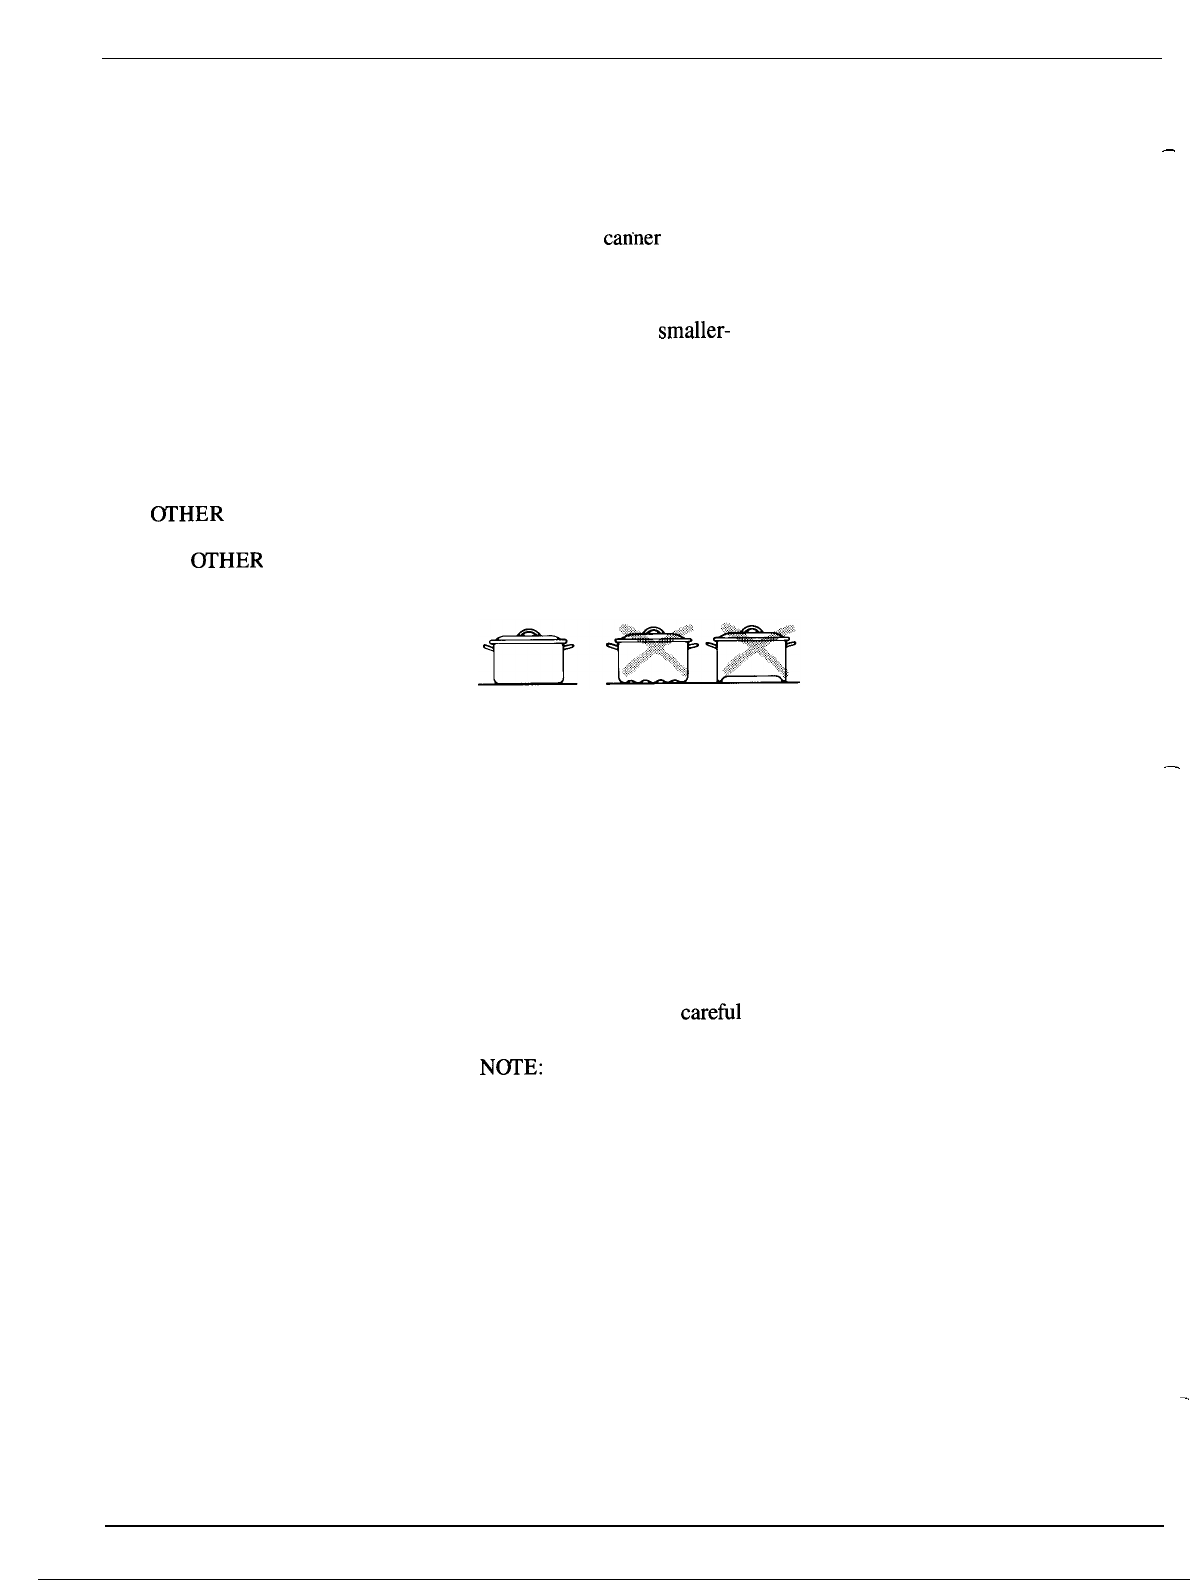
3. Deep Fat Frying. Do not overfill –
1.
Use medium-or heavyweight energy, pans should be flat on the kettle with fat that may spill over
cookware. Aluminum cookware bottom, have straight sides and tight when adding food. Frosty foods
conducts heat faster than other fitting lids. Match the size of the bubble vigorously. Watch foods
metals. Cast iron and coated cast saucepan to the size of the surface frying at high temperatures and
iron cookware is slow to absorb unit. A pan that extends more than keep cooktop clean from
heat, but generally cooks evenly at an inch beyond the edge of the drip accumulated grease.
low or medium settings. Steel pans pan traps heat which causes
may cook unevenly if not combined discoloration ranging from blue to
dark gray on chrome drip pans.
with other metals.
Food
Cereal
Cornmeal, grits,
oatmeal
Cocoa
Coffee
Eggs
Cooked in shell
Fried sunny-side-up
Fried over easy
Poached
Scrambled or omelets
Fruits
Meata, Poultry
Braised: Pot roasts of
beef, lamb or veal; pork
steaks and chops
Pan-fried: Tender
chops; thin steaks up to
3/4 inch; minute steaks;
hamburgers; franks and
sausage; thin fish fillets
Cookware
Covered
Saucepan
Uncovered
Saucepan
Percolator
Covered
Saucepan
Covered
Skillet
Uncovered
Skillet
Covered
Skillet
Uncovered
Skillet
Covered
Covered
Skillet
Uncovered
Skillet
Directions and Setting to
Start
Cookirm
HI. In covered pan bring water to
boil hefore adding cereal.
HI. Stir together water or milk,
cocoa ingredients. Bring just to
a boil.
HI. At first perk, switch heat
to LO.
HI. Cover eggs with cool water.
Cover pan, cook until steaming.
MED HI (5-6). Melt butter, add
eggs and cover skillet.
HI. Melt buttm
HI. In covered pan bring water to
a boil.
HI. Heat butter until light golden
in color.
HI. In covered pan bring fruit and
water to boil.
HI. Melt fat, then add meat.
Switch to MED HI (5-6) to brown
meat. Add water or other liquid.
HI. Preheat skillet, then grease
lightly.
Settint2
to
Comdete
Cooking
LO, then add cereaf. Finish timing
according to package directions
MED, to cook 1 or 2 minutes to
completely blend ingredients.
LO to maintain gentle but
steady perk.
LO. Cook only 3 to4 minutes for
soft cooked; 15 minutes for hard
cooked.
Continue cooking at MED HI (5-6)
until whites are just set, about 3 to 5
more minutes.
LO, then add eggs. When bottoms
of eggs have just set, carefully turn
over to cook other side.
LO. Carefully add
eggs.
Cook
uncovered about 5 minutes at
MED HI (5-6).
MED. Add
e=
mixture. Cook,
stirring to desired doneness.
LO. Stir occasionally and check
for sticking.
LO. Simmer until fork tender.
MED HI (5-6) or MED. Brown and
cook to desired doneness, turning
over as needed.
Comments
Cereals bubble and expand as they
cook; use large enough saucepan to
prevent
boilover.
Milk boils over rapidly. Watch as
boiling point approaches.
Percolate 8 to 10 minutes for
8
CUDS
.
less
for fewer
CUDS
.
If you do not cover skillet, baste
e~s
with fat to cook tops evenly.
Remove cooked
e~s
with slotted
spoon or pancake turner.
Eggs continue to set slightfy after
cooking. For omelet do not stir
last few minutes. When set, fold
in
haff.
Fresh fruit: Use 1/4 to 1/2 cup
water per pound of fruit.
Dried fruit: Use water as package
directs. Time depends on whether
fruit has been presoaked. If not,
aflow
more cooking time.
Meat can be seasoned and floured
before it is browned, if desired.
Liquid variations for flavor could
be wine, fruit or tomato juice or
meat broth.
Timing: Steaks 1 to 2 inches: 1 to
2 hours. Beef Stew: 2 to 3 hours.
Pot Roast:
2%
to 4 hours.
Pan frying is best for thin steaks and
chops. If rare is desired, pre-heat
skillet before adding meat.
8