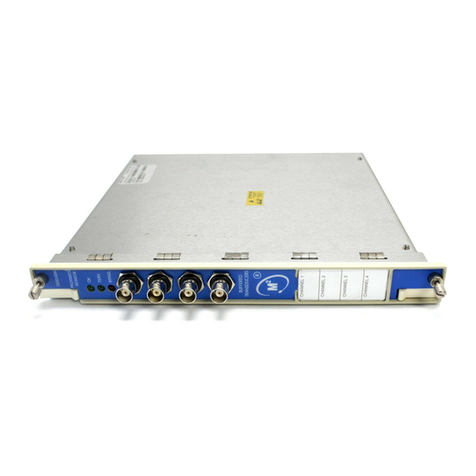
GE Bently Nevada 3300/03 User manual

Part Number 89604-01
Rev. F (08/07)
Bently Nevada™ Asset Condition Monitoring
Operation Manual
3300/03 System Monitor

3300/03 System Monitor Operation Manual
ii
Copyright © 1991. Bently Nevada LLC.
All rights reserved.
The information contained in this document is subject to change without notice.
The following are trademarks of General Electric Company in the United States and other
countries:
Dynamic Data Manager, Keyphasor, Proximitor and Transient Data Manager
Contact Information
The following ways of contacting Bently Nevada are provided for those times when you
cannot contact your local representative:
Mailing Address 1631 Bently Parkway South
Minden, Nevada USA 89423
USA
Telephone 1.775.782.3611
1.800.227.5514
Fax 1.775.215.2873
Internet www.ge-energy.com/bently

iii
Additional Information
Notice:
This manual does not contain all the information required to operate and maintain
the product. Refer to the following manuals for other required information.
3300 System Overview (Part Number 80171-01)
3300 System Installation Instructions (Part Number 80172-01)
3300 System Troubleshooting (Part Number 80173-01)
3300/12 Power Supply (Part Number 89602-01)
Serial Data Interface & Dynamic Data Interface (Part Number 89541-01)
Dynamic Data Manager System (Part Number 46390-01)
Transient Data Manager User Guide (Part Number 79206-01)
Product Disposal Statement
Customers and third parties, who are not member states of the European Union, who are
in control of the product at the end of its life or at the end of its use, are solely
responsible for the proper disposal of the product. No person, firm, corporation,
association or agency that is in control of product shall dispose of it in a manner that is
in violation of any applicable federal, state, local or international law. Bently Nevada LLC
is not responsible for the disposal of the product at the end of its life or at the end of its
use.
SYMBOLS
Special symbols are used in the manual to illustrate specifics in the step-by-step
processes. For
example:

3300/03 System Monitor Operation Manual
iv
Contents
1. SYSTEM MONITOR ...................................................................................................................................... 1
2. MONITOR FUNCTIONS.............................................................................................................................. 2
3. ASSEMBLY & DISASSEMBLY PROCEDURE......................................................................................... 4
4. DATA INTERFACE REMOVAL................................................................................................................... 5
5. FRONT PANEL INSTALLATION & REMOVAL...................................................................................... 6
6. MONITOR OPTIONS.................................................................................................................................... 7
7. PROGRAMMABLE OPTIONS .................................................................................................................... 8
8. OK RELAY CONFIGURATION.................................................................................................................10
9. OPERATIONAL TESTING..........................................................................................................................11
10. Keyphasor OPERATIONAL TEST..........................................................................................................12
11. RECOMMENDED SPARE PARTS...........................................................................................................17
12. SPECIFICATIONS........................................................................................................................................18

Section 1 - SYSTEM MONITOR
1
1. SYSTEM MONITOR

3300/03 System Monitor Operation Manual
2
2. MONITOR FUNCTIONS
SYSTEM POWER-UP INHIBIT
The System Monitor provides a Power-up Inhibit function. This function allows each monitor to
inhibit its alarms during power-up or whenever a system supply voltage falls below its operating
level. After power-up, the inhibit function remains active for approximately 2 seconds.
RACK INHIBIT
When activated by a external contact closure this function places all monitors in bypass, disables
all alarms, zero scales all outputs, and de-energizes the system OK relay. The connections for this
function are located on the power input module (PIM) at the rear of the rack.
SUPPLY VOLTAGES OK
Seven LEDs located behind the front panel of the System Monitor are ON to indicate the voltage
supplies are functioning. The voltage supplies are +VRH, +VRL, +7.5V, +5V, REF, -7.5V, and -VT.
There is a green LED (SUPPLIES OK) on the front panel of the System Monitor. When this LED is on
all of the voltage supplies are functional.
SYSTEM RESET
The System Monitor provides the ability to cause a System Reset. Closing external contacts
through terminals on the PIM or pressing the RESET switch on the front panel will cause a System
Reset.
TRIP MULTIPLY
The most common use of this function is to prevent unwanted monitor alarms during certain
conditions of machine operation. In the operation of some machinery, it is impossible to avoid
some periods of "higher than normal" vibration. Examples include startup and coastdown,
especially if the operating speed is above rotor system balance resonances ("critical speeds"),
structural and other resonances, and changes in machine load or other operating conditions.
The Trip Multiply function causes the monitor alarm setpoints (both Alert and Danger) to increase
by a fixed amount, either two times (2X) or three times (3X), according to the ordering option. Only
those monitors ordered with this option will be affected. The Trip Multiply function is performed in
the System Monitor, but is an ordering option for each monitor. It must be specified at the time of
order placement and be installed at the factory.
Trip Multiply is activated by contact closure on the PIM. A red LED on the System Monitor front
panel indicates that the Trip Multiply function is active.
OK RELAY
The purpose of this relay is to provide a means to annunciate a problem that is detected with any
transducer system connected to the rack. The OK Relay is connected to the OK Circuit of every

Section 2 - MONITOR FUNCTIONS
3
monitor in the rack. The OK Circuit continuously checks the condition of the transducer(s)
associated with that monitor. If the circuit detects a transducer problem, the OK LED on the front
of the affected monitor goes off and a relay drive signal is sent to the OK Relay in the System
Monitor.
The OK Relay is located on the System Monitor PIM, is normally energized, and is a single-pole,
double-throw (SPDT) relay. Since it is normally energized, the relay also can be used to
annunciate when mains power to the rack is lost or interrupted. Either a system power-up inhibit
signal from the System Monitor or a not OK signal from any monitor in the rack will cause the OK
Relay to change state.
ALARM SETPOINT ADJUST
The System Monitor has two switches on the front panel that adjust alarm setpoint levels on each
monitor. One switch is for upscale adjustments, and the other switch is for downscale
adjustments.
DATA INTERFACE
The System Monitor supports the following Bently Nevada data interfaces: Dynamic Data
Manager (DDM), Transient Data Manager®(TDM), Serial Data Interface (SDI), Dynamic Data
Interface (DDI) and Transient Data Interface (TDI). The SDI and DDI are options of the System
Monitor and reside within the System Monitor slot of the rack. DDM, TDM and TDI are external
data interfaces which gain access to the rack through the PIM. There is an external version of the
SDI and DDI which connects to the PIM. For more information about these products consult a
Bently Nevada sales representative.
Keyphasor®TRANSDUCERS
The System Monitor receives input from four Keyphasor®transducers through terminals on the
PIM. Two of the Keyphasor®transducers are available to the monitors within the rack. All four of
the Keyphasor®transducers are available to the Dynamic Data Interface (DDI). Buffered
Keyphasor®signals are also available from the coaxial connectors on the front panel. The System
Monitor also provides short-circuit protected Keyphasor®transducer power.
STATIC DATA BUS BUFFER
The System Monitor multiplexes signals from either the DDM or TDM to select static data
from the monitors. The System Monitor buffers the static data signals sent from the
monitor to the DDM or TDM.

3300/03 System Monitor Operation Manual
4
3. ASSEMBLY & DISASSEMBLY PROCEDURE
This section explains how to disassemble the System Monitor to set jumper options on the circuit
board. To install a System Monitor to a rack set the options as described in section 7 then do
steps 1 through 4 in reverse order. The only tool you need is a screwdriver.
1. Loosen the screws
on the front panel and
pull the System Monitor
out from the rack.
2. Remove the side cover by
pinching the protruding tip
on each of the 4 standoffs.
CAUTION
Improper rack operation may
occur.
Power down rack when intalling
or removing a monitor.

Section 4 - DATA INTERFACE REMOVAL
5
4. DATA INTERFACE REMOVAL
If the System Monitor has either the optional Dynamic Data Interface and or Serial Data Interface
circuit boards installed, remove the data interface boards to access the option jumpers located on
the System Monitor.
1. Remove the Dynamic
Data Interface board by
pinching the protruding
tip on each of the 4
standoffs and gently
prying the Dynamic
Data Interface board
away from the Serial
Data Interface board.
2. Remove the Serial Data
Interface board by
gently prying it away
from the two mating
connectors and 5
standoffs on the System
Monitor board.

3300/03 System Monitor Operation Manual
6
5. FRONT PANEL INSTALLATION &
REMOVAL

Section 6 - MONITOR OPTIONS
7
6. MONITOR OPTIONS
SYSTEM MONITOR
PART NUMBER
DATA INTERFACE AGENCY APPROVAL
3300/03 AXX BXX
01 = None or
DDM/TDM
02 = SDI
03 = DDI
00 = NOT REQUIRED
01 = CSA
02 = BASEEFA
03 = FM

3300/03 System Monitor Operation Manual
8
7. PROGRAMMABLE OPTIONS
The System Monitor has jumper-programmable options for selecting the transducer
voltage and the data interface. Change these options by removing and installing jumpers
on the circuit board.
Jumper Locations
* W6 is for future use or is N/A.

Section 7 - PROGRAMMABLE OPTIONS
9
Data Manager Options
To configure the System Monitor to work with the different data interfaces remove all option
jumpers from headers W3A-W3D, W4A-W4H, W5A-W5H, W7 and W8A-W8E and install jumpers
as specified in Table 1.
Table 1. Data Manager Options
OPTION INSTALL JUMPERS
Dynamic Data Manager®or
Transient Data Manager®or
No Data Interface
Internal
Serial Data Interface/
Dynamic Data Interface
External
Serial Data Interface/
Dynamic Data Interface or
Transient Data Interface
W3A,W3B,W5A,W5B,W5C,W5D,W5E,*
W5F,W5G,W5H,W8D & W8E
W3C,W3D,W4A,W4B,W4C,W4D,W4E,**
W4F,W4G,W4H,W7,W8D & W8E
W3C,W3D,W5A,W5B,W5C,W5D,W5F,
W5G,W5H,W8A,W8B & W8C
* As shipped from factory for a 3300/03 - 01 System Monitor.
** As shipped from factory for a 3300/03 - 02 or 3300/03 - 03 System Monitor.
-VT Options
To set the -VT option according to the option set on the Power Supply, remove jumpers from
headers W1 and W2 and install jumpers as specified in Table 2.
Table 2. -VT Options
OPTION INSTALL
JUMPER
REMOVE
JUMPER
-VT = -18 Volts
-VT = -24 Volts
W2
W1
W1
W2

3300/03 System Monitor Operation Manual
10
8. OK RELAY CONFIGURATION
The following diagram shows the functional concept of the OK Relay. For more detail refer to
schematics (see Section 13).

Section 9 - OPERATIONAL TESTING
11
9. OPERATIONAL TESTING
To verify that the system monitor is functional apply power at the Power Input Module. The LED
indicating that the supplies are OK should turn on after 2 seconds.
CAUTION
Improper operation may
occur. Set -VT Jumpers in
the System Monitor and
Power Supply to the same
voltage (-18 VDC or -24
VDC).

3300/03 System Monitor Operation Manual
12
10. Keyphasor OPERATIONAL TEST
The following test procedure for Keyphasor®transducer 1 is also applicable for testing
Keyphasor® transducers 2 through 4.
The machine associated with the Keyphasor®transducer under test should be running during
this procedure. If the machine is not turning, simulate the operating machinery input at
approximately the same frequency as the shaft rotating speed, with a function generator or TK3
test kit.
1. Measure Keyphasor®1
power at the KPH1PWR
terminal on the power input
module (PIM). If -VT is -24 V,
the voltage should read
between -23.2 and -24.2
Vdc. If -VT is -18 V, the
voltage should read
between -17.40 and -18.30
Vdc.

Section 10 - Keyphasor OPERATIONAL TEST
13
2. Disconnect
the wire from the
KPH1PWR terminal
and measure the
voltage at the power
terminal. The voltage
should be within the
tolerance specified in
step 1.
3. Loosen the
screws that hold the
power input module
to the rack and pull
the power input
module out from the
rear of the rack.
Examine the cabling
and connections
between the module
and the rack.
WARNING
High voltage
present. Contact
could cause shock,
burns, or death.

3300/03 System Monitor Operation Manual
14
4. Reconnect the wire to the KPH1PWR terminal.
Disconnect the wire at the -VT (-18 or -24 Vdc)
terminal of the Proximitor®. Measure the voltage at
the wire. The voltage should be within the tolerances
specified in step 1.
5. Check the Keyphasor® output signal at the
System Monitor front panel KO / 1 coaxial connector.

Section 10 - Keyphasor OPERATIONAL TEST
15
6. Check Keyphasor®signal
at the power input module
KPH1 terminal.
7. Disconnect wire at the
power input module KPH1
terminal and check wire for
Keyphasor®signal.

3300/03 System Monitor Operation Manual
16
8. Reconnect wire to the power input
module KPH1 terminal.
9. Disconnect wire at the Proximitor®
output terminal and check signal at the
output terminal.
Table of contents
Other GE Monitor manuals

GE
GE Bently Nevada 1900/27 User manual

GE
GE Dash 3000 User manual

GE
GE KITCHEN HUB UVH1301 User manual

GE
GE QuickPanel+ IC755CxS06RDx User manual

GE
GE TRANSFIX DGA 500 User manual

GE
GE Corometrics 250cx Series User manual

GE
GE CARESCAPE User manual

GE
GE Dinamap PRO Series User manual

GE
GE IC754VKI06MTD User manual

GE
GE Responder 2000 User manual

GE
GE CareScape V100 User manual

GE
GE IC755CS06RD Series User manual

GE
GE HDTV Monitor User manual

GE
GE Kelman Minitrans User manual

GE
GE TMO2D User manual

GE
GE Bently Nevada 3300/25 User manual

GE
GE IC754VBB06CTD User manual

GE
GE 1926A-1AN User manual

GE
GE PACSystems ICRXIDIXNE19LCTA User manual

GE
GE 3500/40M User manual