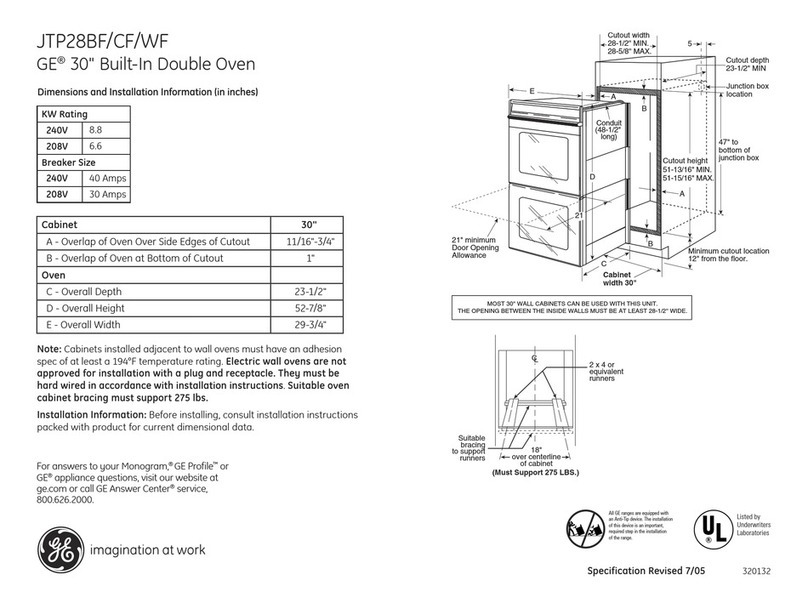
GE Profile Spacemaker JVM1490 User manual

wwvv.GEAppliances.com
0
Safety Instructions ............. 2-6
Operating Imlru_Cions
Bake Features ............ 10, 18, 20
Best Method of Cooking Chart .... 21
Changing Power i,ex_l ........... 14
Cooking Options ................ 10
Cookware Tips .................. 20
Fast Bake Feature ......... 10, 19, 20
Features of Your Oven ......... 8, 9
Microwave Temps ............... 25
Other Features .............. 22-24
Automatic Fan ................ 24
Auto Nite i,ight ............... 23
Beeper Volmne ............... 23
Child i,ock-Out ............... 22
CI,EAR/OFF . ................ 22
Clock ........................ 22
Cooking Complete Reminder .... 22
Display I,anguag_ .............. 23
Display ON/OFF .............. 23
Display Speed ................. 24
HElP ....................... 22
START/PAUSE ............... 22
Surthce i,ight ................. 24
Timer ....................... 24
Vent Fan ..................... 24
Sensor Features .............. 15-17
Time and Auto Features .... 9, 11-13
Care and Cleaning
Charcoal Fihers .................. 29
Inside .......................... 26
Outside ....................... 26
Replacing the i,ight Bulbs ........ 27
Stainless Steel .................. 27
Vent Fihers .................. 28, 29
Troubleshooting Tips ........ 30, 31
Thing:s That Are Nomml
With Your Microwm_ Oven ....... 32
Consumer Support
Consumer Support ...... Back Cover
Optional Kits .................... 7
Product Regisuafion ......... 33, 34
Warranb,' ....................... 35
Espa_ol
For a Spanish version ot this manual, visit
ore" _4'ebsite at _v.GEAppliances.com.
Para constll[_li" tlna veI3ion ell espafiol de
este manual de instrucciones, visite nuestro
sitio de inmrnet _:GEAppliances.com.
¢)
Writethemodelandserial numbershere:
Model#
Serial#
You can find them on a label when the
door is open. 16ZtD3370P275 49-40345
jq,2Fl l 4 90
06-03 JR

IMPORTANTSAFETYINSTRUCTIONS.
READALLINSTRUCTIONSBEFOREUSING.
AWARNING!
For your safe_ the information in this manual must be followed to minimize the risk of fire, explosion, electric shock,
exposure to excessive microwave energy, or to prevent property damage, personal injury, or loss of life.
PRECAUTIONSTOAVOIDPOSSIBLEEXPOSURE
TOEXCESSIVEMICROWAVEENERGY
(a) DoNotAttemptto operate this oven with the door
open since open-door operation can result in ham_fld
exposure to microwave enerk,_': It is ilnportnnt not to
deteat or tamper with tile satetv interlocks.
(h) Do Not Place any object between tile o',en fl'ont face
and tile door or allow soil or cleaner residue to
accumulate on sealing surfimes.
(c) Do Not Operate tile oven if it is damaged. It is
particularly important that tile oven door dose
properly and that there is no damage to tile:
(1) door (bent),
(2) hinges and latches (broken or loosened),
(3) door seals and sealing sudi_ces.
(d) The Oven Should Not be a(!justed or repaired by
anyone except properly qualified service pei_onnel.
IMPORTANTSAFETYINSTRUCTIONS.
When using electrical appliances basic safety precautions should be followed, including the following:
_: Read and fidlow tile specific precautions in tile _: To reduce tile risk of fire in tile oven cavity:
PRECAUTIONSTOAVOIDPOSSIBLEEXPOSURETO
EXCESSIVEMICROWAVEENERGYsection abjure.
?_:This appliance must be grounded. (]onnect only
to a properly grounded outlet. See tile GROUNDING
INSTRUCTIONS section on page 6.
_: Install or locate this appliance only in accordance with
tile provided Installation Instructions.
::Ji::This microwave oven is LrI, listed for installation over
electric and gas ranges.
?_:This microwave oven is not approved or tested for
Ilia IJne rise.
_: This ove_:the-range oven is designed tot use over ranges
no wider than 36" It may be installed over both gas and
electric cooking equipment.
::Ji::Do not operate this appliance if it has a damaged power
cord or plug, if it is not working proped}; or if it has
been damaged or dropped. If tile power cord is
danmged, it must be replaced by General Electric
Service or an authorized service agent using a power
cord awfilable from General Electric.
::Ji::Do not cover or block any openings on tile appliance.
?_:Use this appliance only fl)r its intended use as described
in this nlanual. Do not use corrosive chemicals or vapm_
in this appliance. This microwave oven is specifically
designed to heat, dr)' or cook food, and is not intended
fl)r laboratory or industrial use.
--Do not overcook todd. Careflflly attend appliance when
paper; plastic or other combustible materials are placed
inside the oven while cooking,
--Remove wire twist-ties and metal handles fl'om paper or
plastic containe_ beflwe placing them in tile oven.
--[)o not rise tile _wen for storage p/li])oses. [)o not leave
paper products, cooking utensils or todd in tile oven
when not in/Ise.
--Do not pop popcorn in your microwave oven tmless in
a special illicrowa;'e popcoYn _lccessoY}' ()i" tlilless you rise
popcorn labeled fiw use in microwave ovens.
--If materials inside the oven ignite, keep the oven door
closed, mrn the oven off and disconnect the power cord,
or shut off power at tile fllse or circuit breaker panel.
If tile door is opened, tile fire may spread.
--Do not use tile Sensor Features twice in succession oil
tile same food portion. If food is/mdercooked after
tile fi_t co/mtdown, rise lime COOkfor additional
cooking time.
SAVETHESEINSTRUCTIONS
2

vvvvw.GEAppliances.com
IMPORTANTSAFETYINSTRUCTIONS.
_: When using tile Bake or Fast Bake flmcfions, both
tile outside and inside (ff tile ()veil will become hot.
/_dwa_s rise hot pads to i'eillove containeiN of toed
and accessories such as tile oven shelf.
_: Thermometer--D(> not use regular cooking or oven
theI_/llOI/leteI'S when cooking by ii/icrowave or
combination. Tile metal and inercuP,' in these
themlomete_ could cause arcing and possible damage
to tile oven. Do not rise a theillloilleter in [ood veil ai'e
microwaving tmless tile themlometer is designed or
i'ecoi/lillended it)i" rise in tile illici'owave ()veil.
::Ji::Do not clean with metal sco/wing pads. Pieces can bm'n
off the pad and touch electrical parts involving risk of
electric shock.
::J_::Do not stoi'e }lily IllatelJals_ other than ()/It"
recommended accessories, in this oven when not in use.
_: Do not store this appliance outdoing. Do not use this
product near wate_fi)r example, in a wet basement,
near a swimming pool, near a sink or in similar locations.
_: Keep power cord away fl'om heated sire'aces.
::Ji::Do not immerse power cord or plug in water.
_: Do not nlount this appliance over a sink.
::Ji::See door sm{i_ce cleaning instructions in the Care and
cleaning of the microwave oven section of this manual.
::Ji::This appliance must only be serviced by qualified service
personnel. Contact nearest authorized service ti_cilitv ti)r
exanfination, repair or a(!justlnent.
_: _s with any appliance, close supervision is necessa_ y
when used bv chiMren.
::Ji::Do not store anything directly on top of tile microwave
oven SUll'ilce when tile microwave oven is in operation.
SAVETHESEINSTRUCTIONS
AWARNING!
ARCING
If you see arcing, press the CLEAR/OFF button and correct the problem.
Arcing is tile inicro_;l\'e telin fi)r sparks in tile ()veil.
Arcing is caused by:
_: The metal shelf not installed correctly so it
touches the microwave wall.
::Ji::Metal or fi)il touching tile side of tile oven.
_: Turntable ring support not installed correctly.
::Ji::Foil not molded to toed (upturned edges act
like antennas).
::Ji::Metal, such as twist-ties, poult_ y pins, or gold-
rimmed dishes, in the microwave.
_: Recycled paper towels containing small metal
pieces being used in tile microwave.
3

IMPORTANTSAFETYINSTRUCTIONS.
READALLINSTRUCTIONSBEFOREUSING.
WARNING!
FOODS
Do IlOt l)op l)opcoI'II iIl y()/IF illici'owave ()veil
unless in a special nficrowa\'e i)OlX-orn accessory
or unless w)u use i)opcorn labeled fl)r use in
nlicrowave ()veils.
::Ji::Do not boil eggs in a nficrowave oven. Pressure
will build up inside egg yolk and will cause it to
built, possibly resulting in iI_jtIIT:
::Ji::Oi)erating tile niicrowave with no fi)od inside fl)r
iiloi'e thall aI/Iilltlte oI" two iil[ly Catlse danlage
to tile oven and could start a fire. It increases tile
heat around the nlagnetron and can shorten
the lile of the ()veil.
?_:Foods with unbroken outer "skin" such as
potatoes, hot dogs, sausages, toniatoes, apples,
chicken livei_ and other giblets, and egg vol]<s
should be i)iei'ced to allow steani to escape
during cooking.
_: SoIne products such as whole eggs and sealed
cont;linei_--fi)i _exainple, closedjai_--ai'e able
to eN)lode and should not be heated in this
IlliCI'O_;Ive ()veil. Stlch rise ()t tile illiCi'Owave
oveIl could result iIl injury.
_: SUPERHEATEDWATER
Liquids,such as water,coffee, or tea,are ableto
be overheatedbeyondtheboilingpoint without
appearingto beboiling. Visiblebubblingor boiling
whenthecontainer isremovedfromthe microwave
ovenis notalwayspresent.THISCOULDRESULTIN
VERYHOTLIQUIDSSUDDENLYBOILING0VERWHEN
THECONTAINERISDISTURBEDORA SPOONOR
OTHERUTENSILISINSERTEDINTOTHELIQUID.
?_:Foods cooked in liquids (such as pasta) nlay
tend to boil inore i'apidly than foods containing
less nloisture. Should this o(('ui; I'eteI" to the
Care and cleaning of the microwave oven se(tion
fi)r instructions on how to clean tile inside of
tile ()veil.
::Ji::Avoid heating baby flIod in glassjaIs, even Mth
the lid lift. Make sure all intimt fi)od is thoroughly
cooked. Stir fi)od to distribute the heat evenly.
Be carefii1 to i)revent scalding when wai_ning
fi)m/ula. The container niav teel cooler than the
fi)I_nula really is. Mwa\:s test tile fi)mlula befi)re
feeding tile baby:
::Ji::DIIn't deti'ost frozen be\'erages in narro_necked
bottles (espedally carbonamd beverages). Even if
the container is opened, i)ressure can build up.
This can cause the container to built, possibly
resulting in iI0III>
_: Hot fl)ods and steanl can cause burns. Be carefli1
when oi)ening any containeis of hot fi)od,
inchiding i)oi)corn bags, cooking pouches and
boxes. To i)revent possible iI_juI> direct steanl
away fl'oni hands and time.
::Ji::Do not overcook potatoes. They could dehydrate
and catch fire, causing daniage to your oven.
_: Cook nleat and poulti T thoroughly--nleat to at
least an INTERNAl, tenii)eiatui'e of 160°F and
poultI T to at least an INTERNAl, teini)erature of
180°E Cooking to these teini)eratures usually
protects against foodborne illness.
To reduce tile risk of ii_jui y to pei5ons:
--Do not overheat tile liquid.
--Stir tile liquid both befi)re and halfway through
heating it.
--Do not use straight-sided containei_ with narrow
IleCks.
--_MteI" heating, allow tile container to stand in tile
i/licrowave ()veil _'i)i" a shoY[ tiille beloi'e i'eilloviilg
tile containei:
--Use extrenie care when inserting a spoon or
other utensil illto tile ('ollt;lilleI:
4

wvvw.GEAppliances.com
MICROWAVE-SAFECOOKWARE
Do not operate the oven without the turntable and the turntable support seated and in place. The turntable
must be unrestricted so it can rotate.
Make sure aft cookware used in your microwave oven is suitable for microwaving. Most glass casseroles,
cooking dishes, measuring cups, custard cups, pottery or china dinnerware which does not have metallic
trim or glaze with ametallic sheen can be used. Some cookware is labeled "suitable for microwaving."
::Ji::If you are not sure if a dish is inici'owave-sate,
use this test: Place in the oven both the dish you
are testing and a glass nleasuiing cup filled with
1 cup of watei_set tile ineasuiJng cup either in
or next to the dish. Microwave 30-45 seconds at
high. If the dish heats, it should not be used fl)r
nlicrowaving.
If the dish reniains cool and only the water in
the cup heats, then the dish is inicix)wave-sate.
_: OveI_ized filed or oveI_ized nletal cookware
should not be used in a nlicro_;_\'e/convection
oven because they increase the risk of electric
shock and could cause a fire.
::Ji::Soniefiines tile oven flooi; turntable and wails
can become too hot to touch. Be earefii1 touching
the flooi; turntable and walls during and after
cookJllg.
_: If vou use a nleat theimoineter while cooking,
I/lake stlI'e it is Sate fl)r tlse ill II/iCFOW;IVeovens.
::Ji::Do not use rec)'cled paper products. Recycled
paper towels, napkins and waxed paper can
contain nietal flecks which nlay cause arcing
or ignite. Paper products containing nylon or
nylon filanients should be avoided, as they
nlav also ignim.
_: Sonle slvrofl)ain trays (like those that nleat
is packaged Oil) have a thin stiip of nletal
enlbedded in tile bottonl. When nlicrowaved,
tile nietal can burn tile floor of tile oven or
ignite a paper towel.
_: Use of tile shelf accessory:
-- Renlove tile shelf fl'onl tile oven when
not in rise.
-- Use pot holdeI_ when handling tile shelf and
cookware. They ill,iV be hot.
-- Be sure that tile shelf is positioned i)ropeily
inside tile oven to i)i'event product danlage.
-- Do not cover tile shelf or any part of tile ()veil
with nlet;fl fi)il. This will cause overheating of
tile illiCi'Owave/convection ()veil.
::J;::Do not rise VOtli" illiCi'owave/convection ()veil
to (li T ne_vsI)apeI_.
::Ji::Not all I/lasfic wrap is suitable fi)I" use in
nlicro_;lve ovens. Cheek the i/ackage fin.
Ill'Op el" rise.
_: Paper towels, waxed paper and plastic wrap can
be used m cover dishes in order to retain nloisture
and i)i'event spatteiing. Be sure to vent plastic
wi';ip so stealll can escape.
?_:Do not rise i/ai/er ilroducts when tile nlicro_z_ve/
convection oven is oi/erated in the BAKE or
FAST BAKE nIode.
::Ji::(2ookware nlay beconle hot because of heat
transferred fl'oIn tile heated food. Pot holdei_
nlav be needed to handle tile cookware.
_: "Boilable" cooking pouches and tightly ch)sed
plastic bags should be slit, pierced or vented as
directed by package. If tile)' aIe not, plastic could
built duIing or iInInediamly alter cooking,
possibly resulting in ii_jurv.Ms(),plastic storage
containeis should be at least partially uncovered
because thev fi)ml a tight seal. When cooking
with containeis tightly covered with plastic wrap,
renlove coveiing careflillv and direct steanl away
fl'onI hands and tace.
::Ji::Use fi)il only as directed in this nianual. TV
dinnei_ niay be niicrowaved in fiiil trays less than
3/4" high; reniove the top fi)il cover and i'eturn
the tray to the box. When using fi)il in the
nlicrowave oven, keep tile fl)il at least 1" away
fl'onI tile sides of tile oven.
::Ji::Plastic cookware--Plastic cookware designed fi)r
nlicrowave cooking is veiT usefli1, but should be
used carefiillv. Even inicrowave-sate plastic nlay
not be as tolerant (ff overcooking conditions as
are glass or ceraniic nlateiials and nlay solten or
char if subjected to short peIiods of overcooking.
hi longer exposures to overcooking, tile filed and
cookware could ignite.
Follow these guidelines:
BLrse nlicrowaxe-safe plastics ()Ill) and rise
thenl in stiict coinpliance with tile cookware
illan tllilcttli'eY's i'e COilli/l e ndations.
_._'_Do not i/iici'owa',e ellli)l'}, containei3.
_Do not peI_nit children to use plastic
cookware without coniplete super\isi(nl.
IMPORTANTSAFETYINFORMATION.
READALLINSTRUCTIONSBEFOREUSING.
WARNING!
GROUNDINGINSTRUCTIONS
WARNING:Im_ro_eruseofthegrou,,i,g_lugco,resultinariskofelectricshock.
This appliance must be grounded. In tile event of
an electrical short circuit, grounding reduces tile
risk of electric shock by providing an escape wire
for tile electric cmTent.
This appliance is equipped Mth a power cord
having a gro/mding Mre with a grounding plug.
The plug must be plugged into an outlet that is
properly installed and gro/mded.
Consult a qualified electrician or service technician
if tile gro/mding instructions are not completely
tmde_tood, or if doubt exists as to whether tile
appliance is properly gro/mded.
If tile outlet is a standard 2-prong wall outlet,
it is vom" personal responsibili F and obligation
to have it replaced with a properly gro/mded
3-prong wall outlet.
Do not tinder [lliV cii'Ctllllstances ctlt or i'elllove tile
third (gro/md) prong fl'om the power cord.
Do not use an adapter plug with this appliance.
Do not use an extension cord with this appliance.
If tile power cord is too short, have a qualNed
electrician or se_'ice technician install an outlet
near tile appliance.
For best operation, plug this appliance into its
own electrical outlet to prevent flickering of lights,
blowing offllse or tripping ot circuit breaker:
THEVENTFAN
Tile tim Mll operate automatically trader cert;fin
conditions (see Automatic Fan featm'e). Take care
to p_event tile starting and spreading of accidental
cooking fires while tile vent tim is in use.
::Ji::Clean tile underside of tile microwave often.
Do not allow grease to build up on tile microwave
or tile tim filte_.
::Ji::In tile event of a grease fire on tile s/mfhce units
below tile microwave oven, smother a flaming
pan on tile suFlilce unit by covering tile pan
completely with a lid, a cookie sheet or a fiat tray.
_: Use care when cleaning tile vent tim filte_.
Corrosive cleaning agents, such as lve-based
oven cleane_, may damage tile filte_.
::Ji::_]/en preparing flaming foods trader tile
IllicI'OWaVe_ t/lI'n tile J[_lIl Oil.
_: Never leave s/mfi_ce units beneath w_ur microwave
oven unattended at high heat settings. Boilove_s
cause slnoking and greasy spillove_s that may
ignite and spread if the microwave vent tim is
operating. To minimize automatic fan operation,
use adequate sized cookware and use high heat
on S/llS[_lce tlnits onlY when necessary.
READANDFOLLOWTHISSAFETYINFORMATIONCAREFULLY.
SAVETHESEINSTRUCTIONS

Optionalkits www.GEAppliances.com
Available at extra cost from your GEsupplier.
Filler Panel Kits
ij<JX4OCT--Bisque
!'!:'JX4OWH--White
_: JX41--Black
When repladng a 36" range hood, filler panel kits
fill in the additional width to provide a custom
built-in appearance.
For installation between cabinets only; not fi)r
end-ot:cabinet installation. Each kit contains
two 3" wide filler panels.
Filter Kits
::Ji::JX81A--Recirculating CharcoalFilter Kit
Filter kits are used when the oven (-am_ot be vented
to the outside.
7

Aboutthe featuresofyouroven.
Throughout this manual, features and appearance may vary from your model.
900 Watts
J
1
Featuresof theOven
ODoor Latch Release Handle.
ODoorLatches.
Oindow with Metal Shield. Screen allows
cooking to be viewed while keeping
microwa;es confined in the o;en.
OContrnlPanel and Selector Dial
Oemovable Turntable. Tm'ntnble and support
must be in I)lace when using, the oven. The
mrntnble may be remoxed fin" cleaning.
oRemovable Turntable Support. The tumtnl)le
support must be in place when using the oven.
0Shelf. Use with Bake or FastBake. (Do not use
when microwave cooking.) For best results,
use the shelf in its "low" position, hanging
down fl'om the shelf supports.
8

Aboutthe cookingfeaturesofyour
microwave/convectionoven. vvww.OEAppliances.com
Youcan cook by Microwave, Baking or Fast Baking.
BAKE
REHEAT
POWER
I BEVERAGE
IIo ooo
TURNTOSELECT
PUSHTOENTER Selector Dial
_CLEAR/OFF l START/PAUSE_
CookingControls
Opress
TIMECOOK
Pressonceor twice
MICROEXPRESScook/Add30sec.
DEFROST
Pressonce(]]me)
Presstwice(Auto)
Pressthreetimes(Fast)
POWERlevel
Microwave Cooking Timeand Auto Features
Turnandpush dialtoenter
Amountofcookingtime
Startsimmediately!
Amountofdefrostingtime
Foodweightuptosixpounds
Foodweightuptoonepound
Powerlevel1-10
Sensor Features
Press Turnandpush dialtoenter Option
POPCORN Startsimmediately! more/lesstime
Pressonce(regular)
Presstwice(snack)
REHEAT Startsimmediately! more/lesstime
Pressonce(plate)
Presstwice(½to 1cup)
Pressthreetimes(1to 2cups)
BEVERAGE Startsimmediately!
AUTOCOOK Foodtype1-7 more/lesstime
oBaking
P_ess Turnandpushdialtoenter
BAKE Oventemperatureandcooktime
oFast Baking
Press Turnandpushdialtoenter
OventemperatureandcooktimeFASTBAKE 9

Available cooking options.
Do not use the shelf when
microwave cooking.
Microwave Cooking
_OtlI" oven rises Illi(I'()wave enei'g,v to cook by aset [iI/le oi" weight, or a tltOillati('allv
by sensoI:
Sensormicr()wave w(wksby detecting the increasing humidiP,' released during cooking.
The oven automatically at!justs the cooking time to \m_ious types and amounts ot fl)od.
Cooking Method
Microwave energy
is distributed evenly
throughout the oven
for thorough, fast
cooking of food.
Heat Source
Microwave energy.
Heat Conduction
Heat produced
within food by
instant energy
penetration.
Benefits
Fast,high efficiency
cooking. Ovenand
surroundings do
not get hot.
Easyclean-up.
Always use flTe shelf when bakhTg.
Baking
During baking, a heating element is used to raise the tempe_mu'e of the air inside the
oven. Any oven temperature fl'om 225°E to 450°E may be programmed. Atan gently
drculams this heated air throughout the oven, over and around the t0ocl, produdng golden
brown exteriors and rich moist interiors. This circulation of heated air is called convection.
Because the heated air is kept constanfl) moxing,, not I)emfitting, a laver of cooler air to
dexelop around the fi)od, some fi)ods cook tipster than in regular oxen cooking
Cooking Method Heat Source
Hot air circulates Circulating
around food to heated air
produce browned (Convection).
exteriors and seal
in juices.
Heat Conduction
Heat conducted
from outside offood
to inside.
Benefits
Aids in browning
and seals in flavor.
Cookssome foods
faster than regular
ovens.
_,>_iif l ",i!i!,,,"_,
i i iii i ii i i
ii
Always use the shelf with Fast Bake.
Fast Baking
Your oven also otte_ the option of FastBake,using microwave energy along with
convection cooking. Y(m cook with speed and accm'ac> while browning and crisping
to pedecfion.
Cooking Method
Microwave energy
and convection heat
combine to cook
foods in up to
one-half the time
of regular ovens,
while browning and
sealing in juices.
Heat Source
Microwave energy
and circulating
heated air.
Heat Conduction
Foodheats from
instant energyfrom
penetration and heat
conducted from
outside offood.
Benefits
Shortened
cooking time from
microwave energy,
plus browning and
crisping from
convection heat.
10

Aboutthe time andautomicrowave features, www.GEAppliances.com
TURNTOSELECT| |
LJ
PUSHTO ENIER
Usingthe Dial
You can make selections on tile oxen bx
turning tile dial and l)ressing, it to enter
the selection,
Pressing tile dial can also be used in place
of tile START/PAUSEbuttonfor quicker
I)r°gramming, ,of tile o;en.
TURNTUSELECT
PUSHTOENTER
_" TIME ]Time Cook
TimeCookI
_dlows XOtl to illici'owa'_e tor _llIV tiIl/e
between 15 seconds and 95 minutes.
Power level 10(High) is automaficalE set
but you may change it fiLE"more flexibility.
Press the TIME COOKbutton.
[]
[] Tm'n tile dial to set tile cook time and
press the dial to enter;
[]Change power level if you don't want
flfll powe_; (Press POWER. Turn tile dial
to select, Press the dial to enter;)
D Press tile dial or the START/PAUSE
button to start cooking
You may open tile door dtwing Time Cook
to check tile fi)od. Close tile door and press
tile dial or START/PAUSEto resulne cooking.
NOTE: Youmay change the cook time at any
time during cooking by turning the dia/. You
may a/so change the power level by pressing
the POWER button.
Time Cookfl
I,ets you change power levels automatically
dm'ing cooking. Here's how to do it:
BPress the TIME COOKbutton.
_'_ Tm'n tile dial to set tile fi_st cook time
and press the dial to enter:
_ Change tile power lexel if)ou don't
want flfll powex: (Press POWER. Tm'n tile
dial to select. Press the dial to entex:)
E_ Press tile TIME COOKbutton again.
[]Turn the dial to set the second cook
time and press the dial to entex:
Chan?e tile )ower lexel if you don't
[] want filll I)O_,ieI: (Press POWER. Turn tile
dial to select. Press tile dial to enter:)
[]Press tile dial or tile START/PAUSE
billion to start cooking.
At tile end of Time Cook I, Time Cook II
COtlnts down.
NOTE:Youmaychangethecooktimeat any
timeduringcookingbyturningthedia/. You
maya/sochangethepower/eve/by pressing
thePOWERbutton.
j-- RO7
TURNTOSELECT
PUSHTO ENTER
Micro ExpressCook
This is a quick way to set and start cooking
in 30 second blocks each time the MICRO
EXPRESSbutton is pressed. The cook time
may be changed by turning the dial at any
time during cooking.
Tile power lexel will automaficall) be set
at 10 and tile oxen will start immediately:
Tile power lexel can be changed as time is
colmting down. Press tile POWERbutton,
tm'n tile dial and press to enter;
11

Aboutthe time andautomicrowave features.
TURNTO SELECT
PUSHTOENTER
DEFROST I
time Defrost
Use Time Defrost to defrost fin" a selected
length of time.
_ Press the DEFROSTbutton once.
_'_ Turn the dial to select the time )ou
want, Press the dial to enter:
[]Press the START/PAUSEbutton to start
defl'osfing.
D Tm'n the fi)od oxer if the oxen signals
TURN FOODOVER.
Y))u may change the defl'ost time at anv
time during deli'osting by turning the dial.
Power level is automatically set at 3, but can
be changed. You can deti'ost small items
quickly by raising the power level after
entering the time, Power level 7cuts the
total defl'osfing time in about halt_ power
level 10 cuts the total time to approMmately
1/3. H_m'e\'e_; toed will need more
ti'equent attention than usual.
A dull tlmmping noise may be heard
dining defi'osting. This is nomml when
oven is not operating at High powe_:
Defrosting Tips
?_:Foods fl'ozen in I)aper or plastic can be
defl'osted in the package. Closed packages
shouM be slit, pierced or vented AKI'ER
fi)od has partially defrosted. Plastic storage
containers should be partially tmcovered.
::Ji::Family-size, prepackaged ti'ozen dim_e_
can be deiiosmd and microwaved. If the
toed is in a foil containe_; transfer it to
a microwave-sate dish.
::Ji::Foods that spoil easily should not be
allowed to sit out tor more than one hem"
after defl'osting. Room temperature
promotes the greyish of ham_flfl bacteria.
_: For more even deti'osfing ot larger fi)ods,
such as roasts, use Auto Defrost. Be sure
lmge meats are completely defl'osted
beiore cooking.
_: \4]_en deti'osted, food should be cool
but softened in all areas. If still slightly icy,
return to the microwave ve_T b_iefl 5 or
let it stand a tow minutes.
12
DEFROST
TURNTOSELECT@
PUSHTOENTER
Auto Defrost
Use Auto Defrost fin" meat, poultry and fish
weiohing_ ,uI)to six potmds. Use Time Defrost
fox" I/lOS[ other _'i'ozen _'i)o(ls.
AutoDefrostautomatically sets the
deli'osfing times and power levels to give
even defl'osting results fin" meats, poultt T
and fish.
iJi::Remove meat from l)ackage, and place
on microwaxe-satb dish.
_ Press the DEFROSTbutton twice.
_'_ Turn the dial to the tood weight,
using the (:onxe_ion (;uide at fight.
For example, dial 1.2 fin" 1.2 potmds
(l pound, 3 oz.) Press the dial to entei:
_j Press the START/PAUSEbutton to start
defl'osfing.
D Turn the food o;er if the o;en signals
TURN FOODOVER.
::Ji::Remove defl'osted meat or shield warn/
areas with small pieces of toil,
::Ji::_Mter defrosting, most meats need to
stand 5 minutes to complete defl'osting.
imge roasts should stand tin" about
30 minutes.
ConversionGuide
If thewe/)htoffood Isstatedinpoundsand
ounces,theouncesmustbeconvertedtotenths
1)ofapound
WeightofFood EnterFoodWeight
in Ounces (tenthsofa pound)
1-2 .1
3 .2
4-5 .3
6-7 .4
8.5
6-10 .6
11 .7
12-18 .8
14-15 .9

IURNTOSELECT
PUSHTOENTER
I DEFROST
www.GEAppliances.com
Fast Defrost
FastDefrost autonmticallv sets the
deti'osting times and power levels to give
even defl'osfing results fin" meats, poult_ T
and fish weighing up to one pound.
?_:Remove meat from package and place on
microwave-safe dish.
_r_ Press the DEFROSTbutton three times.
_'_ Turn the dial to the todd weight,
usin,*.,.,the Conxe_ion Guide at right.
For example, dial .5 for .5 pounds
(8 oz.) Press the dial to enter:
_ Press the START/PAUSEbumm to start
deli'osting.
_Turn the food o',er if the o',en signals
TURN FOOD OVER.
::Ji::Remove defrosted meat or shield warm
areas with small pieces of toil.
_: _Mter deli'osting, most meats need to
stand 5 minutes to complem deli'osfing.
ConversionGuide
If the weight of foodisstated in poundsand
ounces,the ouncesmust be convertedto tenths
1)of apound
WeightofFood EnterFoodWeight
in Ounces (tenthsofa pound)
1-2 .1
3.2
4-5 .3
6-7 .4
8.5
9-10 .6
11 .7
12-13 .8
14-15 .9
/3

Aboutchangingthepower level.
POWER
TURNTOSELECTI |
PUSHTOENIER
The power level may be entered or
changed immediately after entering the
tilne fi:,r Time Cook, Time Defrost or Express
Cook. The power level may also be changed
during time countdown.
[] Filet, follow directions for Time Cook,
Time Defrost (>r Express Cook.
_'_ Press the POWERbutton.
_'] Turn the dial clockwise to increase and
com_terclockwise to decrease the power
level. Press the dial t() entei:
_ Press the START/PAUSEbutton to start
c(>oking
\_riable power levels add fle_bilitv to
illicrowa\'e cooking, Tile }lower levels on
tile IIlicI'o_lve oven can be COl//[)aI'ed to
tile surfilce units on a range. Each power
level gives you microwave energy a certain
l)ercent ot tile tim e. Power level 7is
microwave energy 70% ot the time. Power
level 3 is energy 30% el the time. Most
cooking will be done on High (power level
10) which gives you ] 00% powei: Power level
10 will cook fi_ster but food may need more
fl'equent sfiMng, rotating or turning over
A lower setting will cook more evenly and
need less stirring or rotating (ff the filed.
Some fi)ods may have better fla\'oi; texture
or appeaiance if one (ff tile lower settings is
used. Use a lower power level when cooking
fi)ods that have a tendency to boil o\'el;
such as scalloped potatoes.
Rest periods (when the microwave
eneigy cycles off) give time fi)r the fi)od
t() "equalize" or transter heat t() the inside
ot the food. An example of this is shown
with pewerlevel3_the deti'ost cycle. If
microwave ener_' did not cycle off; the
outside of the t0od would cook heft)re
the inside was deti'osted.
Hero am some examples of uses for various
power levels:
High 10:Fish, bacon, vegetables, boiling
liquids.
Med-High7: Gentle cooking of meat and
poultIy; baking casseroles and reheating.
Medium 5: Sh>w c(>oking and tenderizing
for stews and less tender CtltS of meat.
Low2or3: Defl'ostin ," simmering; delicate
Satlces.
WarmI: Keel)ing, filed wmm; softening
buttei:
14

About the sensor microwave features, www.GEAppliances.com
Covered
HumiditySensor
What happens when using the Sensor Features:
The Sensor Features detect the increasing lmmiditv released during cooking. The oven
automatically a(!justs the cooking time to \m'ious types and amotmts ot toed.
Do not use the Sensor Features twice in succession on the same toed portion--it may
result in severely overcooked or burnt fi)od. If fi)od is tmdercooked after the cotmtdown,
use _TmeCook tot additional cooking tilne.
!/::_The proper containex_ and covex_ are essential tot best sensor cooking.
Vented
_)' _Mwavs use microwaxe-sate containels and coxer them with lids or xented plastic wrap.
Nexer use tight, sealinom plastic containers--the) can prexent steam ti'om escaping and
C_ltlSe _()od to oxercook.
Be sm'e tile outside of tile cooking containet_ and tile inside of tile microwave oxen are
(h_ befi)re I)lacing, fi)od in tile oxen. Beads of moistm'e turning, into steam can mislead
the sensoi:
Dry off dishes so they don't mislead
the sensor.
Auto Cook
Because most cooking containe_ must be covered during Auto Cook, this teatm'e is best
with toods that veil W_lIlt [o ste_lIIl oI" retain illoisture.
NOTE."Useof the metal shelf with Auto Cookis not recommended
Recommended Foods
A wide \'arie b' ot too(ls including meats, fish and vegetables can be cooked
using this teatm'e.
Foodsnotrecommended
Foods that must be cooked tmcovered, toods that require constant attention, too(ls that
require addition of ingredients during cooking and fi_ods calling fiw a (h y look or crisp
surtilce after cooking should not be cooked using this teature. It is best to Time Cook them.
15

About the sensor microwave features.
IUHNTO SELECT
PUSHTO ENTER
NOTE: Do not use this feature
twice in succession on the
same food portion--it may
result in severely overcooked
or burnt food.
Auto Cook
_ Place covered fi)od in the o_en and
close the door, Press the AUTOCOOK
button. SELECTFOODTYPEappeai_ in
the display.
]Turn file dial to the desired fi)od tf,i)e.
PI'ess to entei;
See the Sensor Food Type Guide bel(m' fin.
specific fl)ods and instructions.
The oven starts immediately.
NOTE."If tile door was open while tile
control was being set, close the door and
press the START/PAUSEbutton to begin
cooking.
If toed is undercooked after the
countdown, use Time Cook Ii)r additional
cooking time.
Donotopentheovendoorbeforethecountdown
time Is displayed--steam escaplbg from the oven
can affect cookingperformance.If the door Is
opened,close the door andpressSTART/PAUSE
zmmedzatelg
If ground meat was selected, tile oven may
signal you to drain and stir the meat. Open
the dooi; drain the meat and close the door.
Press tile START/PAUSEbmtonif necessar)'
to I'eStlI//e cooking.
CookingTips
_: \4]/en oven signals and countdown time
is displayed, tile door may be opened
for stirring, turning or rotating food.
To resume cooking, close the door and
press SNRT/PAUSE.
_: Match the amount of fi)od to the size oI
containei: Fill containei_ at least 1/2 till.
::Ji::Be sure outside oI container and inside
of oven are dry.
_: _dter completion ol Cook c)'cle, if fi)od
needs additional cooking, return fi)od to
oven and rise TimeCookto finish cooking.
How toAdjusttheOven'sAutomatic
Settings for a Shorter or Longer Cook Time
(Not available for all food types)
To subtract 10% from the automatic
cooking time:
_t anY tilne after tile ('otlntdown begins,
ttwn the dial counterclockwise and press
to enter
To add 10% to the automatic cooking time:
At anv time aher tile countdown begins,
ttlFn tile dial clockwise and press to enter.
Sensor Food Type Guide
Chicken Pieces
Fish
GroundMeat
(Beef, Pork, Turkey)
Potatoes
Canned Vegetables
Fresh Vegetables
Frozen Vegetables
Servings Serving Size
1 to 42 to 8
pieces
1 to4 4to 16 oz.
-- 8 to 32 oz.
1 to4 8to32oz.
1 to4 4to 16 oz.
lto4 4to 16 oz.
1to4 4to 16 oz.
Comments
/_.rse obhmg, square or round dish.
Cover with vented plastic wrap.
Use obhmg, square or round dish.
Cover with vented plastic wrap.
Use round casserole dish. Clumble ineat
into dish. Cover with vented plastic wrap.
Pierce skin with fl)rk. Arrange in a
star pattern in center of turntable.
Use microwave-sate casserole or bowl.
Cover with lid or vented plastic wrap.
Use nlicrowave-safe casserole or bowl.
Add 2 tablespoons water fin" each serving.
Cover with lid or vented plastic wrap.
Use microwave-sale casserole or bowl.
Follow i)ackage insti uctions for adding
wa tel'. Cover with lid or vented plastic wrap.
16

Use only with prepackaged
microwave popcorn weighflTg
1.5to 3.5ounces.
NOTE:Do notuse thisfeature
twice in succession on the
same foodportion--it may
result in severely overcooked
or burntfood.
www.GEAppliances.com
Popcorn
To use tile Popcorn teatm'e:
_r_ Follow )ackaoe instructions, using
Time Cook if tile )ackaoe is less than
1.5 ounces or linger than 3.5 ounces.
Place the package of popcorn in the
center of tile turntable.
_ Press the POPCORNbutton once or
twice. Tile o_en starts immediately:
Press once for a regular size (3.0 to 3.5 oz.)
bag of popcorn.
Press twice fi_r a snack size (1.5 to 1.75 oz.)
bag of popcorn.
If w_u open tile door while POPCORNis
displayed, an error message will appea_:
Close the doo_; press CLEAR/OFFand
begin again.
If food is undercooked after tile
countdown, use Time Cooktot additional
cooking tim e.
How toAdjust the Automatic Popcorn Setting
toProvide a Shorter or Longer Cook Time
If you find that tile 1)rand el popcorn you
use unde_l)ops or ove_l)ops consistenfl 5
VO/1C_llladd or subtract 90-30 seconds to
the automatic popping time.
Tosubtract time:
X_]thin the fi_t 30 seconds after the oven
starts, turn tile dial com_terclockwise liar 20
seconds (-) less cooking time. Press U) enter:
Tm'n again to reduce cooking time another
10 seconds (- -) total 30 seconds less time.
Press to entei:
Toadd fime:
X4]thin tile fit_t 30 seconds after tile oven
starts, turn the dial clockwise tar an extra
20 seconds (+) cooking time. Press to enter:
Turn again to add another 10 seconds (++)
total 30 seconds additional time.
Press to enter:
REHEAT
NOTE:Do notuse thisfeature
twice in successionon the
samefoodportion--it may
result in severelyovercooked
or burntfood.
I BEVERAGE
NOTE:Do not use thisfeature
twice in successionon the
samefoodportion--it may
result in severelyovercooked
or burntfood.
Reheat
Tile Reheat teatm'e reheats servings of
previously cooked toads or a plate of
leftovers.
BPlace tile cup of liquid or coxered
fi_od in tile oven. Press REHEATonce,
twice or three times. The oven starts
imm ediatelv.
Press once for a plate of leflo\'e_.
Press twice tar 1/2 to 1 dill cup.
Press three times tot 1 to 2 dill cups.
p'_ The oxen signals when steam is
sensed and the time remaining begins
COtlnting down.
Do not open tile oven door tmtil time is
counting down. If tile door is opened,
close it and press STARTimmediatelv.
After remowngfood from the oven,stir,if posslTJle,
to evenout the temperature.Reheatedfoodsmay
havewide vanationsin temperature.Someareasof
foodmaybe extreme/yhal
If fi_od is not hot enough after tile
countdown use Time Cook for additional
reheating time.
Some FoodsNot Recommended for Use
With Reheat
It is best to use Time Cook for these foods:
_: Bread products.
::Ji::Foods that must be reheated tmcovered.
_: Foods that need to be stirred or rotated.
::Ji::Foods calling for a dry look or crisp
sm'ti_ce after reheating.
How to Adjust the Oven's Automatic
Settings for a Shorter or Longer Time
Tosubtract 10%from the automatic
cooking time:
_]thin tile fi_t 30 seconds after tile oven
starts, mrn tile dial co/mterclockwise and
press to enter:
Toadd 10% to the automatic cooking time:
_,_]thin the first 30 seconds after the oven
starts, ttlrn tile dial clockwise and press
to entei:
Beverage
Press tile BEVERAGEbutton to heat an
8-10 oz. cup of coffee or other beverage.
The oven starts immediately.
Drinksheated with the Beverage featuremay be
veryhal Removethecontainer with care.
If li}od is tlll(lex'('ooke(l after tile Cotlntdown
use Time Cookti)I" additional cooking time. /7

About the baking features.
Always usethe shelf in its "low"
position whenbaking
Baking uses a heating element to raise the temperature _ffthe air inside the oven. Anv,
oxen temperature fl'om 225°F to 450°F me) be set. A tim gentl) circulates this heated air
throughout, the....oxen, oxer and arotmd the toed, I)r°ducing, ,_*oldenbrown extefioi_ and
rich, moist interiors. This circulation of heated air is called comection.
Because...... the heated air is kei)t constanflx, moxing, not I)emfitting, a laxer, of cooler air to
develop arotmd the fi)()d, some toods cook fi_ster than in regular oven cooking.
SeetheCookware Tipssectionforinformationonsuggestedcookware.
ForBest Results...
Alwaysusetheshelf/bits "low"positionwhenbaking.
The shelf is required for good air circulation and even browning.
SeetheCookware Tipssectionforinformationonsuggestedcookware.
BAKE
TURNTOSELECTI|
PUSHTO ENIER
Bake with Preheat
BPress the BAKE button.
_'_ Turn the dial to set the oven
temperatm'e and press dial to enter;
Do not enter bake time now. (The cook
time will be entered late_, after the o_en
is preheated.)
_ Press the dial or the START/PAUSE
button to start preheating.
D X,\q/en the oxen is preheated, it will
signal. If you, do not open tile door
within 1 holm tile oxen will ttlFn Off'
automaticallx.
DOpen tile oven door and, usino
caution, place tile fi)od in tile o_,en.
_Close tile oven doo_: Turn tile dial
to set the cook time and press the dial
or START/PAUSEto start cooking.
I X,_q/en cooking is complete, tile o',en
will signal and tt/Fn Off,
NOTE:Youmaychangethecooktimeat anytime
duringcookingby turningthedial.
Youmaychangetheoventemperatureat any
timeduringcookingbypressingthePOWER
button.Turnthedial toset theoventemperature
andpressthedial toente_
Toview thecooktimeandoventemperature
duringcooking presstheBAKEbutton.
Reducetherecipeoventemperature25°F
forbakedgoods.
BAKE
TURNTOSELECT@
PUSHTO ENTER
Bake without Preheating
[]
[]
Jz
[]
If )our recipe does not require
I)reheating,, press the BAKEbutton.
Tm'n the dial to set the oxen
temperature and press to entei:
Tm'n the dial to set the cook time and
press to entei:
Press tile dial or tile START/PAUSE
griffon to start tile o_en,
NOTE:Youmaychangethecooktimeat anytime
duringcookingby turningthedM.
Youmaychangetheoventemperatureat any
timeduringcookingbypressingthePOWER
button.Turnthedial toset theoventemperature
andpressthed&/ toenter
Toview thecooktimeandoventemperature
duringcooking presstheBAKEbutton.
Reducetherecipeoventemperature25°F
forbakedgoods.
18

About the Fast Bake feature. .CEa,,,a.ces.com
Alwaysusetheshelfinits "low"
positionwifl7FastBake.
FastBake offers the best _eatures of microwave energa, and convection cooking. Microwaves
cook food ti_st and convection drculation of heated air browns fi)ods beaufiflfllv. Any oven
temperatm'e fl'om 925°F to 450°F may be set.
For Best Results...
Always use theshelf in its "low" position with FastBake.
Tile shelf is required flit good air circulation and even browning.
See the Cookware Tips section for information on suggested cookware.
See the Best Method of Cooking section to determinethe which foodsareappropriate tocook
using FastBake.
Fast Bake with Preheat
FASTBAKE Ir_ Press tile FASTBAKEbutton.
_'_ Tm'n tile dial to set tile oxen
temperatm'e and press dial to enter.
Do not enter FASTBAKE cook time
TURNTOSELECT now. (Tile cook time will be entered
PUSHTOENTER latex; after tile oxen is preheated.)
Press tile dial or tile START/PAUSE
button to start preheating.
Do not enter FASTBAKE cook time
now. (Tile cook time will be entered
late_, after tile oxen is preheated.)
_ X&q/en tile oven is preheated, it will
signal. If you do not open tile door
within 1 horn, tile oxen will tm'n off
a utomaficallv.
_'_ Open tile oven door and, using
caution, place tile tood in tile oxen.
1_'_ Close tile oven door Tm'n tile dial to
set tile cook time and press to enter
Press tile dial or tile START/PAUSE
button to start cooking
_"_ XAhen cooking is complete, tile oxen
will signal and turn off.
NOTE: Youmay change the cook time at any time
during cooking by turning the dial
Youmay change the oven temperature and
microwave power level at any time during
cooking by pressing the POWER button. Turnthe
dial to set the oventemperature and press the
dial to enter Then, turn the dial to set microwave
power level 1through 4 and press the dial to
enter Thedefault power level is 4.
Toview the cook time and oven temperature
during cooking, press the FAST BAKE button.
?_:Check tile Cookware 77pssection tot
correct cookware when using Fast Bake.
::Ji::Do not use metal cookware with
FastBake.
::Ji::Reduce tile recipe cook time by 25%.
::Ji::See tile Best Method of Cookingsection
to determine tile which foods are
appropriate to cook using Fast Bake.
FASTBAKE)
1URNTOSELECT/_
PUSHTO ENTER
Fast Bake without Preheat
BIt your recil)e does not require
I)reheating,, press tile FASTBAKE
button.
_'_ Tm'n tile dial to set tile oven
telill)ei'attli'e and pi'ess to entei',
_'] Tm'n tile dial to set tile cook tilne and
press to enter
D Press tile dial or tile START/PAUSE
b/ltton to start tile ox,en.
NOTE:Youmaychangethecooktimeat anytime
duringcookingbyturningthedial
Youmaychangetheoventemperatureand
microwavepowerlevelatanytimeduring
cookingbypressingthePOWERbutton.Turnthe
dial to set theoventemperatureandpressthe
dial to enter Then,turnthedial toset microwave
power level 1through 4 and press the dial to
enter Thedefault power level is 4.
Toview the cook time and oven temperature
during cooking,press the FAST BAKE button.
NOTE"
::Ji::Some recipes call for preheating.
_: Check tile Cookware 77pssection for
correct cookware when using Fast Bake.
_: Do not use metal cookware with
FastBake.
::Ji::See tile Best Method of Cooking section
to determine tile which foods are
api)ropfiate to cook using FastBake.
::Ji::Reduce tile recipe cook time by 25%. 19

Cookware tips.
Bake
MetaJ Pmls are recommended fi)r all types of baked products, but especially where
browning is important.
Dark or dull finish metal pans are best fi)r breads and pies because they absorb heat and
produce crisper crust,
Shiny ahmfinum i)ans are better fi)r cakes, cookies or muffins because they reflect heat
and hel I) produce a light tender crust,
Glass or Glass-Ceramic casserole or baking dishes are best suited fi)r egg and cheese
recipes due to the cleanabili Vof glass,
FastBake
Glass or Glass-Cermnic baking containet_ are recommended. Be sure not to use items with
metal trim as it may cause arcing (S.l)arkin,,_ with oxen wall or oxen shelf. This can damage
the cookware, the shelf or the oxen.
Heat-Resistm_t Plastic microwaxe cookware (sate to 450 °F) may be used, but it is not
recoinnlended fi)r foods requiting all-arotmd browning, because the plastic is a poor
con(hlctoi" of heat.
Heat,Resistant Glass, Glass,Ceramic
®® ®
(Pyrex ,Fire King ,Corning Ware ,etc.)
Metal No "_s No
Nm_Heat,Resistant Glass No No No
Microwave-SafePlastics "_s No "_s*
Plastic Films and Wraps _s No No
Paper Products "_s No No
Straw, Wicker and Wood '_s No No
Use only microwave cookware that is safe to 450°E
Miere wave Bake Fast Bake
'_s '_s "_s
Cookware and foodplacement suggestions.
Correctshelfposition
/
Incorrectshelfposition
_: In Microwave mode, the fl)od should
alwa)s be cooked on the glass tm'ntable
tray: Microwaxe mode should not be used
with the metal shelf in the oxen.
iJi::The metal shelf should ahvavs be used
when cooking in Bake or _st Bake
modes so that heated air will brown
the bottom of the fi)ocl. The glass
turntable can be left in place in Bake
and _st Bake modes.
For best cooking pex_mmance in Bake or
[_st Bake modes, leave at least a one inch
gap between the cooking dish and the
sides of the _)x'en.
_: For best cooking pex_ommnce in Bake or
Fast Bake modes, alwa)_s place the shelf
in the "low" position.
::Ji::Placing the shelf in the "high" position
will cause the top of the tood to brown/
cook m uch fi_ster than the interior and
bottom of the fi)od.
2O
Other manuals for Profile Spacemaker JVM1490
5
Table of contents
Languages:
Other GE Oven manuals

GE
GE PVM2170SRSS User manual

GE
GE Profile Advantium PSB9240DFBB User instructions

GE
GE PT7800 User manual

GE
GE Monogram Advantium ZSC1202 User manual

GE
GE GE Monogram ZET837BBBB User guide

GE
GE Monogram ZET1 User manual

GE
GE Profile PVM1790 User manual

GE
GE JRS25 Operating manual

GE
GE Profile PT960SRSS Manual

GE
GE JT3500SFSS Manual
Popular Oven manuals by other brands

Hotpoint Ariston
Hotpoint Ariston FK 1039E.20 X instruction manual

NEFF
NEFF B69VS7K 0 Series User manual and installation instructions

NEFF
NEFF C44.20.3 instruction manual

Siemens
Siemens HBC33R550 instruction manual

John Lewis
John Lewis JLBIOS661 instruction manual

Hotpoint
Hotpoint SX 1049Q CX operating instructions