GE 29488 User manual

THIS MANUAL IS AVAILABLE FOR FREE
COMPLIMENTS OF
BUYMEBUYME.COM
TO ORDER THIS PRODUCT, PLEASE CALL TOLL-FREE
1-877-992-8963 OR VISIT WWW.BUYMEBUYME.COM

We bring good things to life.
29488
4-Line Caller ID Intercom Speakerphone
User’s Guide

2
EQUIPMENT APPROVAL INFORMATION
Your telephone equipment is approved for connection to the Public SwitchedTelephone Network and is in compliance with parts
15 and 68, FCC Rules and Regulations and theTechnical Requirements forTelephoneTerminal Equipment published by ACTA.
1Notification to the Local Telephone Company
On the bottom of this equipment is a label indicating, among other information, the US number and Ringer Equivalence
Number (REN) for the equipment.You must, upon request, provide this information to your telephone company.
The REN is useful in determining the number of devices you may connect to your telephone line and still have all of these devices
ring when your telephone number is called. In most (but not all) areas, the sum of the RENs of all devices connected to one line
should not exceed 5. To be certain of the number of devices you may connect to your line as determined by the REN, you should contact
your local telephone company.
Notes
•This equipment may not be used on coin service provided by the telephone company.
•Party lines are subject to state tariffs, and therefore, you may not be able to use your own telephone equipment if you are on a
party line. Check with your local telephone company.
•Notice must be given to the telephone company upon permanent disconnection of your telephone from your line.
2Rights of the Telephone Company
Should your equipment cause trouble on your line which may harm the telephone network, the telephone company shall, where
practicable, notify you that temporary discontinuance of service may be required. Where prior notice is not practicable and the
circumstances warrant such action, the telephone company may temporarily discontinue service immediately. In case of such
temporary discontinuance, the telephone company must: (1) promptly notify you of such temporary discontinuance; (2) afford you
the opportunity to correct the situation; and (3) inform you of your right to bring a complaint to the Commission pursuant to
procedures set forth in Subpart E of Part 68, FCC Rules and Regulations.
The telephone company may make changes in its communications facilities, equipment, operations or procedures where such
action is required in the operation of its business and not inconsistent with FCC Rules and Regulations. If these changes are
expected to affect the use or performance of your telephone equipment, the telephone company must give you adequate notice, in
writing, to allow you to maintain uninterrupted service.
INTERFERENCE INFORMATION
This device complies with Part 15 of the FCC Rules. Operation is subject to the following two conditions: (1)This device may not cause
harmful interference; and (2)This device must accept any interference received, including interference that may cause undesired
operation.
This equipment has been tested and found to comply with the limits for a Class B digital device, pursuant to Part 15 of the FCC Rules.
These limits are designed to provide reasonable protection against harmful interference in a residential installation.
This equipment generates, uses, and can radiate radio frequency energy and, if not installed and used in accordance with the
instructions, may cause harmful interference to radio communications. However, there is no guarantee that interference will not occur
in a particular installation.
If this equipment does cause harmful interference to radio or television reception, which can be determined by turning the equipment
off and on, the user is encouraged to try to correct the interference by one or more of the following measures:
•Reorient or relocate the receiving antenna (that is, the antenna for radio or television that is “receiving” the interference).
•Reorient or relocate and increase the separation between the telecommunications equipment and receiving antenna.
•Connect the telecommunications equipment into an outlet on a circuit different from that to which the receiving antenna is
connected.
If these measures do not eliminate the interference, please consult your dealer or an experienced radio/television technician for
additional suggestions. Also, the Federal Communications Commission has prepared a helpful booklet, “HowTo Identify and
Resolve Radio/TV Interference Problems.”This booklet is available from the U.S. Government Printing Office, Washington, D.C.
20402. Please specify stock number 004-000-00345-4 when ordering copies.
HEARING AID COMPATIBILITY (HAC)
This telephone system meets FCC standards for Hearing Aid Compatibility.
US NUMBER IS LOCATED ONTHE CABINET BOTTOM
REN NUMBER IS LOCATED ONTHE CABINET BOTTOM

3
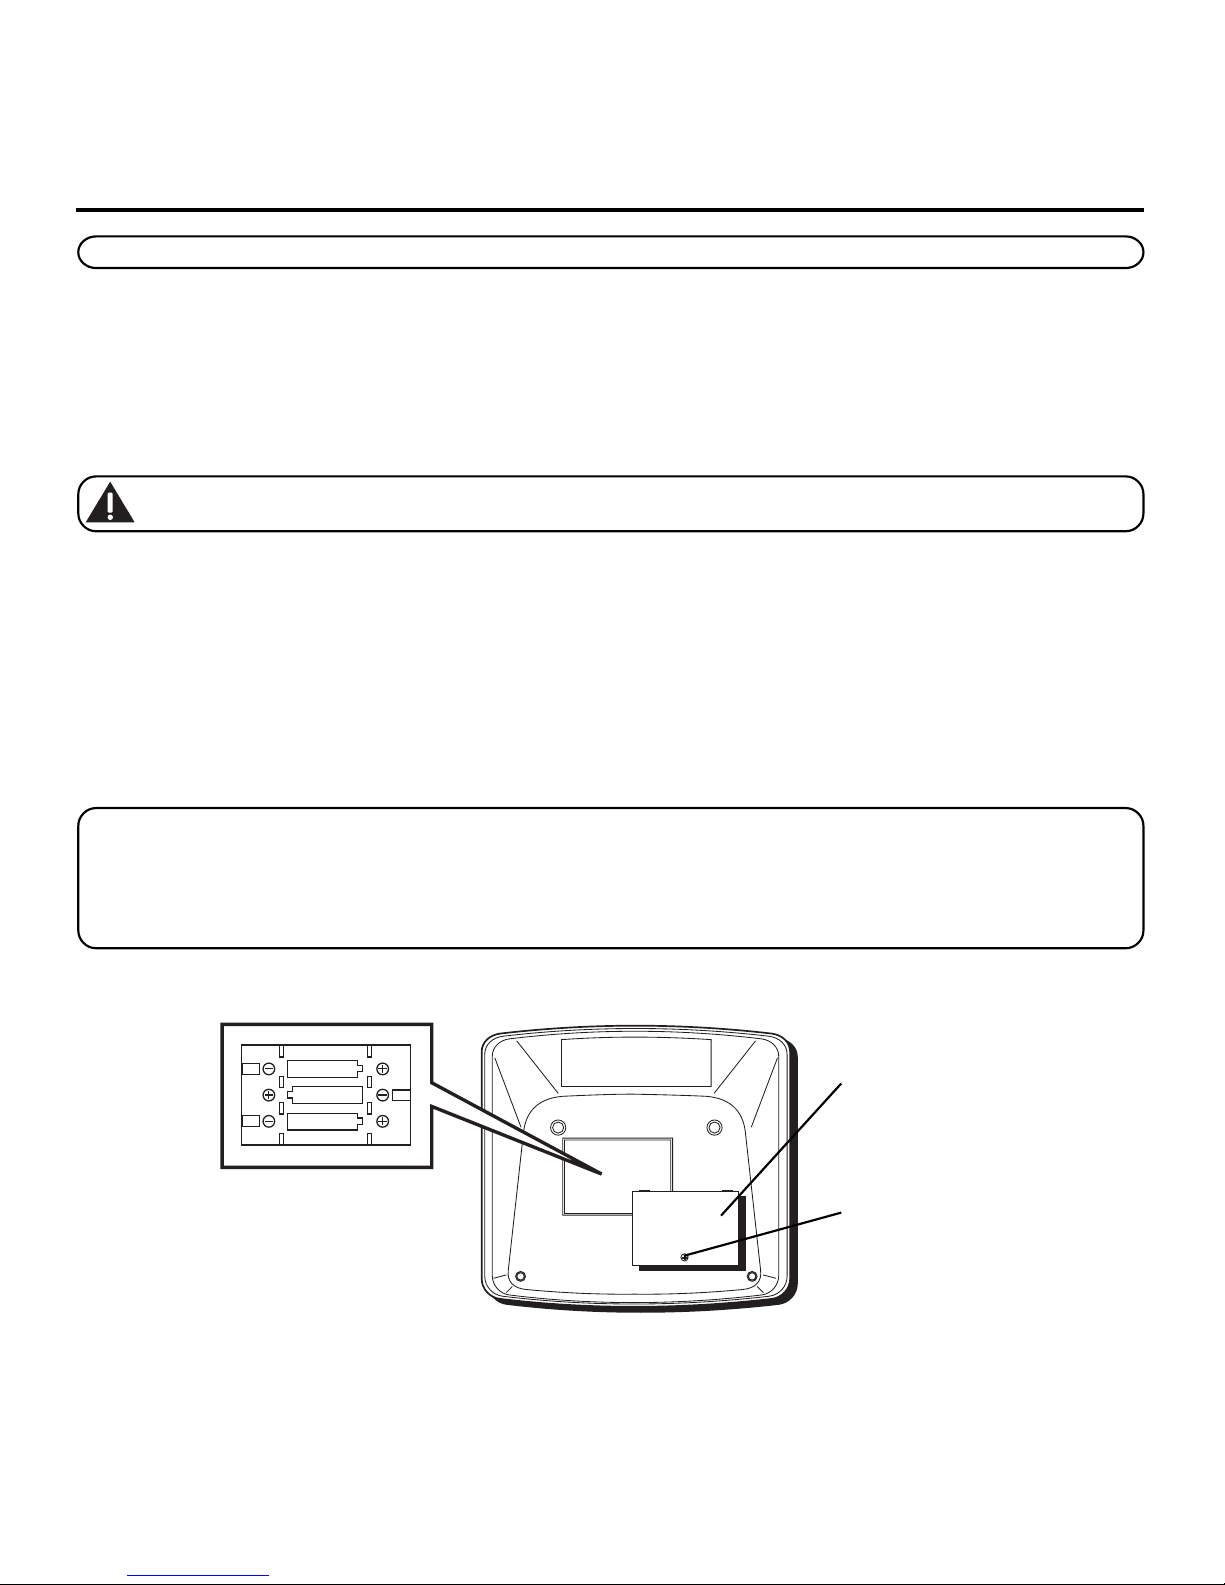
SEE MARKING ON BOTTOM / BACK OF PRODUCT
RISK OF ELECTRIC SHOCK
DO NOT OPEN
WARNING:TO PREVENT FIRE OR
ELECTRICAL SHOCK HAZARD, DO
NOT EXPOSETHIS PRODUCT TO
RAIN OR MOISTURE.
THE LIGHTNING FLASH
AND ARROW HEAD
WITHIN THE TRIANGLE
IS A WARNING SIGN
ALERTING YOU OF
“DANGEROUS
VOLTAGE” INSIDE THE
PRODUCT.
CAUTION: TO REDUCE THE RISK OF
ELECTRIC SHOCK, DO NOT REMOVE
COVER (OR BACK). NO USER
SERVICEABLE PARTS INSIDE. REFER
SERVICING TO QUALIFIED SERVICE
PERSONNEL.
THE EXCLAMATION
POINT WITHIN THE
TRIANGLE IS A
WARNING SIGN
ALERTING YOU OF
IMPORTANT
INSTRUCTIONS
ACCOMPANYING THE
PRODUCT.
CAUTION:
TABLE OF CONTENTS
EQUIPMENT APPROVAL INFORMATION ....................................................... 2
INTERFERENCE INFORMATION .................................................................. 2
HEARING AID COMPATIBILITY (HAC)....................................................... 2
INTRODUCTION .................................................................................... 4
BEFORE Y OU BEGIN ............................................................................. 4
PARTS CHECKLIST ............................................................................ 4
MODULAR JACK REQUIREMENTS ........................................................ 4
IMPORTANT INSTALLATION INFORMATION ................................................... 5
INSTALLING AND REPLACING BATTERIES ............................................... 5
INSTALLING THE PHONE ......................................................................... 6
CONNECTING THE AC (ELECTRICAL) POWER ......................................... 6
CONNECTING THE HANDSET ............................................................... 6
CONNECTING LINES 1+2 AND 3+4 TOT WO DUAL-LINE
PHONE JACKS ..................................................................... 6
CONNECTING LINES 1+2 AND 3+4 TO FOUR SINGLE-LINE
PHONE JACKS ..................................................................... 6
WALL MOUNTING ........................................................................... 7
SETTING UPTHE T ELEPHONE .................................................................. 7
SETTING APHONE ID....................................................................... 8
SETTING THE PHONE NAME ............................................................... 8
CHANGING APHONE ID .................................................................... 8
SYSTEM VERIFICATION ...................................................................... 9
OTHER SYSTEM PHONES ............................................................. 9
SETTING UPTHE CLOCK .................................................................... 9
PROGRAMMING THE HOUR FORMAT .................................................... 9
SETTING THET IME ............................................................................ 9
HOUR ...................................................................................... 9
MINUTES .................................................................................. 9
MONTH .................................................................................... 9
DATE ..................................................................................... 10
SETTINGY OUR LOCAL AREA CODE ................................................... 10
SETTING THE REGIONAL AREA CODES ............................................... 10
SETTING THE RINGERT ONE .............................................................. 11
ADJUSTING THE DISPLAY CONTRAST ................................................. 11
SETTING THE LANGUAGE ................................................................. 11
RESTORING THE ORIGINAL SETTINGS ................................................. 12
SETTING THE PRIORITY LINE ............................................................. 12
PROGRAMMING THE PAUSE DURATION ............................................... 12
ADJUSTING THE DONOT DISTURB SETTING ....................................... 12
SETTING THE AUTO INTERCOM ......................................................... 13
BASIC OPERATION .............................................................................. 13
MAKING CALLS ............................................................................. 13
USING THE HANDSET ................................................................ 13
USING THE SPEAKERPHONE ........................................................ 13
USING THE HEADSET ................................................................. 13
RECEIVING CALLS .......................................................................... 14
USING THE HANDSET ................................................................ 14
USING THE SPEAKERPHONE ........................................................ 14
USING THE HEADSET ................................................................. 14
SWITCHING BETWEEN THE SPEAKERPHONE, HANDSET,
AND HEADSET ................................................................... 14
MUTE .......................................................................................... 14
DONOT DISTURB FEATURE ............................................................. 14
HOLD .......................................................................................... 15
PLACING ACALL ON HOLD ......................................................... 15
RELEASING ACALL ON HOLD ..................................................... 15
FLASH ......................................................................................... 15
REDIAL ........................................................................................ 15
REVIEWING THE REDIAL NUMBERS ............................................... 15
TRANSFER .................................................................................... 15
TRANSFERRING ACALL TO ANOTHER STATION ............................... 15
RECEIVING AT RANSFER FROM ANOTHER STATION ........................... 16
PRIVACY ....................................................................................... 16
PROVIDING PRIVACY .................................................................. 16
VOLUME ...................................................................................... 16
RINGER VOLUME ...................................................................... 16
SPEAKERPHONE, HANDSET, AND HEADSET VOLUME ........................ 16
CONFERENCE CALLS ....................................................................... 17
INTERCOM CALLS ........................................................................... 17
ONE -TOUCH INTERCOM ............................................................ 17
ANSWERING AN INTERCOM CALL ................................................. 18
INTERCOM HOLD ...................................................................... 18
INTERCOM CONFERENCE CALLS ................................................... 18
PAGING ALL STATIONS .............................................................. 18
DATA PORT .................................................................................. 19
CALLER ID (CID) FEATURES ............................................................... 19
SUMMARY SCREEN ........................................................................ 19
RECEIVING AND STORING CALLS ....................................................... 19
REVIEWING CALL RECORDS ............................................................. 20
SAVING ACALL RECORD TO THE INTERCOM/MEMO LOG OR TO
PHONE BOOK MEMORY ...................................................... 20
DELETING ACALL RECORD .............................................................. 20
DELETING ALL CALL RECORDS ......................................................... 20
DIALING BACK .............................................................................. 21
IFY OU PROGRAMMEDY OUR LOCAL AREA CODE ................................. 21
IFY OU DID NOT PROGRAMY OUR LOCAL AREA CODE ......................... 21
CALL WAITING CALLER ID .............................................................. 21
CALLER ID DISPLAY MESSAGES ........................................................... 21
PREVENTING UNKNOWN OR BLOCKED CALLER ID CALLS FROM
BEING SAVED ................................................................... 22
DELETING ALL UNKNOWN CALLER ID RECORDS ................................. 22
SETTING THE AUTOT IME & DATE UPDATE FROM CALLER ID ................. 22
MEMORY .......................................................................................... 22
STORING ANUMBER AND NAME IN MEMORY ..................................... 23
STORING THE LAST NUMBER DIALED ................................................. 23
STORING APAUSE IN MEMORY ........................................................ 23
DIALING ASTORED NUMBER ........................................................... 24
CHAIN DIALING ............................................................................. 24
REVIEWING MEMORY ..................................................................... 24
PHONE BOOK .......................................................................... 24
INTERCOM/MEMO LOG .............................................................. 24
CHANGING ASTORED NAME AND NUMBER ........................................ 25
MEMORY DELETE/CLEAR ................................................................ 25
CLEARING ALL MEMORIES ......................................................... 25
TROUBLESHOOTING GUIDE .................................................................. 26
GENERAL PRODUCT CARE ................................................................... 27
SERVICE ........................................................................................... 27
INDEX .............................................................................................. 28
LIMITED WARRANTY ........................................................................... 30

4
INTRODUCTION
Your Four-Line Caller ID Intercom Speakerphone is a full-featured phone ideally suited for home or office use. It is
designed to receive calls on up to 4 incoming telephone lines and to serve up to 16 station users. In an
installed system, your phone provides such features as: 16 memory locations, 90 phone book memories, hold,
conference call, intercom, call transfer, Caller ID display, and speakerphone capabilities.
Please read this user’s guide carefully to familiarize yourself with all the features of your new phone. Also, make
sure to retain this guide for future reference.
IMPORTANT: In order to use all of the features of this unit, you must subscribe to either the standard Name/Number
Caller ID Service or Caller ID with Call Waiting Service. To know who is calling while you are on the phone, you must
subscribe to Caller ID with Call Waiting Service.
CAUTION: When using telephone equipment, there are basic safety instructions that should always be followed. Refer to
the IMPORTANT SAFETY INSTRUCTIONS provided with this product and save them for future reference.
NOTE: Make sure you keep these instructions for future reference. You may need to add stations or make changes to the
system later.
BEFORE YOU BEGIN
PARTS CHECKLIST
Make sure your package includes the following items:
CAUTION: Use only the ATLINKS, USA Inc. 5-2495 power supply that is compatible with this unit. Using other power
supplies may damage the unit. To order a new power supply, call the Thomson multimedia, Inc. Mail Order Department at
1-800-338-0376.
MODULAR JACK REQUIREMENTS
To properly connect your phone to your telephone lines, you should identify the type of wall jack(s) you
have.You will need an RJ11C (for a single line) or a RJ14C (for two lines) type modular phone jack, which
might look like the one pictured here. If you don’t have either modular jack, call your local phone
company to find out how to get one installed.
VERY IMPORTANT: In order to achieve full system operation (i.e. intercom, page, etc.), Line 1 must be connected and
must be common to all phones connected to the system. Only other 29487 or 29488 models are compatible for full system
operation. Connecting phones other than the 29487/88 to Line 1 may inhibit the intercom and paging operations.
For proper operation of intercom, page function, etc., DO NOT connect a DSL modem to Line 1.
To transfer a call from one station to another, the two stations should be connected to the same line.
#
OPER
0
TONE
WXYZ
9
TUV
8
PQRS
7
MNO
6
JKL
5
GHI
4
DEF
3
ABC
21
INTERCOM
DIAL
CLEAR
CONFER
LINE
3
LINE
1
HOLD
HEADSET MUTE
FLASH
VOLUME
REDIAL/PAUSE
TRANSFER
PRIVACY
REVIEW
16
SPEAKER
*
PAGE
LINE
4
LINE
2
MENU
STORE
DIRECTORY
EXIT SELECT
1
2
3
4
5
6
7
8
9
10
11
12
13
14
15
NEWCALL
Base Handset Handset cord Mounting pedestal Line cords AC power supply

5
IMPORTANT INSTALLATION INFORMATION
IMPORTANT: It is imperative you follow these steps in sequence for proper installation of the phone and note the following:
•Never install telephone wiring during a lightning storm.
•Never touch non-insulated telephone wires or terminals, unless the telephone line has been disconnected
from the network.
•Use caution when installing or modifying telephone lines.
•Without AC power, the Intercom and page functions will not operate.
•Without AC power and a properly installed battery, the flash function will not operate.
CAUTION: Always disconnect all phone cords from the base unit before battery installation or replacement.
INSTALLING AND REPLACING BATTERIES
1. If the line cords are connected, disconnect them from the base unit.
2. Carefully turn over the phone. Remove the desktop/wall mounting pedestal.
3. Loosen the screw on the battery compartment door with a Phillips screwdriver and lift up the battery
compartment door.
4. Install three new or replace the three old 'AA' size alkaline batteries as indicated on the diagram inside the
battery compartment.
5. Replace the battery compartment door and tighten the screw on the battery compartment door.
6. Re-attach the desktop/wall mounting pedestal.
NOTE: If the battery icon in the display is blank or shows only one bar, you need to replace the batteries as soon as possible
in order to maintain unit operation during AC main power outage. As a precaution, you may want to write down any stored
information you do not want erased.
IMPORTANT: If you're not going to use the telephone for more than 30 days, remove the batteries because they could leak
and damage the unit.
“A A”
“A A”
“A A”
Battery compartment door
Screw

6
INSTALLING THE PHONE
Your four-line phone should be placed on a level surface such as a desk or table top, or you can mount it on a wall. A
desktop/wall mounting pedestal is packaged with your phone.
CONNECTING THE AC (ELECTRICAL) POWER
Plug the power supply cord into the jack marked 6VAC on the back of the base.Then plug the other end into an
electrical outlet.
CAUTION: Use only the ATLINKS USA, Inc. 5-2495 power supply that came with this unit. Using other power supplies may
damage the unit. To order a new power supply, call the Thomson multimedia, Inc. Mail Order Department at 1-800-338-0376
CONNECTING THE HANDSET
•Connect one end of the coiled handset cord to the jack on the side of the base unit.
•Connect the other end of the cord to the jack at the lower end of the handset, then place the handset in the cradle.
CONNECTING LINES 1+2 AND 3+4 TO TWO DUAL-LINE PHONE JACKS
LINE 3 + 4
LINE 1 + 2
Adapter/coupler on LINE 3 + 4 Adapter/coupler on LINE 1 + 2
1. Connect one end of the straight telephone line cord tagged as "LINE 1+2" to the jack marked LINE 1 + 2 on the
back of the base. Connect the other end to a dual line wall phone jack.
2. Connect one end of the other straight telephone line cord to the jack marked LINE 3 + 4 on the back of the base.
Connect the other end to a dual line wall phone jack.
3. The unit automatically searches and sets the phone ID. Refer to Setting Up Phone ID section.
CONNECTING LINES 1+2 AND 3+4 TO FOUR SINGLE-LINE PHONE JACKS

7
NOTE: If you have four single-line wall jacks, you must use adapters/couplers (not included) to combine the four wall jacks
into two dual-line jacks. The adapter/coupler may look similar to the one pictured above and can be purchased from your
local telephone products vendor.
WALL MOUNTING
1. Remove the base pedestal.
2. Rotate the phone so that the bottom of the base is facing up and the thickest end is pointing away from you.
3. Rotate the base pedestal so that the thinnest end is pointing away from you. Reattach the base pedestal by
inserting the tabs into the slots on the bottom of the base, then slide the base pedestal in place by pushing it
away from you.
SETTING UPTHE TELEPHONE
#
OPER
0
TONE
WXYZ
9
TUV
8
PQRS
7
MNO
6
JKL
5
GHI
4
DEF
3
ABC
21
INTERCOM
DIAL
CLEAR
CONFER
LINE
3
LINE
1
HOLD
HEADSET MUTE
FLASH
VOLUME
REDIAL/PAUSE
TRANSFER
PRIVACY
REVIEW
16
SPEAKER
*
PAG E
LINE
4
LINE
2
MENU
STORE
DIRECTORY
EXIT SELECT
1
2
3
4
5
6
7
8
9
10
11
12
13
14
15
NEW CALL
CONFERENCE button
LINE 4 button
LINE 3 button
LINE 2 button
LINE 1 button
INTERCOM button
INTERCOM indicator
STORE button
MENU button
DIRECTORY button
DIAL button
SELECT button
DISPLAY
EXIT button
CLEAR button
PRIVACY indicator
PRIVACY button
PAGE button
TRANSFER button
REDIAL/PAUSE button
VOLUME button
FLASH button
HEADSET button
HEADSET indicator
SPEAKER indicator
SPEAKER button
MUTE button MUTE indicator
HOLD button
Intercom/Memo Log
buttons (1-16)
REVIEW/up and down arrow buttons
NEW CALL indicator
Headset jack

8
SETTING APHONE ID
When the Line 1 telephone cord and AC power supply cords are properly installed, the unit automatically searches
and sets up a Phone ID which shows in the display.To set your own Phone ID, or change your phone ID, follow the
menu options, or press EXIT to start using the phone.
NOTE:
•If the phone cannot find an ID, determine if there are too many phones connected to the system. A maximum of 16
phones can be connected in the system.
•The Phone ID (01 to 16) is unique. When more than one phone using the same Phone ID is detected, only one phone
with that ID will be valid. The phone IDs for the other phone(s) is automatically erased, and the phone(s) intercom
indicators blink red and green. You must use the Menu options to select a new Phone ID for each phone.
SETTING THE PHONE NAME
1. Press the MENU button.
2. Use the REVIEW up or down arrow button to scroll to
SET PHONE OPTIONS
.
3. Press the SELECT button.
4. Use the REVIEW up or down arrow button to scroll to
SET PHONE NAME
.
5. Press the SELECT button.
SET PHONE NAME
is displayed.
6. Use the number pad to enter your name (up to 8 characters). More than one letter or character is stored in each of
the number keys. For example, to enter letter "A", press the 2 key once. For a "B", press the same key twice. For a
"C", press three times.
7. Use the REVIEW up or down arrow button to move the cursor.
NOTE: Press CLEAR to delete an incorrect letter.
8. Once the desired letter is selected,
• use the REVIEW down arrow button to move to the next letter, or
• press the next character if the character is a different dial button, or
• wait a couple of seconds for the phone to automatically advance to the next character position.
9. When finished, press the SELECT button again.
OK
is displayed.
NOTE: The Phone Name and ID are displayed when phone is idle.
CHANGING APHONE ID
1. Press the MENU button.
2. Use the REVIEW up or down arrow button to scroll to
SET PHONE OPTIONS
.
3. Press the SELECT button.
4. Use the REVIEW up or down arrow button to scroll to
SET PHONE ID
.
5. Press the SELECT button.
6. Select the new ID by pressing the corresponding memory location button (1-16) or press the SELECT button to
automatically search and set the ID.
NOTE: You may press the EXIT button at any time to exit except after ID searching starts.

9
SYSTEM VERIFICATION
The following procedures should be used to test the system’s configuration and identify possible line connection
errors.The phone must be connected to the AC power outlet, Line 1 must be connected to the LINE 1 + 2 jack, and
the phone must have a phone ID number.
VERY IMPORTANT: In order to achieve full system operation (i.e. intercom, page, etc.), Line 1 must be connected and
must be common to all phones connected to the system. Only other 29487 or 29488 models are compatible for full system
operation.
OTHER SYSTEM PHONES
1. Press LINE 1.
2. Look at all the other stations. If they all indicate line 1 is being used, the connection is correct.
OR
1. Press the INTERCOM button.The display shows
INTERCOM
and
ENTER CALLING PHONE ID
.
2. Enter a phone ID by pressing an Intercom/Memo Log button (1-16).The display shows the phone ID you entered.
If the phone ID you entered is connected to the system, you will hear a ring back tone (call through tone) at your
phone. If the phone ID is not connected to the system, you will hear an error tone.
NO ANSWER
shows in the
display and intercom is cancelled.
SETTING UPTHE CLOCK
PROGRAMMING THE HOUR FORMAT
The clock is capable of being set to a 12- or 24-hour format.The default is 12-hour mode.
1. Press the MENU button.
2. Press the REVIEW down arrow button to scroll to
SET ADVANCE FEATURE
.
3. Press the SELECT button.
SET HOUR FORMAT
is displayed.
4. Press the SELECT button again.
5. Use the REVIEW up or down arrow button to select
12-HOUR
or
24-HOUR
.
6. Press the SELECT button to confirm.
SETTING THE TIME
1. Press the MENU button.
SETTIME & DATE
is displayed.
2. Press the SELECT button.
HOUR
1. Use the REVIEW up or down arrow button to select the desired hour.
2. Press the SELECT button to confirm.You are now ready to select the minutes.
MINUTES
1. Use the REVIEW up or down arrow button to select the desired minute.
2. Press the SELECT button to confirm.You are now ready to select the month.
MONTH
1. Use the REVIEW up or down arrow button to select the desired month.
2. Press the SELECT to confirm.You are now ready to select the date.

10
DATE
1. Use the REVIEW up or down arrow button to select the desired date.
2. Press the SELECT button to confirm.You are now back to select the hour.
3. Press the EXIT button to finish.
NOTE: You may press EXIT at any step in the process. It is not necessary to re-program the complete time & date if you only
want to adjust certain fields (i.e.; hour only).
SETTING YOUR LOCAL AREA CODE
1. Press the MENU button.
2. Use the REVIEW up or down arrow button to scroll to
SET AREA CODE
.
3. Press the SELECT button.
Enter Number
is displayed.
4. Use the touch tone pad on your phone to enter your area code.
NOTE: If you make a mistake, press CLEAR to clear all three digits and re-enter the area code.
5. When you are finished, press the SELECT button to confirm.
NOTE: You may press the EXIT button at any time to exist.
SETTING THE REGIONAL AREA CODES
Depending on your location, you may need to set regional area codes. Setting Regional Area Codes helps the phone
determine the number format to display when a valid Caller ID signal is received. Call records matching any of the
set regional area codes are displayed as 10 digits.
NOTE: If the number is not displayed correctly, the phone may not be able to dial back the number properly. You can store
up to 6 regional area codes.
You may need to set regional area codes if you reside in an area that:
•uses multiple area codes
•uses overlapping area codes
•requires 10-digit dialing.
1. Press the MENU button.
2. Use the REVIEW up and down arrow button to scroll to
SET ADVANCE FEATURE
.
3. Press the SELECT button.
4. Use the REVIEW up and down arrow button to scroll to
SET REGIONAL CODES
.
5. Press the SELECT button.
6. All 6 regional codes show in the display. Use the touch tone pad on your phone to enter digits. Press CLEAR to clear a
wrong digit, or you may use the REVIEW up and down arrow button to move the cursor to the preferred digit.
7. P ress the SELECT button to confirm.
NOTE:
•You may press the EXIT button at any time to exit.
•You must set all three digits of the regional area code.

11
SETTING THE RINGER TONE
The ringers for all 4 lines can be set independent of one another.
1. Press the MENU button.
2. Use the REVIEW up or down arrow button to scroll to
SET PHONE OPTIONS
.
3. Press the SELECT button.
4. Use the REVIEW up or down arrow button to scroll to
SET RINGTONE
.
5. Press the SELECT button.The ring tone settings for the four lines show in the display.
6. Use the REVIEW up or down arrow button to scroll through the options. A sample ring tone is generated when
you point to individual options.
7. P ress the SELECT button to confirm.The cursor in the display automatically moves to next line .
NOTE: If the Ringer Tone is turned OFF (in the display), the cursor in the display automatically moves to the CID ON/OFF
option. Use the REVIEW up or down arrow button to select CID ON or OFF. (The ON setting allows the unit to detect and
display CID records for the corresponding line. The OFF setting disables the CID function for a particular line.) Press the
SELECT button to confirm. The cursor in the display automatically moves to the next line.
8. Repeat steps 6 and 7 for each telephone line.
9. When finished, press the EXIT button.
NOTE: You may press the EXIT button at any time to exit.
NOTE: The line indicators continue to flash for incoming calls even if the ringer is disabled.
ADJUSTING THE DISPLAY CONTRAST
The display contrast can be set to one of its four contrast levels.
1. Press the MENU button.
2. Use the REVIEW up or down arrow button to scroll to
SET LCD CONTRAST
.
3. Press the SELECT button.The contrast scale shows on the display.
4. Use REVIEW up or down arrow button to adjust the contrast level.
5. Press the SELECT button to confirm.
NOTE: You may press the EXIT button at any time to exit.
SETTING THE LANGUAGE
1. Press the MENU button.
2. Use the REVIEW up or down arrow button to scroll to
SET LANGUAGE
.
3. Press the SELECT button.
4. Press the REVIEW up or down arrow button to select from
English
,
Espanol
or
Francais
.
5. Press the SELECT button to confirm.
NOTE: You may press the EXIT button at any time to exit.

12
RESTORING THE ORIGINAL SETTINGS
This feature allows you to reset the menu settings to the original default settings.
1. Press the MENU button.
2. Use the REVIEW up or down arrow button to scroll to
SET ADVANCE FEATURE
.
3. Press the SELECT button.
4. Use the REVIEW up or down arrow button to scroll to
RESTORETO DEFAULTS.
5. Press the SELECT button.
6. Use the REVIEW up or down arrow button to choose
Yes
or
No
.
7. P ress the SELECT button to confirm your selection.
NOTE: You may press the EXIT button at any time to exit
SETTING THE PRIORITY LINE
A priority line allows you to select one of the 4 lines to have precedence over the other 3 lines.
1. Press the MENU button.
2. Use the REVIEW up or down arrow button to scroll to
SET PHONE OPTIONS
.
3. Press the SELECT button.
4. Use the REVIEW up or down arrow button to scroll to
SET PRIORITY LINE
.
5. Press the SELECT button.The priority line number shows in the display.
6. Use the REVIEW up or down arrow button to scroll to line number.
7. P ress the SELECT button to confirm.
NOTE: You may press the EXIT button at any time to exit.
PROGRAMMING THE PAUSE DURATION
1. Press the MENU button.
2. Use the REVIEW up or down arrow button to scroll to
SET PHONE OPTIONS
.
3. Press the SELECT button.
4. Use the REVIEW up or down arrow button to scroll to
SET PAUSETIME
.
5. Press the SELECT button.
6. Use the REVIEW up or down arrow button to scroll through the pause time options.You may choose from 1
second to 9 seconds.
7. P ress the SELECT button to confirm your selection.
NOTE: You may press the EXIT button at any time to exit.
ADJUSTING THE DONOT DISTURB SETTING
1. When the unit is idle, press the PRIVACY button.The Privacy indicator flashes and the last selected duration
setting is displayed.
2. Use the REVIEW up or down arrow button to select the desired duration.You may choose from 15 minutes, 30
minutes, 1 hour, or 2 hours and increase the duration by 1 hour intervals up to 24 hours.
3. Press the SELECT button to confirm your selection.

13
SETTING THE AUTO INTERCOM
For “hands-free” operation, the phone can be set to automatically answer an intercom call.
TIP: You may also use this feature for room monitoring.
1. Press the MENU button.
2. Use the REVIEW up or down arrow button to scroll to the
SET ADVANCE FEATURE
.
3. Press the SELECT button.
4. Use the REVIEW up or down arrow button to scroll to
INTERCOM AUTO ANS
.
5. Press the SELECT button.
6. Use the REVIEW up or down arrow button to choose
Yes
or
No
.
7. P ress the SELECT button to confirm your selection.
NOTE: You may press the EXIT button at any time to exit.
BASIC OPERATION
Your phone provides the convenience of accessing four separate telephone lines, each obtained from the telephone
company and each having its own phone number.This is generally applicable to small offices. It provides for 16
telephones (or stations) to share multiple lines. Each station is interconnected to all others by an intercom.
MAKING CALLS
USING THE HANDSET
1. Pick up the handset and the phone automatically selects an open line.
2. Wait for a dial tone then dial a phone number.
3. Hang up the handset when finished.
USING THE SPEAKERPHONE
1. Press the SPEAKERPHONE button and the phone automatically selects an open line.
2. Wait for a dial tone then dial a phone number.
3. Press SPEAKERPHONE when finished.
NOTE: Only one-way conversation is possible in speakerphone mode. When you are speaking, you are transmitting. When
you are listening, you are receiving. You can’t do both at the same time. The phone will automatically switch between
transmitting and receiving depending on the level of the voice or the room noise picked up by the speakerphone mic.
USING THE HEADSET
1. Connect the headset plug to the jack on the side of the base unit.
2. Press the HEADSET button to enable the headset.The HEADSET indicator blinks.
3. Press the line you want to use.
4. Wait for a dial tone then dial a phone number.
5. Press HEADSET to turn it off.
CAUTION: Use only the ATLINKS USA, Inc. 5-2425 headset that is compatible with this unit. Using other
headsets may damage the unit. To order a new headset, call the Thomson multimedia, Inc. Mail Order
Department at 1-800-338-0376.
NOTE: If the headset is not connected, an error tone is heard when the HEADSET button is pressed.

14
RECEIVING CALLS
USING THE HANDSET
When the phone rings, the corresponding line’s indicator flashes rapidly.
1. Pick up the handset.The line is automatically selected.
2. When you are finished, hang up the handset.
USING THE SPEAKERPHONE
When the phone rings, the corresponding line’s indicator flashes rapidly.
1. Press the SPEAKERPHONE button.The speakerphone turns on automatically and selects a line.
2. When you are finished, press SPEAKERPHONE.
USING THE HEADSET
1. Connect the headset plug to the jack on the side of the base unit. When the phone rings, the corresponding line’s
indicator flashes rapidly.
2. Press the line button. If the headset mode is not on, you must first press HEADSET to enable the headset. The
HEADSET indicator blinks.
3. When you are finished, press the HEADSET button.
NOTE: Whether you are making or receiving a call, the caller will be disconnected if you press another line without putting
the call on hold first.
SWITCHING BETWEEN THE SPEAKERPHONE, HANDSET, AND HEADSET
To switch to the speakerphone, press SPEAKERPHONE.The speakerphone indicator turns on.
To switch to the handset, pick up the handset.The speakerphone or headset turns off.
To switch to the headset, press HEADSET to enable the headset.The headset indicator turns on.
MUTE
To have a private, off-line conversation, use the MUTE feature.The party on the other end of the line cannot hear
you, but you can still hear them.
1. Press MUTE to activate the mute feature.The mute indicator turns on.
2. Press MUTE again to turn it off.
NOTE: Switching from speakerphone to handset or headset cancels mute.
DONOT DISTURB FEATURE
This feature can be set at individual telephones to disable (silence) an incoming ring signal, intercom ring, or page.
To program the duration of do not disturb, see “Adjusting the Do Not Disturb Setting”.
1. While the phone is not in use, press PRIVACY.The indicator blinks and the display shows, how long the ringer will
be disabled. When there is an incoming call or an intercom call, the status indicators function as normal but the
phone will not ring.
2. To cancel, press PRIVACY again.

15
HOLD
PLACING ACALL ON HOLD
1. Press the HOLD button.The indicator for the line on hold flashes green.
2. Hang up or press another line button.
The phone emits a beep every 30 seconds as a reminder. At the other stations, the indicator blinks red but no beep
is heard.
NOTE: If you put a call on HOLD while in PRIVACY mode, no one but you can access the line on hold. Anyone trying to
access the line receives an error tone.
RELEASING ACALL ON HOLD
Press the button for line on hold.The phone automatically goes into speakerphone mode.
NOTE: If you want to change modes, lift the handset to switch to the handset, or press the HEADSET button to use the headset.
NOTE: The call on hold can be picked up at any station using this procedure.
FLASH
Use the FLASH button to activate custom calling services such as call waiting or call forwarding, which are available
through your local phone company.
REDIAL
1. Pick up the handset, or press SPEAKERPHONE, or a line button.
2. The line is automatically selected. (For headset, press the line you want to use.)
3. Wait for a dial tone then press REDIAL.
NOTE: The redial function will not operate if the number to be redialed contains more than 32 digits. If the number is
longer than that, you will hear an error tone.
REVIEWING THE REDIAL NUMBERS
Your phone records up to six previously dialed phone numbers.
1. When the phone is idle, press the REDIAL button.
2. Use the REVIEW up or down arrow button to view the six previously dialed numbers.
3. While the preferred number is displayed, pick up the handset or press the SPEAKERPHONE, DIAL, or a line button
to dial the phone number.
NOTE: If you do not select a line button, the line is automatically seized and the number is dialed accordingly.
TRANSFER
TRANSFERRING ACALL TO ANOTHER STATION
1. With the caller on the line, press theTRANSFER button.
2. Press an Intercom/Memo Log button (1-16) that corresponds to the station you want to transfer the call to.The
line’s indicator blinks yellow until the party picks up the transferred call. Once the call is picked up, the indicator
stays red.The indicator on the receiving party’s line rapidly flashes red and rings.

16
• If the transferred call is not picked up at the other station within 45 seconds.The transfer cancels, the line is put
on hold, and the line indicator flashes green.
• If the party at the other station doesn’t pick up the transferred call, and you want to attempt to transfer to
another station, press the line button and repeat the transfer process from step 1.
RECEIVING ATRANSFER FROM ANOTHER STATION
If a call is transferred to your station, the line indicator flashes red.To answer the call, press that line button.
If you are on the line when a call is transferred to you, will hear beeps to alert you of the incoming call.You can put
your current call on hold by pressing HOLD, and then pick up the incoming call by pressing the line button.
NOTE: During the transfer, the only two stations that can access the line are: a) the transferring station, or; b) the station
receiving the transfer.
VERY IMPORTANT: To transfer a call from one station to another, the two stations should be connected to the same line.
PRIVACY
While in use, a line can be secured so that no one else can listen to the conversation.This feature only applies to
29487/29488 phones However, other phones which are not compatible with these models can still access the line.
PROVIDING PRIVACY
At any time during a conversation, you can use the Privacy feature to secure the line.
1. While on a line, press the PRIVACY button.The indicator turns on.
2. To cancel, press PRIVACY again or hang up.
NOTE: If you put a call on hold while in privacy mode, no one but you can access the line on hold.
VOLUME
The ringer, speaker, and handset/headset volume is set independently with the VOLUME up and down buttons.Your
telephone comes with default settings which can be adjusted to individual taste.To return to the default settings,
press both the up and down buttons simultaneously.There are 8 possible volume settings per mode.The volume
indicator scale is displayed during volume adjustment.
RINGER VOLUME
1. While the phone is on the hook, press the VOLUME up or down button.The phone rings according to the
current setting.
2. Tap the up or down button to adjust the volume one level at a time.The phone stores the setting after the last
button press.
NOTE: To turn the ringer off, on, or change the ringing pattern, see Setting the Ringer Tone.
SPEAKERPHONE, HANDSET, AND HEADSET VOLUME
While the phone is in use, press the VOLUME up or down buttons until you reach the desired volume.The phone
stores the setting after the last button press.

17
CONFERENCE CALLS
This feature allows you to have a 3-way conversation using any combination of 2 lines.
To connect and conference
1. To make a call, press the line you want and dial the telephone number. If you already have someone on the line,
skip to step 2.
2. Press the HOLD button to place the call on hold.
3. Press another line button and dial the telephone number of the party you want to conference with.
4. Press the CONFERENCE button.
5. Speak to both parties.
NOTE: If you have more than one line on hold, and you want to have a conference call, you must first select the line on
which you want to conference.
To disconnect one party:
Press the line button for the person you want to continue speaking with, and the other party is automatically
disconnected.
To disconnect both parties:
Hang up the handset, or press the SPEAKERPHONE or HEADSET button.
NOTE: If you press the HOLD button to put them on hold first, you may then disconnect from each party individually.
INTERCOM CALLS
ONE -TOUCH INTERCOM
NOTE: If the INTERCOM indicator is turned on (solid red), the intercom is in use. You must wait until the indicator turns
off before making an intercom call.
1. Press the Intercom/Memo Log button (1-16) for the station you want to intercom with.The SPEAKERPHONE turns on.
Alternately, you may press the INTERCOM button, then press the Intercom/Memo Log button (1-16) for the
stations you want to intercom with.The speakerphone automatically turns on.
NOTE: If you want to switch to the handset, pick it up and continue speaking. To switch to the headset press the
HEADSET button.
NOTE: The handset, headset, or speakerphone cannot be active when an intercom call is initiated (the handset should be
on the cradle and the speakerphone and headset turned OFF.)
2. To end the intercom call, hang up.
NOTE: If the receiving station does not answer within 45 seconds, the intercom call is cancelled. You will hear an error
tone and NO ANSWER shows in the display.

18
ANSWERING AN INTERCOM CALL
When you receive an INTERCOM call, the INTERCOM indicator flashes red, and the display shows the caller’s name
and phone ID.
NOTE: If you are using the speakerphone, press the INTERCOM button to answer. If you are using the headset (headset indicator
flashes), press the INTERCOM button., or when the intercom indicator turns green, lift the handset and begin speaking.
NOTE: Press SPEAKERPHONE or lift the handset to automatically select a party. If you receive an incoming call and
intercom call at the same time the unit automatically selects the ringing line.
INTERCOM HOLD
1. Make an intercom call or answer an intercom call.
2. Press the HOLD button.The Intercom indicator flashes green.
NOTE:
• When the intercom is on hold, you may not receive another intercom.
• If the other party terminates intercom, intercom hold is also released.
INTERCOM CONFERENCE CALLS
This feature allows you to have a 3-way conversation using the intercom feature and an open line.
1. Place a call or make an intercom call.
2. Press the HOLD button.
3. Place a call on another line or make an intercom call.
4. Press the CONFERENCE button.
5. Speak to both parties.
NOTE: If you have more than one party on hold (telephone line or intercom), you must select the line for the party you
want to conference with.
To disconnect one party:
Press the line or intercom button for the person you want to continue speaking with, and the other party is
automatically disconnected.
To disconnect both parties:
Hang up the handset, or press the SPEAKERPHONE button.
NOTE: If you press the HOLD button to put them on hold first, you may then disconnect from each party individually.
PAGING ALL STATIONS
1. Lift the handset.
2. Press the PAGE button and listen for the beep.The other stations not in use automatically activate their
speakerphones and receive your page.
3. Speak into the handset.You have 30 seconds to page in this mode. After 30 seconds, the page is cancelled.
4. When finished, hang up the handset.
NOTE: You will not receive a page when Do Not Disturb is turned on.

19
DATA PORT
This phone is equipped with a data port jack for you to connect an auxiliary phone device, such as a fax machine,
computer modem, answering machine, or even a cordless phone.
The data port switch on the back of the phone controls the Data Port function and allows you to choose the line that
the data port uses, either line 1, line 2, line 3, or line 4.
You can use the data port to hook up your fax machine, for example, and then set the data port switch to line 4 in
order to receive faxes on the phone number for line 4.
In the event that you are on line 4 and want that person to fax something to you, change the data port switch to line
2 or line 3, and give the person on-line the phone number for line 2 or line 3.Your fax machine now can receive calls
on line 2 or line 3.
IMPORTANT: Be sure to switch the fax machine back to the normal line when you are done because outside callers who do
not know that you have switched lines will not be able to reach your fax machine if they dial the line 4 number.
CALLER ID (CID) FEATURES
12:34 PM 12/25
00Total CALLS
00 New CALLS
(01)JOHN
Name of phone
Battery indicator
Time and date
Phone ID
CID records waiting to be reviewed
Number of records in CID memory
SUMMARY SCREEN
The summary screen shows the current time, current date, number of CID records to be reviewed and total number
of records saved to CID memory. It is displayed until any button is pressed. Within 60 seconds of receiving a new
call, the new caller information is displayed and the red NEW CALL indicator turns on and blinks.
RECEIVING AND STORING CALLS
This unit receives and displays information transmitted by your local phone company.This information can include
the phone number, date and time; or the name, phone number, date and time.The unit can store up to 99 calls for
later review. When the memory is full, a new call automatically replaces the oldest call in memory.
NEW
will appear
in the display for calls received that have not been reviewed.The line number for the call received is also displayed.
LINE 2
12:34 PM 12/25
1-317-123-4567
JOHN SMITH
INCOMING CALL
Table of contents
Languages:
Other GE Telephone manuals