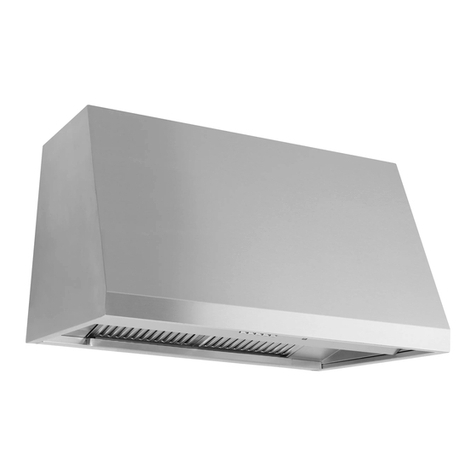
GE Monogram ZV750 User manual

Owner's
Manual
Stainless Steel Vent Hood
ZV750, ZV755
ZV850, ZV855
Hotte aspirante
en acier inoxgdable
Manuel du propri_taire
La section frangaise commence 6 la page 13
Campana de ventilaci6n de
acero inoxidable
Manual del propietario
La secci6n en espafio! empieza en la p6gina 23
I 49-80569 I
05-09JR
monogram.cam

Consumer Information
Stainless Stee! Hood
Contents Consumer Information
Important Phone Numbers .................... !1
Model and Serial Numbers ...................... 2
Owner's Registration for Canadian Customers ...9
Problem Solver.................................. 7
Safety Instructions .............................. ]
Warranty ...................................... 12
Controls and Features ......................... /4
Care and Cleaning
Charcoal Filters .................................. 5
Hood Surfaces .................................. 5
Light Bulbs ...................................... 6
Metal Grease Filter .............................. 5
Before
using _/our
stainless
steel hood
Readthis manual carefully. It is intended to help
you operate and maintain your new stainless steel
hood properly.
Keep it handy for answers to your questions.
If you don't understand something or need more
help, there is a list of toll-free consumer service
numbers included in the back section of this
manual.
OR
Visit our Website at: monogram.cam
Write
down the
model &
serial
numbers
You'llfind them on a label behind the filters.
These numbers are also on the Consumer Product
Ownership Registration Card packed separately
with your hood.
Before sending in this card, please write these
numbers here:
Model Number
Serial Number
Usethese numbers in any correspondence or
service calls concerning your hood.
If you
received a
damaged
hood
Immediately contact the dealer (or builder) that
sold you the hood.
Save time
& money Before you request service, check the Problem
Solverin the back of this manual. It listscauses of minor operating problems that
you can correct yourself.
If you
need
service
Toobtain service, see the Consumer Servicespage
in the back of this manual.
We're proud of our service and want you to be
pleased. If for some reason you are not happy with
the service you receive,here are some steps to
follow for further help.
FIRST,contact the people who serviced your
appliance. Explain why you are not pleased.
In most cases, this will solve the problem.
NEXT,if you are still not pleased, write all the
details-including your phone number-to:
Manager,Customer Relations
GEAppliances
Appliance Park
Louisville,KY/40225

IMPORTANT SAFETY INSTRUCTIONS
READ ALL INSTRUCTIONS BEFORE USING
SAFETYPRECAUTIONS
-A WARNING-To REDUCETHERISK
OF FIRE,ELECTRICSHOCKOR INJURYTO
PERSONS,OBSERVETHE FOLLOWING:
A. Use this unit onlg in the manner intended
bg the manufacturer. If gou have questions,
contact the manufacturer.
B. Before servicing or cleaning unit, switch power
off at service panel and lock the service
disconnecting means to prevent power from
being switched on accidentally. When the
service disconnecting means cannot be
locked, securely fasten a prominent warning
device, such as a tag, to the service panel.
C. Do not use this unit with ang solid-state
speed-control device.
D. This unit must be grounded.
CAUTION-FoR GENERAL
VENTILATINGUSE ONLY. DO NOT USE TO
EXHAUST HAZARDOUS OR EXPLOSIVE
MATERIALSAND VAPORS.
WARNING-To REDUCETHERISK
OF INJURYTO PERSONS INTHE EVENT OF A
RANGE TOP GREASE FIRE,OBSERVE THE
FOLLOWING*:
A. SMOTHERFLAMESwith a close-fitting lid,
cookie sheet, or metal tray, then turn off the
burner. BECAREFULTOPREVENTBURNS.If the
flames do not go out immediately, EVACUATE
AND CALLTHE FIREDEPARTMENT.
B. NEVERPICKUPA FLAMINGPAN-You mag
be burned.
C. DO NOTUSEWATER,including wet dishcloths
or towels-a violent steam explosion will
result.
D. Use an extinguisher ONLYif:
1. You know gou have a ClassABC
extinguisher, and gou alreadg know how
to operate it.
2. The fire is small and contained in the area
where it started.
3. The fire department is being called.
4. You can fight the fire with gour back to an
exit.
*Based on "Kitchen Firesafetg Tips" published
bg NFPA.
-_WARNING-To REDUCETHERISK
OF A RANGE TOP GREASE FIRE:
A. Never leave surface units unattended at high
or medium settings. Boilovers cause smoking
and greasg spillovers that mag ignite. Heat
oils slowlg on low or medium settings.
B. Alwags turn hood ONwhen cooking at high
heat or when flamb_ing food (i.e.Crepes
Suzette, Cherries Jubilee, Peppercorn Beef
Flamb_).
C. Clean ventilating fans frequentlg. Grease
should not be allowed to accumulate on fan
or filter.
D. Use proper pan size. Always use cookware
appropriate for the size of the surface
element.
WARNI NG-ToREDUCETHERISK
OF FIRE,ELECTRICSHOCK OR INJURYTO
PERSONS, OBSERVE THE FOLLOWING:
A. Installation work and electrical wiring must be
done bg qualified person(s)in accordance with
all applicable codes and standards, including
fire-related construction.
B. Sufficient air is needed for proper combustion
and exhausting of gases through the flue
(chimneg) of fuel burning equipment to
prevent back drafting. Follow the heating
equipment manufacturer's guideline and
safetg standards such as those published by
the National Fire Protection Association (NFPA),
and the American Societg for Heating,
Refrigeration and Air Conditioning Engineers
(ASHRAE),and the local code authorities.
C. When cutting or drilling into wall or ceiling, do
not damage electrical wiring and other hidden
utilities.
D. Ducted fans must alwags be vented to the
outdoors.
-_WARNING-To REDUCETHERISK
OF FIRE,USE ONLY METAL DUCTWORK.
•Do not attempt to repair or replace ang
part of gour hood unless it is specificallg
recommended in this manual. All other
servicing should be referred to a qualified
technician.
READ AND SAVE THESE INSTRUCTIONS.

Controls and Features
Stainless Steel Hood
Controls NOTE:Avoid using food products that produce
flames under the range hood.
1. ON/OFF.It remembers the last fan speed used
(except the highest fan speed-Boost).
2. Lowersthe speed.
3. Increasesthe speed.
4. Thehighest speed, Boost, is"instant on" when
the power ison.
5. Delayed fan shut-off. Choose 5, !0 or 20
minutes by pushing this button.
6. LightON/OFF.It remembers the last light level
used. (Sixlight levels.)
7. Dimsthe light.
8. Brightens the light.
.Clean indicator light illuminates after 30 hours
of "on" time to remind gou to clean the metal
grease filters. The light stags on until the filters
are replaced. If the red light stags on and the
filters are in, adjust the right-side filter in place.
Thetimer resets automaticallg.
10. Indicates the time the fan isset to run, before
automaticallg shutting off (5,!0 or 20 minutes).
11. FanONindicator light.
I I I I e 1'o I I I I
o_ o_
_ oc_
o o
m
c_

Care and Cleaning
Stainless Stee! Hood
For gour
safetg
Beforeservicing or cleaning the unit, switch power
off at the service panel and lock the service panel
to prevent power from being switched on
accidentally. Ifthe service panel cannot be locked,
fasten a tag or prominent warning label to the
panel.
Charcoal
filters
(on some models)
If the model isnot vented to the outside, the air
will be recirculated through disposable charcoal
filters that help remove smoke and odors.
The charcoal filters should be replaced when
they are noticeably dirty or discolored (usually
after 6 to 12 months, depending on hood usage).
NOTE:DONOTrinse, or put charcoal filters in an
automatic dishwasher.
The charcoal filters cannot be cleaned.
Theg must be replaced.
Order Charcoal Filter Kit (3 filters) WBO2X10731.
This kit con be ordered from your GE Supplier.
NOTE:Toremovethe metal
filters,pushthembackand
downusingthe knob.Pushthe
charcoalfilters backanddown
usingthe tab.
Charcoal
Metal Filters
Forproperoperation,besureto use
thecharcoalfilters inthe upperset
offilter holdersandmetalfilters in
the lower setoffilter holders.
Metal
grease
filter
Cleanthe grease filter after 30 hours of "on" time.
A signal light will alert you when 30 hours has
passed.
Removethe grease filters and wash them either
bg hand or in the dishwasher using non-abrasive
soap.
Toclean, swish the filters in hot, soapg water or
wash them in the dishwasher. Do not use abrasive
cleansers.
NOTE:Toremove
filters, pushthem
backanddownusing
the knob.
Front
Forproperoperation,besureto
usethe lowersetof filter holders.
Hood
surfaces Do not use asteel-wool pad; it will scratch
the surface.
Toclean the stainless steel surface, use warm,
sudsy water or a stainless steel cleaner or
polish. Always wipe the surface in the direction
of the grain.
Follow the cleaner instructions for cleaning
the stainless steel surface. To inquire about
purchasing stainless steel appliance cleaner or
polish or to find the location of a dealer nearest
you, please call our toll-free number:
National Parts Center: 800.626.2002

Controls and Features
Stainless Steel Hood
Light bulbs NOTE:The glass cover should be removed onlg
when cool.
-&CAUTION:
Before replacing the bulb, disconnect electrical
power to the hood at the main fuse or circuit
breaker.Allow bulbs to cool before touching.
Be sure to letthe light cover and bulb cool
completelg.
For safetg, do not touch a hot bulb with bare hands
or a damp cloth.
Tochange the light bulbs:
1. Removethe lamp lens cover bg inserting a small
flat-blade screwdriver into each of the three slots
and gentlg prging it free,
NOTE:Do not remove the outer trim ring (lamp
assemblg).
2. Graspthe bulb and pull it straight out.
3. Using gloves or a drg cloth, remove the new bulb
from the packaging. (Wearing latex gloves mag
offer a better grip.)The bulb must be the same
wattage, !20-volt, 25-watt halogen with a G-9
base. Earlg bulb failure mag occur if wattage is
too high.
4. Pushthe bulb straight all the wag into the
receptacle.
5. Replacethe lens cover bg inserting the three
retaining tabs into the slots and pressing into
place.
NOTE:For improved lighting, clean the glass cover
frequentlg using a damp cloth.This should be done
when the hood iscompletelg cool.
6. Reconnect electrical power to the hood.
NOTE: Order replacement 120-volt, 25-watt
halogen bulb with G-9 base, WB25×10020.
Thesebulbs can be ordered from gout GEsupplier.
to remove the lamp lens cover.
Bulb
Outertrim ring
(lampassembly)
Donot remove
$ I I
Tab ---T_
ll_ _ Removable inner
__/ larnp lens cover
(J......
NOTE:Makesurethetabs are inserted
intothe slots.
ONLYuse a new 120-volt, 25-watt
halogen bulb with a G-9 base.
Receptacle
Usegloves
orcloth
NOTE:Donot touch the new halogen bulb
with bare fingers. Skinoils can cause earlg
lamp failure.

The Problem Solver
Stainless Steel Hood
Questions?
Use this
problem
solver!
PROBLEM POSSIBLE CAUSE
FAN DOES NOT
OPERATE WHEN
THE ON/OFF BUTTON
IS PUSHED
FAN KEEPS GOING
OFF AND ON
FAN FILTER LIGHT IS ON
FAN DOES NOT OPERATE
WHEN FAN ON/OFF
BUTTON IS PRESSED OR
WHEN + OR - BUTTON
IS PRESSED
LOUD OR ABNORMAL
AIRFLOW NOISE
FAN FAILS TO CIRCULATE
AIR OR MOVES AIR
SLOWER THAN NORMAL
AND/OR FAN IS MAKING
LOUD OR ABNORMAL
AIRFLOW NOISE
THE HOOD CONTROLS
ARE NOT OPERATING
CORRECTLY
EARLY BULB FAILURE
• A fuse mag be blown or a circuit breaker tripped. Replace fuse or
reset circuit breaker.
• The motor is probablg overheating and turning itself off. This can
be harmful to the motor. Check to be sure the filter is clean. If off
and on cgcling continues, call for service.
• After 30 hours of "on" or running time, the light reminds gou to clean the
metal grease filters. The light will glow until the filters are replaced.
The right-side filter is not making contact with the switch. Adjust the
filter in place.
The blower connector is loose or not plugged into its mating connector.
Disconnect power to the unit. Lift the lower duct cover and look at the
blower connector plug. If the blower connector plug is loose, plug it in
securelg. See the Installation Instructions for the plug location and how
to plug in the connector.
Wrong size duct used in installation. This hood requires 6" ducting
and a maximum duct length of !00 equivalent feet to perform optimallg.
Using smaller duct pipe or longer equivalent lengths of duct pipe will
cause improper venting. GEservice technicians cannot correct this issue
if installed improperlg.
• Obstructions in duct work. Hake sure nothing is blocking the vent. Hake
sure gour wall or roof cap has a blade or door.
• Damper blade on wall or roof cap mag not be open. Hake sure damper
swings freelg. Damper blades mag flip over and will not fullg open when
this happens. Adjust to original position.
• Metal grease filter and charcoal filter (if present) mag be dirtg. Clean
the metal grease filter and replace charcoal filter (if present). See Care
and Cleaning.
Control logic confused. Disconnect power to the hood bg resetting
the circuit breaker. Wait 30 seconds to allow controls to reset.
Replacing bulbs with bare hands. Replace bulbs while wearing gloves
to keep skin oils off bulbs.
Bulb wattage is too high. Replace with correct wattage.

Notes
Stainless Steel Hood

Please place in envelope and mail to:
Veuillez mettre dans une enveloppe et envoyez _:
OWNERSHIPREGJSTRATJOH
P.O. BOX1780
MISSJSSAUGA,OHTARJO
L4Y4G1
(FORCAHADJAHCOHSUMERSOHLY)

For Canadian
Customers
Pour les
Consommateurs
Canadiens
z
Z
rr"
rr"
C3
Z
klJ
Z
..-1
_9
Z
I
I
I
I
I
I
I
Pleaseregisteryour product to enableusto contact you
in theremoteeventasafety nolJceisissuedforthis product
andtoallow for efficientcommunicaOonundertheterms
ofvour warranty,shouNthe need arise.
REGISTERON-LINE: wwvv,geappJiances,ca MAILTO:
ENREGISTREMENTSURINTERNE]_,: _.electtemenagersge.ea POSTER_,:
[][]MISS/MLLE.MR'/M[][]Ms.MRS'/MME'FIRSTNAME/PRENOM LASTNAME/NOM
STREETNO/N°RUE STREETNAME/RUE
crfY/VILLE
Veuillezenregi_erv_e produitafindenouspermetb'ede
communiqueravecvoussijamaisunavisdes6curit_concemant
ceproduit6tait_misetdecommuniquerfacilementavecvousen
ver_devo_egararrde,silebesoins'enfairsen_r.
RO,BOX1780,MISSISSAUGA
ONTARIO,L4Y461
A_. NO/APP./RR#
PROVINCE POSTALCODE/POSTAL
AREACODE/IND.RE_G.[TELEPHONE JE-MAIL
DIDYOUPURCHASEASERVICECONTRACTFORTHISAPPLIANCE? YES/OUI FI IFYES/SlOUI:EXPIRATION
Y/A M D/J
AVEZ-VOUSACHETI_UN CONTRATDESERVICEPOURCETAPPAREIL? NO/NON []
NAME OFSELLINGDEALER/NOM DU MARCHAND MODEL /MODt _LE
SERIAL/St_RIE
INSTALLA]IONDATE/DATED'INSTALLA]ION
Y/A M D/J CORRESPONDENCE [] ENGLISH
CORRESPONDANCE [] FRAN(_AIS
[] Ido notwishtoreceiveanypromotionaloffersrecjardingthisproduct.
[] Jened6sirepasrecevoird'offrespromotionnellesconcernantceproduit.
I ............................................................................................................................................................................................................................................................................................................................................................................................................................................................................................................................................................................................................................................................................................................................................................................................................................................................
L
10

Consumer Services
Stainless Steel Hood
With the purchase of your new Monogram appliance,
receive the assurance that if you ever need information
or assistance from GE, we'll be there. All you have to do
is call--toll- free!
GE Answer
Center ®
800.626.2000
Whatever your question about any Honogram major appliance, GEAnswer Center®information
service isavailable to help. Your call-and your question-will be answered promptly ond
courteously. Callthe GEAnswer Center®Hondag to Friday, 8 a.m. to 10 p.m. EST,and Saturday,
8 a.m. to 7p.m. EST.
OR
Visit our Website at: monogram.corn
In=Home Repair
Service
800.444.1845
AGE consumer service professional will provide expert repair service, scheduled at a time that's
convenient for you. To schedule service, call Honday to Friday, 7 a.m. to 10 p.m. EST,or
Saturday and Sunday, 8 a.m. to 6 p.m. EST.Hang GEConsumer Service company-operated
locations offer you service today or tomorrow, or at your convenience. Our factory-trained
technicians know your appliance inside and out-so most repairs can be handled in just one
visit.
For Customers
With Special
Needs...
800.626.2000
71 I /I I i
SECT|ONA-A
GEoffers, free of charge, a brochure to assist in planning a barrier-free
kitchen for persons with limited mobility.
Consumers with impaired hearing or speech who have access to a TDD
or a conventional teletypewriter may call 800.TDD.GEAC(800.855.4522)
to request information or service.
Service
Contracts
800.626.2224
You can hove the secure feeling that GEConsumer Service will still be there after your warranty
expires. Purchase a GEcontract while your warranty is still in effect and you'll receive a
substantial discount. With a multiple-year contract, you're assured of future service at
today's prices.
Parts and
Accessories
800.626.2002
Individuals qualified to service their own appliances can have parts or accessories sent directly
to their home. The GE parts system provides access to over/47,000 parts...and all GEGenuine
Renewal Parts are fully warranted. VISA,HasterCard and Discover cards are accepted.
User maintenance instructions contained in this guide cover procedures intended to be
performed bg ang user. Other servicing generallg should be referred to qualified service
personnel. Caution must be exercised, since improper servicing meg cause unsafe operation.
11

Warranty
Stainless Stee! Hood
YOUR MONOGRAM HOOD WARRANTY
Staple sales slip or cancelled check here. Proof of original
purchase date is needed to obtain service under warranty.
WHAT IS
COVERED LIMITED ONE-YEAR WARRANTY
For one year from date of original purchase, we will provide, free of charge, parts and service
labor in your home to repair or replace any part of the hood that fails because of a
manufacturing defect.
This warranty is extended to the original purchaser and any succeeding owner for products
purchased for ordinary home use in the 48 mainland states, Hawaii and Washington, D.C.
If the product is located in an area where service by a GEAuthorized Servicer is not available,
you may be responsible for a trip charge or you may be required to bring the product to an
Authorized GEService Location for service. In Alaska the warranty is the same except that it is
LIMITEDbecause you must pay to ship the product to the service shop or for the service
technician's travel costs to your home.
All warranty service will be provided by our Factory Service Centers or by our authorized
Customer Care®servicers during normal working hours.
Should your appliance need service, during warranty period or beyond, call 800.444.!845.
Please have your serial number and model number available when calling for service.
WHAT IS NOT
COVERED
o
o
Service trips to your home to teach you
how to use the product.
Replacement of house fuses or resetting
of circuit breakers.
Incidental or consequential damage
caused bg possible defects with this
appliance.
Replacement of the replaceable filters.
Damage to the product caused bg
accident, fire, floods or acts of God.
Damage caused after delivery.
• Failure of the product if it is used for
other than its intended purpose or used
commercially.
• Improper installation.
If you have an installation problem,
contact your dealer or installer. You are
responsible for providing adequate
electrical, gas, exhausting and other
connecting facilities as described in the
Installation Instructions provided with the
product.
• Product not accessible to provide required
service.
EXCLUSIONOFIMPLIEDWARRANTIES--Yoursole and exclusive remedy is product repair
as provided in this Limited Warrantg. Ang implied warranties, including the implied
warranties of merchantability or fitness for a particular purpose, are limited to one
gear or the shortest period allowed bg law.
12
Some states do not allow the exclusion or limitation of incidental or consequential damages, so
the above limitation or exclusion may not apply to you. This warranty gives you specific legal
rights, and you may also have other rights which vary from state to state.
To know what your legal rights are in your state, consult your local or state consumer affairs
office or your state's Attorney General.
Warrantor: General Electric Company. Louisville, KY40225

Information de consommateur
Hotte en acier inoxgdable
Table des
mati_res Service au consommateur
En registrement du produit .................... 19
Garantie ....................................... 22
Instructions de s_curit_ ........................ 14
Plod_le et num6ro de s@ie ................... !3
Num@os de t_16phone importants ........... 21
R_solution de probl_mes ...................... 18
Commandes et fonctions ..................... 15
Entretien et nettogage
Ampoules ..................................... 17
Filtres0 charbon ............................... 16
Filtre0 graisse m_tallique ..................... 16
Surfaces de hotte .............................. 16
Avant
d'utiliser
votre hotte
en acier
Inoxgdable
Lisez attentivement ce manuel. II a @t@conqu
pour vous aider _ utiliser et _ entretenir
correctement votre nouvelle hotte aspirante.
Conservez-le (_port@ede main pour r@pondre
vos questions.
Sivous ne comprenez pas quelque chose ou que
vous avez besoin d'aide, vous trouverez la liste
des num@os d'appel gratuit du service apr@s-
vente au verso de la couverture de ce manuel.
OU
Visitez notre site web sur •monogram.corn
Notez les
num4ros
de module
et de s4rie
Vous les trouverez sur I'_tiquette derriere les
filtres.
Ces num_ros figurent @galement sur la carte
d'enregistrement de propri@t@du produit emball_
s@par@mentavec votre hotte.
Avant d'envoger la carte, veuillez noter les
num_ros ici:
Num@o de module
Num@rode s@rie
Utilisez ces num@rosdans toute correspondance
ou pour tout appel au service apr@s-vente,
concernant votre hotte.
si vous
recevez
une hotte
endommog6e
Contactez imm@diatement le revendeur (ou le
constructeur) qui vous a vendu la hotte.
4Lconomisez
du temps et
de I'argent
Avant de demander I'assistance,reportez-vous
au r@solveurde probl_me figurant au dos de ce
manuel.
IIr_pertorie lescauses des dgsfonctionnements
mineurs que vous pouvez corriger par vos propres
mogens.
Si vous avez
besoin
d'une
intervention
Pour utiliser le service, consultez la page du
service au verso de la couverture de ce manuel.
Nous sommes tiers de notre service et nous
voulons que vous en sogez satisfait. Si,pour une
quelconque raison, vous @tesm_content du
service fourni, voici la proc@dure_ suivre pour
obtenir une aide suppl@mentaire.
PREMIEREMENT,contactez la personne qui a
r@par@votre appareil. Expliquez-lui les raisons de
votre m_contentement. Dans la plupart des cas,
cela r@soudrale probl_me.
ENSUITE,si vous @testoujours m_content,
@criveztousles d_tails-g compris votre num@ro
de t@l_phone-@ •
Manager,Customer Relations
GEAppliances
Appliance Park
Louisville,KV/40225
13

J J
INSTRUCTIONS DE SECURITE IMPORTANTES
LISEZTOUTESLESINSTRUCTIONS
AVANT D'UTILISERVOTREAPPAREIL
J % J J
PRECAUTIONS EN MATIERE DE SECURITE
-& AVERTISSEMENT:
POUR RI_DUIRE LE RISQUE D'INCENDIE,
DE SECOUSSEI_LECTRIQUEOU DE BLESSURE
CORPORELLE, OBSERVEZ LESPRI_CAUTIONS
SUIVANTES :
A. N'utilisezcet appareil que de la mani@repr@vue
par lefabricant. Sivous avez desquestions, appelez
le fabricant.
& Avant de r@arer ou de nettoger votre appareil,
d@branchezle courant au niveau du panneau
de service et verrouillezles m@canismesde
d@branchementde service pour @vitertout
branchement accidentel au courant. Sivous ne pouvez
pas verrouiller lesm@canismesde d@branchementde
service,attachez soigneusement un avertissement bien
visible,comme une@iquette, au panneau de service.
C.N'utilisezjamais cet appareil avec un m@canisme
de r@glagede la vitesse 6 semi-conducteurs.
D.Cet appareil dolt @rebien mis 6 la terre.
-& ATTENTION : UNIQUE,ENTA
USAGE DE VENTILATION GI_NI_RALE.N'UTIMSEZ
JA,A,SPOURL'_CHAPPE,ENTDE,AT,_RESET
DE VAPEURS EXPLOSIVES.
_kAVERTISSEMENT:POUR
RI_DUIRELE RISQUE DE BLESSURE CORPORELLE
SIDE LA GRAISSE PREND FEU SUR LA SURFACE
DE CUISSON DU FOUR, SUIVEZ LES INSTRUCTIONS
SUIVANTES* :
A. I_TOUFFEZLESFLAMMESavec un couvercle qui
convient, une tGle@biscuits ou un plateau en m#tal,
puis @eignez!e brQleur.FAITESBIENATTENTIONDENE
PASVOUSBRULER.Siles flammes nes'#teignent pas
imm#diatement, SORTEZETAPPELEZLESPOMPIERS.
B.NEDI_PLACEZJAMAISUNECASSEROLLEQUI FLAMBE--
Vouspouvez vous brQler.
C.N'UTlUSEZJAMAISD'EAU,en particulier de serviette ou
de chiffon mouill#-il seproduira une explosion violente
de vapeur brOlante.
D. N'UTILISEZUNEXTINCTEURque si :
1.Vous avez un extincteur de classeABCet vous savez
comment I'utiliser;
2. Lefeu est r#duit et confin# d I'endroit oQila
commence;
3.Vous avez d#jd appel# lespompiers;
4.Vous combattez lesflammes entournant le dos d
une sortie.
*Bas@sur I'ouvrage intitul@<<KitchenFireSafetUTips>>
publi@par la NFPA.
-& AVERTISSEMENT: R_DU,SEZ
LE RISQUE D'UN FEU DEGRAISSESUR LA SURFACE
DE CUISSON DU FOUR :
A. Nelaissezjamais les@l@mentsdesurface sans
supervision Iorsqu'ilssont r@gl@ssur une chaleur @lev@e
ou mogenne. Lebouillonnement occasionnedes
d@bordementsfumants et graisseux quipeuvent
prendrefeu. Chauffez@feu doux lessubstances
huileuses,avec un r_glage basou mogen.
B.Ne pr@arez pas des mets flamb_s sur la cuisini_re,
Sivous pr@parezdes mets flamb@ssous la hotte, mettez
le ventilateur en marche.
C.Nettogez les m_canismes de ventilation fr@quemment.
IInefaut pas permettre une accumulation de graissesur
le ventilateur ou sur lefiltre.
D. Utilisezune casserole de bonne taille. Utiliseztoujours
un ustensilede cuisine qui convienne au diam_tre de
I'@l@mentde cuisson.
-&AVERTISSEMENT:POUR
RI_DUIRELE RISQUE D'INCENDIE, DE SECOUSSE
I'--LECTRIQUEOU DE BLESSURECORPORELLE,
OBSERVEZLES PRI_CAUTIONS SUIVANTES :
A.Vous devez faire ex@cutertous lestravaux d'installation
et de c_blage _lectrique par une personne qualifi@e,
conform@ment6 tousles codes et les normes en
vigueur,en particulier ceux de construction relatifs
aux incendies.
B.Vousdevezassezd'airpour avoir une bonne combustion
et permettre I'@vacuationdesgaz par le conduit de
chemin@edu mat@ielde combustion du carburant, afin
d'@vitertout retour d'air.Suivezles directivesdu fabricant
de mat@rielde combustion et les normesde s@curit@
comme cellespubli@espar la National FireProtection
Association(NFPA)etI'AmericanSocietUfor Heating,
Refrigerationand AirConditioningEngineers(ASHRAE),
ainsique lesmodalit@sdes codes Iocaux.
C.Sivous faites untrou ou une ouverture dans un mur ou
un plafond, n'endommagez pas lesills @lectriqueset les
autres installations cach@esde service public.
D.Vous devez toujours alimenter lesventilateurs dans les
conduits en air en provenance de I'ext@ieur.
,i_AVERTISSEMENT: POUR
RI_DUIRELE RISQUE D'INCENDIE, N'UTILISEZ OUE
DES CONDUITS EN METAL
. N'essagezjamais de remplacer ou de r@arer un
@l@mentde votre hotte si lepr@sentmanuel ne le
recommande pas express@ment.Tout autre entretien
dolt Ctreeffectu@par un technicien qualifi&
LISEZ ET CONSERVEZ
CES INSTRUCTIONS.
14

Commandes et fonctions
Hotte en acier inoxydable
Commandes REMARQUE: Evitezd'utiliser des aliments qui
produisent desflammes sous la hotte aspirante.
1. ON/OFF(marche/arr@t).Laderni@revitesse de
ventilation est gard_e en m@moire(except@la
vitesse de ventilation la plus @lev@e- Boost).
2. Abaisse la vitesse.
3. Augmente la vitesse.
4. Lavitesse la plus @lev@eBoost, peut @tre
s@lectionn_eimm@diatementIorsque la hotte
est sous tension.
5. Arr@tdiff@r@de la ventilation. S_lectionnez un
d_lai de 5, 10 ou 20 minutes en appugant sur
cette touche.
6. Lumi_reON/OFF(marche/arr@t).Garde en
m@moirele dernier niveau d'@clairageutilis@.
(Sixniveaux d'@clairage).
7. Abaisse la luminositY.
8_
9.
Augmente la luminosit@.
Levogant de nettogage s'allume au bout de
30 heures d'utilisation pour vous rappeler de
nettoger lesfiltres 6 graisse m_talliques. Le
vogant reste allum_jusqu'_ ce que lesfiltres
soient remis en place. Sile vogant rouge reste
allum_ et les filtres sont en place, ajustez le
filtre du c6t_ droit. Led_compte se remet
z_ro automatiquement.
10. Indique la dur@ede fonctionnement du
ventilateur avant son arr@tautomatique (5,10
ou 20 minutes).
11. Vogant de fonctionnement du ventilateur.
I I I I e 1'o I I I I
o_ o_ o_
c_
_< _ _,
15

Entretien et nettogage
Matte en acier inoxydable
Pour votre
s4curit4 Avant de proc@der(_I'entretien ou au nettogage
de I'appareil, coupez I'alimentation @lectriqueau
niveau du tableau de distribution et verrouillez-le
pour _viter que I'alimentation _lectrique ne soit
accidentellement r_tablie. Sile tableau de
distribution ne peut _tre verrouill_, attachez une
_tiquette ou un avertissement visible au tableau.
Filtres 8
charbon
(sur certains
modSles)
Si le module n'est pas 6quip6 d'une _vacuation
d'air vers I'ext_rieur, cet air sera recircul_ au
travers de filtres 0 charbon jetables qui _liminent
les fum_es et les odeurs.
Lesfiltres 6 charbon doivent _tre remplac6s
d_s que vous remarquez qu'ils sont sales ou
d_color_s (en g_n_ral, au bout de 6 6 !2 mois
suivant I'utilisation de la hotte).
REMARQUE: NErincez PASet NElavez PASles
filtres 6 charbon dans le lave-vaisselle.
Les filtres 0 charbon ne peuvent pas _tre
nettog_s, lls doivent _tre remplac_s.
Commandez une trousse de 3Filtres _Churbon
WBO2XIO 731.
Vous pouvez commander cette trousse ouprds
de votre revendeur GE.
REMARQUE: Pourretirerlesfiltres
m6talliques,poussez-lesversI'arrierepuis
tirez-lesversle bas8 I'aidedu bouton.
Poussezlesfiltres 8 charbonvers I'arriere
puisversle bas_ I'aidedela languette.
Filtres
FiltresM6talliques
Pourunfonctionnementcorrect,
assurez-vousd'avoirplac6lesfiltres
charbondanslesporte-filtres
sup6rieurset lesfiltres m6talliques
danslesporte-filtresinf6rieurs.
Filtre 8
graisse
mdtallique
Nettogez lefiltre 6 graisse apr_s 30 heures de
fonctionnement. Unvogant vous alertera Iorsque
les30 heures de fonctionnement se seront
_coul_es.
Retirezlesfiltres (_graisse et lavez-les (_la main
ou au lave-vaisselle 6 I'aided'un d_tergent
non-abrasif.
Pour les nettoger, passezles filtres dans une eau
chaude savonneuse ou lavez-lesdans le lave-
vaisselle. N'utilisezpas de d_tergent abrasif.
REMARQUE: Pourretirer
lesfiltres, poussez-lesvers
I'arrierepuistirez-lesvers
le bas_ I'aidedubouton.
Avant
Pourunfonctionnementcorrect,assurez-vous
d'avoirutilis6 les 3orte-filtresinf6rieurs.
Surfaces
de la hotte N'utilisez pas de tampon en laine d'acier sous
peine de roger les surfaces.
Pour nettoger une surface en acier inoxgdable,
utilisez une eau tilde savonneuse ou encore de
la cire ou un nettogant sp_cialement conqu pour
I'acier inoxgdable. Nettogez toujours la surface
dans le sens du grain.
Suivez les instructions donn_es pour le nettogant
pour nettoger la surface en acier inoxgdable.
Pour toute information concernant I'achat d'un
nettogant ou d'une cite pour les appareils en
acier inoxgdable ou pour trouver la Iocalisation
du revendeur le plus proche de chez vous,
appelez notre num_ro sans frais :
Centre National
de Pi_ces D_tach_es : 800.626.2002
16

Commandes et fonctions
Hotte en acier inoxgdable
Ampoules REMARQUE: Lediffuseur ne doit @treretir@
qu'apr@srefroidissement.
-A MISE EN GARDE :
Avant de remplacer une ampoule, d_branchez la
hotte de I'alimentation @lectriqueau niveau du
fusible principal ou du disjoncteur. Laissezrefroidir
lesampoules avant de lestoucher.
Laissezrefroidir compl@tementle diffuseur ainsi
que I'ampoule.
Par s_curit@,ne touchez pas une ampoule chaude
mains nues ou avec un chiffon mouill_.
Pour remplacer les ampoules :
1. Retirezle diffuseur en ins_rant un petit tournevis
t@teplate dans chacune desfentes pour
I'extraire doucement.
REMARQUE: Neretirez pas la garniture externe
(ensemble de la lampe).
.
3.
.
S.
Attrapez I'ampoule et tirez-la directement.
Retirezla nouvelle ampoule de son emballage en
utilisant des gants ou un chiffon sec.(L'utilisation
de gants en latex permet une meilleure prise).
L'ampoule doit avoir la m@mepuissance,
halog@nede 120 volts, 25 watts _ culots G-9.
Un wattage est trap @lev@peut provoquer
une d@faillancepr@cocede I'ampoule.
EnfoncezI'ampoulejusqu'_ la but@edans le
r_ceptacle.
Remettez le diffuseur en place en ins_rant les
trois languettes dans lesfentes et en appugant.
REMARQUE: Pour un @clairageplus performant,
nettogez fr@quemment le diffuseur _ I'aide d'un
chiffon humide. Cecidoit @trefait Iorsque la hotte
est refroidie.
6. Rebranchez I'alimentation _lectrique de la hotte.
REMARQUE : Commandez des ampoules
halog_nes de remplacement de 120 volts,
25 watts avec un culot G-9, WB25×10020.
Vouspouvez commander cesampoules aupr_s
de votre revendeur GE.
e
pourretirerlediffuseur.
Ampoule
Garniture
ext6rieure
(ensembledela
i , ,lampe)
' , ' Nepasretirer
Languette --T_
'*__ amovibleDiffuseurinterne
REMARQUE: Assurez-vousque les
languettessont ins6r_esdanslesfentes.
Utilisez uniquement une nouvelle
ampoule halog_ne de 120 volts, 25 watts
avec un culot G-9.
R6ceptacle
Utilisezdesgants
ou unchiffon
REMARQUE :Ne touchezpaslanouvelle
ampoulehalog6nea mainsnues.Le
s@bum de lapeau peutprovoquerune
d@failloncepr@cocede l'ampoule.
17

R@solution de probl@mes
Hotte en acier inoxgdable
Questions ?
Utilisez ce
tableau des
probl mes
les plus
frdquents
PROBLEME CAUSE POSSIBLE
LE VENTILATEUR NE
FONCTIONNE PAS
LORSQUE LA TOUCHE
MARCHEIARRET EST
ENFONCI_E
LE VENTILATEUR NE
CESSE DE S°I_TEINDRE
ET DE S°ALLUMER
LE VOYANT DU FILTRE
DU VENTILATEUR EST
ALLUMI_
LE VENTILATEUR
NE FONCTIONNE PAS
LORSQUE LA TOUCHE
MARCHE/ARRET OU
LATOUCHE + OU-
EST ENFONCI_E.
CIRCULATION D'AIR
BRUYANTE OU
ANORMALE
LE VENTILATEUR NE FAIT
PAS CIRCULER L'AIR OU
DISPLACE L'AIR PLUS
LENTEMENT QUE LA
NORMALE ET/OU LA
CIRCULATION D'AIR
PAR LE VENTILATEUR
EST BRUYANTE OU
ANORMALE
LES COMMANDES
DE LA HOTTE
NE FONCTIONNENT
PAS CORRECTEMENT
D#FAILLANCE PRI_COCE
DE L'AMPOULE
• Ledisjoncteur est peut-@tred_clench_ ou un fusible grill_. Remplacez
le fusible ou r@enclenchezle disjoncteur.
• Le moteur surchauffe probablement et s'@teint.Ceci peut endommager
le moteur. Assurez-vous que le filtre est propre. Si le probl@mepersiste,
appelez un technicien.
• Levogant s'allume au bout de 30 heures d'utilisation pour vous rappeler
de nettoger les filtres 0 graisse m_talliques. Le vogant restera allum_
jusqu'_ ce que les filtres soient remis en place.
• Lefiltre du cBt_ droit ne fait pas contact avec le commutateur. Ajustez
ce filtre.
Leconnecteur du ventilateur est lache ou n'est pas correctement
branch& D@branchezI'unit_ de I'alimentation _lectrique. Soulevez
le conduit inf@rieuret examinez le connecteur du ventilateur. Si
le connecteur est lache, branchez-le de nouveau. R_f@rez-vousaux
Instructions d'insta!lation pour I'emplacement et le branchement
de ce connecteur.
La mauvaise dimension de conduit a @t@utilis@elots de I'installation.
Cette hotte n_cessite un conduit de 15,2 cm (6 po) de diam@treet
une Iongueur maximale de conduit de !00 pieds @quivalentpour
fonctionner correctement. L'utilisation d'un conduit plus @troitou
d'une Iongueur trop importante conduira @une mauvaise ventilation.
Lestechniciens de service GE ne peuvent corriger ce probl_me si
I'installation n'a pas _t_ faite correctement.
Obstructions dans le conduit. Assurez-vous que rien ne bloque
I'_vacuation. Assurez-vous que les @ventsmuraux ou de toiture sont
_quip@sde lames ou d'une porte.
Leslames du registre sur I'@ventmural ou de toiture ne sont peut-@tre
pas ouvertes. Assurez-vous que le registre puisse bouger librement.
Leslames du registre peuvent se retourner et ne seront alors pas
compl@tement ouvertes. Remettez-les dans leurs positions initiales.
Lefiltre 0 graisse m@talliqueet le filtre 0 charbon (siI'appareil en est
_quip@)sont peut-@tre sales. Nettogez le filtre _ graisse m@tallique
et remplacez le filtre _ charbon (si I'appareil en est _quip@).Consultez
la section Entretien et nettogage.
La Iogique de commande ne fonctionne pas correctement. Coupez
I'alimentation de la hotte en d_clenchant le disjoncteur. Attendez
30 secondes pour que les commandes se r@initialisent.
L'ampoule a @t@remplac@e_ mains nues. Remplacez les ampoules
en utilisant des gants pour @viterle d_p6t de s@bumsur les ampoules.
Lewattage de I'ampoule est trop _lev@.Remplacez avec le wattage
correct.
18

Please place in envelope and mail to:
Veuillez mettre dans une enveloppe et envoyez _:
OWNERSHIPREGJSTRATJOH
P.O. BOX1780
MISSJSSAUGA,OHTARJO
L4Y4G1
(FORCAHADJAHCOHSUMERSOHLY)
!9

For Canadian
Customers
Pour les
Consommateurs
Canadiens
z
Z
rr"
rr"
C3
Z
klJ
Z
..-1
_9
Z
I
I
I
I
I
I
I
Pleaseregisteryour product to enableusto contact you
in theremoteeventasafety nolJceisissuedforthis product
andtoallow for efficientcommunicaOonundertheterms
ofvour warranty,shouNthe need arise.
REGISTERON-LINE: wwvv,geappJiances,ca MAILTO:
ENREGISTREMENTSURINTERNE]_,: _.electtemenagersge.ea POSTER_,:
[][]MISS/MLLE.MR'/M[][]Ms.MRS'/MME'FIRSTNAME/PRENOM LASTNAME/NOM
STREETNO/N°RUE STREETNAME/RUE
crfY/VILLE
Veuillezenregi_erv_e produitafindenouspermetb'ede
communiqueravecvoussijamaisunavisdes6curit_concemant
ceproduit6tait_misetdecommuniquerfacilementavecvousen
ver_devo_egararrde,silebesoins'enfairsen_r.
RO,BOX1780,MISSISSAUGA
ONTARIO,L4Y461
A_. NO/APP./RR#
PROVINCE POSTALCODE/POSTAL
AREACODE/IND.RE_G.[TELEPHONE JE-MAIL
DIDYOUPURCHASEASERVICECONTRACTFORTHISAPPLIANCE? YES/OUI FI IFYES/SlOUI:EXPIRATION
Y/A M D/J
AVEZ-VOUSACHETI_UN CONTRATDESERVICEPOURCETAPPAREIL? NO/NON []
NAME OFSELLINGDEALER/NOM DU MARCHAND MODEL /MODt _LE
SERIAL/St_RIE
INSTALLA]IONDATE/DATED'INSTALLA]ION
Y/A M D/J CORRESPONDENCE [] ENGLISH
CORRESPONDANCE [] FRAN(_AIS
[] Ido notwishtoreceiveanypromotionaloffersrecjardingthisproduct.
[] Jened6sirepasrecevoird'offrespromotionnellesconcernantceproduit.
I ............................................................................................................................................................................................................................................................................................................................................................................................................................................................................................................................................................................................................................................................................................................................................................................................................................................................
L
20
Other manuals for Monogram ZV750
13
This manual suits for next models
3
Table of contents
Languages:
Other GE Ventilation Hood manuals

GE
GE JV535 Operating instructions

GE
GE JVX3240 Original instructions

GE
GE PVB98DTBB Manual

GE
GE JVW5301, JVW5361 User manual

GE
GE Monogram 49-80565 User manual

GE
GE JV367HWW Service manual

GE
GE JV694 Training manual

GE
GE Monogram ZV800 User manual

GE
GE Monogram ZV1050 User manual

GE
GE JVE40STSS Operating instructions
Popular Ventilation Hood manuals by other brands

woodmizer
woodmizer MD400 SAFETY, OPERATION, MAINTENANCE AND PARTS MANUAL

FAL
FAL FAL-60-55RDS instruction manual

BLUE STONE
BLUE STONE HOB-8735 user manual

VentAHood
VentAHood WALL MOUNT HOOD installation instructions

Turboair
Turboair ARGENTA Instructions for use

Turboair
Turboair ACANTO Instruction on mounting and use