manuals.online logo
Brands
  1. Home
  2. •
  3. Brands
  4. •
  5. GE
  6. •
  7. Ventilation Hood
  8. •
  9. GE Monogram ZV42 User manual

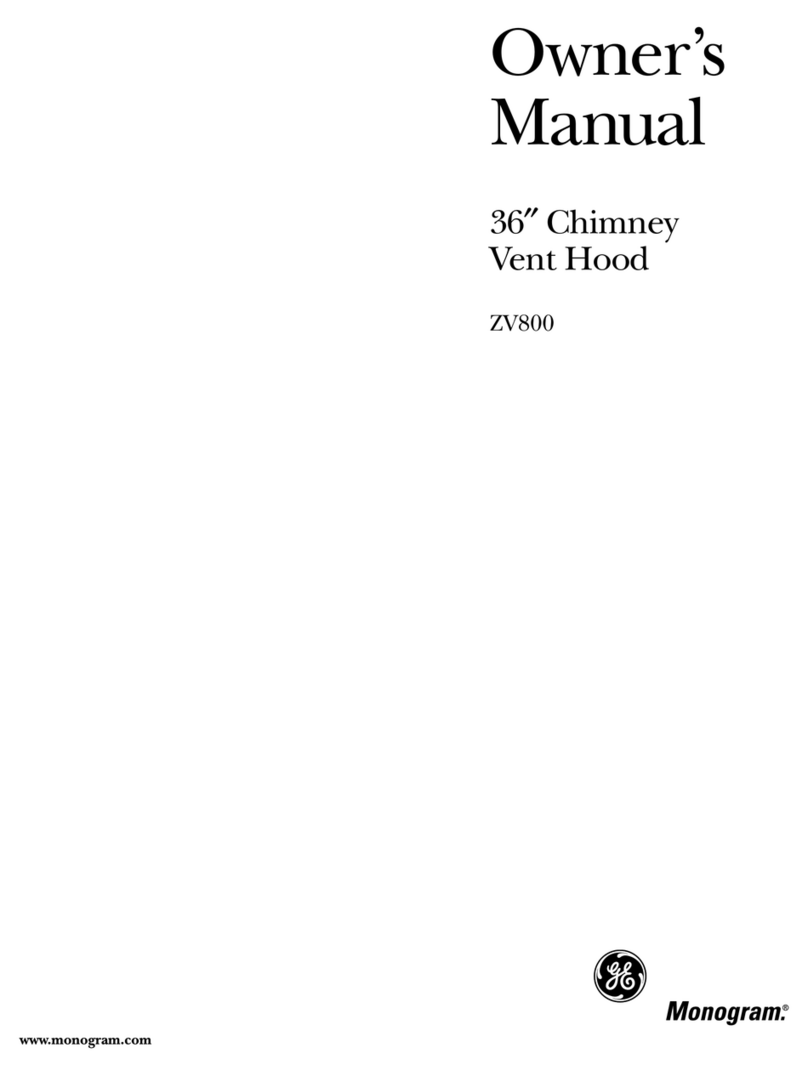
GE Monogram ZV42 User manual

Owner's
Manual
Stainless Steel
Professional Island
Range Hood
Models:
ZV42
ZV54
ge.com
Consumer hlfbrmafion
Pr@ssional Island Range Hood
Contents Consumer Information
Important Phone Numbers ............ 11
Model and Serial Numbers ............. 2
Problem Solver . .................. 9, 10
Product Registration .................. 2
Safety Instructions ................ 3, 4, 6
Warranty ................... Back Cover
Controls and Features ................. 5
Care and Cleaning
BafIle Grease Filters ................... 7
Drip Trays ........................... 7
Light Bulbs ......................... 6
Stainless Steel Surf_ces ................ 8
B_ore using
your stain#ss
steel hood
Read this manual carefully. It is intended
to help you operate and maintain your new
professional range hood properly.
Keep it bandy for answers to your questions.
If you don't understand something or need
more help, there is a list of toll-fiee consuiI:ter
service nmnbers included in the back section
of this manual.
Visit our Website at: ge.com
Write down
the model
& serial
numbers
You'll find them on a label on the hood.
These nmnbers are also on the Consumer
Product Ownership Registration Card packed
separately with your hood.
Use these numbers in any correspondence or
service calls concerning your hood.
Before sending in this card, please write these
numbers here:
Model Number
Serial Number
If you received
a damaged
hood
Immediately contact the dealer (or builder)
that sold you the hood.
Save time
&money
Before you request service, check the Problem
Solver in the back of this manual. It lists causes of minor operating problems that
you can correct yourself.
If you need
service
To obtain service, see the Consumer Services
page in the back of this manual.
We're proud of our seIwice and want you to be
pleased. If for some reason you are not happy
with the service you receive, here are some
steps to fbllow for fiuther help.
FIRST, contact the people who serviced your
appliance. Explain why you are not pleased.
In most cases, this will solve the problem.
NEXT, if you are still not pleased, write all the
derails--including your phone number--to:
Managm; Customer Relations
GE Appliances
Appliance Park
Louisville, KY 40225
IMPORTANT SAFETY INSTRUCTIONS
READ ALL INSTRUCTIONS BEFORE USING
SAI >2TYPP 2CA UTYONS
WAKNING: TO REDUCE THE RISK
OF FIRE, ELECTRIC SHOCK OR INJURY TO
PERSONS, OBSERVE THE FOLLOWING:
A. Use dfis trait only in die manner intended
by tlle manufhctmer If you have questions,
contact the manufi_cturer
B. Before servicing or cleaning unit, switch power
off at service panel and lock the service
disconnecting means to prevent power fiom
being switched on accidentally. When the
service disconnecting means cannot be locked,
securely fi_ten a prominent warning device,
such as a tag, to the service panel.
C. Do not use tiffs unit with any solid-store speed
conuol device.
D. This unit must be grounded.
CAUTION: mReEsER aL
VENTILATING USE ONLY. DO NOT USE
TO EXHAUST HAZARDOUS OR EXPLOSIVE
MATERIALS AND VAPORS.
WARNING: TO REDUCE THE RISK
OF INJURY TO PERSONS IN THE EVENT OF
A RANGE TOP GREASE FIRE, OBSERVE THE
FOLLOWING*:
a. SM OTHER FLAMES wifll a close-fitting lid,
coolde sheet or metal tray, fllen turn off die
burner BE CAREFUL TO PREVENT BURNS.
If the flames do not go out immediamly,
EVACUATE AND CALL THE FIRE
DEPARTMENT.
B. NEVER PICK UP A FLAMING PAN--
You may be burned.
C. DO NOT USE WATER, including wet
disllclodls or towels--a violent steam
explosion will result.
D. Use an extinguisher ONIX if".
1. You know you have a CkkssABC exfinguishe,;
and you Nready know how to opemm it.
2. The fire is small and contained in the area
where it starred.
3. The fire depamnent is being called.
4. You can fight the fire with your back to
an exit.
WARNING: TO REDUCE THE RISK
OF A RANGE TOP GREASE FIRE:
Ao Never leave surface units unattended at high
settings, goilovers cause smoking and greasy
spillovers that may ignim. Heat oils slowly on
low or medium settings.
B. Always mrn hood ON when cooMng at high
heat or when flmnb_ing food (i.e. Crepes
Suzeue, Cherries Jubilee, Peppercorn Beef
Flamb_).
C. Clean ventilating rims fiequendy. (;tease shotfld
not be allowed to accumulam on fan or filmr
D. Use proper pan size. Always use cookware
appropriam for the size of the smface element.
WARNING: TORED :CETHERISK
OF FIRE, ELECTRIC SHOCK OR INJURY TO
PERSONS, OBSERVE THE FOLLOWING:
a. Installation work and electrical wiring must be
done by qualified pe_on (s) in accordance with
all applicable codes and standards, including
fire-related construction.
B. Sufficient air is needed fbr proper combustion
and exhausting of gases through the flue
(chimney) of fhel burning equipment to
prevent back drafting. Folk_w tlle beating
equipment manufacturer's guideline and
safe.ty standards such as those published by the
National Fire Protection Association (NFPA),
and the American Society for Heating,
Refiigerafion and Air Conditioning Enginee,_
(ASHRAE), and die local code authorities.
C. When cutting or drilling into wall or ceiling,
do not damage elecuica/wiring and other
bidden utilities.
D. Ducted fans must ah.vays be vented to the
OtltdooIs.
WARNING: TO REDUCE THE RISK
OF FIRE, USE ONLY METAL DUCTWORK.
* Do not attempt to repah or replace any
part of yore hood unless it is specifically
recommended in tiffs manual All other
setMcing shoukt be refe.rred to a qualified
mchnician.
• S" "S
*Based on "Kitchen Firesafetv Tq0s publl_hed
by NFPA. P _AD AND SAVE THESE INSTRUCTIONS.
INSTRUCTIONS DE SI CURITI IMPORTANTES
LISEZ TOUTES LES INSTRUCTIONS AVANT D'UTILISER VOTRE APPAREIL
p _, p p
PP 2CA UTYONS EN MA TIEP 2 DE SECURIT>2
AVERTISSEMENT •.
POUR REDUIRE LE RISQUE D'INCENDIE,
DE SECOUSSE I_LECTRIQUE OU DE
BLESSURE CORPORELLE, OBSERVEZ LES
PRI_CAUTIONS SUIVANTES :
A. N'utilisez cet appareil que de la mani&re pr&'ue
par le tid)ricant. Si xous mez des questions, appelez
le tid)ricant.
B. A_ant de rdparer ou de netto}er xotre appareil,
ddbv, mchez le cour, mt au nixeau du panneau
de service et xerrouillez les m&anismes de
d_bnmchement de service pour &'iter tont
bc, mchement accidentel m_ co/it, int. Si xons
ne pomez pas xerrouiller les m&anismes de
d_bnmchement de service, attachez soigneusement
tm axertissement bien visible, con/hie t/ne _tiquette,
m/panneau de service.
C. N'utilisezjanmis cet appareil mec un m&anisme
de r_glage de la vitesse _'_semi-c/mducteurs.
D. Cet appareil doit &trebien mis _'tla terre.
ATTENTION : QpEME r
USAGE DE VENTILATION GENERALE.
N'UTIUSEZJaM_s POURL'ECHAPPEMENT
DE MATIERES ET DE VAPEURS EXPLOSIVES.
AVERTISSEMENT •.
POUR REDIXIRE LE RISQUE DE BLESSURE
CORPORELLE SI DE LA GRAISSE PREND FEU
SUR LA SURFACE DE CUISSON DU FOUR,
SUIVEZ LES INSTRUCTIONS SUIVANTES* :
A. I_TOUFFEZ I,ES FLAMMES w,ec un couvercle qui
comqent, une t61e _'tbiscuits ou un plateau ell m(_tal,
puis _teignez le brfilem: FAITES BIEN ATTENTION
DE NE PAS VOUS BR(JI,ER. Si les flammes ne
s'_teignent pas imnlddiatement, SORTEZ ET
APPELEZ LES POMPIERS.
B. NE DI_PLACEZ,JAMAIS UNE CASSEROII,E Q,UI
FI AMBE_"Ous pomez xous brfiler.
{2.N'UTIHSEZ,IAMAIS D'EAU, ell particulier de
serviette ou de chiffon mouilld--il se produim
une explosion violente de xapeur brfil;mte.
D. N'UTIHSEZ UN EXTINCTEUR que si :
1. \ires avcz un extincteur de classe ABC et xous
smez con]n]ent l'utiliser;
2. Lc tcu est r_duit et c/mfin_ _'_l'endroit off il
_t con/n/ence;
3. V0us mez d@'{ appel(_ les pompiers;
4. \.ires coml)attez les flannnes ell tournant le
dos fi tree sortie.
• Bas_ sur l'oux Page intiml_ (<Kitchen Fire Satc/y Tips>)
publid par la NFPA.
AVERTISSEMENT •.
REDUISEZ LE RISQUE D'UN FEU DE GRAISSE
SUR LA SURFACE DE CUISSON DU FOUR :
A. Ne laissezjamais sans surveillance les uni/& de
cuisson de surti_ce _'_une temI)_C,mwe (_lev_e.
Lc bouillonnement occasionne des d_bordements
flmmnts et gcaisseux qui peuvent prendre tcu.
Chauflcz fi tcu doux les substances huileuses,
avcc un r6glage has ou rot,yen.
B. Metmz tot{jours la hotm ell marche quand vous
cuisinez fihalite tempdmture ou quand vous tilims
flamber des aliments (p. ex. crbpes Suzet/e, cerises
Jubilee, goeuf flamb_ Peppercorn).
C. Net/oyez les m&anismes de ventilation fl_quenmmnt.
I1ne flint pas permettre une accunmlation de gcaisse
sur le venfilamur ou sur le filtre.
D. Utilisez tree casserole de bonne mille. Utilisez
tlmjours tm ustensile de cuisine qui comqenne au
diam(tre de l%l&nent de cuisson.
AVERTISSEMENT •.
POLAR RI_DUIRE LE RISQUE D'INCENDIE,
DE SECOUSSE I_LECTRIQUE OU DE
BLESSURE CORPORELLE, OBSERVEZ LEft;
PRI_CAUTIONS SUIVANTES :
A. V0us devez t{lire ex6cuter tt}us les tca_aux
d'installation et de cfiblage dlectrique par une
personne qualifi6e, contbrm(_n]ent ?_tous les codes
et les normes ell xqguem; ell particulier ceux de
construction relatits mix incendies.
B. \4ms devez assez d'air pour avoir )me bonne
combustion et permettre l'&acuafion des gaz par le
conduit de cheminOe du mat0riel de combustion du
carlmF, mt, afin d'&'imr/out re/our d'ain Suivez les
directives du tid)ricant de mat0riel de combustion
et les normes de s&uri/0 comme celles publKes par
la Natiomd Fire Promcfion Association (NFPA) et
l'American Socie/y tot Heating, Reti'igecafion and
Air Conditioning Engineers (ASHRAE), ainsi que les
modali/& des codes locaux.
C. Si vous thi/es un trou ou )me ouverture dans un tour
ou un platond, n'endommagez pas les ills dlectriques
et les autres installations cach_es de service public.
D. V{msdevez/o/_jours alimenter les venfilateurs dans
les conduits ell air ell provenance de l'ext_rieur.
AVERTISSEMENT •.
POLAR RI_DIUIRE LE RISQUE D'INCENDIE,
N'UTILISEZ QUE DES CONDUITS EN MI_TAL
• N'essayezjamais de remplacer ou de r_parer un
616ment de votre }at)tie si le pr&ent manuel ne le
recommande pas express&nent. Tout autre entrefien
dolt &tre ettcc/ud par un mchnicien qualifi&
LISEZ ET CONSERVEZ CES INSTRUCTIONS.
4
Controls and Features
Profbssional Island Range Hood
Controls
2_
3_
Light control
Turn the light control fiom OFF to HI fbr
the brightest light while cooking.
Fan control
Turn the tim control speed fiom OFF to HI
as needed.
Continuous use of the fan system while
cooking helps keep the kitchen comfortable
and less humid. It also reduces cooldng
odors and soiling moisture that create a
fiequent need for cleaning.
NOTE: When the fan is operating on the
lowest setting, it will be vetT quiet. Ah,vays
make sure that the tim is turned OFF when
you are finished in the kitchen.
Fan ON indicator light
Comes on when the fan is turned on.
OFF
Appearance will vary.
[_
-- OFF
ffl
l
1
mHI
I
2
Implement
holders hnplement holder rods are located on each
side of the hood.
Use these rods to hang and display cooking
utensils such as whisks, spoons, forks or any
non-flammable decorative items. Frequently
used small pots and pans can also hang fiom
these rods.
WARNING:
DO NOT hang flammable items flom these
implement rods.
DO NOT hang items weighing more than
10 pounds on either side, or 20 pounds
total weight.
AVERTISSEMENT ."
N'accrochez pas d'articles inflammables A
ces tringles.
N'accrochez pas d'articles pesant plus de 5 kg
(10 lbs) de chaque c6t_, soit au total pesant
plus de 10 kg (20 lbs).
@e
Appearance will vary.
Care and Cleaning
Pr@ssior_al lslar_d Rar_ge Hood
For your sc(ety
Pour votre
securit
Before servicing or cleaning unit, switch power
off at service panel and lock the service
disconnecting means to prevent power f}om
being switched on accidentally. When the
service disconnecting means cannot be locked,
securely fasten a prominent warning device,
such as a rag, to the service panel.
Avant de r6parer ou de nettoyer votre appareil,
d6branchez le courant au niveau du panneau
de service et verrouillez les m6canismes de
d_branchement de service pour _viter tout
branchement accidentel au courant. Si vous
ne pouvez pas verrouiller les m_canismes
de dSbranchement de service, attachez
soigneusement un avertissement bien visible,
comme une _fiquette, au panneau de service.
Light bulbs The bulbs are located on the underside of
the hood.
To change the light bulbs:
1. Remove the trim ring by turning it
counterclockwise.
2. Grasp the bulb on the edges and remove
by turning it counterclockwise.
3. Replace with the same Vpe and size bulb.
These 120 volt, 50 watt, par 16 halogen flood
bulbs, with standard base, are available at
specialty lighting stores.
These bulbs can also be ordered from your
GE supplier.
Order bulb no. WB08X10028.
Care and Cleaning
Profbssional Island Range Hood
Baffle grease
filters and
drip trays
Island hood models have reusable metal grease
baffles and drip trays.
The metal bafi:les channel grease released by
foods on the cooktop into the drip trays. The
baffles also help prevent flaming foods on the
cooktop f]om damaging the inside of the hood.
For this reason, the bafl:les must ALWAYS be in
place when the hood is used. The grease baflqes
and drip trays should be cleaned once a month,
or as needed.
To clean the grease baffles and drip trays,
drain and wipe all excess grease with a d, T
paper towel. Soak them and then swish them
around in hot water and detergent. Don't use
ammonia or ammonia products because they
will darken the metal. Do not use abrasives or
oven cleaners. Rinse, shake and let them dry
before replacing. They may also be cleaned
in an automatic dishwashen
To remove:
(;rasp both baffle knobs on each filter and
pull them up, finward and out. Grasp the
drip tray and carefully lift it up and out of
the hood track.
To replace the drip trays:
1. Place and seat the drip tray into the
hood track.
2. Slide them left or right undl all trays are
side-bDside in place in the track.
To replace the baffles:
1. Hold the bafi:le at the bottom by one of
the knobs.
2. Place the other end of the bafi:le against
the inside fYont of the hood.
3. Slide it up and push the bottom end back
until it firmly seats into place.
rip Tray
Drip"Tray (_*"-
Track _
Drip Tray Replacement
Baffle
Baffle Replacement
Care and Cleaning
Pr@ssional Island Range Hood
Stainless
steel su@¢ces
Do not use asteel wool pad; it MI1 scratch
the surface.
To clean the stainless steel surfhce, use warm sudsy
water or a stainless steel cleaner or polish. Ah,vays
wipe the suif_ce in the direction of the grain.
Follow the cleaner insnucfions for cleaning
the stainless smel surface.
To inquire about purch_sing stainless steel
appliance cleaner or polish, or to find the location
of a dealer nearest you, please cN1 our toll-fiee
ntllllber:
National Parts Center 1.800.626.2002
ge.com
The Problem Solver
Projbssional Island Rang'e Hood
Questions ?
Use this
prob#m
solver!
PROBLEM POSSIBLE CAUSE
@FAN AND LIGHTS DO
NOT OPERATE WHEN
THE SWITCHES ARE
TURNED ON
The hood was never electrically connected by the installer/
electrician/builder. Call the electrician/installer/builder to
complete tile installation. This is not covered by warranty.
A fi_se may be blown or a circuit breaker tripped. Replace tile filse
or reset the circuit breaker.
Tlle blower IIlotor wire ]larxless was not connected or was not
connected properly by the installer/electrician/builder to its mating
connector located inside tile hood on tile top surface, to tile lea of
the blower assembly.
1. Switch power off at service panel and lock the service
disconnecting means to prevent power flom being switched on
accidentally. When tlle service disconnecting means cannot be
locked, securely fasten a prominent warning device, such as
a rag, to tlle service panel.
2. Remove tile filters and locate tile blower wire harness connector.
Is it plugged into its madng connector?
3. If no, plug the blower motor connector into its madng connector
on tlle top of the hood. Switch the power back on. Check to see
if tile fan now works.
THE BLOWER DOES
NOT WORK BUT
THE LIGHTS DO
THE BLOWER FALLS
TO EXHAUST THE
SMOKE/STEAM/
ODORS ADEQUATELY
4_ If no, check tile circuit breaker/fuse. If it is blown/tripped,
replace/reset it. Does tile blower work now? If no, call GE
for service.
* Many factors could be tile root cause fin reduced air-flow.
1. Installation could be tlle problem: Your hood was designed to
meet specific ducfing requirements. Refer to tile Installation
Instructions or if you do not have them, go to ge.com.
If your duct length exceeds the manufhcmrer's requirements,
hood performance will sufIer. Air-flow will also be reduced if the
house duct work is too small or there are too many elbows in the
system. Contact your installer or buikter
2. Obstruction in duct work could be the problem: Make sure
nothing is blocking the vent (bird nests or kinks in the duct work).
3. Damper blade may not be opening. Make sure tlle rope is removed
flom tile damper blades and that it swings open fleely:
4. Damper blade on Wall or Roof Cap may not be opening. Contact
your builder so they can make sme tlle damper swings open fleel>
5. Dirty filters/baffles--make sure filters (and all hood smfaces) are
kept clean of grease and dirt.
The Problem Solver
Projbssior_al lslar_d Rar£_'e Hood
Questions ?
Use this
prob#m
solver!
PROBLEM POSSIBLE CAUSE
@
PART IS MISSING/
DAMAGED/
DEFECTIVE
DUCT COVER IS
MISSING
INSTALLATION *
PART IS MISSING/
DAMAGED/
DEFECTIVE
In the tmlikely event that a part would be missing, damaged or
defbcfive, we can serve you, the consumer, quickly by mailing these
parts to you. We have identified several easy-to-install parts.
These include: lamps, lamp bezels, baffle filters, grease trays, knobs,
utensil rods, Owner's Manual and Installation Instructions.
Call GE service and carefully describe your model number and the
part you need. The model number is located inside the hood chassis,
behind the baftle filter.
Chimney kit and duct covers for 8" ceiling installations are included
with the hood.
For 9" and 10"ceilings, please order the ff_llowing appropriate ldt:
-- 42" models, ZX42DC10
-- 54" models, ZX54DC10
Call GE Parts. See Consumer Service page in this manual for a list
of phone numbers.
We provide a 10" round, vertical duct transition. Tiffs part can
be mailed out to the hood installer if it is in some way mmsable.
All other duct transitions, elbows, etc. must be purchased locally.
We can also mail out many other parts that c()me with the hood to
your installer. Call GE Service. See Consumer Service page in this
manual fin a list of phone numbers. Ask them to mail the parts
only--no service call required.
10
Consumer Services
With the purchase of your new Monogram appliance, receive the
assurance that if you ever need information or assistance from GE,
we'll be there. All you have to do is call--toll-free!
GE Answer
Center _
800.626.2000
Whatever your question about any Monogram major appliance, GE Answer Center ®
infbrmation service is available to help. Your call--and your question--will be answered
promptly and courteously. And you can call any time. GE Answer Center ®service is open
24 hours a day, Monday through Saturday.
OR
Visit our Website at: monogram.corn
Monogram
Preferred Service
800.444.1845
If yore Monogram appliance should ever require service, you can depend on Monogram
Preferred Service. Simply call 800.444.1845, where our Monogram Preferred Service Specialists
are available 7 a.m.-10 p.m. ET Monday through Friday and 8 a.m.-6 p.m. ET Saturday and
Sunday to coordinate your service appointment.
For Customers
With Special
Needs...
800.626.2000
SEcvnoN A-A
GE offers, flee of charge, a brochure to assist in planning a barrier-free
kitchen for persons with limited mobility.
Consmners with impaired hearing or speech who have access to
a TDD or a conventional teletypewriter may call 800.TDD.GEAC
(800.833.4322) to request infbrxnation or service.
Service Contracts
800. 626. 2224
You can have the secure feeling that GE Consumer Service will still be there after your
warranty expires. Purchase a GE conuact while your warranty is still in eft>ct and you'll
receive a substantial discount. With a multiple-year conuact, you're assured of flmne
service at today's prices.
Parts and
Accessories
800.626.2002
Individuals qualified to service their own appliances can have parts or accessories sent directly
to their home. The GE parts system provides access to over 47,000 parts...and all GE Genuine
Renewal Parts are fitly warranted. VISA, MasterCard and Discover cards are accepted.
User maintenance instructions contained in this manual cover procedures intended to be
performed by any user. Other servicing generally should be referred to qualified service
personnel. Caution must be exercised, since improper servicing may cause unsafe operation.
11
WARRANTY
YOUR MONOGRAM HOOD WARRANTY
Staple sales slip or cancelled check here. Proof of original purchase
date is needed to obtain service under warranty.
WHATIS
COVERED
LIMITED ONE-YEAR WARRANTY
For one year flom date of original purchase, we will provide, flee of charge, parts and
service labor in your home to repair or replace any part of the hood that fails because of a
manufhcturing defect.
This warranty is extended to the original purchaser and any succeeding owner for products
purchased for ordinary home use in the 48 mainland states, Hawaii and Washington, D.C.
If the product is located in an area where service by a GE Authorized SexMcer is not available,
you may be responsible for a trip charge or you may be required to bring the product to an
Authorized GE Service Location for service° In Alaska the warranty is the same except that it
is LIMITED because you must pay to ship the product to the service shop or for the service
technician's travel costs to your home.
All warranty service will be provided by our Factory Service Centers or by our authorized
Customer Care ° servicers during normal working hours.
Should your appliance need service, during warranty period or beyond, call 800o444o1845o
Please have serial nmnber and model nmnber available when calling for service°
WHAT IS NOT
COVERED
, Service trips to your home to teach you how
to use the product.
, Replacement of house fuses or resetting
of circuit breakers.
,Incidental or consequential damage caused
by possible defects with this appliance.
, Replacement of the filters.
, Damage to the product caused by accident,
fire, floods or acts of God.
,Failure of the product if it is used for
other than its intended purpose or used
commercially.
,Improper installation, delivery or
maintenance.
,Damage caused after delivery.
, Product not accessible to provide
required service.
EXCLUSIONOFIMPLIEDWARRANTIES--Yoursole andexclusiveremedyisproductrepair
as providedin thisLimitedWarranty.Anyimpliedwarranties,includingtheimpliedwarrantiesof
merchantabilityor fitnessfora particular purpose, are limitedtooneyearortheshortestperiod
allowed bylaw.
149-80394-1 I
06-07 JR
Printed in Italy
Some states do not allow the exclusion or limitation of incidental or consequential damages,
so the above limitation or exclusion may not apply to you. This warranty gives you specific
legal rights, and you may also have other rights which vary flom state to state.
To know what your legal rights are in your state,
consult your local or state consumer affhirs office
or your state's Attorney General.
Warrantor: General Electric Company.
Louisville, KY 40225
GE Consumer & Industriel
Appliances
General Electric Company
Louisville, KY/40225
ge.com

Other manuals for Monogram ZV42

3

This manual suits for next models

1

Other GE Ventilation Hood manuals

GE Monogram ZVC30LSS User manual

GE

GE Monogram ZVC30LSS User manual

GE JV535 Operating instructions

GE

GE JV535 Operating instructions

GE Monogram ZVC42L1SS User manual

GE

GE Monogram ZVC42L1SS User manual

GE JV322J Installation instructions

GE

GE JV322J Installation instructions

GE Appliances JV966 Original instructions

GE

GE Appliances JV966 Original instructions

GE JN330 Installation instructions

GE

GE JN330 Installation instructions

GE Profile JVB67HBB User manual

GE

GE Profile JVB67HBB User manual

GE Monogram ZV750 How to use

GE

GE Monogram ZV750 How to use

GE Monogram ZV750 User manual

GE

GE Monogram ZV750 User manual

GE Monogram ZV950SDSS User guide

GE

GE Monogram ZV950SDSS User guide

GE Profile PV977 Operating instructions

GE

GE Profile PV977 Operating instructions

GE MONOGRAM ZV800SJSS User guide

GE

GE MONOGRAM ZV800SJSS User guide

GE Monogram ZV950 User manual

GE

GE Monogram ZV950 User manual

GE Monogram ZV30H User manual

GE

GE Monogram ZV30H User manual

GE JVX3300 Original instructions

GE

GE JVX3300 Original instructions

GE JVB94SHSS User guide

GE

GE JVB94SHSS User guide

GE Cafe CV966TSS Manual

GE

GE Cafe CV966TSS Manual

GE GE Deluxe JV347X User manual

GE

GE GE Deluxe JV347X User manual

GE JV395 Training manual

GE

GE JV395 Training manual

GE JV930SCBR Training manual

GE

GE JV930SCBR Training manual

GE JVB37 Original instructions

GE

GE JVB37 Original instructions

GE Monogram ZV370YSS User guide

GE

GE Monogram ZV370YSS User guide

GE Monogram ZV30H User manual

GE

GE Monogram ZV30H User manual

GE UVC9300 Original instructions

GE

GE UVC9300 Original instructions

Popular Ventilation Hood manuals by other brands

Pando V.3000 N ECO installation manual

Pando

Pando V.3000 N ECO installation manual

Miele DA 5100 D Operating and installation instructions

Miele

Miele DA 5100 D Operating and installation instructions

Siemens iQ300 LC67KHM60B Instructions for installation and use

Siemens

Siemens iQ300 LC67KHM60B Instructions for installation and use

Siemens LI60OA521 instruction manual

Siemens

Siemens LI60OA521 instruction manual

KitchenAid KXW8748YSS Installation Instructions and Use & Care Guide

KitchenAid

KitchenAid KXW8748YSS Installation Instructions and Use & Care Guide

Progress PDI9075E user manual

Progress

Progress PDI9075E user manual

airhood AH-01AG user manual

airhood

airhood AH-01AG user manual

Baumatic BH6BGL instruction manual

Baumatic

Baumatic BH6BGL instruction manual

GLOBALO Silentio 60 Operating and installation instructions

GLOBALO

GLOBALO Silentio 60 Operating and installation instructions

Electrolux FHWC3055LSA Use & care guide

Electrolux

Electrolux FHWC3055LSA Use & care guide

Thermador UCV36 installation instructions

Thermador

Thermador UCV36 installation instructions

Beko HCB91731BX user manual

Beko

Beko HCB91731BX user manual

Faber BELA30SS600-B installation instructions

Faber

Faber BELA30SS600-B installation instructions

Dacor Modernist DHD Series Planning guide

Dacor

Dacor Modernist DHD Series Planning guide

Miele DA 269-4 Operating and installation instruction

Miele

Miele DA 269-4 Operating and installation instruction

Viking VERSAVENT RVDD330R Specifications

Viking

Viking VERSAVENT RVDD330R Specifications

Koolatron AutoKool 40007 installation instructions

Koolatron

Koolatron AutoKool 40007 installation instructions

Kuppersbusch IKD 1157.1 GE-UL Use and Installation Instructions

Kuppersbusch

Kuppersbusch IKD 1157.1 GE-UL Use and Installation Instructions

manuals.online logo
manuals.online logoBrands
  • About & Mission
  • Contact us
  • Privacy Policy
  • Terms and Conditions

Copyright 2025 Manuals.Online. All Rights Reserved.