manuals.online logo
Brands
  1. Home
  2. •
  3. Brands
  4. •
  5. GE
  6. •
  7. Water Filtration System
  8. •
  9. GE FQROPF Instruction Manual

GE FQROPF Instruction Manual

1
* Especificaciones operativas
Capacidad: Certificado para un máximo de 3,411 litros (900 galones); hasta seis meses.
Requisitos de temperatura: 40-120 psi (2.8 – 8.2 bar)
Temperatura: 0.6º - 38º C (33º - 100º F)
Ritmo de flujo: 4.36 lpm (1.15 gpm)
Substance Tested for
Reduction / Sustancia
probada para
reducción
Average
Influent /
Influente
promedio
NSF specified Challenge Concentration
/ Concentración de desafío especificada
por NSF
Average Product Water
concentration / Producto
promedio concentración de
agua
Max Permissable Product
Water Concentration /
Concentración de agua
máxima permitida del producto
Percent Reduction /
Reducción porcentual
Chlorine 2.02mg/L
+/- 0.2
2mg/L +/- 0.2 0.06 mg/L  
Particulate 18333
particles/mL
At least 10,000 particles/mL 1 ng/L 30 ng/L 
* Operating Specifications
Capacity: rated for up to 900 gallons (3,411 l); up to six months
Pressure requirement: 40–120 psi (2.8–8.2 bar)
Temperature: 33–100°F (0.6–38°C)
Flow rate: 1.15 gpm (4.36 lpm)
WARNING To reduce the risk associated with the ingestion
of contaminants, do not use with water that is microbiologically
unsafe or of unknown quality without adequate disinfection before
or after the system.
Small parts remaining after the installation could be a choke
hazard. Discard safely.
Filter is rated for 900 gallons and should be changed out at the rated capacity, every 6 months, or when a noticeable
reduction in flow rate occurs.
NOTE: Fits models PXRQ15FBL, PXRQ15RBL, PNRQ15FBL, PNRQ15RBL, PNRQ20FBL, PNRQ20FWW, PNRQ20FBB,
PNRQ20FCC, PNRQ21LBN, PNRQ21LRB, PNRQ20RBL, PNRQ21RBN, and PNRQ21RRB
La capacidad es de 900 galones y se debería cambiar cuando se llegue a dicha capacidad, cada 6 meses, o cuando la
reducción del promedio del flujo sea evidente
NOTA: Se adapta a los modelos PXRQ15FBL, PXRQ15RBL, PNRQ15FBL, PNRQ15RBL, PNRQ20FBL, PNRQ20FWW,
PNRQ20FBB, PNRQ20FCC, PNRQ21LBN, PNRQ21LRB, PNRQ20RBL, PNRQ21RBN, y PNRQ21RRB
Certified by
IAPMO
R&T against
NSF/ANSI Standard 42 in models
PNRQ15RBL, PNRQ20RBL, and
PNRQ21RBN, for the reduction of the
claims specified on the Performance
Data Sheet.
ADVERTENCIA A fin de reducir el riesgo asociado con la ingestión
de contaminantes, no use con agua que no sea segura a nivel
microbacteriológico o de calidad desconocida, sin una desinfección
adecuada, antes o después, del sistema.
Las pequeñas piezas que sobran después de la instalación pueden
constituir un riesgo de asfixia. Deséchelas adecuadamente.
Certificado por IAPMO R&T contra
los Estándares NSF/ANSI 42 en los
modelos PNRQ15RBL, PNRQ20RBL, and
PNRQ21RBN para la reducción de los
reclamos especificados en la Hoja de Datos
de Desarrollo.
Replacement Filter Cartridges/Estimated
Replacement Costs
FQROPF—Replacement filter cartridge $45–$50
For replacement parts, call toll free 877.959.8688.
Cartuchos de filtro de reemplazo/costos estimados
de reposición
FQROPF—Reposición del recipiente del filtro $45–$50
Para partes de reemplazo, llame gratis al 877.959.8688.
• This System has been tested according to NSF/ANSI
42 for the reduction of the substances listed below. The
concentration of the indicated substances in water entering
the system was reduced to a concentration less than or
equal to the permissible limit for water leaving the system,
as specified in NSF/ANSI 42.
• Actual performance may vary with local water conditions.
• Systems certified for cyst reduction may be used on
disinfected waters that may contain filterable cysts.
• Este sistema ha sido probado de acuerdo con NSF/ANSI 42 para
la reducción de las sustancias mencionadas más adelante. La
concentración de las sustancias indicadas contenidas en el agua
que entra al sistema fue reducida a una concentración menor o
igual al límite permitido para el agua que sale del sistema, según
las normas establecidas por NSF/ANSI 42.
• El desarrollo real podría variar de acuerdo con las condiciones
locales del agua.
•
Los sistemas certificados para la reducción de quistes se podrán
usar en aguas desinfectadas que puedan contener quistes filtrables.
SPECIFICATIONS ESPECIFICACIONES
Replacement Filter/ Filtro de Recambio
FQROPF
Instruction Manual and Performance Data Sheet
Manual de Instrucciones y Ficha Técnica del Funcionamiento
49-50321-3 07-19 GEA
INCLUDED COMPONENTS
Ŷ)LOWHU&DUWULGJHVŶ,QVWUXFWLRQ0DQXDO
INSTALLATION
CAUTION To reduce the risk associated with
property damage due to water leakage, read and follow
instructions before installation and use of this system.
Installation and use MUST comply with all state and local
plumbing codes.
Ŷ3URWHFWIURPIUHH]LQJUHPRYHILOWHUFDUWULGJHZKHQ
temperatures are expected to drop below 33° F (1° C).
Ŷ'RQRWLQVWDOOV\VWHPVLQDUHDVZKHUHDPELHQW
temperatures may go above 110° F or below 40° F
Ŷ'RQRWLQVWDOOLIZDWHUSUHVVXUHH[FHHGVSVL,I\RXU
water pressure exceeds 80 psi (552 kPa), you should
install a pressure limiting valve. Contact a plumbing
professional if you are uncertain how to check your water
pressure.
ŶThe filter cartridge should be replaced every six
months or earlier if indicated by the system monitor
or when noticeable reduction in flow occurs.
1. Turn OFF the icemaker (if attached to the system).
2. Turn off water supply to the system.
3. Turn ON faucet to drain tank (may take several
minutes). Turn OFF faucet when tank is empty.
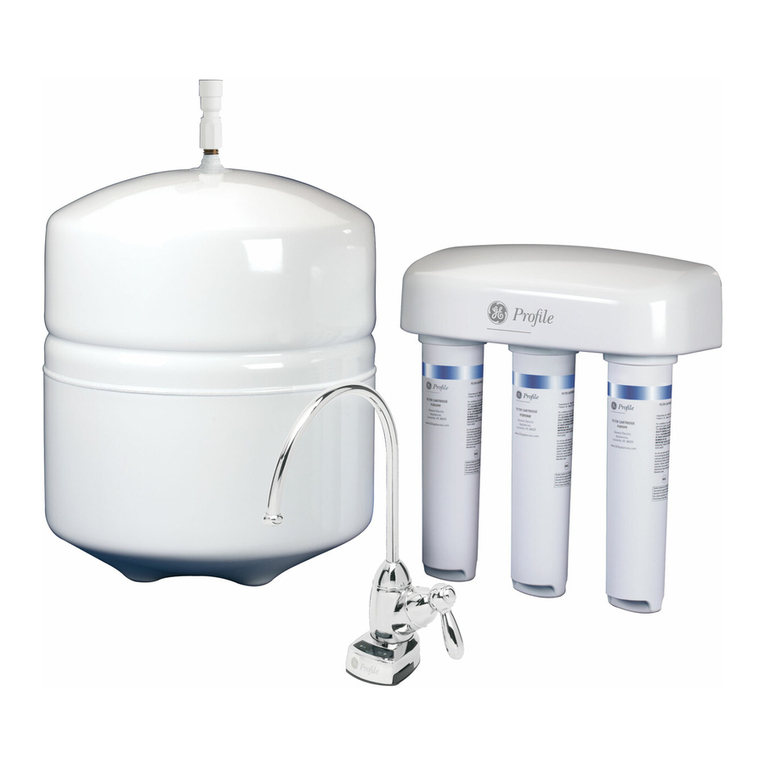
4. Remove the prefilter, postfilter and Reverse Osmosis
cartridges by rotating to the left about 1/3 turn.
5. Sanitize the Reverse Osmosis System.
NOTE: System should be sanitized when replacing the
prefilter and postfilter cartridges or the Reverse Osmosis
cartridge. Follow the Sanitizing the Reverse Osmosis
System procedure outlined in the Owner’s Manual.
6. Remove foil on top of new replacement cartridge. Install
new cartridge into the manifold by turning to the right
about 1/3 turn until the alignment marks line up and the
cartridges stop. DO NOT OVERTIGHTEN. The cartridge
will rise up as it is turned.
NOTE: The prefilter and postfilter are identical. You may
install either filter in the prefilter or postfilter position. The
reverse osmosis cartridge is installed in the center position.
7. Turn ON water supply to fill the system (may take up to
4 hours). Check for leaks.
8. Remove the battery tray and wait 90 seconds before
replacing the battery, positive “+” side up, to fully reset
the monitor function in the faucet base for the next six
months (see Battery Installation in the Owner’s Manual
for proper procedure)
9. If only the prefilter and postfilter are replace, turn the
faucet ON and fill and empty the filled storage tank a
total of 2 times. If the membrane cartridge is replaced,
fill and empty the storage tank a total of 4 times. &This
will remove the food grade preservatives contained in
new membranes. This preservative will give product
water an unpleasant taste and odor.)
10. Once the storage tank is full, turn on the icemaker (if
attached to the system).
To remove
Reverse
Osmosis
Prefilter Postfilter
2
INSTALACIÓN
COMPONENTES INCLUIDOS
Ŷ&DUWXFKRVGHILOWURŶ0DQXDOGHLQVWUXFFLRQHVIOXMR
PRECAUCIÓN A fin de reducir el riesgo
asociado con daños sobre la propiedad debido a pérdida
de agua, lea y siga las siguientes instrucciones antes de
instalar y usar este sistema. La instalación y uso DEBEN
cumplir con todos los códigos estatales y locales de
plomería.
Ŷ&RPRSURWHFFLyQFRQWUDHOIUtRUHWLUHHOFDUWXFKRGHOILOWUR
cuando se espere que la temperatura sea inferior a los
33º F (1º C).
Ŷ1RLQVWDOHVLVWHPDVHQiUHDVGRQGHODVWHPSHUDWXUDVGHO
ambiente puedan ser superiores a los 110º F o inferiores
a los 40º F.
• No se deberá instalar si la presión del agua supera los
120 psi (827 kPa). Si la presión del agua es superior a los
80 psi (552 KPa), deberá instalar una válvula limitadora
de presión. Si no está seguro sobre cómo controlar
la presión del agua, comuníquese con un plomero
profesional.
ŶEl cartucho del filtro se debería reemplazar cada seis
meses o antes si así lo indica el monitor del sistema
o cuando la reducción del flujo sea evidente.
1. Apague la máquina de hielo (si está unida al sistema).
2. Apague el suministro de agua hacia el sistema.
3. Encienda el grifo hacia el tanque de drenaje (podría
tomarse varios minutos). Cierre el grifo cuando el
tanque esté vacío.
4. Retire los cartuchos de pre-filtro, de post-filtro y
de Ósmosis Inversa rotando hacia la izquierda
aproximadamente un tercio de giro.
5. Desinfecte el sistema de Ósmosis Inversa.
NOTA: El sistema debe desinfectarse cuando se
reemplace los cartuchos de pre-filtro y post-filtro o el
cartucho de Ósmosis Inversa. Siga el procedimiento Cómo
desinfectar el sistema de Ósmosis Inversa esbozado en el
Manual del propietario.
6. Retire el aluminio que viene encima z del nuevo
cartucho de reemplazo. Instale el nuevo cartucho en
el colector girando hacia la derecha aproximadamente
un tercio de giro hasta que las marcas de alineación
queden alineadas y el cartucho pare. NO APRIETE EN
EXCESO. Los cartuchos se levantarán a medida que
giran.
NOTA: El pre-filtro y post-filtro son idénticos. Puede
instalar cualquier filtro en la posición de pre-filtro o post-
filtro. El cartucho de Ósmosis Inversa se instala en la
posición central.
7. Encienda el suministro de agua para llenar el sistema
(puede tomar hasta 4 horas). Revise en busca de fugas.
8. Retire la bandeja de la batería y espere 90 segundos
antes de reemplazar la misma, con el lado positivo “+”
hacia arriba, para reiniciar completamente la función
del monitor en la base del grifo para los próximos
seis meses (para realizar un procedimiento correcto,
consulte sobre la instalación de la batería en el Manual
del Usuario).
9. Si sólo se reemplazan el prefiltro y el posfiltro, gire el
grifo hacia ON (Encender) y llene y vacíe el tanque
de almacenamiento lleno un total de dos veces. Si
se reemplaza el cartucho de la membrana, llene
y vacíe el tanque de almacenamiento un total de
cuatro veces. (Esto eliminará los conservantes para
alimentos contenidos en las nuevas membranas. Estos
conservantes le dan al agua producto un gusto y olor
desagradable).
10. Una vez que el tanque de almacenamiento esté lleno,
encienda la máquina de hielos (si está pegado al
sistema).
Para retirar
Osmosis
Inversa
Pre-filtro Post-filtro
3
LIMITED 30-DAY WARRANTY
GARANTÍA LIMITADA POR 30 DÍAS
If your GE Appliances filter fails because of manufacturing
defects within 30 days from the date of original purchase, we
will provide a new filter without charge. Return the defective
filter to the retailer from whom it was purchased with a copy
of the “proof of purchase.” If the filter is defective, it will be
replaced.
This warranty does not cover filters that are improperly
installed, damaged, abused or used for other than the
intended purpose. It does not include the cost of returning
the filter to the vendor from which it was purchased, the
labor to remove, install or diagnose the failure, parts used in
commercial applications and incidental or consequential defect
with the unit.
EXCLUSION OF IMPLIED WARRANTIES—Your sole
and exclusive remedy is product exchange as provided
in this Limited Warranty. Any implied warranties,
including the implied warranties of merchantability or
fitness for a particular purpose, are limited to 30 days
or the shortest period allowed by law.
Si su filtro de GE Appliances falla debido a un defecto de fabricación
dentro del período de 30 días a partir de la fecha de compra
original, GE Appliances cambiará el filtro defectuoso por un filtro GE
Appliances nuevo sin costo. Envíe el filtro defectuoso al vendedor
donde lo compró junto con una copia del “comprobante de compra”
del filtro. Si el filtro está defectuoso, lo cambiaremos.
Esta garantía no cubre filtros instalados incorrectamente, dañados,
maltratados ni usados para otro propósito que no sea para el
cual fueron diseñados. No incluye el costo de devolución del
filtro al vendedor donde lo compró, la mano de obra por remover,
instalar o diagnosticar la falla, las piezas utilizadas en aplicaciones
comerciales, los daños accidentales o consecuentes provocados por
posibles defectos con la unidad.
EXCLUSIÓN DE GARANTÍAS IMPLÍCITAS—Su único y exclusivo
derecho es el cambio del producto, tal y como se indica en esta
Garantía limitada. Cualquier garantía implícita, incluyendo las garantías
implícitas de comerciabilidad o adecuación para un fin determinado,
están limitadas a 30 días o al período más corto permitido por la ley.
4

Other GE Water Filtration System manuals

GE GNSV70RBL Original instructions

GE

GE GNSV70RBL Original instructions

GE GXSV65F Operating instructions

GE

GE GXSV65F Operating instructions

GE OSMONICS E4 Series User manual

GE

GE OSMONICS E4 Series User manual

GE PNRQ15RBL Original instructions

GE

GE PNRQ15RBL Original instructions

GE SmartWater GXWH35F User manual

GE

GE SmartWater GXWH35F User manual

GE GNUT05Z01 User manual

GE

GE GNUT05Z01 User manual

GE GXWH50M User manual

GE

GE GXWH50M User manual

GE GXK255TBN Original instructions

GE

GE GXK255TBN Original instructions

GE RPWFE4PK User manual

GE

GE RPWFE4PK User manual

GE Zoneline RAK13 User manual

GE

GE Zoneline RAK13 User manual

GE GXSL55R Operating instructions

GE

GE GXSL55R Operating instructions

GE Pro Elite RO-450 Manual

GE

GE Pro Elite RO-450 Manual

GE SmartWater GNSV70FBL Operating instructions

GE

GE SmartWater GNSV70FBL Operating instructions

GE MWF3PK Manual

GE

GE MWF3PK Manual

GE Profile PNRQ15FBL User instructions

GE

GE Profile PNRQ15FBL User instructions

GE 000 gpd User manual

GE

GE 000 gpd User manual

GE Smart Water PNRV18ZWW01 User manual

GE

GE Smart Water PNRV18ZWW01 User manual

GE SmartWater GXRM10 User manual

GE

GE SmartWater GXRM10 User manual

GE E4H-16K User manual

GE

GE E4H-16K User manual

GE GNUL30B Safety guide

GE

GE GNUL30B Safety guide

GE GXSV65F Operating instructions

GE

GE GXSV65F Operating instructions

GE MILLENIUM  OSMONICS MILLENIUMTM REVERSE OSMOSIS... User manual

GE

GE MILLENIUM OSMONICS MILLENIUMTM REVERSE OSMOSIS... User manual

GE Replacement Filter User manual

GE

GE Replacement Filter User manual

GE SmartWater GNSV75FWW Service manual

GE

GE SmartWater GNSV75FWW Service manual

Popular Water Filtration System manuals by other brands

Rx Clear 801405 quick start guide

Rx Clear

Rx Clear 801405 quick start guide

Intewa SEPAMAT F 20 Installation and user manual

Intewa

Intewa SEPAMAT F 20 Installation and user manual

A+ Corporation Avenger 38M Installation & operation instructions

A+ Corporation

A+ Corporation Avenger 38M Installation & operation instructions

JRC NSVS616 manual

JRC

JRC NSVS616 manual

CAB MAESTRO 3E/450 Operator's manual

CAB

CAB MAESTRO 3E/450 Operator's manual

CAB MAESTRO 2M Operator's manual

CAB

CAB MAESTRO 2M Operator's manual

Intex CS8110 owner's manual

Intex

Intex CS8110 owner's manual

EHEIM Classic 2213 user manual

EHEIM

EHEIM Classic 2213 user manual

Watts 70608 Series installation manual

Watts

Watts 70608 Series installation manual

Zero B ultimate user manual

Zero B

Zero B ultimate user manual

Doulton HIS installation instructions

Doulton

Doulton HIS installation instructions

Forbes EDGE user manual

Forbes

Forbes EDGE user manual

3M 3MPF101 Installation and operating instructions

3M

3M 3MPF101 Installation and operating instructions

inventum IPF1000R user manual

inventum

inventum IPF1000R user manual

Eureka Forbes AquaSure Aayush user manual

Eureka Forbes

Eureka Forbes AquaSure Aayush user manual

amiad Filtomat MG-110P Installation, operation and maintenance instructions

amiad

amiad Filtomat MG-110P Installation, operation and maintenance instructions

Trapzilla TSS-95-ECA Installation & maintenance instructions

Trapzilla

Trapzilla TSS-95-ECA Installation & maintenance instructions

SMA NR-PL-DCEMV5-01 manual

SMA

SMA NR-PL-DCEMV5-01 manual

manuals.online logo
manuals.online logoBrands
  • About & Mission
  • Contact us
  • Privacy Policy
  • Terms and Conditions

Copyright 2025 Manuals.Online. All Rights Reserved.