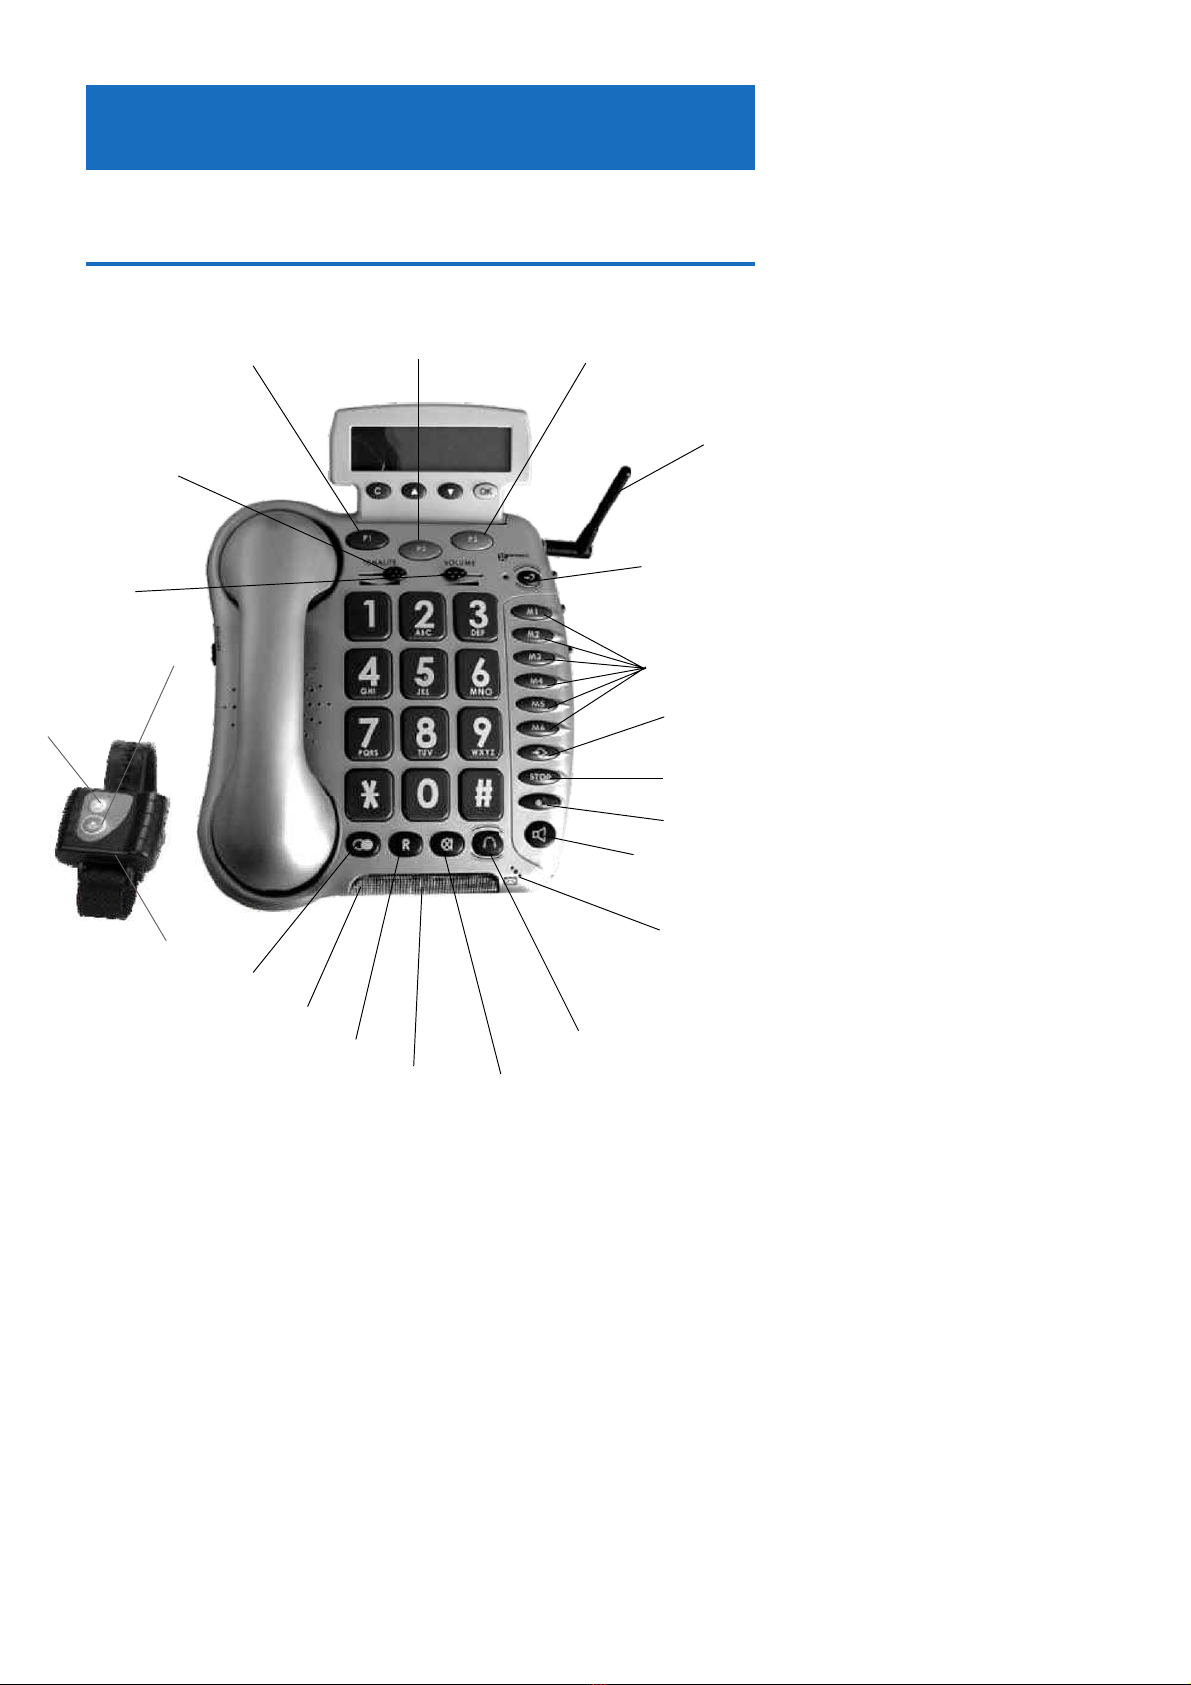
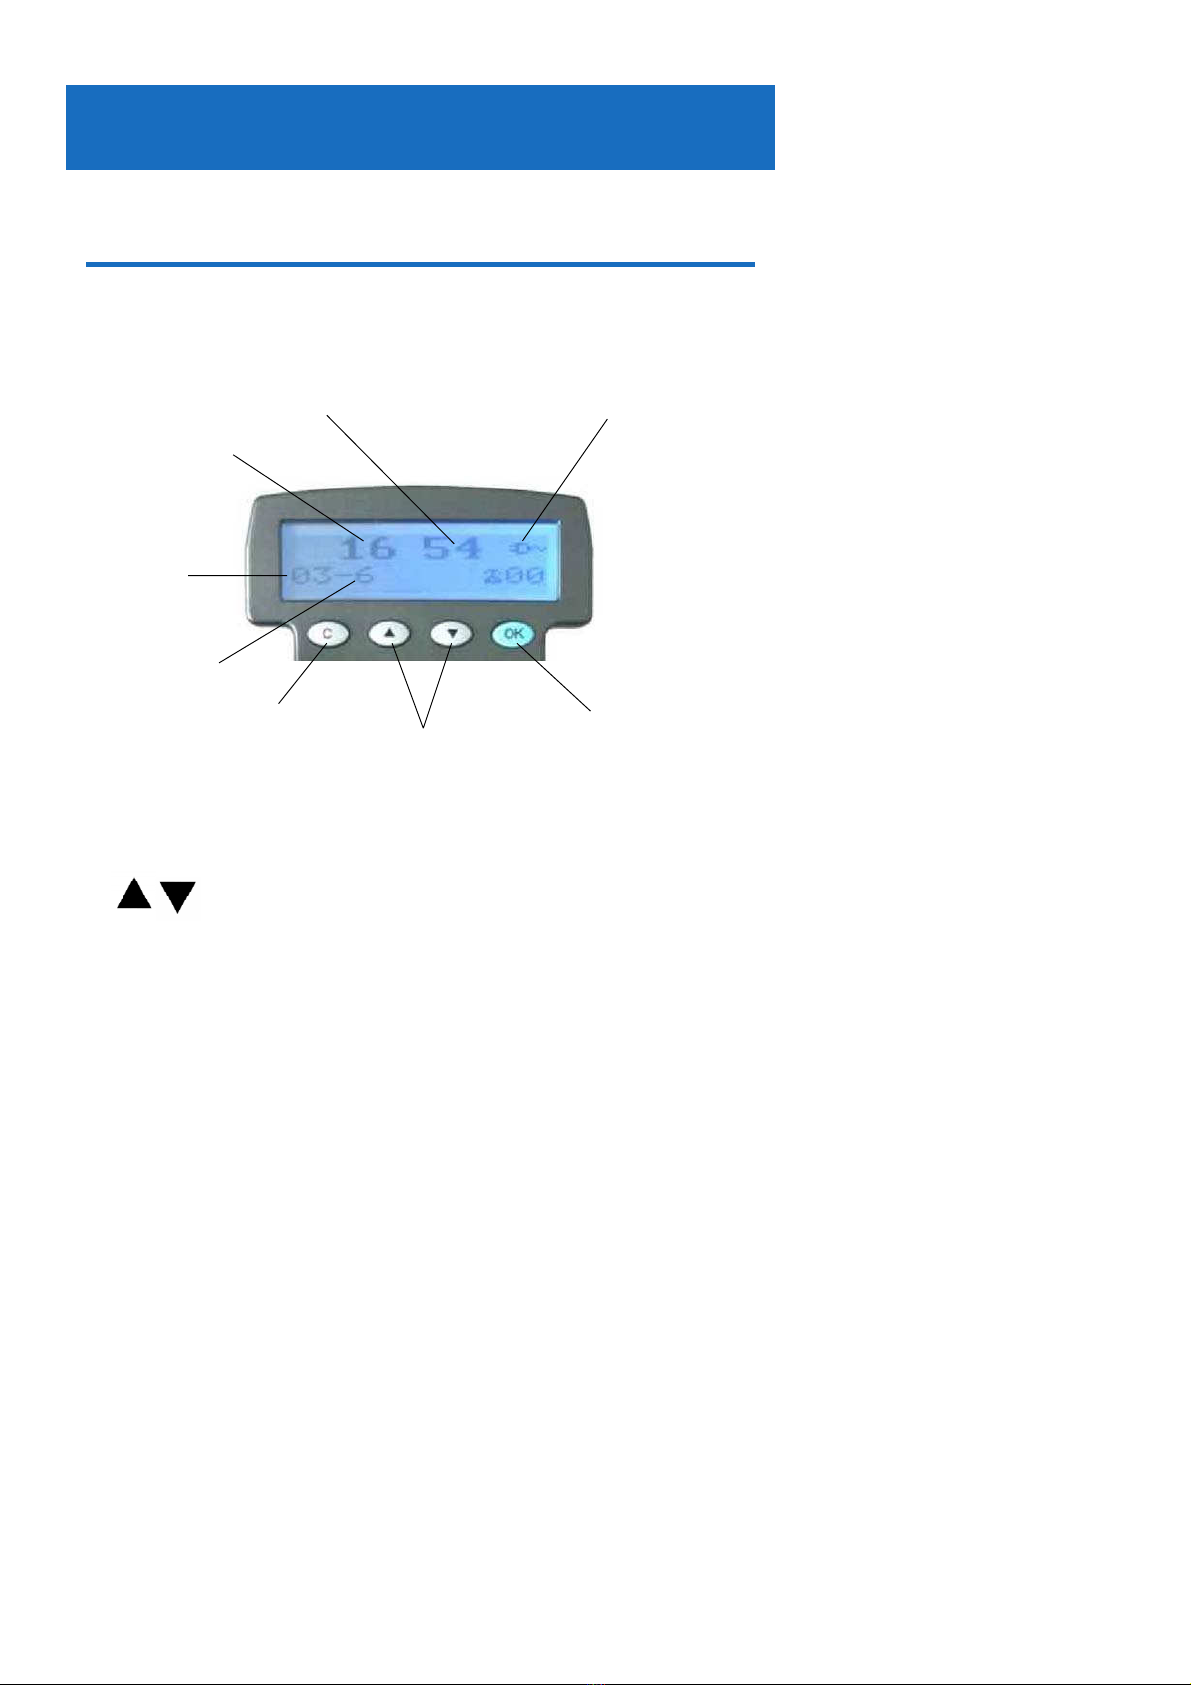
Geemarc Clearsound CL600 User manual
Other Geemarc Telephone manuals

Geemarc
Geemarc CL400 User manual

Geemarc
Geemarc CL100 User manual

Geemarc
Geemarc DALLAS20 User manual

Geemarc
Geemarc amplidect 295 photo User manual

Geemarc
Geemarc SOLAR4 User manual

Geemarc
Geemarc AMPLI600 User manual

Geemarc
Geemarc CL8350 Mounting instructions

Geemarc
Geemarc CL595 User manual

Geemarc
Geemarc Jupiter 4 User manual

Geemarc
Geemarc DALLAS10 User manual

Geemarc
Geemarc AmpliPOWER 40 User manual

Geemarc
Geemarc AMPLIDECT COMBI 595 User manual

Geemarc
Geemarc CL1100 User manual

Geemarc
Geemarc AMPLI600 User manual

Geemarc
Geemarc Ampli100VM User manual

Geemarc
Geemarc Dallas 10 User manual

Geemarc
Geemarc Jupiter 3 User manual

Geemarc
Geemarc CL100 User manual

Geemarc
Geemarc Serenities User manual

Geemarc
Geemarc APOLLO 10 User manual