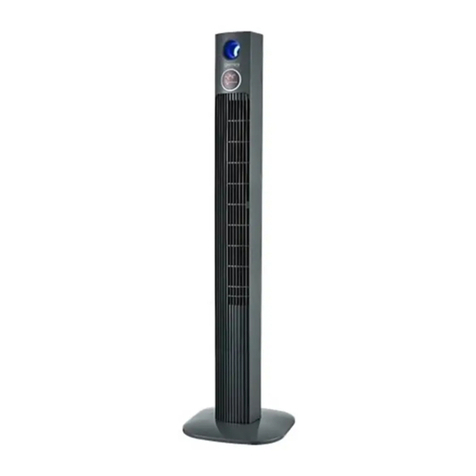
Gemini GTF45 User manual

1
MODEL NO.: GTF45
35W
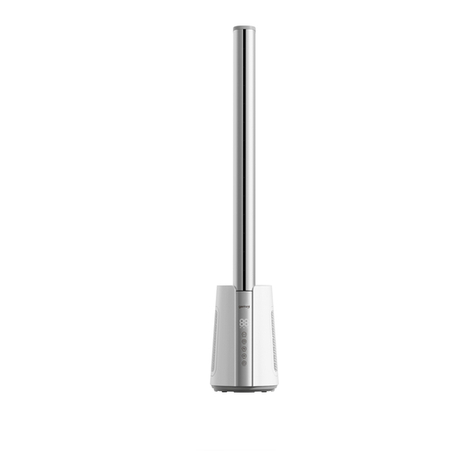
Tower Fan
A GILMAN GROUP BRAND

2
SAFETY INSTRUCTION
Thank you for purchasing this fan. This product has passed through extensive
quality assurance process. Every care has been taken to ensure that it reaches you
in perfect condition. Warning! When using electric tools, basic safety precautions
should be followed to reduce the risk of fire, electric shock and personal injury,
including the following,
Read all these instructions before attempting to operate this product
and save these instructions.
1. Check the voltage indicated on the rating plate. This tool is designed for a 230V-50Hz
electric supply.
2. Do not use electrical extension cord with this fan.
3. Do not introduce your fingers through the front case. Do not let children introduce any
foreign body into the front case.
4. Do not let hair, net curtains, tablecloth, clothes or curtains next to the openings of the fan.
They could be aspiring into the fan, causing damaged or injuries.
5. Do not use any fan having a cord or a plug damaged, after working default or if the fan is
fallen or have been damaged by any way.
6. Periodically check the electric cable of this fan. If the electric cable is damaged, it must be
replaced by the manufacturer, its after-sales service or by a similar qualified person in order
to avoid a danger.
7. Do not use this fan outside.
8. Do not use this fan in a damp area such as bathroom.
9. Do not use this fan on a window.
10. Do not use this fan with any semi-conductors speed control.
11. The fan should not be operate without a base nor used laying on its side.
12. Do not place the electrical cord under a cover. Do not overlay the cord with little covers or
such element. Place the cord in an area where there are not any risk to stumble over it.
13. The fan must always be unplugged when not operating. To unplug the fan, all the switches
must be on the position ”OFF”, and then the plug could be disconnected.
14. Do not operate the fan in an area where gasoline is used or stocked, painting or such flam-
mable liquids.
15. Use this fan only as it is describe in this manual.
16. Do not try to throw off this fan, there are not any piece that could eventually be repaired by
the user. If you need maintenance, please send back the fan to the agent.
17. No part of this fan must be replaced by the user.
18. The fan should not be opened by user.
19. If the supply cord is damaged, it must be replaced by the manufacturer or its service agent
or a similarly qualified person in order to avoid a hazard.
20. The fan MUST NOT be earthed.
21. Keep electrical appliances out of reach from Children or infirm persons.
22. Do not let them use the appliances without supervision.
NOTE:
There are no serviceable parts in this unit. Do not attempt to disassemble.
WARNING: Never use this fan with any solid-state speed control device.
Doing so will create fire and/or shock hazards.

3
Parts of the fan
CAUTION: THIS FAN MUST OPERATE IN THE UPRIGHT POSITION ONLY. DO NOT
LAY FAN ON ITS SIDE OR IN ANY OTHER POSITION. DOING SO MAY CAUSE
DAMAGE TO THE FAN AND/OR PERSONAL PROPERTY. DO NOT USE THIS FAN
WITHOUT ITS BASE.
1. Top control panel
2. FND Display
3. Front cover
4. Back cover
5. Grille
6. Column
7. Base
8. Remote control
Assembly Instructions
1. Remove all items of packing from the tower fan.
2. Pass the power cord through the middle of
the two base pieces
3. Position base piece onto the
support posts of the other base
piece to create the base assembly.
4. Turn the tower body upside down
position the base assembly onto the
pedestal tube. Ensure that the
pedestaltubeissittingushin
the base assembly.
5. Screw the base assembly onto the pedestal tube with the supplied screws.
6. Position the power cord into the provided cord track in the rear base.
7. Turn the tower fan back to upright position. It is now ready for use.

4
Operating Instructions
Top control panel
1. Use in a dry place, free of excessive humidity and water.
2. This unit can be operated by the control panel on the fan or by remote
control in the same manner.
Osc: Press the oscillation button to activate the oscillation function for widespread
breeze distribution.Press again to turn the oscillation function off.
Ion:
Press this button, product will clear and fresh the air. Press again to stop Ion function
Mode: Choose from 3 different breeze patterns (Sleep, Nature, Normal) by pressing
this button until the type of breeze desired is indicated on the FND display.
On/Off:
Press this button to turn the fan on or off.
Press it, product will start at low speed. Press again, the product will stop.
Speed: Choose from 3 comfort settings (HIGH, MED, LOW) by pressing this button
until the speed you want is indicated on the FND display.
Timer: Press this button to activate the timer – off function. Each time the button is
pressed the timer will be increased by 1 hour up to a maximum of 12 hours.
1
2
3
4
5
6
4
2
15
63
OSC

5
1. Ion
2. Sleep wind
3. Natural wind
4. Display room temperature or timer
5. Oscillation
6. Speed
FND DISPLAY 1
5
2
6
3 4
Guidelines for using the remote control
Guidelines for use of batteries
SPECIFICATIONS
• The remote control must be pointed towards the receiver on the fan in order to work.
• The remote control may not operate in a room where heavy machine is operating.
• Do not block the line of sight between the remote control and the receiver.
• Handletheremotecontrolwithcare.Donotdroptheremotecontrolontheooror
bang it against hard objects.
• If the remote control will not be used for a long period of time, remove the batteries
from the battery compartment.
• The remote control uses two AAA batteries, both of which should be new and
replaced at the same time when they run out. (Battery not included)
• Clean battery contacts and also those of the device prior to battery installation
• Ensure the batteries are installed correctly with regard to polarity, matching +/- sides
of the battery to corresponding indications on the remote control.
• Remove used and dead/discharged batteries promptly.
Model Number: GTF45
Voltage: 230Vac / 50Hz
Wattage: 35 Watt
Oscillation: 90 degrees
Weight: 4.20 kg
Dimensions: L320xW320xH1145mm

6
CLEANING INSTRUCTIONS
1. Always disconnect the cord from the electrical outlet before cleaning your fan.
2. Dust may be removed by using a vacuum cleaner along the back of the fan where
the plastic grille covers the air intake.
3. Wipe the exterior surfaces of the fan occasionally with a damp cloth (not dripping
wet) and dry thoroughly with a soft dry cloth before operating the fan.
4.
Do not use harsh cleaners or materials to clean this unit, doing so will cause damage.
5: Unscrew the screw in front of fan grille, open the grille to clean the fan wheel softly.
Please see below picture
CAUTION: DO NOT ALLOW WATER TO RUN INTO THE INTERIOR OF THE FAN AS
THIS COULD CREATE A FIRE OR ELECTRIC SHOCK HAZARD. THE FAN MOTOR
IS FACTORY LUBRICATED FOR LIFE AND WILL REQUIRE NO FURTHER LUBRI-
CATION. NO OTHER USER MAINTENANCE IS REQUIRED OR RECOMMENDED.
IF SERVICE IS REQUIRED, SEND YOUR FAN TO THE NEAREST AUTHORIZED
SERVICE DEPOT.
TO STORE:
1. Follow cleaning instructions 1-4 above.
2. Retain the original packaging to store your fan.
3. Always store in a dry place.
4. Never store while still plugged in.
5. Never wrap cord tightly around the fan or put any stress on the cord where it
enters the fan as it could cause the cord to fray or break.
Care and Maintenance
1: Always disconnect the cord from the electrical outlet when cleaning your fan.
2: Light accumulated dust may be removed from the fan with a soft cloth or vacuum
cleaner using the dusting brush attachment.

7
3: Wipe the exterior surfaces of the fan occasionally with a cloth moistened (Not
dripping wet) with a mild soap solution. Dry the case thoroughly with a soft dry
cloth before operating the fan.
4:
Avoid the use of gasoline, benzene, thinner etc as they may result in damage to the fan.
5: Store the fan in a clean dry place when not in use.
CAUTION! DO NOT IMMERSE THE UNIT IN WATER OR ALLOW WATER TO DRIP
INTO THE INTERIOR OF THE FAN HOUSING AS THIS COULD CREATE A FIRE OR
ELECTRIC SHOCK HAZARD.
WARNING! DO NOT ATTEMPT TO OPEN OR REPAIR THE UNIT YOURSELF.
DOING SO COULD VOID THE WARRANTY AND CAUSE DAMAGE OR
PERSONAL INJURY.

8
注意: 當使用電動工具時,應遵循基本的安全預防措施,以減少火災,觸電和人身傷害的
風險,包括以下內容:
閱讀所有說明,然後再嘗試操作本產品,並保存這些指示:
1. 檢查銘牌上標示的電壓。這個工具被設計在230V-50Hz的電力供應中使用
2. 不要使用電源延長線
3. 不要把你的手指穿過前方的出風口。不要讓孩子把任何異物插進入前方的出風口
4. 不要讓頭髮,窗簾,桌布,衣服或窗簾旁邊的物件放在的風扇的開口。他們可能被吸
入風扇,造成損壞或人身傷害
5. 如風扇的電源線或插頭,工作後,或風扇跌落地,或以任何方式損壞,不要使用
6. 定期檢查該風扇的電源線。如果電源線損壞,必須由製造商,其售後服務或類似的合
格的人替換,以避免危險
7. 不要在戶外使用這風扇
8. 不要在潮濕的地方,如浴室使用這風扇
9. 不要在窗口附近使用這風扇
10.不要使用任何半導體速度控制器來控制這風扇
11.如沒有地座或橫放都不應操作
12.請勿將電源線蓋著。將電源線在一個地方不會有任何絆倒風險
13.風扇不工作時,請把插頭拔出。在拔走插頭前,所有的開關必須是在“OFF”位置,
然後才把插頭拔除
14.不要在有汽油使用或儲存,油漆或易燃液體的地方使用
15.只使用本手冊中描述的方法使用這風扇
16.不要試圖打開這風扇,用戶不可以進行維修。如果您需要維修,請送回風風扇代理
17.這風扇無一部分可由用戶進行更換
18.用戶不可打開風扇
19.如果電源線損壞,必須由製造商,其售後服務或類似的合格的人替換
20.風扇不可接地
21.保持電器不可被兒童或體弱者接觸。不要讓他們在沒有監督下使用電器
重要安全事項
注意:
這風扇無一部分可由用戶進行更換,用戶不可打開風扇
警告:
不要使用任何固態速度控制器來控制這風扇,這會引至火警或觸電

9
名稱
小心
組裝
該風扇僅在直立的位置使用。不要將風扇放側或打平使用。這樣做可能會對風扇造成損
壞的和/或對個人做成損失。不要在沒有底座時使用這風扇。
1. 控制面版
2. FND 顯示屏
3. 前蓋
4. 後蓋
5. 出風網
6. 機身
7. 地座
8. 遙控器
風扇機身
鏍絲
1. 移除所有包裝
2. 把電源線穿過底座間
3. 把底座合起來
4. 把風扇倒轉, 放好底座, 確保風扇軸在底座中間
5. 收底座螺絲
6. 把電源線放在底座上的特設坑位
7. 把風扇倒轉到正常位置

10
使用方法
1. 在乾爽的地方使用, 不要在潮濕和有水的附近使用
2. 風扇可以在控制面版或用遙控器控制
頂部控制版面
旋轉
按此制使風扇左右擺動, 再按使擺動停止
離子
此功能可清潔和清新空氣, 按此制來開關這功能
模式
有三種開動模式 (睡眠, 自然, 正常), 按動此制來轉換模式
開/關
按此制來開關風扇, 按一下開動, 按一下關機
速度
有三個速度 (高,中,低), 按動此制來轉換速度
時間制
按一下會增加1 小時, 最多12 小時, 再按便關閉時間制功能
4
2
15
63
1
2
3
4
5
6
OSC

11
FND顯示屏
1. 離子
2. 睡眠模式
3. 自然模式
4. 室溫或時間顯示
5. 旋轉
6. 速度
1
5
2
6
3 4
使用遙控器
遙控器用電池
規格
- 遙控器必須對著風扇的接收器
- 遙控器可能無法在一個有重型機器的房間裡運行
- 遙控器和接收器之間不可以有阻擋
- 小心使用遙控器。不要把遙控器摔落在地板上,或與硬物猛敲
- 如果遙控器很長時間不使用,從電池倉中取出電池
- 遙控器使用兩粒AAA電池,這須同時更換和是新的 (本產品購買時不包括電池)
- 電池安裝前先清潔電池的接觸點
- 確保電池的+/ -配對遙控器上的相應的標誌
- 適當地處理已用完的電池
型號: GTF45
電壓: 230V ac 50 Hz
功率: 35 瓦
旋轉角度: 90 度
重量: 4.20 公斤
尺寸: 長320x 闊320x 高1145mm

12
清潔
儲存
1. 在清潔之前,必須要把電源插頭從電源插座上拔除。
2. 用吸塵機把風扇後方的網架內的塵吸走。
3. 偶爾用濕布(不滴水的濕)擦拭風扇的表面,用柔軟的乾布徹底抹乾風扇。
4. 不要使用刺激性的清潔劑或材料清潔本機,這樣做會造成損壞。
5. 擰下前面風扇的進氣格的螺釘,打開進氣格,輕輕地對風扇進行清理。
請參考下面的圖片
1. 依以上1-4 項
2. 用回原先的包裝材料包這風扇
3. 儲存在乾燥的地方
4. 如果仍插著, 請先把插頭拔除
5. 不要把電源線緊緊的繞著風扇, 這會使電源線損壞
小心: 不要讓水走入風扇內部,因為這可能會導致火災或電擊的危險。風扇馬達在工廠時
已加潤滑,不需要自行另加潤滑劑。也沒有其他須用戶自行維護的部份。如果需要維修
服務時,請將您的風扇送到最近的授權服務站。

13
保養
1. 清潔前先把插頭拔除
2. 用布或吸塵機把風扇上的塵除去
3. 偶爾用濕布(不滴水的濕)擦拭風扇的表面,用柔軟的乾布徹底抹乾風扇
4. 不要用清潔劑抹風扇機身
5. 儲存在乾燥的地方
注意:
不能把風扇浸泡在水裏,或讓水淌進風扇內部,否則可能導致火災或電擊危險。
警告:
不要嘗試打開或自行修理。這樣做可能會導致保失效,並導致損壞或人身傷害。

14

15

16
Table of contents
Other Gemini Fan manuals
Popular Fan manuals by other brands

Modern Forms
Modern Forms Skylark installation instructions

Broan
Broan P402 Series instructions

Harbor Freight Tools
Harbor Freight Tools 98625 Instructions and precautions

Caframo
Caframo 737DX-BCS Black/Titanium Features

Kendal Lighting
Kendal Lighting AC-24144 installation instructions

Tesco
Tesco PF1614W user manual

EDM Product
EDM Product 33813 instruction manual

Goldair
Goldair PLATINUM GPCF300B operating instructions

ARDES
ARDES AR5M50 manual

ELTA FANS
ELTA FANS Multiflow SMC Series Installation and maintenance instructions

Harbor Breeze
Harbor Breeze TG44BNK3D1RC installation manual

Brandson
Brandson 303830 user manual