5
5. Operating Procedure
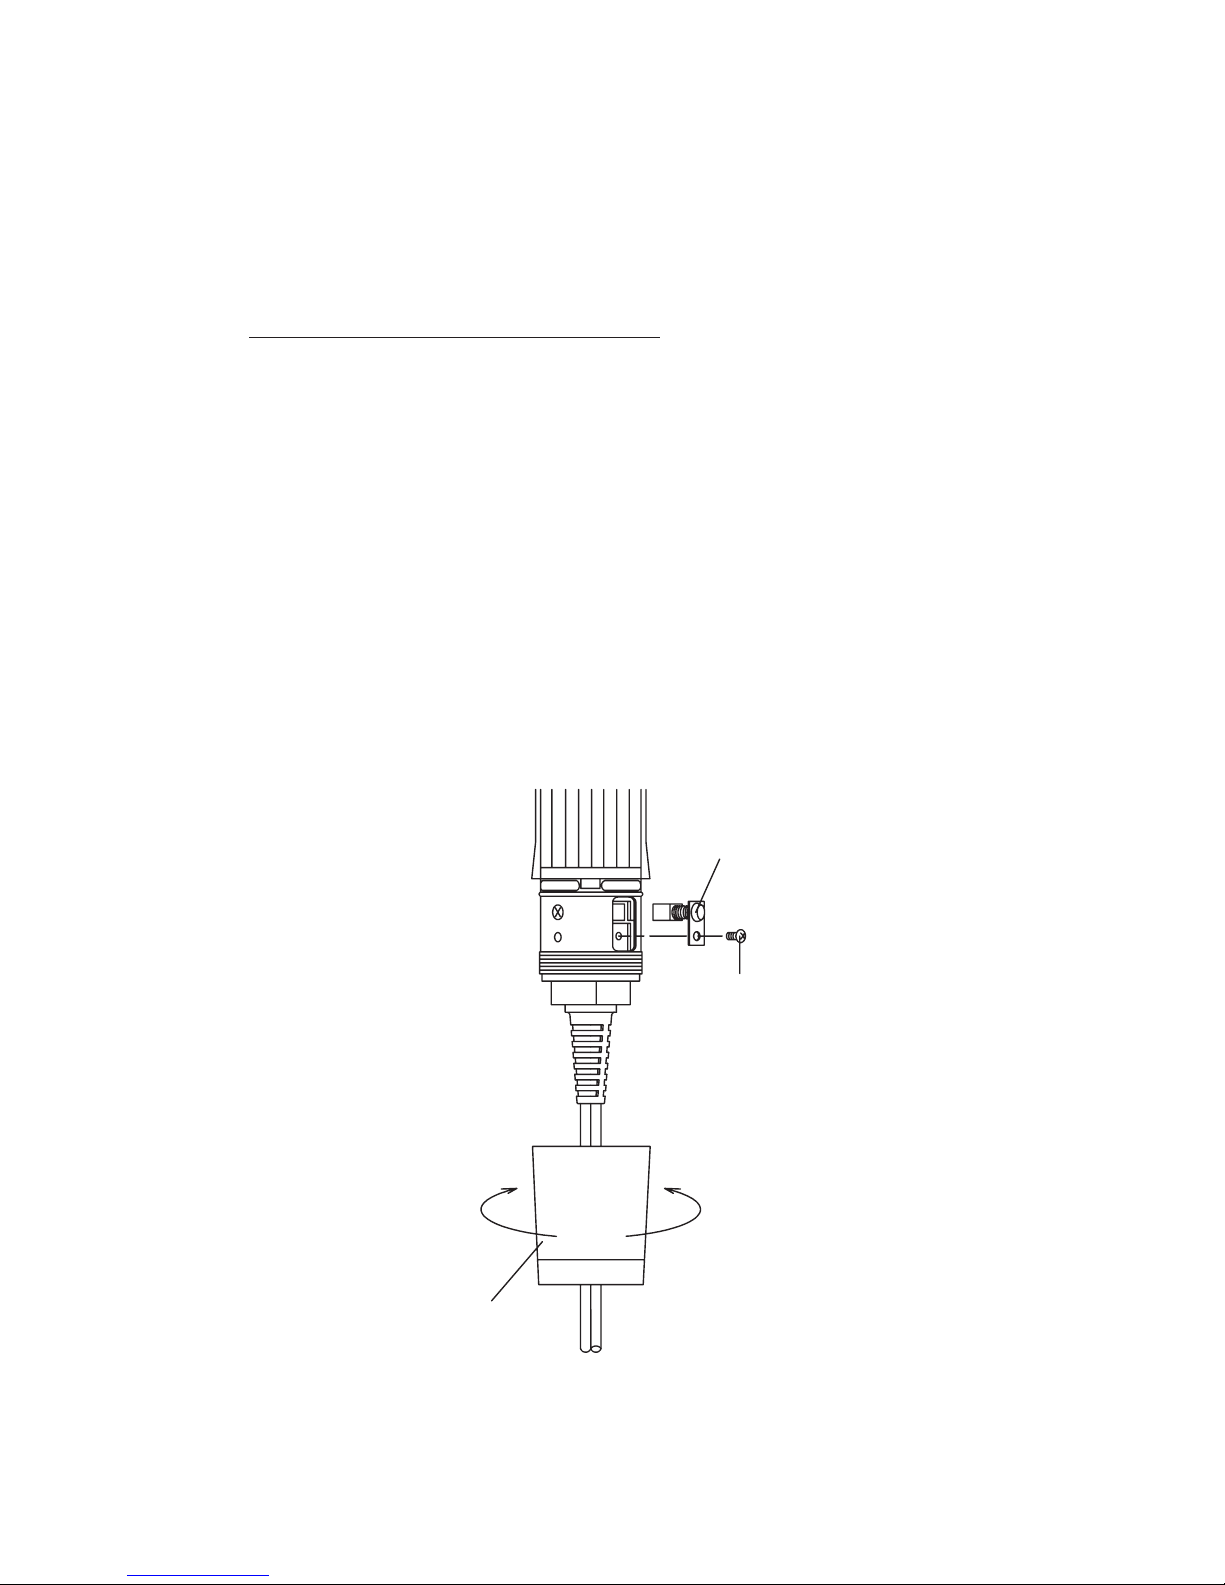
With your New SZX Profiler adjusted for stroke and with a selected tool fitted, con-
nect the Gesswein Power Hand Controller to an electrical supply and the Profiler to
controller.
Set the Slide Rheostat on the Controller to “Low” or the “0” position. Put the Controller
Main Switch to the “ON” position, which lights up a pilot light that indicates your New
SZX Profiler is ready to use.
To i n c r e a s e t h e s p e e d o f t h e N ew S Z X P r o f i l e r, m o ve t h e S l i d e R h e o s t a t t o wa r d H i g h
or “10” and the desired reciprocating frequency. You can now begin working. When
work is completed, put the Main Switch to “OFF.”
To o p e r a t e yo u r h a n d p i e c e u s i n g t h e o p t i o n a l Va r i a b l e - S p e e d Fo o t R h e o s t a t o r
optional On/Off Foot Switch, please refer to the Power Hand 2X Controller Instruction
Manual for proper connection. The handpiece will not run until the foot rheostat/switch
is depressed. The rheostat provides infinitely variable speed control; the switch only
turns the handpiece on and off (operates at speed selected on controller).
8
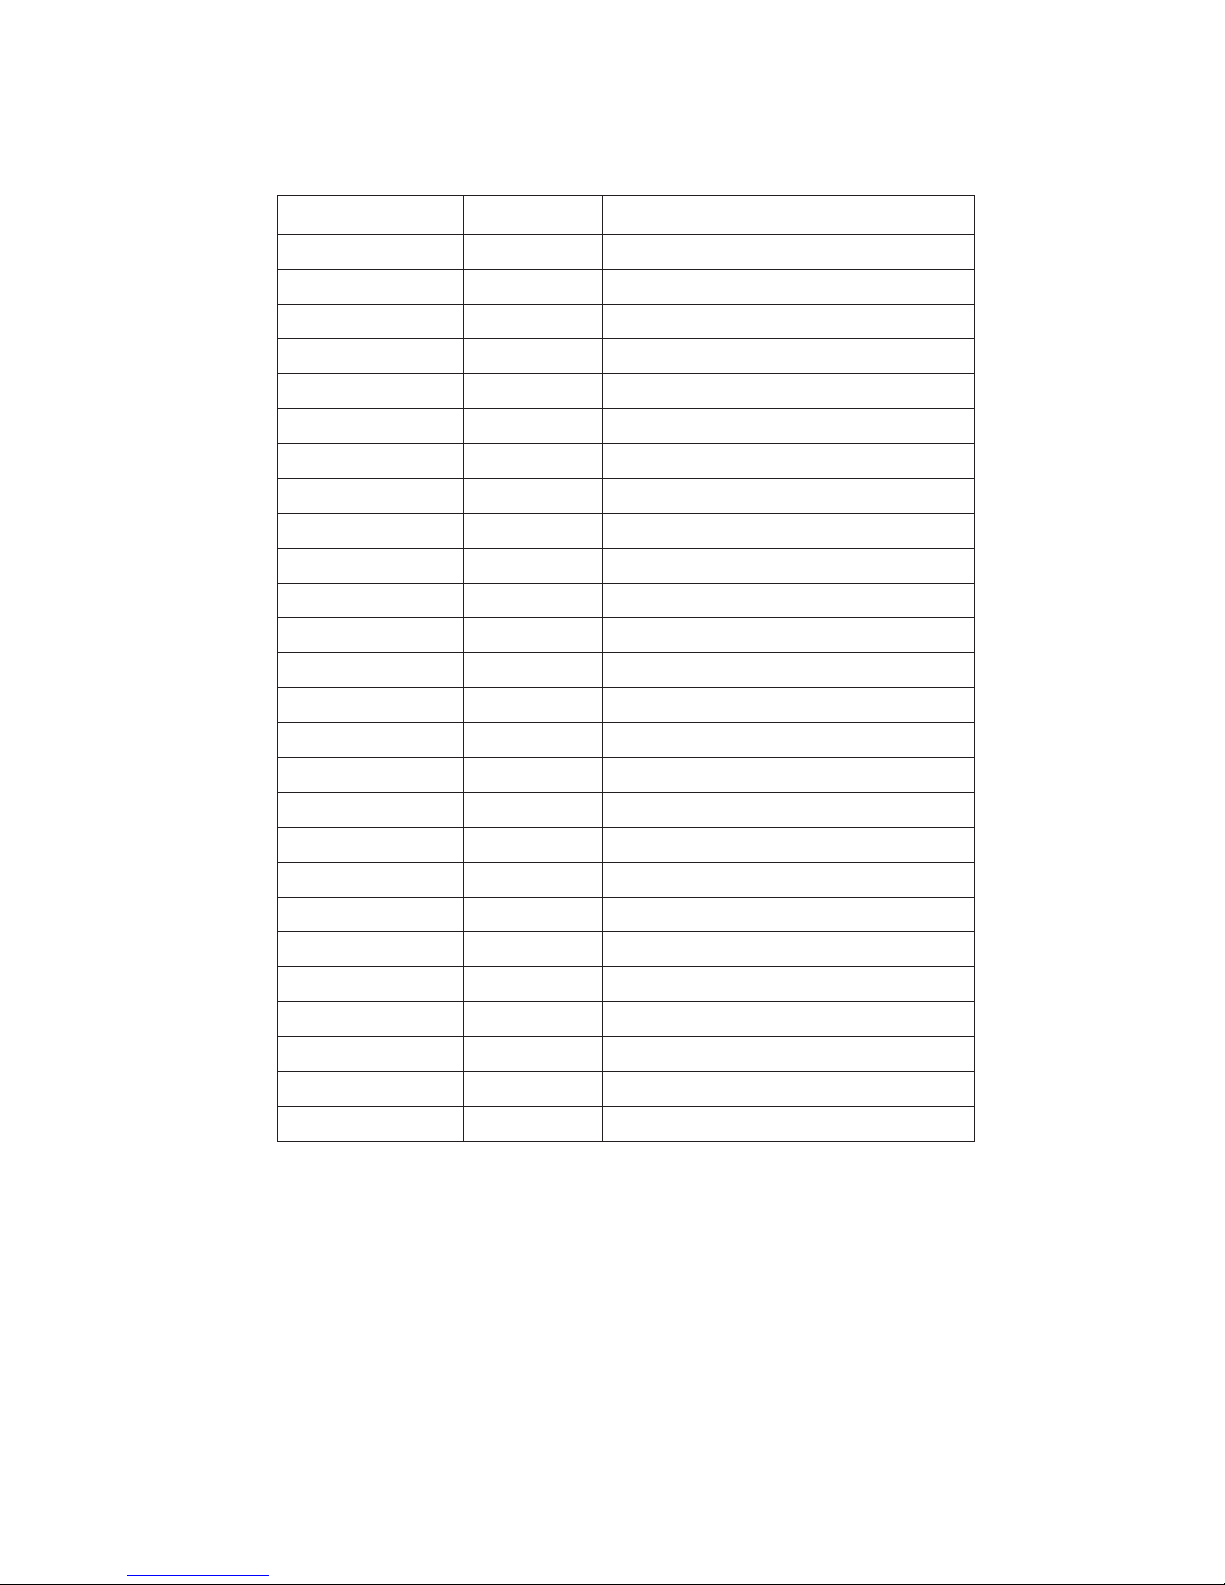
New Z-SZX Parts List
When ordering spare parts, always specify part# (or item# if applicable) and
description.
Part# Item# Description
Z-SWX-101 8960230 Top Cover
Z-SWX-102 8960231 Oval Countersunk Set Screw
Z-SWX-200 8960232 Swing Arm Complete
Z-SWX-201 8960233 Swing Arm Support B
Z-SWX-202 8960234 Swing Arm
Z-SWX-203 8960235 Tool-Securing Screw
Z-SWX-204 8960236 Swing Arm Support A
Z-SWX-300 Eccentric Shaft Complete
Z-SWX-301 8960156 E-Type Clip Ring
Z-SWX-302 5103076 Ball Bearing
Z-SWX-303 8960238 Eccentric Shaft
Z-SWX-400 8960241 Main Shaft Complete
Z-SWX-401 8960242 Main Shaft
Z-SWX-402 8960067 Coil Spring
Z-SWX-403 5100151 Nylon Coupler (Joint)
Z-SWX-404 8960068 C-Type Clip
Z-SWX-405 8960243 Plastic Spacer
Z-SWX-406 5103079 Ball Bearing
Z-SWX-407 8960244 O-Type Rubber Ring
Z-SWX-408 8960245 Bearing Spacer
Z-SWX-409 8960246 C-Type Clip Ring
Z-SWX-420 8960240 Hexagon Socket Set Screw
Z-SWX-501 8960239 C-Type Clip Ring
Z-SWX-502 8960247 Wave Washer
Z-SWX-503 8960248 Lock Ring Completed
Z-SWX-002 8960249 Hexagon Key Wrench