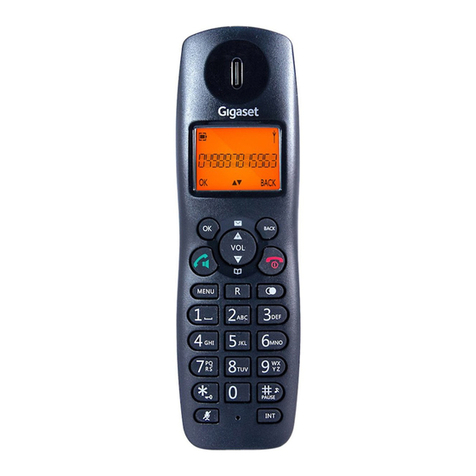
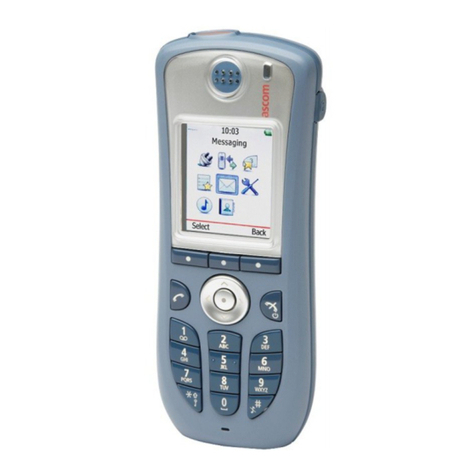
Gigaset A540h User manual

Gigaset A540H / en / A31008-M2651-R101-2-4N19 / Cover_front.fm / 21.01.2015
Congratulations
By purchasing a Gigaset, you have chosen a brand that is fully committed
to sustainability.
This product’s packaging is eco-friendly!
To learn more, visit www.gigaset.com.
A540H

Gigaset A540H / en / A31008-M2651-R101-2-4N19 / Cover_front.fm / 21.01.2015
2
3
5
4
12
1
11
9
10
8
7
ÐU
6
Gigaset service contact numbers - UK and Ireland:
Forpersonal advice on our range of products and for repairs or guarantee/warranty claims call:
Service Centre UK: 020 369 53111
Service Centre Ireland: 0818 200 033
Please have your proof of purchase ready when calling.

en fr nl 1
Gigaset A540H / en / A31008-M2651-R101-2-4N19 / overview.fm / 21.01.2015
A-Klasse_Layout_Neu, Version 4, 28.05.2014
Overview
Overview
Handset
1Display
2Status bar (¢page 23)
Icons display current settings and operating status of the
telephone
3Display keys (¢page 7)
4End call key, On/off key
End a call;
Cancel function
Go back one menu level ¤Press briefly
Return to idle status ¤Hold down
Switch the handset on/off
(in display’s idle status)
¤Hold down
5Hash key
Keypad lock on/off
(in display’s idle status)
¤Hold down
Toggle between upper/lower case and digits;
6Recall key
Consultation call (flash) ¤Press briefly
Insert a dialling pause ¤Hold down
7Microphone
8Message key (¢page 9)
Access to the calls and message lists;
Flashing: new message or new call
9Star key
In idle status:
Deactivate the ringtone
¤Hold down
With an existing connection:
switch from pulse dialling to tone
dialling (optional)
¤Press briefly
10 Key 1
Select network mailbox ¤Hold down
11 Talk key / Handsfree key
Dial number displayed;
Accept call; switch from earpiece to handsfree mode;
Open the redial list ¤Press briefly
Start dialling ¤Hold down
12 Control key/Menu key (¢page 7)

2en fr nl
Gigaset A540H / en / A31008-M2651-R101-2-4N19 / overview.fm / 21.01.2015
A-Klasse_Layout_Neu, Version 4, 28.05.2014
Overview
Using the user guide effectively
Icons
Keys
Functions, confirming and selecting
Procedures
Example: Activating/deactivating Auto answer
Illustration in the user guide:
¤Menu ¤qSettings ¤OK ¤qTelephony ¤OK ¤Auto Answer ¤OK (³=activated)
aWarnings, the non-adherence to which can lead to injury to persons or damage to devices or
generate costs.
hPrerequisite, to be able to carry out the following action.
iImportant information regarding function and appropriate handling.
Talk key c/ End call key aNumber/letter keys Qto O
Star key P/ Hash key (Message key f/ Recall key S
Control key qDisplay keys nB
iOverview of display icons (¢page 23).
Confirm selection using OK
One menu level back using Back
Change to idle display using Hold down a
Function selected/activated ³
Function not selected/deactivated ´
Step: Follow this procedure:
¤Menu In idle status press the display key Menu.
The main menu opens.
¤qSettings
¤OK
Select Settings using the control key q.
Press OK to confirm. The submenu Settings opens.
¤qTelephony
¤OK
Select Telephony using the control key q.
Press OK to confirm. The submenu Telephony opens.
¤Auto Answer The activate/deactivate auto answer function appears as the first menu item.
¤OK Activate or deactivate using OK.
The Auto Answer is activated ³or deactivated ´.

en fr nl 3
Gigaset A540H / en / A31008-M2651-R101-2-4N19 / HSGIVZ.fm / 21.01.2015
A-Klasse_Layout_Neu, Version 4, 28.05.2014
Contents
Contents
Overview . . . . . . . . . . . . . . . . . . . . . . . . . . . . . . . . . . . . . . . . . . . . . . . . . . . . . . . . . . . . . . . . . . . . . . . . 1
Handset . . . . . . . . . . . . . . . . . . . . . . . . . . . . . . . . . . . . . . . . . . . . . . . . . . . . . . . . . . . . . . . . . . . . . . . . . . . . . . . . . . . . . . . . 1
Using the user guide effectively . . . . . . . . . . . . . . . . . . . . . . . . . . . . . . . . . . . . . . . . . . . . . . . . . . . . . . . . . . . . . . . . . 2
Safety precautions . . . . . . . . . . . . . . . . . . . . . . . . . . . . . . . . . . . . . . . . . . . . . . . . . . . . . . . . . . . . . . . 4
Getting started . . . . . . . . . . . . . . . . . . . . . . . . . . . . . . . . . . . . . . . . . . . . . . . . . . . . . . . . . . . . . . . . . . 5
Using the telephone . . . . . . . . . . . . . . . . . . . . . . . . . . . . . . . . . . . . . . . . . . . . . . . . . . . . . . . . . . . . . 7
Making calls . . . . . . . . . . . . . . . . . . . . . . . . . . . . . . . . . . . . . . . . . . . . . . . . . . . . . . . . . . . . . . . . . . . . . . . . . . . . . . . . . . . . 8
Messages . . . . . . . . . . . . . . . . . . . . . . . . . . . . . . . . . . . . . . . . . . . . . . . . . . . . . . . . . . . . . . . . . . . . . . . . . . . . . . . . . . . . . . 11
Phonebook (Address book) . . . . . . . . . . . . . . . . . . . . . . . . . . . . . . . . . . . . . . . . . . . . . . . . . . . . . . . . . . . . . . . . . . . . . 12
Additional functions . . . . . . . . . . . . . . . . . . . . . . . . . . . . . . . . . . . . . . . . . . . . . . . . . . . . . . . . . . . . 14
Alarm clock . . . . . . . . . . . . . . . . . . . . . . . . . . . . . . . . . . . . . . . . . . . . . . . . . . . . . . . . . . . . . . . . . . . . . . . . . . . . . . . . . . . . 14
ECO DECT . . . . . . . . . . . . . . . . . . . . . . . . . . . . . . . . . . . . . . . . . . . . . . . . . . . . . . . . . . . . . . . . . . . . . . . . . . . . . . . . . . . . . 14
Adjusting the telephone settings . . . . . . . . . . . . . . . . . . . . . . . . . . . . . . . . . . . . . . . . . . . . . . . . 15
Manufacturer's advice . . . . . . . . . . . . . . . . . . . . . . . . . . . . . . . . . . . . . . . . . . . . . . . . . . . . . . . . . . 17
Appendix . . . . . . . . . . . . . . . . . . . . . . . . . . . . . . . . . . . . . . . . . . . . . . . . . . . . . . . . . . . . . . . . . . . . . . . . . . . . . . . . . . . . . 21
Display icons . . . . . . . . . . . . . . . . . . . . . . . . . . . . . . . . . . . . . . . . . . . . . . . . . . . . . . . . . . . . . . . . . . . . . . . . . . . . . . . . . . 23
Index . . . . . . . . . . . . . . . . . . . . . . . . . . . . . . . . . . . . . . . . . . . . . . . . . . . . . . . . . . . . . . . . . . . . . . . . . . . 24

4en fr nl
Gigaset A540H / en / A31008-M2651-R101-2-4N19 / security.fm / 21.01.2015
A-Klasse_Layout_Neu, Version 4, 28.05.2014
Safety precautions
Safety precautions
a• Read the safety precautions and the user guide before use.
• Explain their content and the potential hazards associated with using the device to your children.
• The device cannot be used in the event of a power failure. It is also not possible to make emergency
calls.
• Emergency numbers cannot be dialled if the keypad/display lock is activated!
Use only the power adapter indicated on the device.
Use only rechargeable batteries that correspond to the specification (see "Specifications"). Never
use a conventional (non-rechargeable) battery or other battery types as this could result in significant
health risks and personal injury. Rechargeable batteries, which are noticeably damaged, must be
replaced.
Using your telephone may affect nearby medical equipment. Be aware of the technical conditions in
your particular environment, e.g. doctor's surgery.
If you use a medical device (e.g. a pacemaker), please contact the device manufacturer. They will be
able to advise you regarding the susceptibility of the device to external sources of high frequency
energy (for the specifications of your Gigaset product see "Specifications").
Do not hold the rear of the handset to your ear when it is ringing or when speaker mode is activated.
Otherwise you risk serious and permanent damage to your hearing.
Your Gigaset is compatible with the majority of digital hearing aids on the market. However, perfect
function with all hearing aids cannot be guaranteed.
The phone may cause interference in analogue hearing aids (humming or whistling) or cause them to
overload. If you require assistance, please contact the hearing aid supplier.
The devices are not splashproof. For this reason do not install them in a damp environment such as
bathrooms or shower rooms.
Do not use the devices in environments with a potential explosion hazard (e.g. paint shops).
If you give your Gigaset to a third party, make sure you also give them the user guide.
Remove faulty devices from use or have them repaired by our Service team, as these could interfere
with other wireless services.
Do not use the device if the display is cracked or broken. Broken glass or plastic can cause injury to
hands and face. Send the device to our Service department to be repaired.
en fr nl 5
Gigaset A540H / en / A31008-M2651-R101-2-4N19 / starting.fm / 21.01.2015
A-Klasse_Layout_Neu, Version 4, 28.05.2014
Getting started
Getting started
Contents of the package
•Onehandset,
• One charging cradle incl. power adapter,
• One battery cover (rear cover for the handset),
• Two batteries,
•Oneuserguide.
Setting up the charging cradle
The charging cradle is designed for use in closed, dry rooms within a temperature range of +5°C to +45°C.
¤Position the base and charging cradle on a level, non-slip surface at a central point in the building or house,
or mount the charging cradle onto the wall.
¤Position the charging cradle on a level, non-slip surface.
The device's feet do not usually leave any marks on surfaces. However, due to the multitude of different
varnishes and polishes used on today's furnishings, marks on the surfaces cannot be completely ruled out.
Connecting the charging cradle
Setting up the handset for use
The display is protected by a plastic film: ¤Remove the protective film!
Inserting the batteries
i• Never expose the telephone to heat sources, direct sunlight or other electrical devices.
• Protect your telephone from moisture, dust, corrosive liquids and vapours.
• Pay attention to the range of the base. This is up to 50 m inside buildings and up to 300 m in
unobstructed outdoor areas. The range is reduced when Max. Range is deactivated (¢page 14).
aUse only rechargeable batteries recommended by Gigaset Communications GmbH (¢page 22), as
this could otherwise result in significant injury to health and material damage. For example, the outer
casing of the batteries could be destroyed or the batteries could explode. The telephone could also
malfunction or be damaged as a result of using batteries that are not of the recommended type.
¤Connect the flat plug of the power adapter to the charging
cradle .
¤Plug the power adapter into the power socket .
If you have to remove the plug from the charging cradle again:
¤Disconnect the power adapter from the mains power supply.
¤Press the release button ¤Disconnect the plug .
1
2
3
4
2
1
3
4

6en fr nl
Gigaset A540H / en / A31008-M2651-R101-2-4N19 / starting.fm / 21.01.2015
A-Klasse_Layout_Neu, Version 4, 28.05.2014
Getting started
Charging the batteries
Display language
¤Menu ¤qSettings ¤OK ¤qLanguage ¤OK ¤. . . select language with q¤OK (³= selected)
Registering the handset
• Registering automatically to Gigaset base
¤Place the handset into the base
• Registering manually
On the base: Press and hold the registration/paging key (min. 3 secs.)
and on the handset: Menu ¤qSettings ¤OK ¤qRegistration ¤OK ¤Register
Handset ¤OK ¤. . . enter system PIN if necessary (default setting:
0000)¤OK
For further information on this, please see the user guide of the base.
The telephone is now ready for use.
Charge the batteries fully prior to first use in the base/charging cradle.
The batteries are fully charged when the power icon disappears from the display.
aThe handset may only be placed in the designated base/charging cradle.
i• The battery may heat up during charging. This is not dangerous.
• After a time, the charge capacity of the battery will decrease for technical reasons.
iIf you do not understand the language currently set:
¤v¤L4 ¤. . . select language with q¤OK (³= selected)
i• Display shows Handset is registering. The connection to the base is established; this may take
some time.
• After successful registration, Handset registered is displayed.
¤Insert the batteries (for
correct +/- direction, see
diagram).
¤Insert the battery cover from
the top .
¤Then press the cover until it
clicks into place .
1
2
1
2
To open the battery cover:
¤Grip the notch on the cover
and slide it
downwards .
3
4
4
3
4 h
= U
=+

en fr nl 7
Gigaset A540H / en / A31008-M2651-R101-2-4N19 / operating.fm / 21.01.2015
A-Klasse_Layout_Neu, Version 4, 28.05.2014
Using the telephone
Using the telephone
Switching the handset on/off
In idle status: ¤Press and hold the End call key a.
Locking/unlocking the keypad
The keypad lock prevents any accidental use of the telephone.
Activating/deactivating keypad lock: ¤(hold down
Control key
The control key allows you to navigate within menus and entry fields. In idle status or
during a external call, it has the following functions:
In the description below, the side of the control key (up, down, right, left) that you have to press in the different
operating situations is marked in black, e.g. vfor "press right on the control key".
Display keys
Different functions are displayed over the function keys depending on the operating situation.
Example
i• If a call is signalled on the handset, the keypad automatically unlocks.
The call can be accepted.
• It then locks again when the call is finished.
In idle status During a conversation
Open phonebook. sOpen phonebook. s
Open the main menu. vMute microphone. v
Open list of handsets. uInitiate an internal consultation call. u
Open the Audio Settings (¢page 15) menu. tAdjust the loudspeaker volume for earpiece and
handsfree mode.
t
Redial Menu
Current display key functions
Display keys

8en fr nl
Gigaset A540H / en / A31008-M2651-R101-2-4N19 / operating.fm / 21.01.2015
A-Klasse_Layout_Neu, Version 4, 28.05.2014
Using the telephone
Menu guidance
The functions of the telephone are displayed on a menu that consists of several levels.
Opening the main menu (in idle status):
¤Press right von the control key ¤. . . scroll to the function with the control key q¤OK
Returning to the previous menu level:
¤Press the display key Back
or ¤Briefly press the End call key a
Returning to idle status
¤Press and hold the End call key a.
Entering text
Names in the phonebook
•Selecting letters/characters: Multiple letters and characters are assigned to each key between Qand O,
see character charts ¢page 22.
Selecting desired letters/characters:
. . . ¤Press the key briefly several times in succession
or . . . ¤Press and hold the key.
•Lowercase, uppercase and digits for the following letters: ¤Press the hash key (
Making calls
Making an external call
¤. . . Enter the number ¤Press the Talk key cbriefly
or ¤Press and hold the Talk key c¤. . . enter number
Cancel dialling: ¤Press the End call key a
Dialling from the phonebook
¤. . . open the phonebook with s¤. . . select entry with q¤press the Talk key c
Dialling from the redial list
The redial list contains the 10 numbers last dialled with the handset.
¤Press the Talk key cbriefly . . . Redial list is opened ¤. . . select entry with q¤press the Talk key c
iIf no key is pressed, the display will automatically change to idle status after 2 minutes.
•Input position: Numbers/letters/characters are inserted at the cursor
position
•Placing the cursor: ¤Press the control key r
•Deleting characters to the left of the cursor:¤Press the display key Del.
iThe first letter and each letter following a space is automatically in upper case.

en fr nl 9
Gigaset A540H / en / A31008-M2651-R101-2-4N19 / operating.fm / 21.01.2015
A-Klasse_Layout_Neu, Version 4, 28.05.2014
Using the telephone
Managing entries in the redial list
¤Press the Talk key cbriefly . . . Redial list is opened ¤. . . select entry with q¤Menu . . . then
Dialling from the call list
The call list (¢page 11) contains the last 25 numbers for all calls or for only missed (not received) calls,
depending on the type of list set.
¤Press the Message key f¤qCalls List: ¤OK ¤. . . select entry with q¤press the Talk key c
Accepting a call
Accepting a call: ¤Press the Talk key c
or if Auto Answer is activated (¢page 16):
¤. . . Remove the handset from the charging cradle
Handsfree mode
¤Press the Talk key c.
Placing the handset in the charging cradle during a call:
¤Press and hold down the Talk key c¤. . . Place the handset in the charging cradle ¤. . . hold down c
for a further 2 seconds
Call Waiting - for Australia only
Many Telecommunication providers in Australia and New Zealand offer a Call waiting service on your Home
Phone Line. Please speak to your service provider to check if your Home Phone line is activated for this service
(charges may apply).
The most common providers instructions for Call waiting are as follows.
Australia:
Telstra:
To answer an incoming call when you're already on a call, or to switch between calls:
• Press the Recall key Sand listen for the dial tone, then press 2.
• To hang up on one call and return to the other:
• Press the Recall key Son your phone and listen for the dial tone, then press 1.
•Torejectanincomingcallwhen you are already on a call:
• Push the Recall key Son your phone and listen for the dial tone, then press Qagain.
For more information please contact Telstra.
• Copy the number to the display: ¤qUse Number ¤OK
• Copy the entry to the phonebook
(¢page 12):
¤qCopy to Directory ¤OK
• Delete the selected entry: ¤qDelete Entry ¤OK
• Delete all entries: ¤qDelete List ¤OK
iThe numbers can be edited or added here.
iIThese processes depend on the network provider and are subject to change

10 en fr nl
Gigaset A540H / en / A31008-M2651-R101-2-4N19 / operating.fm / 21.01.2015
A-Klasse_Layout_Neu, Version 4, 28.05.2014
Using the telephone
Optus:
You are on the phone and hear the beeps.
To put the first caller on hold and talk to the new caller (the caller on hold will hear nothing):
• Press the Recall key Son your phone.
To return to the first caller:
• Press the Recall key Sand put the new caller on hold. You can alternate between the calls in this way.
Or
• Hang up the first call. The phone will ring again with the second caller. This means that you will not be able
to go back to the first caller.
For more information please contact Optus.
New Zealand:
Telecom NZ:
You are on the phone and hear four beeps.
To talk to the second caller:
• Press the Recall key Son your phone.
To return to the first caller:
Press the Recall key Sagain and you will be able to continue your original conversation.
For more information please contact Telecom NZ.
Internal consultation call/connecting a call - for Australia only
You are in conversation with an external participant. Press the control key uand call one or all handsets. The
external participant hears the music on hold.
•Before the internal participant has answered, press the end call key a; the call is diverted to the partici-
pant who answers the call.
•After the internal participant has answered you can talk to him. Then press the end call key a; the call is
diverted, or press the ”display key; you are reconnected to the external participant.
Please note: This equipment may not provide for the effective handover of a call to another device con-
nected to the same line.
Call volume
• Accessing the settings during a call for the mode currently in use (handsfree, earpiece):
¤Control key t¤. . . set volume with q¤OK
• Accessing the settings via the menu:
¤Menu ¤qSettings ¤OK ¤qAudio Settings ¤OK ¤Call Volume ¤OK ¤. . . then
Mute microphone
When the microphone is deactivated during a conversation, the other caller cannot hear.
iThe setting is automatically stored after around 2 seconds, even if OK is not pressed.
•Handsetvolume: ¤Earpiece Volume ¤OK ¤. . . set volume with q¤OK (μSaved)
• Loudspeaker volume: ¤qHandsfree Volume ¤OK ¤. . . set volume with q¤OK (μSaved)
• Activating/deactivating the microphone: ¤Press v

en fr nl 11
Gigaset A540H / en / A31008-M2651-R101-2-4N19 / contacts.fm / 21.01.2015
A-Klasse_Layout_Neu, Version 4, 28.05.2014
Using the telephone
Messages
Message lists
Incoming messages are saved in the message lists. An advisory tone sounds
as soon as a new entry appears on a list. The Message key also flashes. Icons
for message types and the number of new messages are shown on the idle
display:
•Ãon the answer machine (depending on the base)/network mailbox
•™in the call list (¢page 11).
Opening message lists
¤Press the Message key f¤. . . select message list with q:
•Answer M.: Answer machine list (depending on the base)
•Net. MBX: Network mailbox
•CallsList: Call list (¢page 11)
¤. . . Open selected message list with OK
Call lists
The call list contains the last 25 numbers for all calls or for only missed (not received) calls, depending on the
type of list set.
The following information is displayed in the list entries:
•Entrystatus:
•New Call: New missed call.
•Old Call: Entry already read.
•Answ.: Call was accepted.
• Caller's number. If the number is saved in the phonebook, the
name is displayed instead.
• Date and time of call (if set).
Setting the list type
¤Menu ¤qSettings ¤OK ¤qTelephony ¤OK ¤qCalls
List Type ¤OK . . . then
i•Ifnew messages are available, only lists with new messages are displayed.
• The icon for the network mailbox is always displayed, provided the number is stored in the
telephone. The other lists are only displayed if they contain messages.
•Ifyouselectthenetwork mailbox, the network mailbox number will be selected. Lists are not
opened on the display.
• Select missed calls: ¤qMissed Calls ¤OK (³= selected)
•Selectallcalls: ¤qAll Calls ¤OK (³= selected)
Example
ÐU
à ™
03 01
Redial Menu
New Call 02
1234567890
28.06. 08:34
Back UMenu
Example
Using the telephone

12 en fr nl
Gigaset A540H / en / A31008-M2651-R101-2-4N19 / contacts.fm / 21.01.2015
A-Klasse_Layout_Neu, Version 4, 28.05.2014
Using the telephone
Opening the call list
¤Message key f¤qCallsList . . . the list with the number of
new entries (1) and the number of old (read) entries (2) is
displayed ¤OK
Calling back a caller from the call list
¤Press the Talk key c
Additional options
¤Menu . . . then
Phonebook (Address book)
A name and number is stored in a phonebook entry (entering of numbers/letters/characters ¢page 8).
Opening phonebook
¤Press sin idle status
Phonebook entries
Creating an entry
¤s. . . then
•Storingthefirst entry in the phonebook:
¤Dir. empty New Entry? ¤OK ¤. . . enter number with ~¤OK ¤. . . enter name with ~¤OK
•Storinganadditional entry in the phonebook:
¤Menu ¤New Entry ¤OK ¤. . . enter number with ~¤OK ¤. . . enter name with ~¤OK
Selecting an entry
¤s¤. . . enter the first few letters with ~. . . the display skips to the first name that begins with these
letters ¤. . . scroll to the desired entry with qif necessary
Changing an entry
¤s¤. . . select the desired entry with q¤Menu ¤qEdit Entry ¤OK ¤. . . edit the number
with ~¤OK ¤. . . edit the name with ~¤OK
• Copy an entry to the phonebook
(¢page 12):
¤qCopy to Dir. ¤OK
• Delete the selected entry: ¤qDelete Entry ¤OK
• Delete all entries: ¤qDelete List ¤OK
iNumber of entries up to 150
Length of entries numbers: max. 32 digits
names: max. 16 characters
• A special background colour and caller melody can be assigned to each entry (¢page 13).
• The phonebook is created individually for each handset. The whole phonebook or individual
entries, however, can be copied to other handsets (¢page 13).
• Sort order:
Space |Digits (0-9) |Letters (alphabetical) |Other characters
iScrolling continuously upwards or downwards in the phonebook:
¤Hold down q
Example
CallsList 02+03
Back WOK
1
2

en fr nl 13
Gigaset A540H / en / A31008-M2651-R101-2-4N19 / contacts.fm / 21.01.2015
A-Klasse_Layout_Neu, Version 4, 28.05.2014
Using the telephone
Marking an entry as VIP
A VIP Caller Melody and/or a VIP Caller Colour can be assigned to each entry. The entry is displayed in the
phonebook in this colour with the icon Æ.
¤s¤. . . select the desired entry with q¤Menu ¤. . . then
Editing/adding call number
¤s¤. . . select the desired entry with q¤Menu ¤qUse Number ¤OK . . . number appears in the
display ¤. . . edit/add number with ~¤. . . select number with c
Deleting an entry
¤s¤. . . select the desired entry with q¤Menu ¤qDelete Entry ¤OK
Deleting all phonebook entries
¤s¤Menu ¤qDelete List ¤OK ¤Delete? ¤OK
Quick dial keys
Entries from the phonebook can be allocated to keys 0 and 2 to 9:
¤s¤. . . select the desired entry with q¤Menu ¤qShortcut ¤OK . . . then
¤. . . press the desired key with ~
or ¤. . . select the desired key with q¤OK
Dialling: ¤. . . hold down the corresponding quick dial key in idle status
Copying an entry/phonebook
The entire phonebook or individual entries can be copied.
Copying individual entries
¤s¤. . . select the desired entry with q¤Menu ¤qSend Entry ¤OK ¤. . . select the recipient
handset with q¤OK . . . after successful transfer, Entry copied. Next entry? is displayed . . . then
Copying the entire phonebook
¤s¤Menu ¤qSend List ¤OK ¤. . . select the recipient handset with q¤OK
•Melody: ¤qVIP Caller Melody ¤OK ¤. . . select the desired melody with q¤OK
• Colour: ¤qVIP Caller Colour ¤OK ¤. . . select the desired colour with q¤OK
iThe number on the display can be copied to the phonebook:
¤Menu ¤Copy to Directory ¤OK
h• The sending and receiving handset must both be registered to the same base.
• The other handset and the base can send and receive phonebook entries.
i• An external call interrupts the transfer.
•VIP Caller Melody and VIP Caller Colour are not copied.
• Entries with numbers already stored are discarded.
•Ifone additional entry must be sent: ¤OK
•Ifno additional entries must be sent: ¤Back

14 en fr nl
Gigaset A540H / en / A31008-M2651-R101-2-4N19 / contacts.fm / 21.01.2015
A-Klasse_Layout_Neu, Version 4, 28.05.2014
Additional functions
Copying numbers to the phonebook
Copying numbers to the phonebook that are displayed in a call list or the redial list, and numbers that have
already been entered to dial:
¤Menu ¤Copy to Directory ¤OK ¤. . . confirm number with OK ¤. . . where necessary add name ¤
OK
Additional functions
Alarm clock
An alarm call is signalled on the display and with the selected volume and melody (¢page 15) for a maxi-
mum of 60 seconds. During a call, the alarm is only indicated by a short tone.
Activating the alarm clock
¤Menu ¤Alarm Clock ¤OK ¤Activation ¤OK (³=activated)¤. . . select the wake-up time in hours
and minutes with ~¤OK (μSaved)
When the alarm clock is activated, the icon ëand the wake-up time is displayed in idle display.
Deactivating the alarm clock
¤Menu ¤Alarm Clock ¤OK ¤Activation ¤OK (´= deactivated)
Setting the wake-up time
¤Menu ¤Alarm Clock ¤OK ¤qWake up time ¤OK ¤Time: ¤. . . enter the wake-up time in hours
and minutes with ~¤OK (μSaved)
Deactivating alarm/snooze mode
ECO DECT
Reducing transmission power (depending on the base)
The telephone's radiation is automatically reduced according to the distance of the handset from the base.
The radiation of the handset and base can also be reduced:
•¤By deactivating Max. Range
•¤By activating No Radiation
See the base user guide for further details.
hA number is shown on the display.
hDate and time are set .
hAn alarm call sounds.
• Deactivate until the next alarm call: ¤Press Off
• Snooze mode: ¤Press Snooze or press any key . . . the alarm call will be
deactivated and repeated 5 minutes later
iThe radiation can only be reduced if your base supports this function.

en fr nl 15
Gigaset A540H / en / A31008-M2651-R101-2-4N19 / settings.fm / 21.01.2015
A-Klasse_Layout_Neu, Version 4, 28.05.2014
Adjusting the telephone settings
Display
Language
Different languages are available for the display.
¤Menu ¤qSettings ¤OK ¤qLanguage ¤OK ¤. . . select language with q¤OK (³= selected)
Screensaver
A digital clock can be set as a screensaver.
¤Menu ¤qSettings ¤OK ¤qDisplay ¤OK ¤Screensaver ¤OK ¤. . . select No Screensaver /
Digital Clock with q¤OK (³= selected)
Colour scheme
The display background can be set to 4 different colours.
¤Menu ¤qSettings ¤OK ¤qDisplay ¤OK ¤qColour Schemes ¤OK ¤. . . select Col. Scheme
1...4 with q¤OK (³= selected)
Contrast
The display contrast can be set to 9 different levels.
¤Menu ¤qSettings ¤OK ¤qDisplay ¤OK ¤qContrast ¤OK ¤. . . select Level: 1...9 with q¤
OK (³= selected)
Ringtones
Basic ringtone setting.
Activate/deactivate ringtone permanently:¤Hold down the star key P
Ringtone volume
¤Menu ¤qSettings ¤OK ¤qAudio Settings ¤OK ¤qRinger Volume ¤OK ¤. . . set the
ringtone volume with q¤OK (μSaved)
Ringtone melody
The ringtone melody can be set separately for external calls, internal calls and the alarm clock.
¤Menu ¤qSettings ¤OK ¤qAudio Settings ¤OK ¤qRingtones (Handset) ¤OK . . . then
¤. . . select the ringtone melody with q¤OK (³=selected)
Advisory tones/battery warning tone
The handset notifies acoustically about different activities and statuses. The tones can be activated/
deactivated independently of one another.
¤Menu ¤qSettings ¤OK ¤qAudio Settings ¤OK . . . then
iDeactivating the ringtone for the current call:¤Menu ¤Silent ¤OK
iThe volume is the same for all types of signalling.
•Externalcalls: ¤External Calls ¤OK ¤Melodies ¤OK
• Internal calls: ¤qInternal Calls ¤OK
•Alarmclock: ¤qAlarm Clock ¤OK
•AdvisoryTones: ¤. . . select Advisory Tones with q¤OK (³=activated)
•BatteryLow: ¤. . . select Battery Low with q¤OK (³=activated)

16 en fr nl
Gigaset A540H / en / A31008-M2651-R101-2-4N19 / settings.fm / 21.01.2015
A-Klasse_Layout_Neu, Version 4, 28.05.2014
Adjusting the telephone settings
Auto Answer
A call is accepted as soon as the handset is lifted from the charging cradle.
¤Menu ¤qSettings ¤OK ¤qTelephony ¤OK ¤Auto Answer ¤OK (³=activated)
Protection against unwanted calls
Time control for external calls
The telephone does not ring during a specified time period.
¤Menu ¤qSettings ¤OK ¤qAudio Settings ¤OK ¤qRingtones (Handset) ¤OK ¤External
Calls ¤OK ¤qTime Control ¤OK ¤qActivation ¤OK (³=activated) . . . set or edit the time
period: ¤qSettings ¤OK ¤Ringer off from . . . enter start ¤OK ¤Ringer off until . . . enter end ¤
OK (μSaved)
¤
No ringing for anonymous calls
The handset does not ring for anonymous calls (the caller has actively withheld Calling Line Identification).
¤Menu ¤qSettings ¤OK ¤qAudio Settings ¤OK ¤qRingtones (Handset) ¤OK ¤External
Calls ¤OK ¤qAnonymous Calls Silent ¤OK (³=activated)
Telephone reset
Individual modifications to the handset settings can be reset.
¤Menu ¤qSettings ¤OK ¤qSystem ¤OK ¤qReset Handset ¤OK ¤. . . Answer the security
question with OK
iDuring this period, the handset will continue to ring for numbers to which a VIP ringtone is assigned
in the phonebook.
i• The setting only applies to handset for which the setting is configured.
• The call is only signalled on the display.
i• When resetting the handset (Reset Handset), audio and display settings will be deleted.
The following are not affected:
•Date/time,
• Registration of handsets to the base and the current selection of the base,
•SystemPIN,
• Entries in phonebook,
•Rediallist.

en fr nl 17
Gigaset A540H / en / A31008-M2651-R101-2-4N19 / appendix.fm / 21.01.2015
A-Klasse_Layout_Neu, Version 4, 28.05.2014
Manufacturer's advice
Service (Customer Care) - United Kingdom and Ireland
Step by step towards your solution with Gigaset Customer Care
www.gigaset.com/service
Visit our Customer Care pages:
www.gigaset.com/service
Here you will find:
uFrequently asked questions
uFree software and user manual downloads
uCompatibility checks
Contact our Customer Care staff:
Couldn't find a solution in the FAQs section?
We are happy to help...
... by eMail: www.gigaset.com/contact
... by telephone:
United Kingdom
www.gigaset.com/uk/service
Service Hotline: 020 36953111 (local call cost charge)
Ireland
www.gigaset.com/ie/service
Service Hotline: 0818 200 033 (6.6561 Ct./Call)
Please have your proof of purchase ready when calling.
Please note that if the Gigaset product is not sold by authorised dealers in the national territory
the product may not be fully compatible with the national telephone network. It is clearly spec-
ified on the box near the CE mark for which country/countries the equipment has been devel-
oped. If the equipment is used in a manner inconsistent with this advice or with the instructions
of the manual and on the product itself, this may have implications on the conditions for war-
ranty or guarantee claims (repair or exchange of product).
In order to make use of the warranty, the product purchaser is asked to submit a receipt which
proves the date of purchase (date from which the warranty period starts) and the type of goods
that have been purchased.

18 en fr nl
Gigaset A540H / en / A31008-M2651-R101-2-4N19 / appendix.fm / 21.01.2015
A-Klasse_Layout_Neu, Version 4, 28.05.2014
Manufacturer's advice
Guarantee Certificate - United Kingdom
Without prejudice to any claim the user (customer) may have in relation to the dealer or retailer, the customer
shall be granted a manufacturer's Guarantee under the conditions set out below:
uIn the case of new devices and their components exhibiting defects resulting from manufacturing and/or
material faults within 24 months of purchase, Gigaset Communications shall, at its own option and free of
charge, either replace the device with another device reflecting the current state of the art, or repair the
said device. In respect of parts subject to wear and tear (including but not limited to, batteries, keypads,
casing), this warranty shall be valid for six months from the date of purchase.
uThis Guarantee shall be invalid if the device defect is attributable to improper treatment and/or failure to
comply with information contained in the user guides.
uThis Guarantee shall not apply to or extend to services performed by the authorised dealer or the cus-
tomer themselves (e. g. installation, configuration, software downloads). User guides and any software
supplied on a separate data medium shall be excluded from the Guarantee.
uThe purchase receipt, together with the date of purchase, shall be required as evidence for invoking the
Guarantee. Claims under the Guarantee must be submitted within two months of the Guarantee default
becoming evident.
uOwnership of devices or components replaced by and returned to Gigaset Communications shall vest in
Gigaset Communications.
uThis Guarantee shall apply to new devices purchased in the European Union. For Products sold in the
United Kingdom the Guarantee is issued by: Gigaset Communications UK Limited, 2 White Friars, Chester,
CH1 1NZ.
uAny other claims resulting out of or in connection with the device shall be excluded from this Guarantee.
Nothing in this Guarantee shall attempt to limit or exclude a Customers Statutory Rights, nor the manu-
facturer's liability for death or personal injury resulting from its negligence.
uThe duration of the Guarantee shall not be extended by services rendered under the terms of the Guaran-
tee.
uInsofar as no Guarantee default exists, Gigaset Communications reserves the right to charge the customer
for replacement or repair.
uThe above provisions does not imply a change in the burden of proof to the detriment of the customer.
To invoke this Guarantee, please contact the Gigaset Communications telephone service. The relevant
number is to be found in the accompanying user guide.
Guarantee Certificate - Ireland
Without prejudice to any claim the user (customer) may have in relation to the dealer or retailer, the customer
shall be granted a manufacturer’s Guarantee under the conditions set out below:
uIn the case of new devices and their components exhibiting defects resulting from manufacturing and/or
material faults within 24 months of purchase, Gigaset Communications shall, at its own option and free of
charge, either replace the device with another device reflecting the current state of the art, or repair the
said device. In respect of parts subject to wear and tear (including but not limited to, batteries, keypads,
casing), this warranty shall be valid for six months from the date of purchase.
uThis Guarantee shall be invalid if the device defect is attributable to improper care or use and/or failure to
comply with information contained in the user manuals. In particular claims under the Guarantee cannot
be made if:
uThe device is opened (this is classed as third party intervention)
uRepairs or other work done by persons not authorised by Gigaset Communications.
uComponents on the printed circuit board are manipulated
uThe software is manipulated
uDefects or damage caused by dropping, breaking, lightning or ingress of moisture. This also applies if
defects or damage was caused by mechanical, chemical, radio interference or thermal factors (e.g.: micro-
wave, sauna etc.)
uDevices fitted with accessories not authorised by Gigaset Communications
uThis Guarantee shall not apply to or extend to services performed by the authorised dealer or the cus-
tomer themselves (e.g. installation, configuration, software downloads). User manuals and any software
supplied on a separate data medium shall be excluded from the Guarantee.
uThe purchase receipt, together with the date of purchase, shall be required as evidence for invoking the
Guarantee. Claims under the Guarantee must be submitted within two months of the Guarantee default
becoming evident.
uOwnership of devices or components replaced by and returned to Gigaset Communications shall vest in
Gigaset Communications.
uThis Guarantee shall apply to new devices purchased in the European Union. For Products sold in the
Republic of Ireland the Guarantee is issued by Gigaset Communications UK Limited, 2 White Friars, Chester,
CH1 1NZ.
uAny other claims resulting out of or in connection with the device shall be excluded from this Guarantee.
Nothing in this Guarantee shall attempt to limit or exclude a Customers Statutory Rights, nor the manu-
facturer’s liability for death or personal injury resulting from its negligence.
uThe duration of the Guarantee shall not be extended by services rendered under the terms of the Guaran-
tee.
Other manuals for A540h
2
Table of contents
Other Gigaset Handset manuals

Gigaset
Gigaset E390 HX User manual

Gigaset
Gigaset E390 User manual

Gigaset
Gigaset A475A User manual

Gigaset
Gigaset A540 User guide

Gigaset
Gigaset AS690HX User manual

Gigaset
Gigaset E490 User manual

Gigaset
Gigaset SL360 HS User manual

Gigaset
Gigaset A510 User manual

Gigaset
Gigaset A670A User manual

Gigaset
Gigaset A130 User manual

Gigaset
Gigaset C575 User manual

Gigaset
Gigaset G2000C User manual

Gigaset
Gigaset C190A User manual

Gigaset
Gigaset E370HX User manual

Gigaset
Gigaset A590 User manual

Gigaset
Gigaset S810 User manual

Gigaset
Gigaset Gigaset C360 User manual

Gigaset
Gigaset C610 User manual

Gigaset
Gigaset CL390HX User manual

Gigaset
Gigaset A170 User manual