Gigaset E390HX / LHSG IE-UK en / A31008-M2968-L101-1-7619 / security.fm / 5/31/21
Template Module, Version 2.1, 11.08.2020 / Template Basiseinstellungen: Version 3.1 - 07.07.2020
Safety precautions
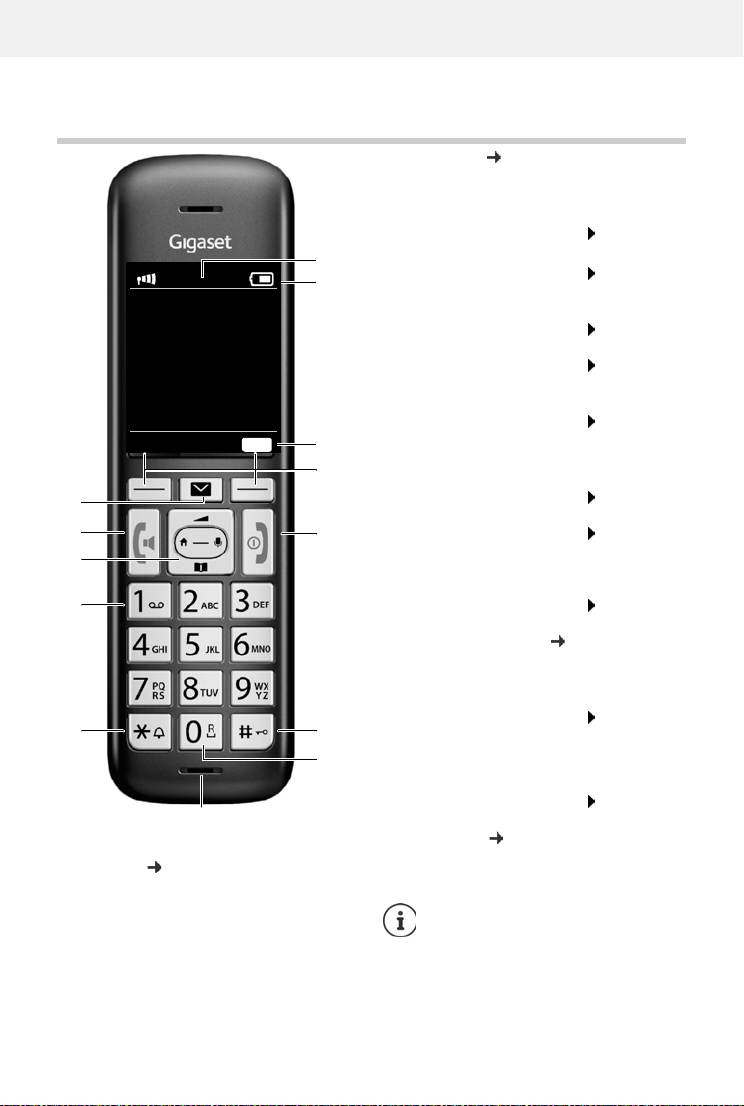
Availability and operation of the functions
may differ on your telephone.
7
Safety precautions
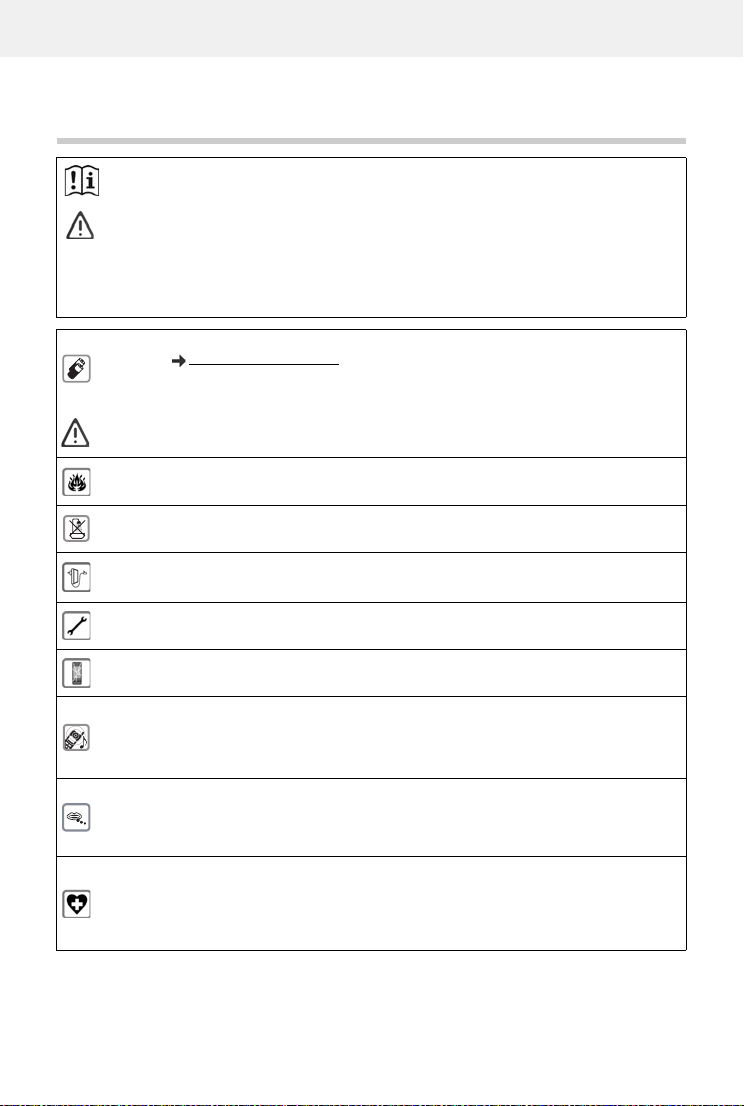
Read the safety precautions and the user guide before use.
The device cannot be used in the event of a power failure. In case of a power failure it is also not
possible to make emergency calls.
If the LAN or Internet connection is down, functions that require an Internet connection are not
available, such as Internet telephony (VoIP), online directories and the Info Center. You are able to
make and receive calls if the phone is connected to an analogue landline.
Emergency numbers cannot be dialled if the keypad/display lock is activated!
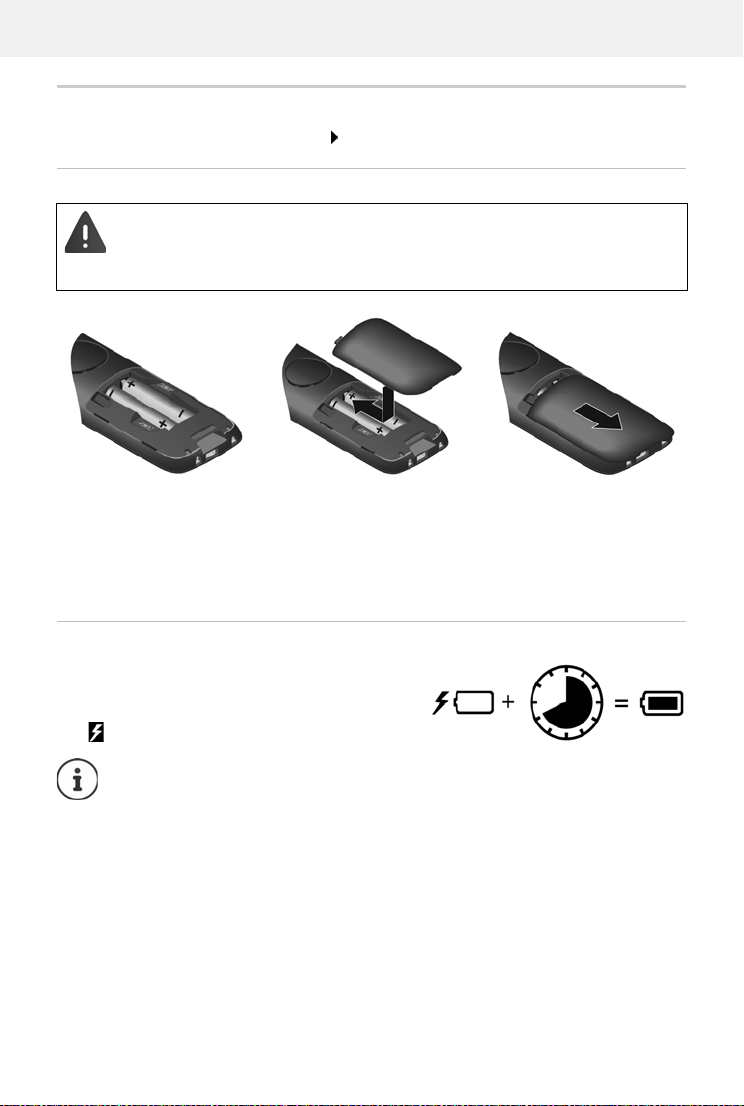
Use only rechargeable batteries that correspond to the specification (see list of permitted
batteries www.gigaset.com/service). Never use a conventional (non-rechargeable) battery or
other battery types as this could result in significant health risks and personal injury. Rechargeable
batteries, which are noticeably damaged, must be replaced.
The handset must not be operated if the battery cover is open.
Ensure that the batteries can not be short-circuited by objects in the battery compartment.
Do not use the devices in environments with a potential explosion hazard (e.g. paint shops).
The devices are not splashproof. For this reason do not install them in a damp environment such
as bathrooms or shower rooms.
Use only the power adapter indicated on the device.
Whilst charging, the power socket must be easily accessible.
Remove faulty devices from use or have them repaired by our Service team, as these could inter-
fere with other wireless services.
Do not use the device if the display is cracked or broken. Broken glass or plastic can cause injury
to hands and face. Send the device to our Service department to be repaired.
Do not hold the rear of the handset to your ear when it is ringing or when speaker mode is acti-
vated. Otherwise you risk serious and permanent damage to your hearing.
The phone may cause interference in analogue hearing aids (humming or whistling) or cause
them to overload. If you require assistance, please contact the hearing aid supplier.
Keep small cells and batteries, which can be swallowed, out of the reach of children.
Swallowing a battery can lead to burns, perforation of soft tissue and death. Severe burns can
occur within 2 hours of swallowing.
In the case of a swallowed cell or battery, seek medical care immediately.
Using your telephone may affect nearby medical equipment. Be aware of the technical conditions
in your particular environment, e.g. doctor's surgery. If you use a medical device (e.g. a pace-
maker), please contact the device manufacturer. They will be able to advise you regarding the
susceptibility of the device to external sources of high frequency energy (for the specifications of
your Gigaset product see "Technical data").