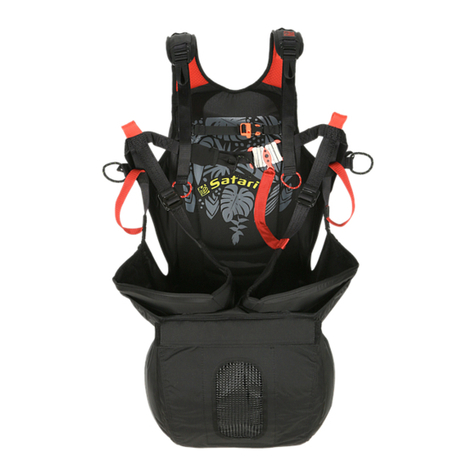
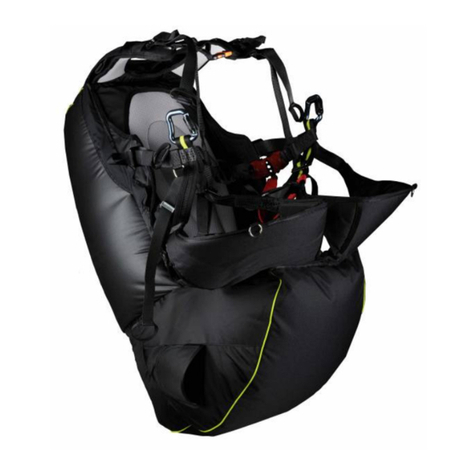
Gin Yeti UL User manual

User manual
V1.0 July 2020

Yeti UL front container manual: 2
© Gin Gliders Inc
The information in this manual is provided for guidance only and is subject to change without notice. This manual is not intended
as a comprehensive assembly, use, service, repair or maintenance manual. Please see your dealer for all assembly, service,
repairs or maintenance. Your dealer may also be able to refer you to classes, clinics or articles on paraglider use, service, repair or
maintenance.
WARNING:
Like any extreme sport, paragliding involves unpredictable risks which may lead
to injury or death. By choosing to fly, you assume the sole responsibility for
those risks. You can minimize the risks by having the appropriate attitude,
training and experience and by properly understanding, using and maintaining
your equipment. Always seek to expand your knowledge and to develop
self-reliance. If there is anything you do not understand, consult with your local
dealer as a first point of contact, with the GIN importer in your country or with
Gin Gliders directly.
Because it is impossible to anticipate every situation or condition that can
occur while paragliding, this manual makes no representation about the safe
use of the wing under all conditions. Neither GIN Gliders nor the seller of GIN
equipment can guarantee, or be held responsible for, the safety of yourself or
anyone else.
Many countries have specific regulations or laws regarding paragliding
activity. It’s your responsibility to know and observe the regulations of the
region where you fly.
This equipment must never be used for parachuting or BASE jumping.
You must wear a helmet as well as all other standard safety equipment
required for paragliding.This equipment is strongly recommended to be used
an experienced paraglider pilot only.

Yeti UL front container manual: 3
Thank you...
..for choosing GIN Gliders. We are confident you’ll enjoy many rewarding experiences in
the air with your GIN Yeti UL front container..
This manual contains important safety, performance and maintenance information. Read
it before your first flight, keep it for reference, and please pass it on to the new owner if
you ever re-sell your equipment.
Any updates to this manual, or relevant safety information, will be published on our
website: www.gingliders.com. You can also register for email updates via our website.
Happy flying and safe landings,
GIN Team

Yeti UL front container manual: 4
CONTENTS
CONTENTS 4
Manual 5
GIN Gliders Homepage 5
GIN Gliders and the environment 6
Respect for nature and the environment 6
Safety 7
Safety advice 7
Safety notices 7
Liability, warranty exclusion and operating limitations 8
Liability and warranty exclusion 8
Operating limitations 8
Introduction of the Yeti UL front container 9
Included with the Yeti UL front container 10
Packing the Yeti UL front container 10
Rescue handle attachment 12
Connecting the rescue bridle 13
Closing the container 14
Installing the Yeti UL front container 16
Preflight check 17
GIN quality and service 17
Final words… 18
Addresses 19

Yeti UL front container manual: 5
Manual
We recommend that you familiarise yourself with your new Yeti UL front container by
reading this Manual before your first use. This will allow you to acquaint yourself with its
functions, to learn the best way to use it in various situations, and explain how to get the
best out of your gear. This manual contains details on design of the Yeti UL front container,
technical data and illustrations however the information is subject to change. We reserve
the right to make changes without prior notification.
This Manual was current at the time of going to print. The latest version can be
downloaded from GIN’s website.
GIN Gliders Homepage
GIN Gliders has a comprehensive website, which provides additional information about the
Yeti UL front container, any updates to the manual and many other issues related to
paragliding. GIN’s website is the first port of call for GIN’s worldwide following:
www.gingliders.com
On GIN Gliders website, you will find an extensive range of accessories for your paraglider,
useful products for pilots, as well as additional information and accessories.
You will also find links there to other services and websites:
●GIN Gliders Shops
●Facebook, Twitter & youtube
These websites and their content are provided for your use. The content of GIN Gliders
websites has been made available for your use on an “as is” and “as available” basis. GIN
Gliders reserves the right to alter the websites at any time or to block access to them.

Yeti UL front container manual: 6
GIN Gliders and the environment
Protection of the environment, safety and quality are the three basic values of GIN Gliders
and these have implications on everything we do. We also believe that our customers
share our environmental awareness.
Respect for nature and the environment
You can easily play a part in the protection of the environment by practising our sport in
such a way that there is no damage to nature and the areas in which we fly. Keep to
marked trails, take your rubbish away with you, refrain from making unnecessary noise and
respect the sensitive biological equilibrium of nature. Consideration for nature is required
even at the launch site!
Paragliding is, of course, an outdoor sport – protect and preserve our planet’s
resources.

Yeti UL front container manual: 7
Safety
WARNING: the safety advice and instructions contained in this Manual must be
followed in all circumstances. Failure to do so shall render invalid any certification
and/or result in loss of insurance cover, and could lead to serious injuries or even death.
Safety advice
Paragliding demands a high level of individual responsibility. Prudence and risk-awareness
are basic requirements for the safe practice of the sport, for the very reason that it is so
easy to learn and practically anyone can do so. Carelessness and overestimating one’s
own abilities can quickly lead to critical situations. A reliable assessment of conditions for
flying is particularly important. Paragliders are not designed to be flown in turbulent
weather. Most serious accidents with paragliders are caused by pilots misjudging the
weather for flying.
Paragliders are subject to the guidelines for air sports equipment and must not under
any circumstances be flown without a valid certification. Independent experimentation is
strictly prohibited. This Manual does not replace the need to attend training at a
paragliding school.
Observe the other specific safety advice in the various sections of this Manual.
Safety notices
Safety notices are issued when defects arise during use of paragliding products which
could possibly also affect other products of the same model. The notices contain
instructions on how the affected gliders can be inspected for possible faults and the steps
required to rectify them.
GIN Gliders publishes on its website any technical safety notices and airworthiness
instructions which are issued in respect of GIN products. The product owner is responsible
for carrying out the action required by the safety notice.
Safety notices are issued by the certification agencies and also published on the
relevant websites. You should therefore regularly check the safety pages of the
certification agencies and keep up-to-date with new safety notices which cover any
products relating to paragliding.

Yeti UL front container manual: 8
Liability, warranty exclusion and operating limitations
Use of the Yeti UL front container is at the pilot’s own risk! Any current paraglider or
harness was tested according to EN or CCC. This container is made for rescues that are
hand-deployed reserve parachutes for paraglider pilots to be used in an emergency
situation while flying.
Pilots are responsible for their own safety and must ensure that the airworthiness of their
paragliding equipment, which includes also the Yeti UL front container and everything
should be checked prior to every flight. The pilot should launch only if the paraglider is
airworthy. In addition, pilots must observe the relevant regulations in each country.
The glider may only be used if the pilot has a licence which is valid for the area or is flying
under the supervision of an approved flying instructor. There shall be no liability on the
part of third parties, in particular the manufacturer and the dealer.
ATTENTION: Maximum speed for usage for paragliding rescues is: 32 m/s (115 km/h)
CAUTION: Paragliding rescues have a repacking interval of 6 months. Each time the rescue is
repacked it should be inspected for damage, the effect of water, sand, salt or other
environmental influences may reduce the repack / inspection interval.
Liability and warranty exclusion
In terms of the warranty and guarantee conditions, the Yeti UL front container may not be
flown if any of the following situations exists:
●the pilot has incorrect or inadequate equipment (reserve, protection, helmet etc)
●the pilot has insufficient experience or training
Operating limitations
The Yeti UL front container must be operated only within the operating limits. These are
exceeded, if one or more of the following points apply:
●the glider is flown in rain or drizzle, cloud, fog and / or snow
●the container and rescue parachute is wet
●there are turbulent weather conditions or wind speeds on launch higher than 2/3
the maximum flyable airspeed of the glider (varies according to the total take-off
weight)
●air temperature below -10°C and above 50°C

Yeti UL front container manual: 9
Introduction of the Yeti UL front
container
For pilots who prefer to fly with a front rescue, the Yeti UL front container can be used with
most harnesses and rescues. The small instrument panel allows to put some flight
instruments.
The Yeti UL front container is currently available in size S and M.
Size and rescue compatibility
Size
Volume
Weight
GIN rescue
Small
2-2.6 L
130 g
Yeti UL S & M
Medium
3-3.5 L
150 g
Yeti UL S, M & L
Yeti 27 & 35
Yeti Cross 26 & 32

Yeti UL front container manual: 10
Included with the Yeti UL front container
- Yeti UL front container
- Rescue handle
- Y-Rescue bridle
Packing the Yeti UL front container
Gin Gliders recommend that rescue installation is performed properly by a competent
person. The rescue parachute is a pilots last resort and failure to pack or connect the
reserve parachute in the correct way may cause death or severe injury. The pilot is
responsible for ensuring proper installation.
This Yeti UL front container is compatible with the G-Lite, Yeti and Yeti Cross rescue
parachutes. Other manufacturers’ rescues may also be used but we cannot guarantee their
function. The pilot is responsible for checking compatibility.

Yeti UL front container manual: 11
Every first installation of a rescue system into the Yeti UL front container must be checked
by a qualified paragliding professional for compatibility. To verify the installation, you must
perform a test deployment by sitting in a simulator.
Rescue parachutes should be repacked at least every 150 days; so installing your rescue in
a new Yeti UL front container may also provide a good opportunity for a repack. After
every repack of the rescue parachute you should also do a compatibility check.
Rescue compatibility
MAKE SURE THAT THE RESCUE PARACHUTE CAN BE RELEASED FROM THE RESCUE
CONTAINER—it must be done by you, the pilot, sitting in the harness hanging from a
simulator.
WARNING: If you are in any doubt about any aspect of rescue installation, seek
professional advice!
IMPORTANT: You must perform a test deployment from a simulator to verify the
installation.
IMPORTANT: Make sure that both Y-rescue bridle ends are connected with a main
carabiner on each side.

Yeti UL front container manual: 12
Rescue handle attachment
Before you attach the rescue handle, check the length of the strap connecting the rescue
deployment handle to the rescue inner container. It should be long enough that the
reserve can be extracted without the danger of the pins not being pulled before the strap
tightens on the reserve, but not so long that there is excessive slack that extends the
movement required for deployment.
Pass the handle through Pass the handle through Make a loop like shown in
the center loop itself the picture. Pull to make a
clean knot
CAUTION: Please use the center attachment loop. If the handle is connected to the side
loop, Rescue deployment can be delayed or may even be prevented.
IMPORTANT: The deployment bag of other manufacturers’ rescue systems may have
different loop positions which may cause a deployment failure.

Yeti UL front container manual: 13
Connecting the rescue bridle
We recommend that the rescue is connected with a handshake-knot with the rescue bridle
(see pictures bellow). In case you use a different type of connector like a carabiner, make
sure that it is rated at least 9 times the maximum weight.
It is the pilot’s responsibility to check the compatibility of the rescue system and ensure
that it is installed properly. Be sure to inspect your connection during normal maintenance
and safety checks. Replace it whenever there are any signs of wear and check your rescue
system with a professional after any deployment.
Pass the rescue bridle through the bridle. Secure the connection with a tape
Pull hard to make a clean knot.
ATTENTION: Make sure that the knot is tight. A loose knot might lead to failure in case
the rescue is deployed under high speeds.
In case us use a carabiner to connect your rescue with your rescue bridle:
We recommend that you cover the connection using the Maillon rapid cover to prevent
excess friction. Rubber- bands should also be used to secure the attachment and prevent
excess friction.
Correct carabiner-connection

Yeti UL front container manual: 14
Closing the container
Close the cockpit as described below:
Pass the strap of the container through the Repeat on the other side
plastic buckle of the rescue bridle
Both rescue bridles should now point Pass the strap back through the plastic
buckle
Out to the bridle ends
Repeat on the other side Both rescue bridles should now be
connected
to the rescue container

Yeti UL front container manual: 15
Place the rescue on the container
Insert a paracord in each loop
Use the paracords to
pass the loops Now pass through the top flap and secure
through the loops of the base flap with the rescue handle pins
Put the rescue handle pins in the openings Tighten the rubber bands left and right
left and right

Yeti UL front container manual: 16
Hide rubber band and the stopper in the
container
Installing the Yeti UL front container
The Yeti UL front container can be used on any harness and with any glider. Connect both
rescue bridles with the main carabiners. Gin Glider harnesses have color coded webbing
connections. RIGHT side of harness has BLUE webbing connection, LEFT side of the
harness has RED webbing connection to match the Yeti UL front container risers for safe
and easy connection. It is possible to secure the Yeti UL front container with the two lower
straps.

Yeti UL front container manual: 17
Preflight check
The deployment handle and its strap must be connected to the deployment bag of the
parachute. In particular, check the length of the strap connecting the rescue deployment
handle to the rescue inner container. It should be long enough that the reserve can be
extracted without the danger of the pins not being pulled before the strap tightens on the
reserve, but not so long that there is excessive slack that extends the movement required
for deployment.
IMPORTANT: After you have finished packing the Yeti UL front container, you must do a test
deployment to ensure that it can be deployed correctly.
IMPORTANT: Make sure that both rescue bridles are connected with a main carabiner
on each side.
GIN quality and service
We take pride in the quality of our products and are committed to putting right any
problems affecting the safety or function of your equipment and which are attributable to
manufacturing faults. Your GIN dealer is your first point of contact if you have any problems

Yeti UL front container manual: 18
with your equipment. If you are unable to contact your dealer or GIN importer, contact Gin
Gliders directly via our website.

Yeti UL front container manual: 19
Final words…
Most of us today live in a dependent society where we are regulated and protected.
Individuals rarely are afforded opportunities to develop the self-responsibility that is the
foundation of safety in extreme sports such as paragliding.
Most accidents are caused by getting into situations that are too demanding for your
level of experience. This happens if you lack fundamental understanding, are incapable of
assessing the risk or simply do not pay sufficient attention to your surroundings or your
own state of mind.
To stay safe, the best you can do is to increase your understanding, skill and experience
at a rate you can manage safely. There is no substitute for self-responsibility and good
judgement.
In the end, paragliding offers a unique opportunity to learn to take control of your own
destiny. Memento mori, carpe diem!
Fly safely, and...E N J O Y!
GIN Team

Yeti UL front container manual: 20
Addresses
Gin Gliders Inc.
285-1 Galdam-Ri, Mohyun-Myun
Yongin City, Kyunggi-Do
449-851 Korea
Fon: +82-31-333-1241
Fax: +82-31-334-6788
www.gingliders.com
DHV
Miesbacher Str. 2
Postfach 88
83701 Gmund am Tegernsee
Germany
Fon: +49 (0) 8022 9675 - 0
Fax: +49 (0) 8022 9675 - 99
Email: [email protected]
www.dhv.de
EAPR
European Academy of Parachute Rigging
Marktstr. 11
87730 Bad Grönenbach
Germany
Fon: +49 (0) 8334 - 534470
Fax: +49 (0) 8334 - 534469
Email: [email protected]
www.para-academy.eu
FAI - Fédération Aéronautique Internationale
Maison du Sport International
Av. de Rhodanie 54
1007 Lausanne
Switzerland
Fon: +41 21 345 1070
Fax: +41 21 345 1077
www.fai.org
DULV
Mühlweg 9
71577 Großerlach-Morbach
Germany
Fon: +49 (0) 7192 93014 - 0
Email: [email protected]
www.dulv.de
Air Turquoise SA
Route du Pré-au-Comte 8
1844 Villeneuve
Switzerland
Fon: +41 219 65 65 65
Fax: +41 219 65 65 68
www.para-test.com
Gin Gliders Inc.
285-1 Galdam-Ri, Mohyun-Myun, Yongin-City, Kyunggi-Do, Korea
www.gingliders.com,
Table of contents
Other Gin Safety Equipment manuals
Popular Safety Equipment manuals by other brands

Pizzato Elettrica
Pizzato Elettrica CS AR-91 Series operating instructions

Compass
Compass STCGE 05 quick start guide

Viraj
Viraj Sequre First SF-FBH-A-1022 User instructions

FrontLine
FrontLine ST14SH instruction manual

OlexLa
OlexLa OLC-TCT691 user manual

Tractel
Tractel Blocmat S Installation, operating and maintenance manual

Knightsbridge
Knightsbridge EMLREC Installation & maintenance manual

Anova
Anova VAR3030 Instruction and user's manual

ROCK EXOTICA
ROCK EXOTICA Omni-AZTEK Elite Set-of-fours DIRECTIONS FOR ASSEMBLY

Siemens
Siemens 3TK2853 Original operating instructions

LIMM
LIMM Traction Cleats user manual

SICK
SICK ReLy OSSD2 operating instructions